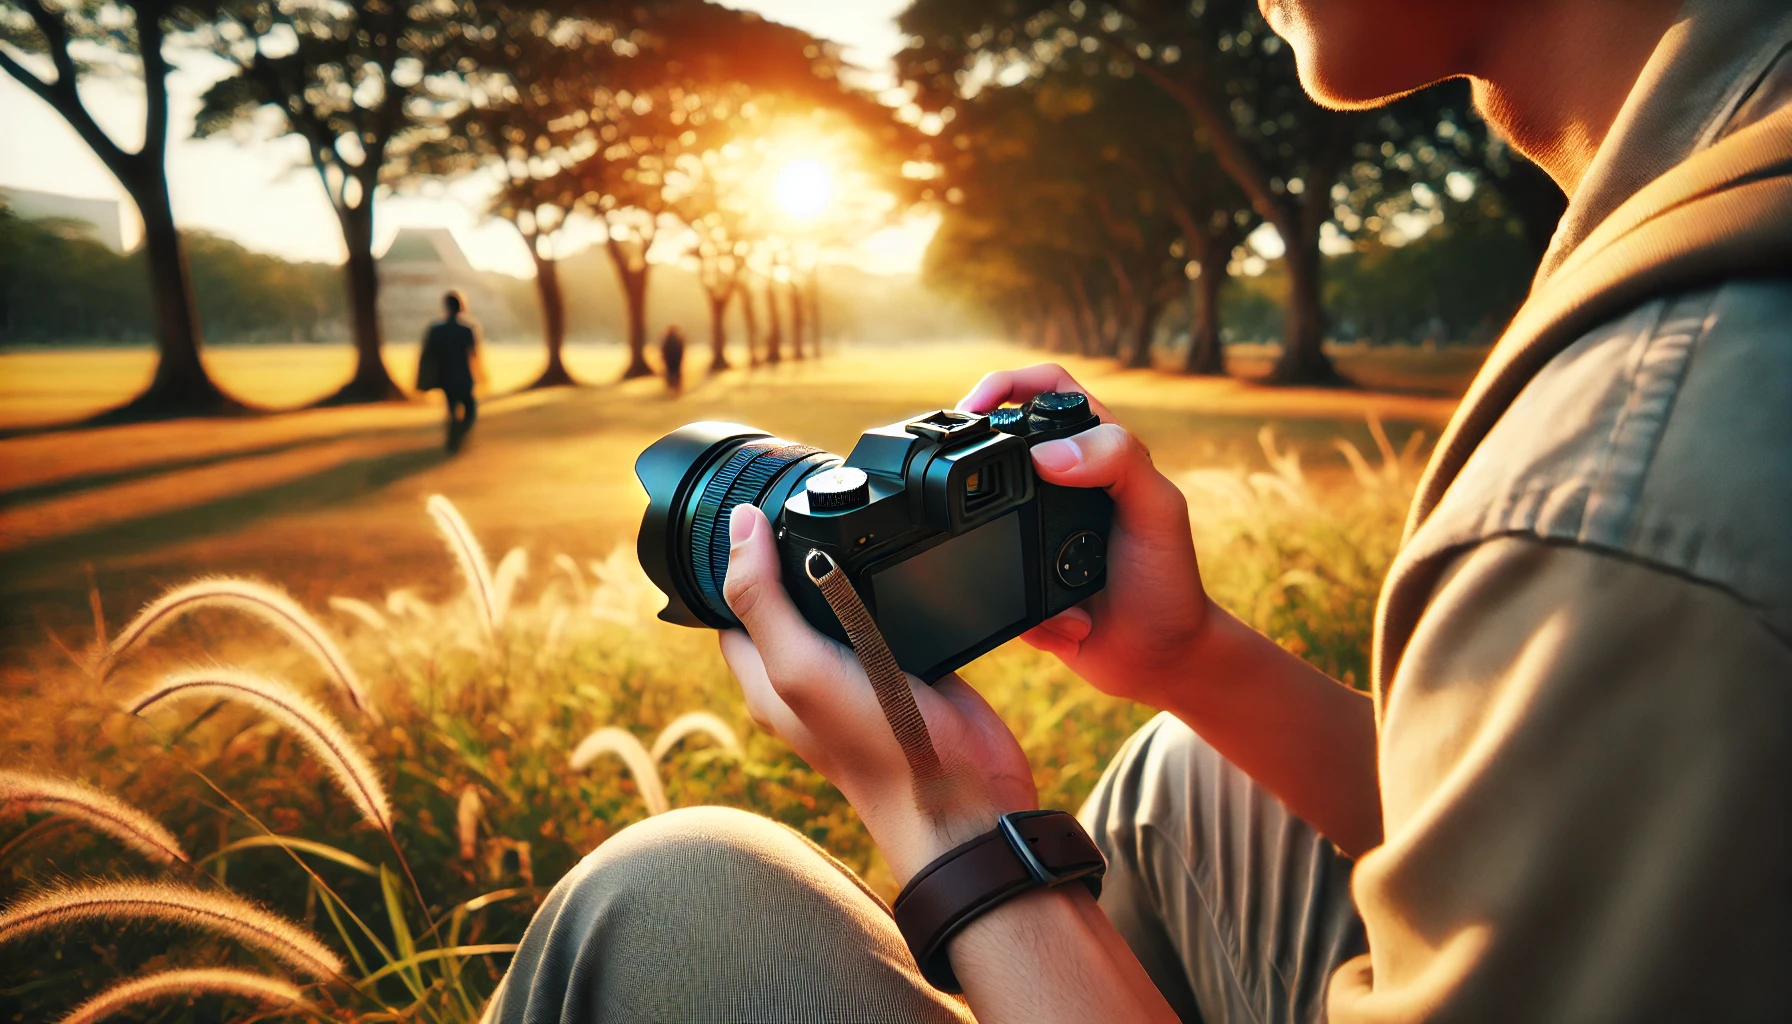
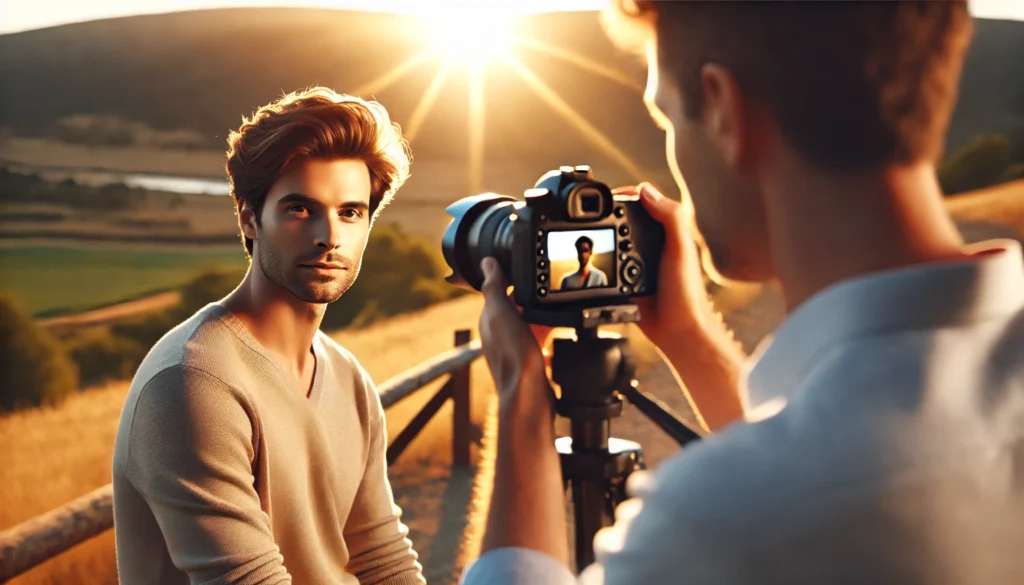
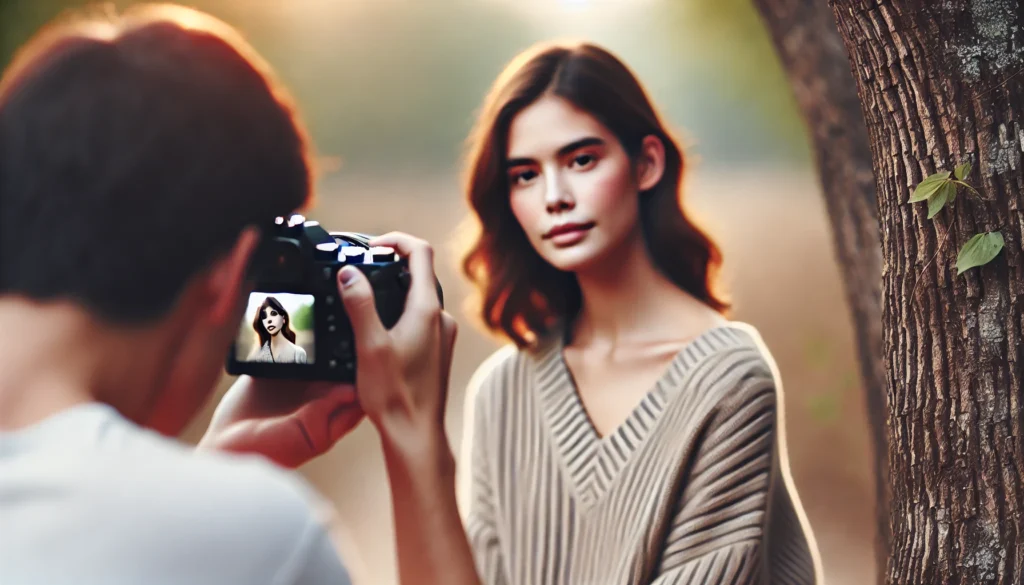
Photography is a powerful form of expression and a skill that many people are eager to improve. Whether you’re just starting out or looking to sharpen your abilities, understanding the fundamentals of photography is crucial. In this article, we’ll explore key tips to help you improve your photography skills and take your images to the next level.
Understanding the Basics of Photography
Before diving into advanced techniques, it’s essential to understand the basic elements that influence your photos. These elements include the exposure triangle: aperture, shutter speed, and ISO.
- Aperture: The aperture controls the amount of light that enters your camera. It is represented by f-stops (e.g., f/2.8, f/5.6). A wider aperture (smaller f-stop number) allows more light to hit the sensor, resulting in a brighter image and a shallow depth of field. On the other hand, a smaller aperture (higher f-stop number) results in a deeper depth of field, keeping more of the image in focus.
- Shutter Speed: Shutter speed controls how long your camera’s shutter stays open to let light in. A fast shutter speed (e.g., 1/1000) freezes motion, while a slower shutter speed (e.g., 1/30) creates motion blur. It’s important to find a balance between these settings to achieve the desired effect.
- ISO: ISO determines the sensitivity of your camera’s sensor to light. A lower ISO (e.g., 100) is ideal for well-lit environments, while a higher ISO (e.g., 1600 or above) is better suited for low-light situations. However, using high ISO values can introduce noise into your photos, so it’s best to keep it as low as possible while maintaining proper exposure.
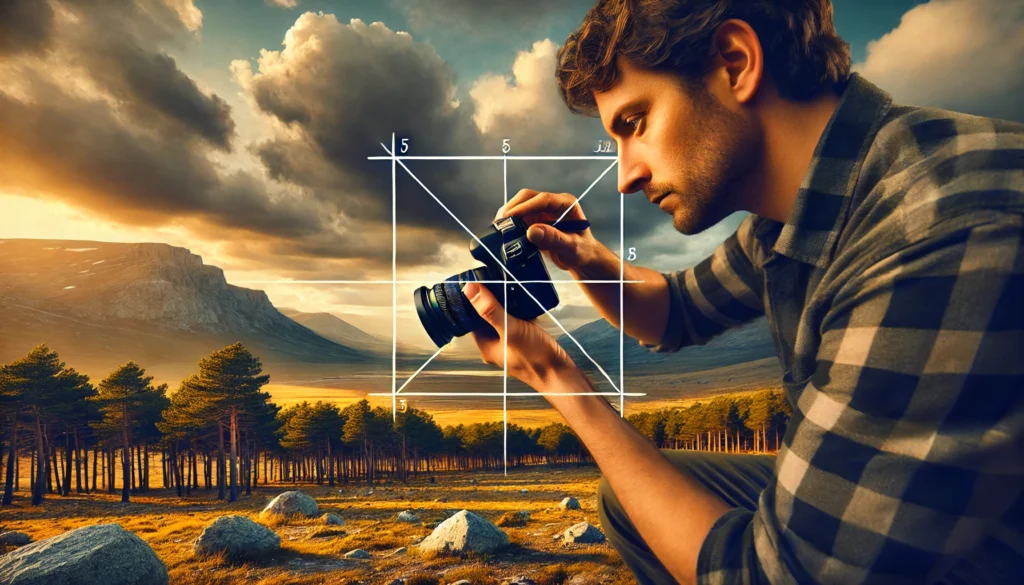
Mastering Composition
Composition plays a significant role in photography and can make or break an image. Here are some composition techniques you should consider:
- Rule of Thirds: This rule divides an image into a 3×3 grid, with the subject placed along the lines or at the intersections. This creates a balanced composition and leads the viewer’s eye through the frame.
- Leading Lines: Leading lines draw the viewer’s attention to the subject. Roads, rivers, fences, and other lines within the scene can be used to guide the viewer’s eye toward the focal point.
- Framing: Use natural elements to frame your subject. Trees, windows, and doorways can act as frames to focus attention on the subject while adding depth and context to the image.
- Symmetry and Patterns: Symmetry and repetitive patterns can make a photograph visually striking. Look for elements in your environment that form symmetrical shapes or patterns and experiment with their placement in your composition.
Using Light to Your Advantage
Lighting is one of the most important factors in photography. How you use light will dramatically affect the mood and quality of your images. Here are some tips to help you work with light:
- Golden Hour: The golden hour, which occurs shortly after sunrise and before sunset, offers soft, warm, and flattering light. This is often considered the best time for portrait photography because the light is diffused and creates beautiful, natural skin tones.
- Avoid Harsh Midday Sun: The midday sun can create harsh shadows and overly bright highlights. If you have to shoot during this time, try using a reflector or shooting in the shade to soften the light.
- Backlighting: When the light source is behind the subject, it creates a silhouette effect. This can be a powerful technique to emphasize the shape of your subject, but be cautious of overexposure.
- Use of Flash: When shooting in low light, a flash can help fill in shadows. However, it’s important to use flash properly to avoid overexposing your subject or creating unflattering reflections. Consider using diffusers or bouncing the flash off walls or ceilings for softer lighting.
Focus on Your Subjects
Whether you’re photographing people, landscapes, or objects, getting your focus right is crucial for a sharp, clear image. Here are some tips for focusing:
- Auto-focus vs. Manual Focus: Many cameras offer both auto-focus and manual focus. Auto-focus is great for quick shots, but it can struggle in low-light or when photographing fast-moving subjects. In these cases, manual focus can offer more control.
- Focus on the Eyes (for Portraits): In portrait photography, it’s important to focus on the eyes. The eyes are the focal point of a person’s face and are critical for making the image engaging.
- Depth of Field: A shallow depth of field (achieved with a wide aperture) blurs the background and isolates the subject, making it stand out. A deep depth of field (achieved with a small aperture) keeps more of the scene in focus, which is ideal for landscapes and architectural shots.
Practice Regularly
Like any skill, photography requires regular practice to improve. Here are a few ways to keep practicing:
- Set Challenges for Yourself: Challenge yourself with specific photography tasks, such as taking photos with only natural light or focusing on a particular theme, like “reflections” or “shadows.”
- Experiment with Different Styles: Try different types of photography, such as portrait, landscape, still life, street photography, or macro photography. Each style will teach you new techniques and help you discover your unique photographic voice.
- Review Your Work: Take time to look back at your photos and assess what you like and what could be improved. Don’t be afraid to experiment and learn from your mistakes.
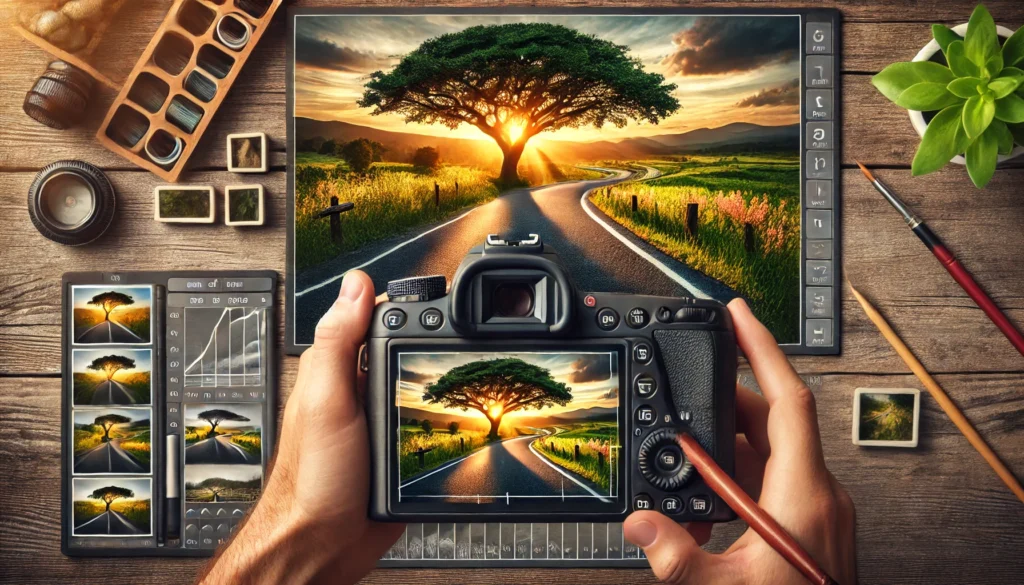
Post-Processing Your Photos
Editing your photos is an essential part of modern photography. While it’s important to get the exposure, composition, and focus right in-camera, post-processing allows you to refine your images and bring out their full potential. Here are some editing tips:
- Use Editing Software: Programs like Adobe Lightroom and Photoshop provide powerful tools for adjusting exposure, contrast, colors, and sharpness. You can also crop, straighten, and remove unwanted elements from your photos.
- Don’t Over-Edit: While editing can enhance your photos, avoid overdoing it. Too much saturation, contrast, or sharpening can make your image look unnatural. Aim for a more subtle, realistic effect.
- Sharpen and Enhance Details: When editing, make sure to sharpen your image and enhance fine details. This can make a significant difference, especially in close-up shots.
Conclusion
Improving your photography skills takes time, patience, and a willingness to learn. By mastering the basics, focusing on composition, using light effectively, and practicing regularly, you can elevate your photography to a professional level. Remember, photography is an art, and your unique perspective and creativity will always shine through in your work. Keep practicing, experimenting, and most importantly, have fun with your photography journey!
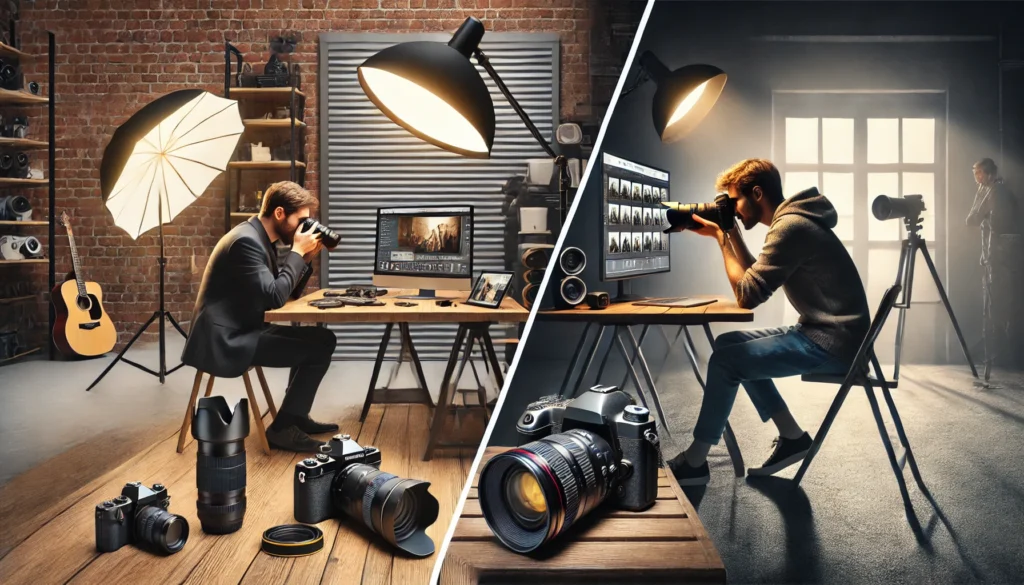
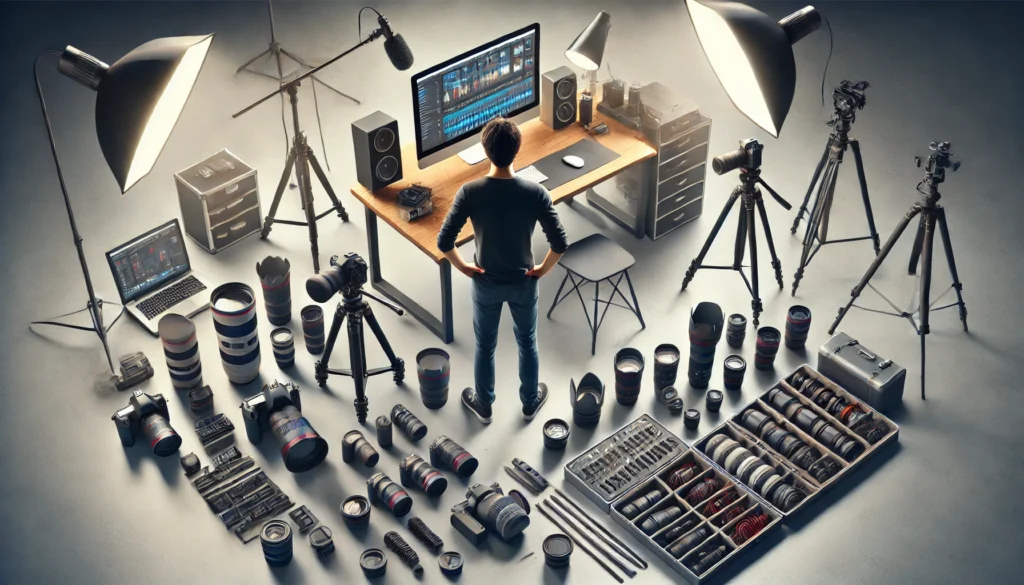
The Importance of Photography Equipment for Professionals
Photography is not just about capturing images; it’s about telling stories, evoking emotions, and creating powerful visual representations. For professional photographers, having the right equipment is crucial. While creativity and skill are key, your tools also play an essential role in the quality and efficiency of your work. In this article, we’ll discuss the importance of photography equipment and how it can impact your professional success.
Why Equipment Matters in Photography
When you think about professional photography, the equipment is often one of the first things that come to mind. This is because the right gear can make a significant difference in the outcome of a shoot. While talent and experience are important, having the appropriate tools for the job allows photographers to capture high-quality images in various environments.
- Image Quality: High-quality cameras, lenses, and accessories allow photographers to produce sharp, detailed images with accurate color reproduction. Professional-grade equipment also performs better in low-light conditions and provides greater dynamic range, resulting in photos that appear more vibrant and true to life.
- Efficiency and Workflow: Investing in quality equipment helps streamline a photographer’s workflow. Fast autofocus, longer battery life, and more durable gear allow professionals to focus on their craft rather than worrying about equipment failures or limitations. It also reduces the time spent on post-processing, as the initial quality of the images is higher.
- Versatility: With the right equipment, a photographer can handle a wide range of projects, from portrait photography to landscape photography to product photography. Professionals need gear that can adapt to different settings and lighting conditions, ensuring they can deliver consistent results no matter the assignment.
Key Pieces of Photography Equipment for Professionals
While each photographer’s needs may vary depending on their niche, certain pieces of equipment are essential for anyone working professionally in the field. Let’s take a look at the most important tools every professional photographer should have.
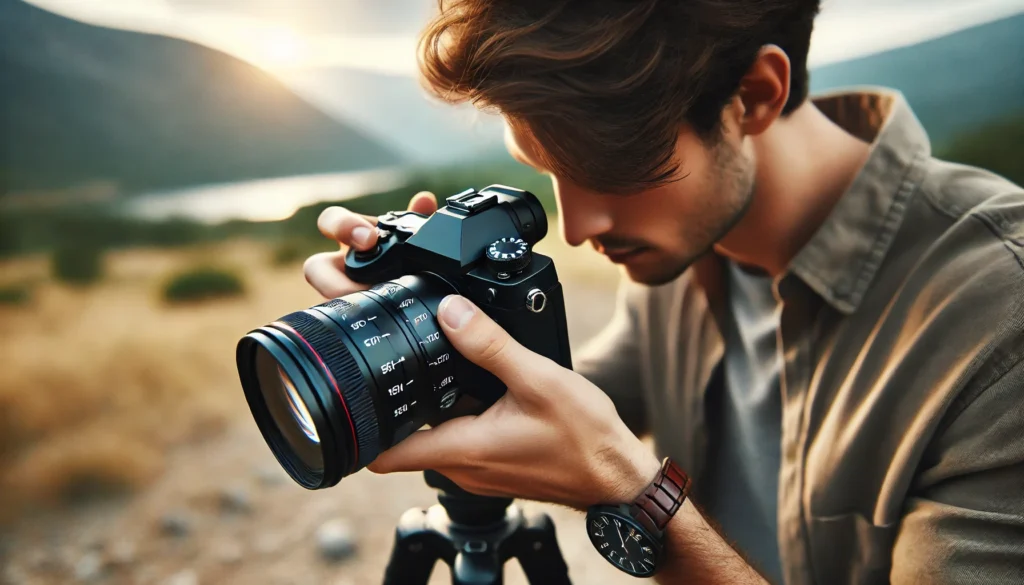
1. Camera Body
The camera body is the heart of a photographer’s gear. Professional cameras offer advanced features like high-resolution sensors, faster processors, and greater control over settings. The camera body is what allows you to capture high-quality images and take full advantage of your lenses and accessories.
- DSLR vs. Mirrorless: There are two main types of cameras that professionals use: DSLR (Digital Single-Lens Reflex) and mirrorless. DSLR cameras are known for their optical viewfinder, extensive lens options, and long battery life. Mirrorless cameras are lighter, more compact, and offer faster autofocus, making them an excellent choice for photographers on the go.
- Full-frame vs. Crop Sensor: Full-frame cameras have larger sensors, which allow for better image quality, especially in low light. Crop sensor cameras are more affordable and offer greater reach with telephoto lenses, but they have slightly lower image quality.
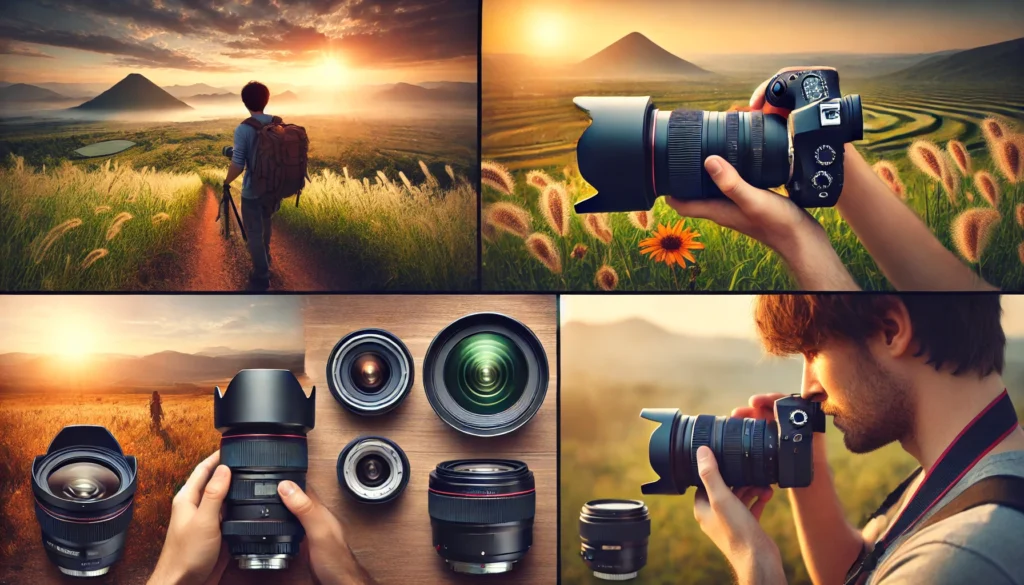
2. Lenses
Lenses are just as important, if not more so, than the camera body itself. The lens you choose will determine the look and feel of your images. Different lenses are suited for various types of photography, and investing in quality lenses can make a huge difference in the results you achieve.
- Prime Lenses: These lenses have a fixed focal length (e.g., 50mm or 35mm) and often produce sharper images with better low-light performance. They’re great for portrait photography and shooting in controlled environments.
- Zoom Lenses: Zoom lenses, like a 24-70mm or 70-200mm, offer flexibility by allowing you to change focal lengths without moving. These lenses are ideal for event photography, weddings, and wildlife photography, where you may need to adjust your framing quickly.
- Wide-Angle and Telephoto Lenses: Wide-angle lenses (e.g., 16-35mm) are essential for landscape and architectural photography, while telephoto lenses (e.g., 70-200mm) are perfect for capturing distant subjects, like wildlife or sports events.
3. Tripods and Stabilization Tools
A tripod is an essential tool for photographers who need stability, especially in low-light situations or when using slow shutter speeds. Whether you’re shooting landscapes, architecture, or long-exposure shots, a sturdy tripod is key to preventing camera shake and ensuring sharp, clear images.
- Monopods: A monopod is another stabilization tool, offering mobility while still providing some stability. It’s great for photographers who need support but don’t want to carry a full tripod.
- Gimbals and Stabilizers: For video shooters, gimbals and handheld stabilizers are essential for smooth footage. These devices help eliminate shaky footage when shooting on the move.
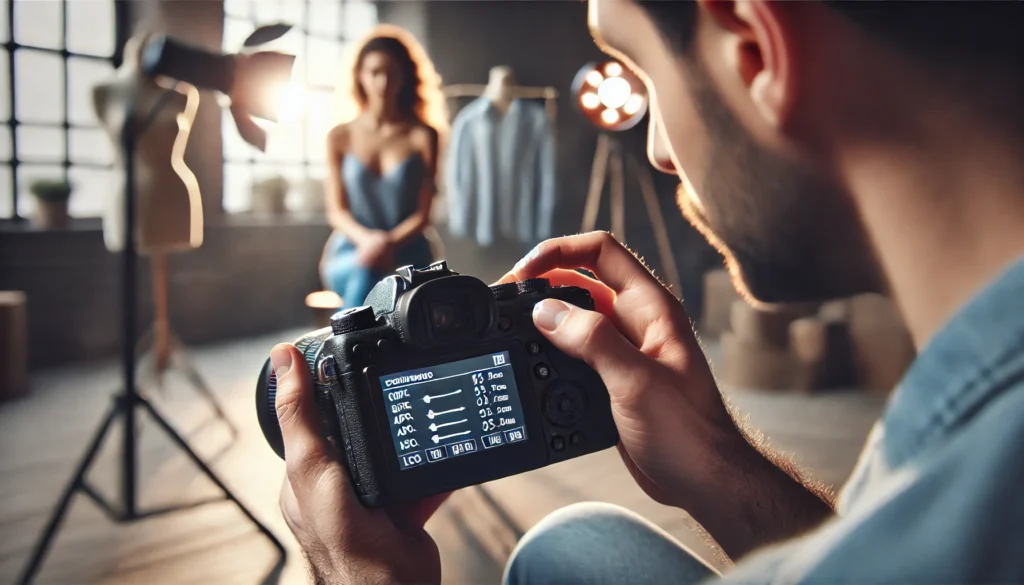
4. External Lighting
Lighting is everything in photography, and for professionals, natural light isn’t always enough. Flash units, softboxes, and reflectors are essential for controlling and manipulating light to achieve the desired effect in your images.
- Speedlights: These small, portable flashes are perfect for event and portrait photographers. They offer flexibility and can be used both on-camera and off-camera.
- Studio Lighting: For controlled environments, studio lighting setups with softboxes and umbrellas provide soft, even lighting that flatters your subject. Studio lighting is ideal for portrait photography, product shoots, and fashion photography.
- Continuous Lighting: For video work and certain types of photography, continuous lighting is a great choice. LED panels provide constant light and are adjustable, giving you more control over your shots.
5. Editing Software
Once you’ve captured your images, post-processing is essential to refine them. Professional photographers rely on advanced editing software like Adobe Lightroom and Photoshop to adjust exposure, color balance, contrast, and sharpness.
- Lightroom: Lightroom is perfect for batch editing and organizing your photos. It offers powerful tools for adjusting exposure, contrast, and color, making it the go-to software for most photographers.
- Photoshop: Photoshop provides advanced editing capabilities, such as retouching, compositing, and detailed image manipulation. It’s ideal for fine-tuning images and achieving creative effects.
6. Memory Cards and Storage
High-resolution images and videos take up a lot of space, so having fast and reliable memory cards is essential. Professional photographers need memory cards with high write speeds and large capacities to handle continuous shooting.
- SD Cards: SD cards are the most common type of memory card for DSLR and mirrorless cameras. It’s a good idea to invest in high-quality cards from trusted brands like SanDisk or Lexar.
- External Hard Drives: To keep your photos and videos safe, invest in external hard drives for backup. Having multiple copies of your work is essential to avoid data loss.
Conclusion
Having the right photography equipment is essential for any professional photographer. While creativity and technique are crucial, the right gear ensures that you can capture the best images and perform your work efficiently. Whether you’re a portrait photographer, landscape photographer, or videographer, investing in quality equipment can elevate your work and help you deliver exceptional results to your clients. Remember, equipment is just one part of the equation; experience, skill, and dedication are what will truly make you a successful photographer.
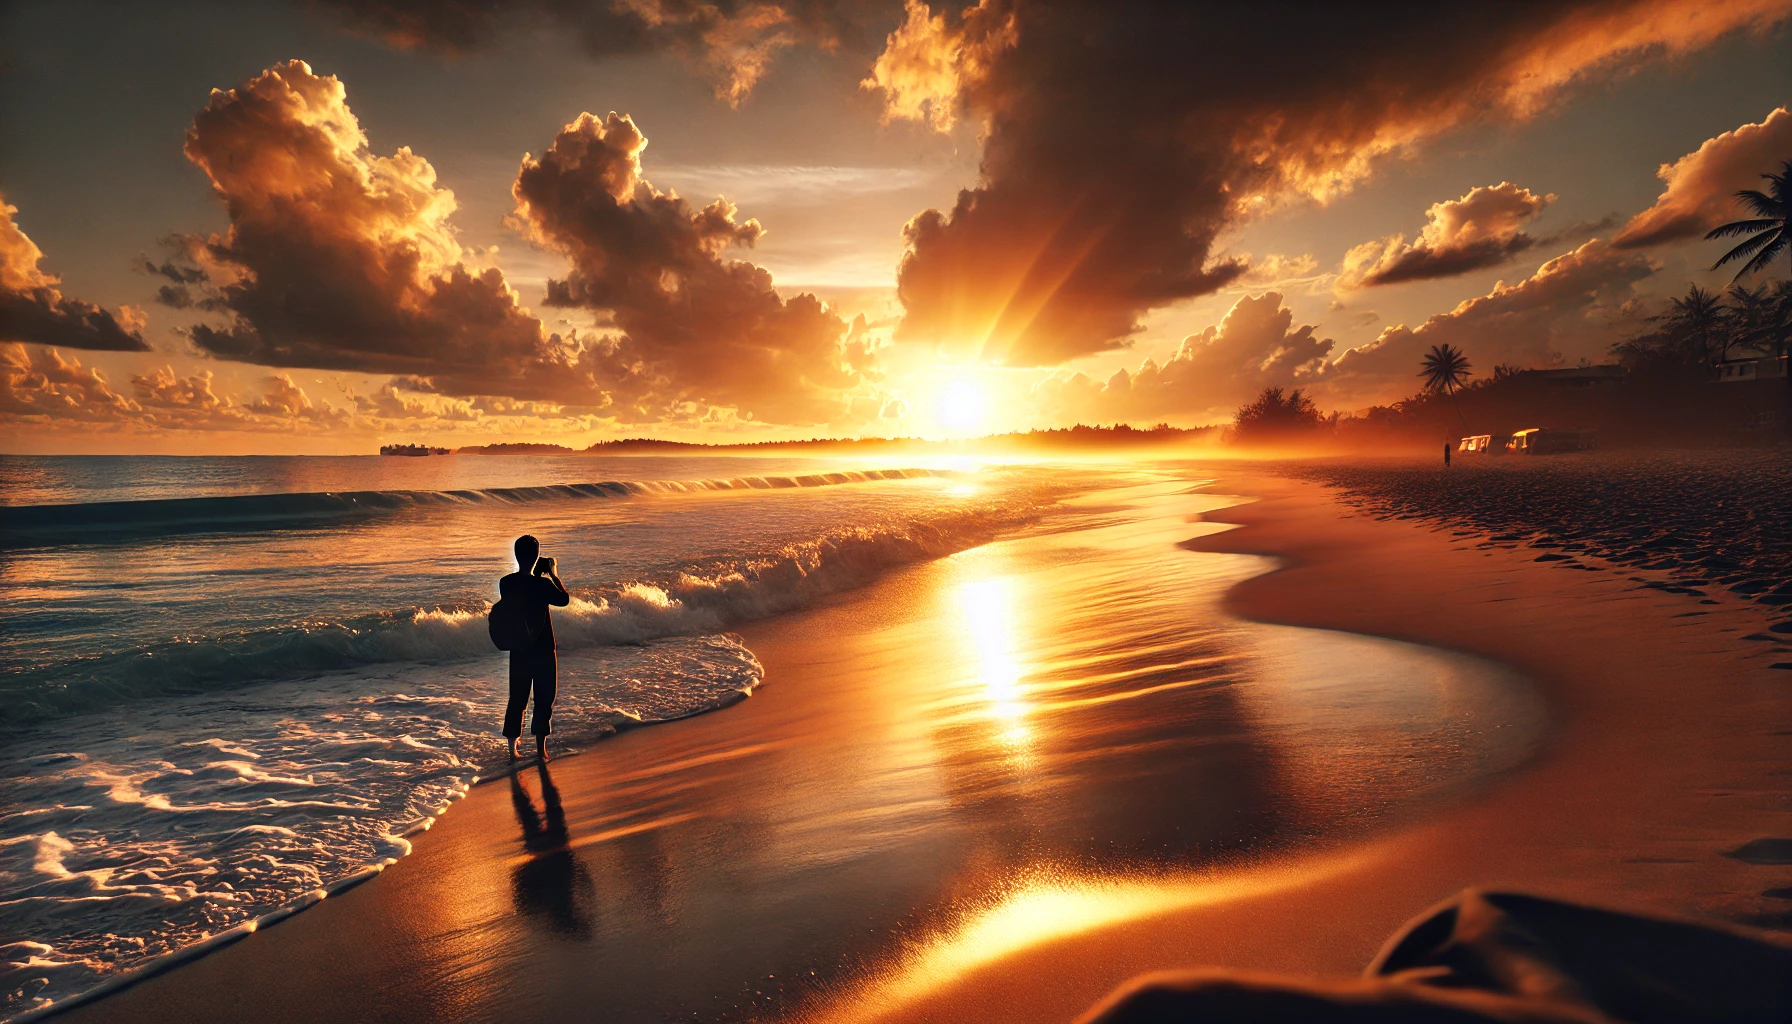
How to Use Natural Light for Professional Photos
Lighting is one of the most important aspects of photography. Without proper lighting, even the best equipment and techniques can fall short. Among the different types of lighting, natural light is often the most accessible and beautiful, providing photographers with a range of effects and moods. In this article, we’ll explore how to effectively use natural light to create professional-quality photographs.
Why Natural Light Is So Powerful
Natural light comes from the sun, and it is free and available to everyone, making it the go-to light source for many photographers. What makes natural light so special is its warmth and the way it can enhance the texture, depth, and mood of an image. Unlike artificial light, which can sometimes appear harsh or flat, natural light has a more organic, soft, and often flattering quality.
- Soft and Flattering: When used properly, natural light can create soft, flattering shadows, particularly in portrait photography. The gradual transition between light and shadow can add depth to your subjects, giving them a more three-dimensional and lifelike appearance.
- Mood and Atmosphere: Natural light can convey different moods and atmospheres depending on the time of day and the weather conditions. The golden hour (the time shortly after sunrise and just before sunset) is especially popular for its warm, golden tones, which create a peaceful and dreamy effect in photos.
- Cost-Effective: Using natural light eliminates the need for expensive lighting setups. It’s available for free, and as long as you understand how to harness it, you can create beautiful images without a large investment in artificial lighting equipment.
Types of Natural Light
To use natural light effectively, it’s important to understand the different qualities of light you can work with. These vary depending on the time of day, the weather, and your environment. Here are the main types of natural light you will encounter:
1. Golden Hour
Golden hour is the period shortly after sunrise and before sunset when the sun is low in the sky. During this time, the light is soft, warm, and diffused, making it ideal for capturing stunning portraits and landscapes. The long shadows and rich color tones give photos a dreamy, almost magical quality.
- Best For: Portraits, landscape photography, and outdoor shoots.
- Tip: Plan your shoots during the golden hour to take advantage of the flattering light. The exact timing of golden hour depends on the season and your location, so check the time in advance.
2. Blue Hour
Blue hour occurs just before sunrise and just after sunset when the sun is below the horizon. The sky takes on deep blue and purple hues, which creates a cool, tranquil atmosphere. While not as popular as golden hour, blue hour can be perfect for urban photography, night scenes, and moody portraits.
- Best For: Cityscapes, long exposure photography, and dramatic moods.
- Tip: Blue hour is fleeting, so be prepared to shoot quickly once the light begins to change.
3. Midday Sun
The midday sun, which occurs when the sun is directly overhead, is often avoided by many photographers due to its harsh light and unflattering shadows. However, it can still be useful, especially if you know how to control it. When shooting in the middle of the day, the light can be intense, casting sharp shadows and high contrast.
- Best For: High-contrast photography, shadows, and black-and-white images.
- Tip: If you need to shoot during midday, try to find shaded areas or use a diffuser to soften the light.
4. Cloudy or Overcast Light
On cloudy or overcast days, the sky acts as a giant softbox, diffusing the sunlight and reducing shadows. The light becomes softer and even, which is perfect for portraits and product photography where harsh shadows are undesirable.
- Best For: Portraits, product photography, and close-up shots.
- Tip: Don’t be discouraged by overcast skies; they can provide some of the most flattering light for photography.
5. Window Light
For indoor photography, natural light from windows is one of the best sources of illumination. Window light can create soft, directional light that adds texture and depth to your photos. It’s especially useful for portraits, still life, and close-up photography.
- Best For: Portraits, food photography, and product shoots.
- Tip: To achieve a soft look, shoot near large windows where the light can flood in from all angles.
Tips for Using Natural Light Effectively
To make the most of natural light, there are several strategies you can use depending on your subject, location, and the mood you want to convey.
1. Use Reflectors
Reflectors help bounce natural light back onto your subject, filling in shadows and softening harsh contrasts. You can use a simple white reflector, or more advanced ones with silver or gold surfaces for different effects. Reflectors are especially useful when working with outdoor portrait photography, where sunlight can be harsh.
- Tip: Position the reflector at a 45-degree angle to bounce light onto your subject’s face and body.
2. Use the Right Angles
The angle at which the light falls on your subject can dramatically change the look of your photo. For portraits, side light (where the light hits the subject from the side) can create beautiful shadows and highlight the texture of the skin. Front lighting (where the light falls directly on the subject’s face) is more even and flattering, while backlighting (light coming from behind the subject) can create silhouettes or highlight hair and edges.
- Tip: Experiment with different angles of light to see how it affects the mood and feel of your photos.
3. Avoid Harsh Shadows with Diffusers
When the sunlight is too harsh, you can use a diffuser to soften the light. A diffuser is a translucent material that scatters the light, resulting in a more even and flattering effect. Diffusers are especially helpful in portrait photography or when shooting products, as they help reduce harsh shadows on your subject’s face or the object.
- Tip: If you don’t have a professional diffuser, you can use household items like a white bed sheet or a shower curtain to soften the light.
4. Control Exposure
When shooting with natural light, it’s important to control the exposure properly. If the light is too bright, your photos may be overexposed and lose detail in highlights. On the other hand, if the light is too dim, your photos may be underexposed, making them dark and lacking detail.
- Tip: Use manual mode on your camera to adjust shutter speed, aperture, and ISO for proper exposure. Experiment with settings to achieve the desired effect.
5. Observe the Direction of Light
The direction of light can affect how your subject looks. Pay attention to where the light is coming from and how it interacts with your subject. For example, when photographing people, the direction of light can emphasize features like facial structure or texture, making it essential to position them correctly relative to the light source.
- Tip: Always observe how light falls on your subject before taking the shot to ensure it enhances the overall composition.
Conclusion
Using natural light in photography is a skill that can dramatically improve your images and give them a professional feel. By understanding the different types of natural light, the best times to shoot, and how to manipulate light with tools like reflectors and diffusers, you can create stunning photographs with just the sun as your guide. Experiment with different lighting conditions, and don’t be afraid to get creative. Natural light offers endless possibilities for photographers, and mastering it will elevate your work to the next level.
Mastering Composition in Photography: Tips and Techniques
Composition is the backbone of a great photograph. It’s how you arrange the elements in your frame to create a visually engaging image. Whether you’re capturing landscapes, portraits, or street photography, mastering composition is key to creating photographs that not only look good but tell a compelling story. In this article, we’ll explore essential tips and techniques that can help you improve your photographic composition and take your photos to the next level.
Why Composition Matters in Photography
Composition is what transforms a simple snapshot into an image that evokes emotion, conveys a message, or captivates the viewer’s attention. The way you arrange elements within your frame influences how the viewer’s eye moves through the image, what they focus on, and the overall balance of the photograph.
Here are a few reasons why composition is essential:
- Guides the Viewer’s Eye: Well-composed images lead the viewer’s eye naturally from one point to another, helping them navigate through the photo and focus on the subject.
- Creates Balance: Good composition creates a sense of harmony in your image. It ensures that no part of the photo feels too crowded or too empty.
- Tells a Story: Composition allows you to frame a narrative. The way you position subjects, use light, and frame the shot can create a story within your image.
Basic Principles of Composition
Several principles of composition can guide your decisions when framing a shot. Here are the most important ones to keep in mind:
1. Rule of Thirds
The rule of thirds is one of the most commonly used compositional techniques. It involves dividing your image into a 3×3 grid with two horizontal and two vertical lines, creating nine equal parts. The idea is to place your main subject along one of these lines or at the intersection points.
- Why It Works: Placing the subject off-center, rather than in the middle, creates a more dynamic and balanced image. It leaves more space in the frame for the viewer to explore, making the composition more interesting.
- Example: For a landscape shot, position the horizon along the top or bottom horizontal line. In portrait photography, place the subject’s eyes along one of the top horizontal lines.
2. Leading Lines
Leading lines are natural or man-made lines in your scene that draw the viewer’s eye towards the subject or focal point. These lines can be roads, rivers, fences, or even shadows.
- Why It Works: Leading lines guide the viewer’s eye through the photo, creating a sense of depth and perspective. They can also emphasize the subject by directing attention to it.
- Example: A long road leading to a distant mountain or a bridge crossing over a river can act as leading lines to direct focus to the main subject of the image.
3. Framing
Framing is a technique where you use elements within your scene to frame your subject. This could include doorways, windows, trees, or other objects that form a natural frame around the subject.
- Why It Works: Framing helps draw attention to the subject and adds depth to the image. It can create a sense of being part of the scene, making the viewer feel like they are looking into the world through the frame.
- Example: Photographing a person through a window, with the window acting as a natural frame, creates a sense of intimacy and focuses the viewer’s attention on the subject.
4. Symmetry and Patterns
Symmetry occurs when the elements in your image are evenly balanced on both sides, while patterns are repetitive elements within the scene. Both symmetry and patterns create a visually appealing structure in the photo.
- Why It Works: Symmetry and patterns provide a sense of order and harmony. They can make the photo feel calm and balanced, drawing the viewer’s eye to the center of the image.
- Example: Architectural shots often make use of symmetry, with doors, windows, or buildings mirrored on either side. Patterns, such as rows of trees or a repetitive design in the landscape, add visual interest.
5. Depth and Layers
Creating depth in your image makes it feel more three-dimensional and engaging. This can be done by including elements in the foreground, middle ground, and background.
- Why It Works: Depth creates a sense of perspective and leads the viewer’s eye deeper into the photo. It helps make an image feel more immersive and adds visual interest.
- Example: In a landscape shot, use rocks or plants in the foreground, a clear subject in the middle, and a distant mountain or sky in the background to create layers and depth.
Advanced Techniques for Composition
Once you’re comfortable with the basics of composition, you can experiment with more advanced techniques to elevate your photos even further.
1. Negative Space
Negative space refers to the empty or unused space around your subject. It can be used strategically to create a sense of simplicity and focus the viewer’s attention on the subject.
- Why It Works: Negative space draws attention to the subject by giving it room to “breathe.” It also creates a minimalist effect, where less is more.
- Example: A lone tree in a vast open field, with the empty sky as negative space, emphasizes the tree’s solitude and creates a peaceful, serene composition.
2. Balancing Elements
Sometimes, placing the main subject off-center (using the rule of thirds) can leave the frame feeling unbalanced. To counteract this, you can balance the empty space by adding another element to the opposite side of the frame. This creates visual balance while still maintaining interest.
- Why It Works: Balanced compositions feel more stable and harmonious, guiding the viewer’s eye across the image evenly.
- Example: If you place a subject on the left side of the frame, you could balance the composition by including a small object or background detail on the right side.
3. Golden Ratio
The golden ratio is a more advanced compositional technique that involves dividing your image into a spiral pattern. It’s based on a mathematical ratio that has been used in art and architecture for centuries. Photographers use it to create naturally pleasing and balanced images.
- Why It Works: The golden ratio helps guide the viewer’s eye in a more organic, flowing manner, rather than using rigid lines like the rule of thirds.
- Example: The spiral can guide the viewer’s eye from the outer edges of the frame toward the focal point, naturally leading them to the subject.
4. Motion and Action
Capturing movement can add a dynamic element to your composition. Whether it’s a moving subject or the blur of a fast-moving background, showing action can give life to your photograph.
- Why It Works: Action adds excitement and energy to the image, and it can convey a story or emotion, creating a sense of movement within a still frame.
- Example: In sports photography, capturing a runner mid-race with motion blur behind them creates a feeling of speed and energy.
Conclusion
Mastering composition is essential to becoming a skilled photographer. By understanding and applying the basic and advanced compositional techniques discussed here, you can elevate your images, making them more visually engaging, dynamic, and meaningful. Composition isn’t just about placing things in the frame — it’s about telling a story, guiding the viewer’s eye, and creating a compelling visual experience. So, next time you’re out shooting, think about the elements in your frame and how you can use composition to create a stunning photograph.
Composition Techniques for Amazing Photography
Great photography is not just about having the best equipment, but also about understanding and applying the principles of composition. Composition refers to the way elements are arranged in a photograph, and it plays a significant role in turning an average photo into a stunning one. Whether you’re a beginner or an experienced photographer, mastering composition can dramatically improve your photos. In this article, we will explore some essential composition techniques to help you capture breathtaking images.
1. The Rule of Thirds
The rule of thirds is one of the most basic and effective composition techniques in photography. It involves dividing the image into nine equal parts by drawing two horizontal lines and two vertical lines. By positioning the subject or key elements along these lines or at their intersections, you create a more balanced and dynamic image. The rule of thirds helps avoid centering the subject, which can often result in a static and less interesting photo.
How to Use the Rule of Thirds
Imagine your image divided into a 3×3 grid. Place your subject off-center, either along one of the vertical or horizontal lines. For example, if you’re photographing a person, position them along the left or right vertical line, leaving empty space on the other side to create a sense of movement or anticipation.
2. Leading Lines
Leading lines are powerful compositional tools that guide the viewer’s eye through the photograph. These lines can be natural or man-made, such as roads, rivers, fences, or architectural elements. Leading lines direct attention to the focal point of the image, making it more engaging and visually pleasing.
How to Use Leading Lines
Look for lines in the environment that naturally draw the viewer’s gaze towards the subject. These lines can be straight or curved, depending on the scene. For example, you might use a winding road to lead the viewer’s eye toward a distant mountain or a railway track that leads toward a person or object.
3. Framing
Framing is a technique where you use elements within the scene to create a “frame” around your subject. This can add depth and draw attention to the main subject while also helping the photo feel more intimate and focused. Framing can be done with natural elements like trees, windows, doors, or even shadows.
How to Use Framing
Look for opportunities to incorporate elements that can surround your subject, drawing attention to it. For example, you can photograph a person standing in a doorway, using the doorframe to create a sense of focus on the subject. Alternatively, trees or archways can be used to frame landscapes or portraits.
4. Symmetry and Patterns
Symmetry and patterns are visually captivating elements that can make your photos stand out. Symmetry refers to when elements on one side of the image mirror those on the other side. Patterns, on the other hand, involve the repetition of shapes, colors, or textures within the frame. Both symmetry and patterns can create harmony and balance in your composition.
How to Use Symmetry and Patterns
Look for symmetrical objects or scenes, such as reflections in water or architectural structures. Position your camera so that the symmetry is clearly visible in the frame. Patterns can be found in nature, such as leaves, flowers, or clouds, or in man-made environments like tiles, staircases, or cityscapes.
5. Negative Space
Negative space, also known as “white space,” refers to the area around and between the subject of the photograph. It is the space that isn’t filled with objects or distractions. Using negative space in your composition can give the subject room to breathe, create a sense of simplicity, and draw attention to the subject in a more subtle way.
How to Use Negative Space
To create a photo with negative space, place your subject off-center and leave plenty of open space around it. This technique works well for minimalist photography, where the subject is small in relation to the empty space surrounding it. For example, a lone tree in the middle of a vast field or a person standing on a wide, open beach can convey a sense of solitude and isolation.
6. The Golden Ratio
The golden ratio is a mathematical ratio often found in nature and art, and it’s used in photography to create balanced and harmonious compositions. The ratio is approximately 1:1.618, and when applied to an image, it guides the placement of elements in a way that is aesthetically pleasing. Many photographers use the golden ratio as a more advanced alternative to the rule of thirds.
How to Use the Golden Ratio
You can apply the golden ratio by using a spiral overlay (often called the Fibonacci spiral) in your composition. The curve of the spiral guides the viewer’s eye towards the focal point of the image. This technique is often used in landscape photography, where elements like trees, mountains, or rivers naturally align with the golden spiral.
7. Depth and Layers
Adding depth to your photos can make them more engaging and visually interesting. Layers in an image can create a sense of dimension and lead the viewer’s eye through the scene. Depth can be achieved through foreground, middle ground, and background elements.
How to Create Depth
To create depth, include objects in the foreground that frame the subject. For example, photographing a flower in the foreground with mountains in the background can create a sense of depth. You can also use elements like fences, roads, or other objects to separate different layers within the scene.
8. Using Light and Shadows
Light and shadows are essential in photography, not only for exposure but also for composition. The way light falls on a subject can create dramatic effects, emphasizing textures, shapes, and lines. Shadows can also add mystery, intrigue, and a sense of drama to your images.
How to Use Light and Shadows in Composition
Pay attention to the direction of light when shooting. Side light can create long, dramatic shadows that enhance textures and details. Backlighting can create silhouettes, which are often striking and artistic. Shadows can also be used to frame your subject or create visual contrast within the image.
9. Experiment with Different Angles
Changing your perspective can dramatically alter the composition and mood of your photo. Instead of shooting from eye level, try shooting from above, below, or at an angle. Experimenting with different perspectives can help you discover new ways to capture your subject and add a unique twist to your compositions.
How to Experiment with Angles
Get creative with your shooting angles. For example, photograph a subject from a low angle to make them appear more imposing or from a high angle to capture an overview of the scene. Moving around your subject and shooting from different perspectives can reveal new compositions that are more dynamic and intriguing.
Final Thoughts
Mastering composition is a key step in becoming a better photographer. By using techniques like the rule of thirds, leading lines, symmetry, and negative space, you can enhance the visual appeal of your photos. Remember that photography is an art form, and while these rules can guide you, creativity and experimentation are equally important. So, go out and start capturing amazing photos with these composition techniques in mind!
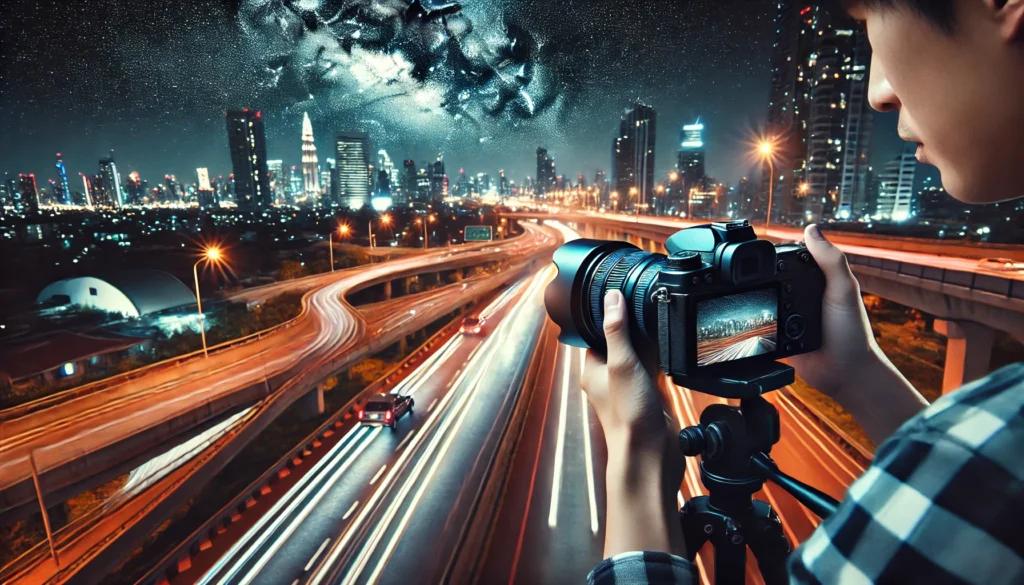
Night Photography Tips: How to Capture Amazing Images at Night
Night photography offers a unique and creative opportunity to capture stunning images that are impossible to take during the day. Whether you’re photographing cityscapes, starry skies, or street scenes, the nighttime presents a different set of challenges and rewards. In this guide, we’ll explore some essential tips and techniques to help you master night photography and capture amazing images at night.
1. Use a Tripod for Stability
One of the most important aspects of night photography is capturing long-exposure shots, which require a steady camera to avoid motion blur. Since the light is lower at night, your camera will need to use slower shutter speeds to gather enough light for the image. A tripod will keep your camera stable, ensuring sharp, clear photos without any unwanted blur.
Why a Tripod is Essential
When shooting at night, your camera may require exposures of several seconds or even longer to properly capture the available light. Without a tripod, it will be almost impossible to take sharp images, as even small movements can cause blur. A sturdy tripod is essential for low-light photography, especially for long-exposure shots.
2. Choose a Wide Aperture (Low f-Number)
A wide aperture (low f-number, like f/2.8 or f/1.8) allows more light to enter the camera, which is crucial for night photography. By using a wider aperture, you can let in more light, helping to create brighter images in low-light environments. A wide aperture also produces a shallow depth of field, which can give your photos a dreamy, blurred background.
How to Set Your Aperture
For night photography, set your aperture to its widest setting (the smallest f-number possible). This will help ensure your camera can capture enough light. Keep in mind that using a very wide aperture might affect the sharpness of objects in the background, so consider the composition and depth of field you want to achieve.
3. Adjust the ISO for Low Noise
ISO determines the sensitivity of your camera’s sensor to light. In night photography, you may need to increase the ISO to capture more light and achieve brighter images. However, higher ISO settings can introduce digital noise, which can reduce the quality of your photos.
How to Find the Right ISO Setting
Start by setting your ISO to a moderate value, such as ISO 800 or ISO 1600, depending on the amount of light available. If you notice too much noise in your photos, you may want to lower the ISO or use post-processing software to reduce noise. Ideally, use the lowest ISO that gives you a bright image with minimal noise.
4. Use Long Exposure for Light Trails
One of the most exciting aspects of night photography is the ability to capture light trails. Whether it’s the headlights of cars, fireworks, or star trails, long exposure can create stunning effects that aren’t possible during the day. By using a long exposure, you can capture the movement of light, creating streaks or trails that add motion and energy to your images.
How to Capture Light Trails
To capture light trails, use a slow shutter speed (several seconds or even minutes) to allow the light sources to leave a trail in the image. Experiment with shutter speeds between 5 and 30 seconds for the best results. Be sure to use a tripod to keep the camera steady during the long exposure.
5. Focus Manually for Sharp Images
Autofocus can struggle in low-light situations, especially at night. To ensure that your photos are sharp, it’s best to use manual focus when shooting at night. You can focus on a distant light, such as a streetlamp or building, to get a clear image.
How to Manually Focus in the Dark
If your camera has a focus assist light, use it to help you manually focus on distant objects. If your camera doesn’t have this feature, use the live view mode to zoom in on a bright point in the scene and adjust the focus until it’s sharp. Take test shots and adjust the focus if necessary until the image is as sharp as possible.
6. Shoot in RAW Format
Shooting in RAW format is essential for night photography, as it gives you much more control during post-processing. RAW files contain more image data than JPEGs, allowing you to recover details from shadows and highlights that might otherwise be lost in low-light scenes.
Why RAW is Better for Night Photography
RAW files allow you to adjust exposure, contrast, and white balance more effectively than JPEGs. If your photo ends up too dark or too light, you can correct it without losing image quality. RAW also provides more flexibility in removing noise, correcting colors, and enhancing fine details in your night shots.
7. Experiment with Different White Balance Settings
The color temperature of light at night can vary greatly depending on the source. Streetlights, neon signs, and the moon all emit different types of light that can affect the color of your photos. To achieve the best results, experiment with different white balance settings to get the right color balance for your scene.
How to Adjust White Balance for Night Photography
Start by setting your white balance to “Tungsten” for cooler tones or “Incandescent” for warmer tones, depending on the lighting around you. You can also use the custom white balance setting to fine-tune the color temperature. If you shoot in RAW format, you can adjust the white balance in post-processing for greater accuracy.
8. Use a Remote Shutter or Self-Timer
When shooting at long exposures, even the smallest movement of your camera can cause blurring. To avoid this, use a remote shutter release or the self-timer function on your camera. This allows you to take the photo without physically touching the camera, ensuring that your shots are crisp and clear.
How to Use a Remote Shutter
Connect a remote shutter release to your camera or use your camera’s built-in self-timer. For long-exposure shots, use a 2-second or 10-second timer to avoid any shake caused by pressing the shutter button. A remote shutter is ideal for minimizing camera movement during exposure, especially in low-light conditions.
9. Capture the Stars with a Wide-Angle Lens
If you’re interested in astrophotography or capturing star trails, a wide-angle lens with a low f-number is ideal for night sky photography. A lens with a focal length of 14mm to 24mm allows you to capture large sections of the night sky while maintaining sharp focus on both the stars and the landscape.
How to Photograph the Stars
Use a wide aperture (f/2.8 or wider) and set your ISO between 1600 and 3200, depending on the amount of light pollution in the area. Keep your shutter speed between 15 and 30 seconds to avoid star trails unless you want to capture them. Focus manually on a distant light source or a bright star to ensure the stars are in focus.
10. Experiment with Different Nighttime Subjects
Night photography isn’t limited to just the stars or city lights. The possibilities are endless, and each type of subject requires different techniques. From capturing light reflections in water to photographing the moon or illuminated buildings, experiment with different nighttime subjects to expand your photography skills.
Subjects to Try
- Cityscapes: Capture the glowing lights of a city skyline.
- Street Photography: Photograph the hustle and bustle of city life at night.
- Milky Way: If you’re in a dark-sky location, try capturing the Milky Way.
- Fireworks: Experiment with different shutter speeds to capture bursts of color.
- Light Painting: Use a flashlight or other light source to create abstract patterns.
Final Thoughts
Night photography presents its own unique set of challenges, but with the right equipment and techniques, you can capture stunning, creative images. Remember to use a tripod for stability, choose the right aperture and ISO settings, and experiment with different exposures to create the perfect shot. By following these tips, you’ll be able to master night photography and unlock the magic of capturing beautiful moments after dark.
Portrait Photography: How to Achieve Stunning Results
Portrait photography is an art form that focuses on capturing the personality, emotion, and character of a subject. Whether you’re photographing family members, friends, or professional models, mastering portrait photography can help you take photos that tell a story and create lasting memories. In this article, we’ll explore tips and techniques to help you achieve stunning results in portrait photography.
1. Understand Lighting in Portrait Photography
Lighting is one of the most critical aspects of portrait photography. The way light falls on your subject can drastically affect the mood and quality of your portrait. There are different types of lighting setups that can help you create various effects, such as soft, dramatic, or natural looks.
Natural Light vs. Artificial Light
Natural light, such as sunlight, can create soft, flattering portraits, especially during the “golden hour,” which occurs shortly after sunrise or before sunset. If you’re shooting indoors, position your subject near a large window to take advantage of soft, natural light.
Artificial light, on the other hand, can provide more control over the intensity and direction of the light. Using softboxes, ring lights, or studio strobes can help you create a well-lit portrait with a professional look. Experimenting with different light sources can help you achieve the exact effect you want.
2. The Importance of Composition
Composition plays a huge role in portrait photography, as it determines how the subject is framed within the photo. Understanding basic composition techniques can elevate the quality of your portraits and make them more visually appealing.
Rule of Thirds
The rule of thirds is a powerful composition technique. Imagine dividing your image into a 3×3 grid, and place the subject’s eyes or face along one of the horizontal or vertical lines. This technique creates balance and draws attention to the subject, making the photo more dynamic.
Leading Lines and Framing
Use elements in the environment, such as doorways, windows, or trees, to frame the subject. Leading lines, like roads or fences, can guide the viewer’s eyes toward the subject, creating a sense of depth and focus.
3. Focus on the Eyes
In portrait photography, the eyes are often considered the most important element. Sharp, well-lit eyes can convey emotion and draw the viewer into the photo. If the eyes are out of focus or poorly lit, the portrait may lose its emotional impact.
How to Focus on the Eyes
When using a DSLR or mirrorless camera, ensure that the focus point is set directly on the eyes. If you’re using a wide aperture (such as f/1.8 or f/2.8), make sure the depth of field is shallow enough to keep the eyes sharp while blurring the background.
4. Choose the Right Lens
The lens you choose can significantly impact the look of your portrait. Different lenses offer different perspectives and effects. A lens with a longer focal length, such as an 85mm or 50mm lens, is ideal for portraits because it creates flattering compression and allows you to blur the background (bokeh effect).
Prime Lenses vs. Zoom Lenses
Prime lenses (lenses with a fixed focal length, such as 50mm or 85mm) are great for portrait photography because they typically offer wider apertures (e.g., f/1.8 or f/1.4), allowing for more control over depth of field and creating that beautiful blurred background.
Zoom lenses, such as a 24-70mm, are versatile and offer flexibility in framing, but they may not provide the same level of background blur as prime lenses. Both types of lenses can be effective for portrait photography, depending on your preferences.
5. Position Your Subject
Positioning your subject correctly can make a huge difference in how your portrait turns out. Subtle changes in body position, head tilt, and eye direction can dramatically alter the mood and impact of the photo.
How to Pose Your Subject
Start by positioning your subject slightly to the side of the camera, rather than directly facing it. This creates a more flattering angle. Ask your subject to slightly tilt their head or shift their weight to one leg to create a natural, relaxed look.
For close-up portraits, ensure that the subject’s shoulders are slightly turned away from the camera, with their head facing towards the lens. This will create a flattering angle and emphasize the subject’s facial features.
6. Use a Shallow Depth of Field
A shallow depth of field (achieved with a wide aperture) allows you to isolate your subject from the background, making them stand out and creating a pleasing blur (bokeh effect) in the background. This is a common technique in portrait photography, as it keeps the focus on the subject and removes distractions.
How to Achieve a Shallow Depth of Field
To achieve a shallow depth of field, set your camera’s aperture to a low f-number (e.g., f/1.8 or f/2.8). A longer focal length lens (such as 85mm) will also help you create a more pronounced bokeh effect.
7. Pay Attention to Background and Environment
The background and environment of your portrait can either enhance or detract from your subject. Make sure the background complements the subject and doesn’t distract from them.
How to Choose the Right Background
If possible, choose a background that is simple and unobtrusive, such as a neutral-colored wall, a natural setting like a park, or an urban environment. Avoid cluttered or distracting backgrounds that take attention away from the subject.
If you’re shooting outdoors, position your subject so that the background elements are blurred (using a shallow depth of field) or framed by natural elements like trees or fences.
8. Communicate with Your Subject
Creating a comfortable atmosphere is key to capturing authentic expressions and emotions. Take the time to communicate with your subject, whether they are a professional model or a family member. Help them relax and feel confident in front of the camera to get the best results.
How to Make Your Subject Feel Comfortable
Give clear instructions on how to pose, but also encourage your subject to move naturally and experiment with different expressions. You can also use props, music, or a little humor to help your subject relax and feel at ease.
9. Focus on Details
Details in portrait photography can make a big difference in the overall impact of the image. Pay attention to small details like hair, clothing, and accessories to ensure they are neat and positioned correctly.
How to Capture the Details
Make sure your subject’s hair is styled as desired and that clothing is free of wrinkles. If you’re capturing a close-up, focus on small details like jewelry, makeup, or the texture of the skin. These elements can add depth and interest to the portrait.
Final Thoughts
Achieving stunning results in portrait photography requires both technical knowledge and creativity. By understanding lighting, composition, and focusing on the details, you can create portraits that not only capture the physical likeness of your subject but also convey emotion and personality. Practice these techniques, experiment with different approaches, and you’ll soon be taking portraits that truly stand out.
How to Use Your Camera’s Manual Mode for Professional Photos
For many photographers, the ultimate goal is to gain full creative control over their images, and one of the best ways to do this is by mastering your camera’s manual mode. In manual mode, you control the three main exposure settings—shutter speed, aperture, and ISO—allowing you to take full advantage of your camera’s potential. In this article, we will explore how to use manual mode to take professional-quality photos.
1. Understanding the Exposure Triangle
Before diving into manual mode, it’s crucial to understand the three core components of exposure: shutter speed, aperture, and ISO. These three settings work together to determine how light or dark your photos will be. Getting the right balance is key to achieving well-exposed, professional-looking images.
Shutter Speed
Shutter speed refers to how long the camera’s shutter is open to allow light to reach the sensor. It is measured in seconds or fractions of a second. A fast shutter speed (e.g., 1/1000s) captures motion sharply, while a slow shutter speed (e.g., 1/30s) can create motion blur, which is useful for capturing moving subjects like flowing water or car lights.
Aperture
Aperture controls the size of the opening in the lens, which affects the amount of light entering the camera. It is measured in f-stops (e.g., f/1.8, f/5.6, f/16). A wide aperture (e.g., f/1.8) allows more light to hit the sensor, resulting in brighter images and a shallow depth of field (blurred background). A narrow aperture (e.g., f/16) lets in less light and produces a deeper depth of field, keeping more of the image in focus.
ISO
ISO controls the sensitivity of the camera’s sensor to light. Lower ISO values (e.g., 100 or 200) are ideal for bright conditions, while higher ISO values (e.g., 1600 or 3200) are necessary in low-light situations. However, increasing the ISO also increases the risk of noise (graininess) in your images, so it’s important to find a balance between exposure and noise levels.
2. Setting Your Camera to Manual Mode
Most DSLR and mirrorless cameras have a mode dial with a “M” for manual mode. Once you switch your camera to manual mode, you’ll be able to adjust all three components of the exposure triangle. The goal is to get a balanced exposure where your image is neither too bright (overexposed) nor too dark (underexposed).
How to Set Manual Mode
To start, set your shutter speed, aperture, and ISO based on the lighting conditions and the effect you want to achieve. You may need to make adjustments as you shoot, depending on the scene and available light.
- Shutter Speed: Start by setting your shutter speed according to the subject you’re photographing. For fast-moving subjects, choose a faster shutter speed (e.g., 1/500s or faster). For stationary subjects, you can use slower shutter speeds.
- Aperture: Adjust your aperture depending on how much depth of field you want. A wide aperture (e.g., f/1.8) is great for portraits with a blurred background, while a narrow aperture (e.g., f/16) is better for landscapes where you want everything in focus.
- ISO: Set your ISO to the lowest value that still gives you a proper exposure. In bright light, try to use ISO 100, and in low-light conditions, increase the ISO to 800, 1600, or higher.
3. Use Your Camera’s Metering System
When shooting in manual mode, your camera will provide feedback on exposure through its metering system. The metering system measures the light in the scene and provides an exposure reading, typically in the form of a scale in the camera’s viewfinder or LCD screen.
How to Read the Meter
The exposure meter usually shows a scale with a 0 in the middle, which represents the ideal exposure. If the meter shows a negative value, your image is underexposed (too dark). If it shows a positive value, the image is overexposed (too bright). Adjust your settings (shutter speed, aperture, or ISO) until the meter indicates a balanced exposure.
4. Balancing the Exposure Triangle
Finding the right combination of shutter speed, aperture, and ISO is a balancing act. If you change one setting, you’ll need to adjust the others to maintain the correct exposure. Here’s how to make adjustments based on the effect you want to achieve:
Adjusting for Motion
If you’re photographing fast-moving subjects, such as sports or wildlife, use a faster shutter speed (e.g., 1/500s or faster). To maintain proper exposure, you may need to open your aperture (use a lower f-number) or increase your ISO to allow more light into the camera.
Adjusting for Depth of Field
For portraits or any shot where you want a blurred background, use a wide aperture (e.g., f/1.8 or f/2.8). This will result in a shallow depth of field, isolating your subject from the background. If the image becomes too bright, decrease the ISO or use a faster shutter speed to balance the exposure.
Adjusting for Low-Light Conditions
In low-light conditions, increase your ISO to allow the sensor to capture more light. However, be mindful of the potential for noise. If noise becomes a problem, try using a wider aperture or a slower shutter speed to compensate without raising the ISO too much.
5. Experiment with Different Settings
One of the advantages of manual mode is the creative control it gives you over your images. Don’t be afraid to experiment with different settings to achieve unique effects. Try shooting with long exposures to capture motion blur, or use a wide aperture to create beautiful bokeh in the background.
Creative Effects with Manual Mode
- Motion Blur: Use slow shutter speeds (e.g., 1/30s or slower) to capture the movement of water, traffic, or people. The motion blur will add a sense of movement to your image.
- Bokeh: Use a wide aperture (e.g., f/1.8 or f/2.8) to create a shallow depth of field and blur the background, creating a pleasing bokeh effect.
- Low Light: In dark environments, use a slow shutter speed, wide aperture, and higher ISO to capture more light and reveal hidden details.
6. Review and Adjust
After taking a shot, review the image and check the exposure. If the image is too bright or too dark, make small adjustments to the settings and take another shot. Don’t be afraid to make changes, as photography is a process of trial and error, especially when you’re learning to use manual mode.
7. Practice, Practice, Practice
Using manual mode can be intimidating at first, but the more you practice, the more comfortable you’ll become with controlling your camera settings. Experiment with different scenes, subjects, and lighting conditions to learn how each element of the exposure triangle affects your photos.
Final Thoughts
Manual mode gives you complete control over your camera’s settings, allowing you to capture professional-quality photos tailored to your vision. Understanding the exposure triangle, practicing with different settings, and learning how to balance shutter speed, aperture, and ISO will help you take your photography skills to the next level. With time and experience, you’ll gain the confidence to create stunning images, no matter the lighting conditions.
What Not to Do in Photography: Common Mistakes and How to Avoid Them
Photography is an art that requires skill, creativity, and attention to detail. Even experienced photographers make mistakes, but understanding these common pitfalls and learning how to avoid them can elevate the quality of your photos. In this article, we’ll explore some of the most common mistakes made in photography and provide tips on how to avoid them, helping you capture stunning, professional-looking images every time.
1. Not Paying Attention to Lighting
Lighting is one of the most important elements in photography. Many beginners make the mistake of not paying enough attention to lighting, which can lead to poorly lit or flat images. Whether you’re shooting indoors or outdoors, the quality and direction of light can make or break your photo.
Mistake to Avoid: Ignoring Natural Light
Natural light, especially during the “golden hour” (shortly after sunrise and before sunset), can create beautiful, soft lighting that enhances your subject. However, shooting at the wrong time of day or in harsh midday sun can result in unflattering shadows and overexposed highlights.
How to Avoid It
Always consider the lighting in your environment before taking a shot. If shooting outdoors, try to avoid the harsh midday sun. For indoor photography, position your subject near windows or use artificial lighting (such as softboxes or ring lights) to create a flattering effect. Experiment with different light sources to find the one that best suits your scene.
2. Using Incorrect Exposure Settings
Exposure refers to how much light hits the camera’s sensor, and it’s controlled by three main settings: shutter speed, aperture, and ISO. Many photographers make the mistake of not properly adjusting these settings, leading to either overexposed (too bright) or underexposed (too dark) images.
Mistake to Avoid: Not Balancing the Exposure Triangle
Failing to balance shutter speed, aperture, and ISO can result in photos that are too dark or too bright. For example, using a very fast shutter speed without compensating with a wider aperture or higher ISO can leave your image too dark. On the other hand, using a slow shutter speed without adjusting the other settings can cause overexposure or motion blur.
How to Avoid It
Understand the exposure triangle and make sure to adjust your settings according to the lighting conditions. For instance, in low-light environments, you may need to use a slower shutter speed, a wider aperture, or a higher ISO. Use your camera’s built-in exposure meter to help you find the correct exposure, and don’t be afraid to make adjustments as needed.
3. Not Focusing Properly
One of the most frustrating mistakes in photography is failing to focus properly. Blurry photos, especially portraits or close-up shots, can ruin an otherwise great image. Many beginners rely too heavily on autofocus, but it can sometimes fail, especially in low-light conditions or when there are multiple subjects in the frame.
Mistake to Avoid: Relying Too Much on Autofocus
Autofocus is convenient, but it’s not always reliable, particularly in challenging lighting conditions or when shooting fast-moving subjects. Autofocus can also focus on the wrong part of the scene, leaving your subject out of focus.
How to Avoid It
Learn to use manual focus when necessary, especially in low light or when shooting portraits. If you’re using autofocus, make sure to select the correct focus point, ideally on your subject’s eyes when photographing people. Take your time to check the focus before snapping the shot.
4. Shooting with a Distracting Background
A cluttered or distracting background can take the focus away from your subject and ruin an otherwise beautiful photo. Often, photographers overlook the background when composing a shot, but it’s just as important as the subject itself.
Mistake to Avoid: Ignoring the Background
A busy or chaotic background can detract from the subject of your photograph. For example, bright colors, objects that overlap your subject, or distracting elements can steal attention and make your photo feel unbalanced.
How to Avoid It
Pay attention to the background when composing your shot. If possible, choose a simple, uncluttered background that complements your subject. You can also use a shallow depth of field (wide aperture) to blur the background, which will help isolate your subject and make it stand out.
5. Not Paying Attention to Composition
Composition refers to how elements are arranged in the frame. Poor composition can make an image feel unbalanced or awkward. Many beginners make the mistake of not applying basic composition techniques, such as the rule of thirds, leading lines, or framing.
Mistake to Avoid: Centering Everything
Centering your subject in every photo can lead to static, uninteresting compositions. While centering can be effective in certain situations, it often makes the image feel rigid and lacking in dynamic energy.
How to Avoid It
Use the rule of thirds to position your subject off-center, creating a more balanced and engaging composition. You can also experiment with other techniques, such as leading lines, symmetry, and framing, to add depth and visual interest to your photos.
6. Over-Editing Your Photos
In the age of digital photography, it’s easy to over-edit images using software like Photoshop or Lightroom. While editing can enhance your photos, overdoing it can make them look unnatural or even ruin the original image.
Mistake to Avoid: Over-Retouching
It’s tempting to smooth out every imperfection, but over-editing can make the subject look unnatural. This is especially problematic in portraits, where excessive smoothing of skin or altering facial features can make the image feel artificial.
How to Avoid It
When editing your photos, aim for subtlety. Enhance the colors, contrast, and sharpness without overdoing it. In portraits, preserve the natural textures of the skin and avoid heavy retouching. If you need to correct minor issues, use the tools available in your editing software, but avoid making drastic changes to the overall look of the image.
7. Forgetting to Check Camera Settings Before Shooting
It’s easy to forget to check your camera settings before taking a shot, especially if you’re in a hurry or shooting in changing light conditions. Using the wrong settings can lead to unexpected results, such as blurry photos or incorrect exposure.
Mistake to Avoid: Not Checking Settings
If you’ve been shooting in low-light conditions and suddenly move into bright sunlight, your exposure settings may be all wrong, resulting in a blown-out image. Similarly, if you forget to adjust your white balance, your photos may have an unnatural color cast.
How to Avoid It
Before taking each shot, quickly check your camera settings. Ensure that your shutter speed, aperture, and ISO are appropriate for the current lighting conditions. Don’t forget to check your white balance as well, especially when moving between different light sources. A quick review of your settings can save you from taking hundreds of poorly exposed photos.
8. Not Experimenting Enough
Many photographers stick to what they know and never step outside their comfort zone. While it’s good to master the basics, not experimenting with new techniques or perspectives can limit your growth as a photographer.
Mistake to Avoid: Sticking to One Style
Relying on the same composition, lighting, and subject matter can lead to stale, repetitive images. Not pushing yourself creatively means you’re missing out on opportunities to improve and discover your unique photographic style.
How to Avoid It
Push your creativity by experimenting with different techniques, lighting setups, compositions, and subjects. Try shooting from different angles, using new camera settings, or exploring new genres of photography. Don’t be afraid to make mistakes—every experiment helps you grow and improve as a photographer.
Final Thoughts
Photography is a rewarding and ever-evolving craft, and everyone makes mistakes along the way. By being aware of the common pitfalls in photography, you can avoid them and improve the quality of your images. Remember, it’s all about learning from your mistakes, experimenting, and constantly improving your skills. With practice, you’ll avoid these common errors and capture stunning, professional photos.
How to Use Different Lenses to Create Unique Effects in Your Photos
Lenses are one of the most powerful tools in a photographer’s kit. The lens you choose can dramatically affect the look and feel of your photos, allowing you to create unique effects that convey mood, depth, and creativity. In this article, we’ll explore the different types of lenses and how to use them to create stunning, one-of-a-kind images.
1. Understanding Different Types of Lenses
Before diving into the creative aspects of lenses, it’s important to understand the different types of lenses available. Each type of lens has its own characteristics and is suited for specific styles of photography.
Prime Lenses
A prime lens has a fixed focal length, meaning you can’t zoom in or out. Common prime lens focal lengths include 35mm, 50mm, and 85mm. These lenses are known for their sharpness and wide apertures, making them ideal for portraits, street photography, and low-light shooting.
Creative Effect: Prime lenses offer a shallow depth of field, which helps isolate the subject from the background. This effect is especially popular in portrait photography, where you can blur the background to create a professional, aesthetically pleasing look.
Zoom Lenses
Zoom lenses offer a variable focal length, allowing you to zoom in and out without changing lenses. Popular zoom lens focal lengths include 24-70mm, 18-55mm, and 70-200mm. These lenses are versatile and great for general photography, from landscapes to portraits.
Creative Effect: Zoom lenses give you flexibility, allowing you to adjust your framing without moving. You can experiment with different focal lengths to capture both wide and detailed shots, making them great for capturing scenes with changing perspectives.
Wide-Angle Lenses
Wide-angle lenses have a short focal length (typically between 14mm and 35mm), which allows you to capture more of the scene in the frame. These lenses are great for landscapes, architecture, and interior photography, as they enable you to capture a wide field of view.
Creative Effect: Wide-angle lenses exaggerate the perspective, making objects in the foreground appear larger and more prominent while pushing the background farther away. This effect is great for emphasizing depth and creating dramatic compositions.
Telephoto Lenses
Telephoto lenses have a long focal length (typically 70mm or more), allowing you to photograph distant subjects with greater detail. They are ideal for wildlife, sports, and portrait photography, as they help compress the perspective and bring distant objects closer.
Creative Effect: Telephoto lenses create a compressed effect, where background elements appear closer to the subject. This is great for portrait photography, as it flattens the image and creates a pleasing bokeh (blurred background) that makes the subject stand out.
Macro Lenses
Macro lenses are specialized lenses designed for close-up photography. These lenses allow you to capture incredibly fine details of small subjects like flowers, insects, and textures. Macro lenses typically have a 1:1 magnification ratio, meaning you can photograph subjects at life-size scale.
Creative Effect: Macro lenses allow you to explore the intricate details of small objects, revealing textures and patterns that would be invisible to the naked eye. This lens is perfect for creating abstract images or capturing nature’s minute details with clarity.
2. Using Lenses for Creative Effects
Now that you understand the basic types of lenses, let’s dive into how you can use them creatively to achieve unique effects in your photos.
Creating Bokeh with a Wide Aperture
Bokeh refers to the aesthetic quality of the blurred background in a photograph. Lenses with wide apertures (low f-stop numbers, such as f/1.4 or f/2.8) are ideal for creating bokeh. Prime lenses, such as a 50mm f/1.8 or 85mm f/1.4, are particularly good for producing creamy, out-of-focus backgrounds.
How to Achieve Bokeh:
- Use a wide aperture (f/1.4, f/2.8) to create a shallow depth of field.
- Focus on your subject and let the background blur out, creating smooth bokeh.
- The effect works best when you have points of light in the background, such as streetlights, to create circular bokeh.
Achieving a Sense of Depth with Wide-Angle Lenses
Wide-angle lenses allow you to create dramatic perspectives that emphasize depth in your photos. This is especially effective when you want to showcase a sense of scale in landscapes or architectural shots. Wide-angle lenses can exaggerate the size of foreground elements, making them appear larger while pushing the background farther away.
How to Use Wide-Angle Lenses Creatively:
- Position your camera low to the ground to emphasize the size of objects in the foreground.
- Experiment with leading lines (such as roads or pathways) to guide the viewer’s eye through the scene.
- Capture vast landscapes where the wide-angle lens can showcase the full expanse of the scene.
Using Telephoto Lenses for Compression and Isolation
Telephoto lenses are fantastic for compressing the scene, making distant objects appear much closer together. This is particularly useful for wildlife and portrait photography, where you want to isolate the subject from the background and create a shallow depth of field.
How to Use Telephoto Lenses Creatively:
- For portraits, use a telephoto lens (e.g., 85mm, 135mm) to achieve a flattering, compressed look. This helps to blur the background and makes the subject stand out.
- For wildlife or sports photography, use a telephoto lens to capture distant subjects with great detail. The lens allows you to isolate the subject from the environment, creating powerful, focused images.
Exploring Texture and Detail with Macro Lenses
Macro lenses open up a whole new world of photography by allowing you to capture tiny details with incredible clarity. From capturing the texture of a leaf to photographing the intricate patterns of an insect’s wings, macro lenses can transform the way you see the world.
How to Use Macro Lenses Creatively:
- Focus on textures, patterns, and minute details that are often overlooked.
- Use natural light or a small portable light source to illuminate your subject and enhance its details.
- Experiment with shallow depth of field to create beautiful, abstract images with blurred backgrounds.
3. Lens Accessories and Add-Ons
In addition to choosing the right lens, there are several accessories that can enhance the effects of your lenses and further expand your creative possibilities.
Lens Filters
Lens filters can help you control light, reduce glare, and enhance colors in your photos. Some common filters include:
- UV filters to protect your lens and reduce haze.
- Polarizing filters to eliminate reflections and enhance contrast in the sky and foliage.
- ND (Neutral Density) filters to allow for longer exposures in bright light conditions, creating effects like motion blur in waterfalls or clouds.
Lens Hoods
Lens hoods help reduce lens flare by blocking stray light from entering the lens. They can also provide a bit of protection for the lens during shooting. When using wide-angle lenses, lens hoods are especially useful for maintaining contrast and preventing unwanted light spots in the frame.
4. Choosing the Right Lens for Your Style
The best lens for you depends on your photography style and the effect you want to achieve. Whether you’re capturing wide landscapes, intimate portraits, or intricate details, there’s a lens suited for every need. It’s worth experimenting with different lenses to discover how each one impacts the composition and mood of your photos.
Final Thoughts
Lenses are a fundamental part of photography that allow you to control your creative vision. Understanding how to use different lenses—whether it’s a wide-angle lens to capture vast landscapes, a telephoto lens to isolate a subject, or a macro lens to explore fine details—can help you create stunning and unique effects in your images. By mastering the use of various lenses, you can elevate your photography and achieve results that are both beautiful and impactful.
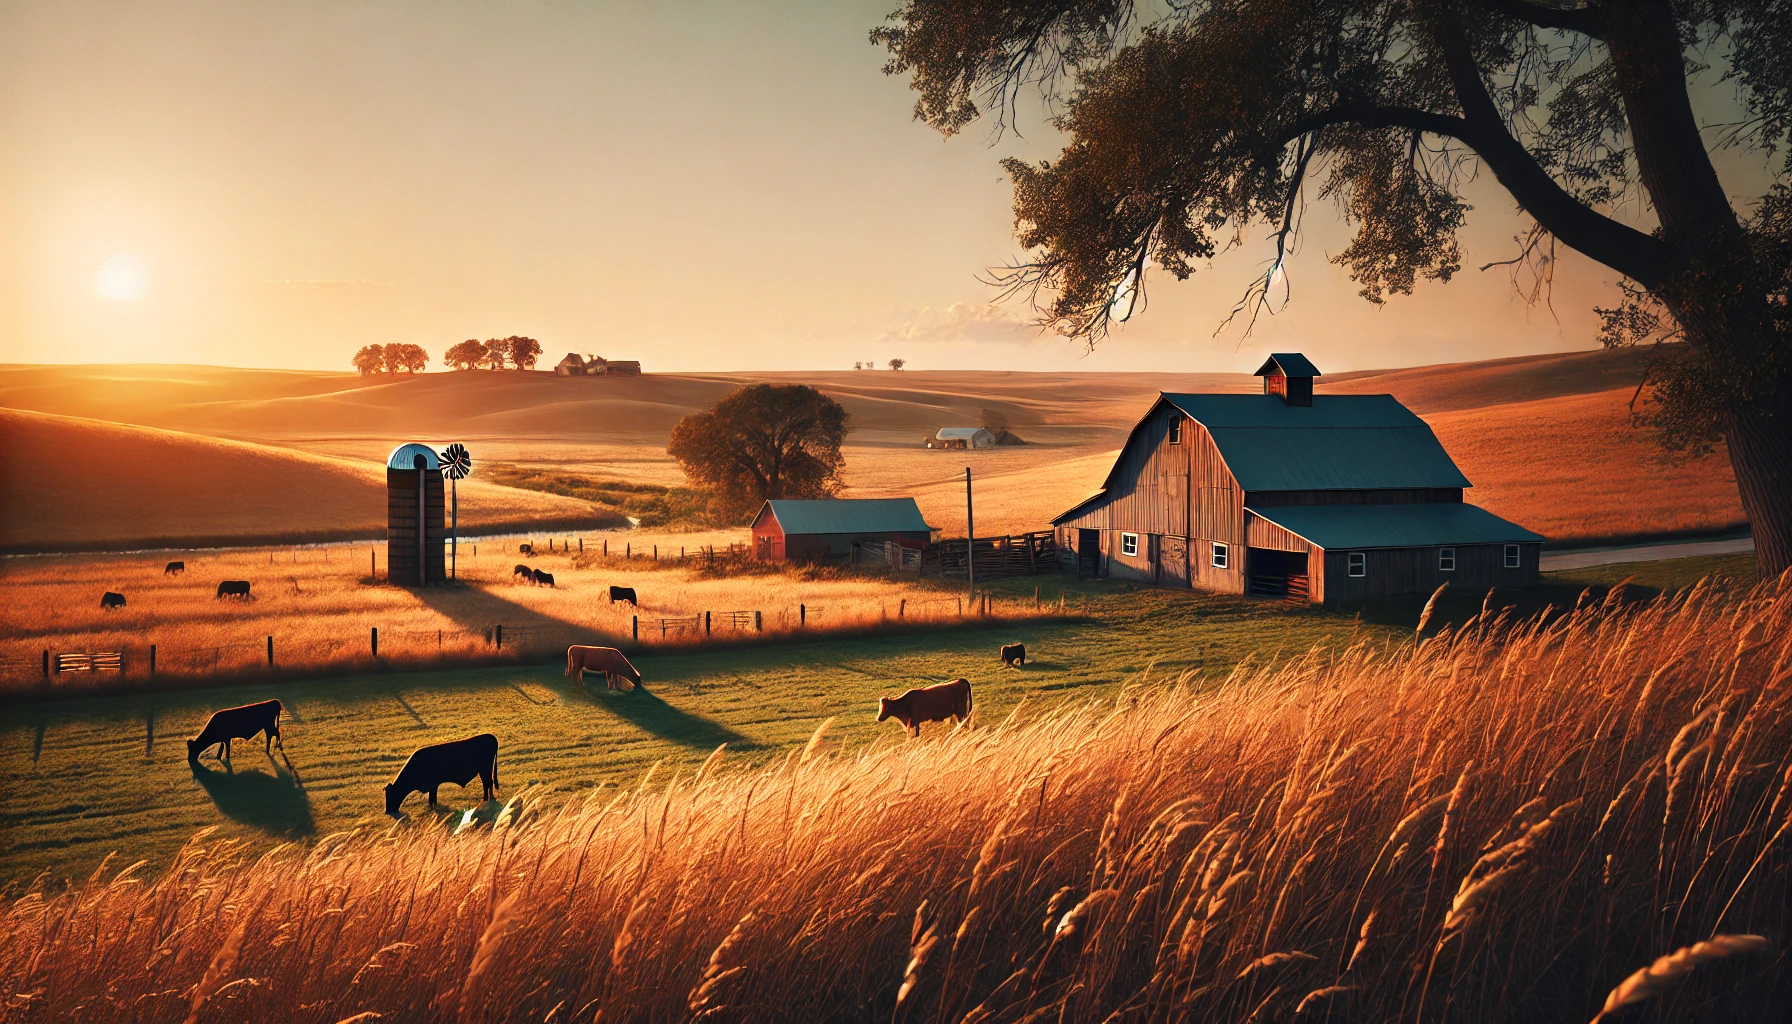
Landscape Photography: Techniques for Capturing Stunning Images
Landscape photography allows you to capture the beauty of nature, from sweeping mountain views to tranquil lakes and vibrant sunsets. A great landscape photo can evoke a sense of awe and wonder, transporting viewers to the scene. Whether you’re a beginner or an experienced photographer, mastering landscape photography requires a combination of technique, timing, and creativity. In this article, we’ll explore essential tips and techniques for capturing stunning landscape images.
1. Choose the Right Time of Day
The time of day you choose to shoot can make a huge difference in the quality and mood of your landscape photos. The light during different times of day can create unique effects and highlight various aspects of the scene.
Golden Hour
The golden hour, which occurs shortly after sunrise and just before sunset, is often regarded as the best time for landscape photography. The light is soft and warm, casting long shadows and enhancing textures. The colors during the golden hour are also more vibrant, making your photos appear more dramatic and eye-catching.
Tip: Arrive early to catch the first light of the day and stay late to capture the warmth of the sunset. Golden hour light can create a magical atmosphere in your images.
Blue Hour
The blue hour is the period just before sunrise and after sunset when the sky is deep blue and the light is soft but cool. While the golden hour is known for its warm tones, the blue hour offers a more tranquil and serene mood. This time of day is perfect for capturing calm, moody landscapes, such as seascapes, cityscapes, or mountain scenes.
Tip: Use the blue hour to create a peaceful atmosphere in your photos. The soft blue light can enhance the contrast between the sky and the landscape.
2. Use a Wide-Angle Lens
A wide-angle lens (typically 14mm to 35mm) is an essential tool for landscape photography. It allows you to capture expansive views, making the most of the scene’s vastness. Wide-angle lenses provide a large field of view, allowing you to fit more of the landscape into the frame, which is perfect for capturing sweeping vistas.
Creative Use of Wide-Angle Lenses
Wide-angle lenses can also help you create depth and leading lines in your compositions. By positioning objects in the foreground, such as rocks, flowers, or trees, you can add depth to your image and guide the viewer’s eye through the scene.
Tip: Experiment with different focal lengths within the wide-angle range to see how they affect the composition and perspective of your photos.
3. Master Your Exposure Settings
Landscape photography often requires long exposure times to capture the full beauty of the scene. Whether you’re photographing a sunset, flowing water, or stars in the night sky, adjusting your exposure settings is key to getting the perfect shot.
Use a Low ISO
When shooting landscapes, it’s best to use a low ISO setting (such as ISO 100 or 200) to maintain image quality and reduce noise. A lower ISO will allow you to capture fine details and produce cleaner, sharper images.
Aperture and Depth of Field
For landscapes, you typically want a large depth of field to keep both the foreground and background in focus. Use a narrow aperture (higher f-number, such as f/8, f/11, or f/16) to achieve this effect. A small aperture will allow you to capture sharp details throughout the scene, from the foreground to the distant horizon.
Tip: Use a tripod to avoid camera shake during longer exposure times, especially when using narrow apertures.
Shutter Speed and Motion
When photographing landscapes with moving elements, such as water or clouds, shutter speed plays a crucial role in capturing the desired motion effect. For flowing water, a slower shutter speed (e.g., 1/4s to 2s) can create a smooth, silky look. For clouds or waves, a slightly faster shutter speed (e.g., 1/30s to 1/60s) can add dynamic movement to the image.
Tip: Experiment with different shutter speeds to find the right balance between motion and sharpness in your landscape photos.
4. Use a Tripod for Stability
A tripod is essential for landscape photography, especially when using slower shutter speeds or narrow apertures. It provides stability and ensures that your camera stays steady while you capture long-exposure shots.
Benefits of Using a Tripod
Using a tripod helps you avoid camera shake, which is especially important for long exposure shots in low-light conditions. It also allows you to compose your shot more carefully and makes it easier to capture multiple exposures for techniques like HDR (High Dynamic Range) photography.
Tip: Invest in a sturdy tripod that can handle different weather conditions, especially if you’re shooting in windy environments or on uneven terrain.
5. Pay Attention to Composition
Composition is key to creating engaging and visually appealing landscape photos. By applying composition techniques, you can guide the viewer’s eye and create a sense of balance and harmony within the frame.
Rule of Thirds
The rule of thirds is a fundamental composition technique that divides the image into a 3×3 grid. By placing your subject or key elements along these gridlines or at the intersections, you create a balanced and dynamic composition. In landscape photography, consider placing the horizon along the top or bottom gridline to create a sense of proportion between the sky and land.
Leading Lines
Leading lines, such as roads, rivers, or paths, can draw the viewer’s eye through the image and lead them toward the focal point. Incorporating leading lines in your landscape composition adds depth and guides the viewer’s eye through the scene.
Tip: Look for natural or man-made lines that lead the viewer into the photo, creating a sense of perspective and movement.
Foreground Interest
Including an interesting foreground element in your landscape photos adds depth and helps to anchor the composition. Objects like rocks, flowers, or trees in the foreground create a sense of scale and lead the viewer’s eye into the distance.
Tip: Look for textures and patterns in the foreground that add visual interest to the scene. This can be particularly effective in wide-angle shots.
6. Use Filters for Enhanced Effects
Filters are an essential tool for landscape photographers, allowing you to control the light and enhance the colors in your images. Some common filters include:
- Polarizing Filter: A polarizer reduces reflections on water and glass and enhances the colors in the sky and foliage. It also increases contrast and saturates colors, making the landscape appear more vibrant.
- ND (Neutral Density) Filter: ND filters reduce the amount of light entering the lens, allowing you to use slower shutter speeds in bright conditions. This is particularly useful for capturing long exposures of waterfalls, rivers, or oceans.
Tip: Experiment with different filters to enhance the mood and clarity of your landscape photos.
7. Post-Processing for Fine-Tuning
Post-processing is a crucial part of landscape photography. Editing your photos can help you bring out the details, adjust exposure, and enhance colors. However, it’s important to avoid over-editing, as this can make your images look unnatural.
What to Edit
- Exposure: Adjust brightness and contrast to bring out the details in both the shadows and highlights.
- White Balance: Correct the white balance to achieve accurate colors, especially in the sky and natural elements.
- Sharpening: Apply subtle sharpening to enhance the fine details in your landscape photos.
Tip: Use editing software like Lightroom or Photoshop to make non-destructive edits, allowing you to preserve the original image quality.
Final Thoughts
Landscape photography offers endless opportunities to capture the beauty of the natural world. By understanding lighting, composition, and exposure techniques, you can create stunning images that showcase the power and tranquility of nature. Experiment with different times of day, lenses, and settings to find your unique style and vision in landscape photography. With practice and patience, you’ll be able to capture breathtaking landscapes that inspire awe and wonder.
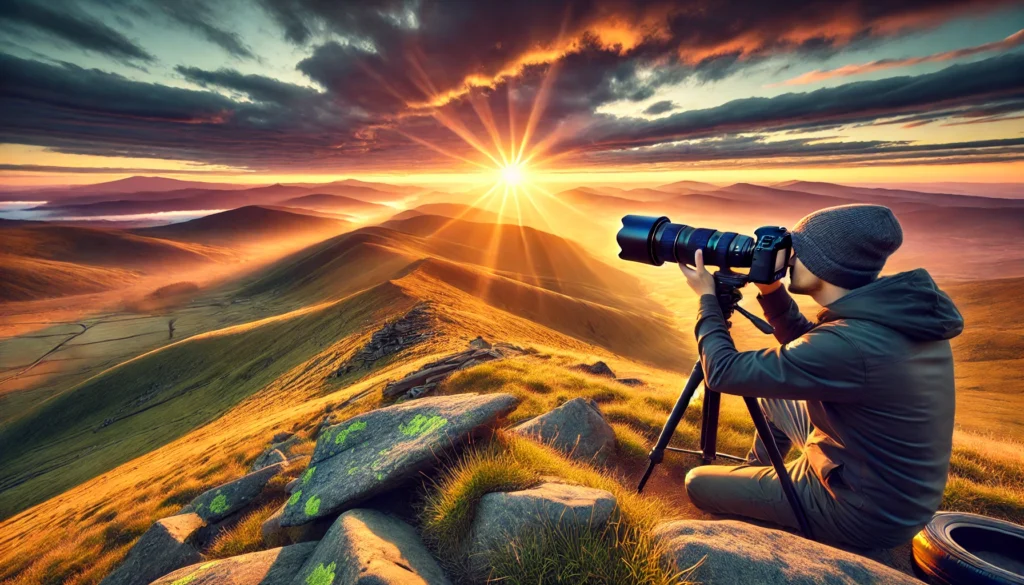
What You Need to Know About Event Photography
Event photography is a dynamic and rewarding field that involves capturing special moments at various events, from weddings and corporate functions to parties and concerts. As an event photographer, you’re tasked with documenting the atmosphere, the people, and the emotions of the occasion, all while ensuring the photos are high-quality and reflect the essence of the event. In this article, we’ll explore key tips and techniques that will help you succeed in event photography and deliver stunning results for your clients.
1. Prepare for the Event
Preparation is key to successful event photography. The more you plan ahead, the better equipped you’ll be to handle the fast-paced nature of events. Before the event, take time to gather all the necessary equipment, understand the event schedule, and communicate with the client to clarify their expectations.
Meet with the Client
Before the event, schedule a meeting or phone call with your client to discuss the event details, including the schedule, the location, key people to photograph, and any specific shots they want. Understanding the client’s vision will help you tailor your approach and ensure you’re ready to capture the most important moments.
Tip: Make sure you understand the event’s timeline, including when speeches, performances, or other key moments will take place. This way, you can be prepared to get the shots that matter most.
Prepare Your Gear
Ensure that your camera, lenses, and accessories are ready for the event. Check your batteries, memory cards, and lenses to make sure everything is in working order. Event photography often involves working in changing lighting conditions, so bring a variety of lenses (e.g., wide-angle, 50mm, and zoom lenses) to handle different situations. A fast lens (with a wide aperture) is especially useful for low-light environments.
Tip: Bring backup equipment, such as extra batteries, memory cards, and a second camera, in case something malfunctions during the event.
2. Master the Basics of Lighting
Lighting is one of the most crucial aspects of event photography, as it can significantly affect the mood and quality of your photos. Event spaces often have complex lighting conditions, such as dim indoor lighting, mixed color temperatures, and harsh spotlights.
Natural vs. Artificial Lighting
When shooting events, you’ll likely encounter both natural and artificial light sources. If you’re shooting during the day, make the most of natural light by positioning your subjects near windows or in well-lit areas. At night or indoors, you’ll rely more on artificial light from your camera’s flash or ambient lighting.
Tip: Use an external flash or off-camera lighting to control the lighting during indoor events. A flash diffuser can help soften the light and create more flattering portraits.
Adjust Your Camera Settings
Adjust your camera settings based on the available light. For indoor events, you may need to increase your ISO to avoid using a flash. A higher ISO will allow you to shoot in low light without introducing too much noise. However, be cautious not to raise the ISO too high, as it can degrade image quality.
Tip: Experiment with your camera’s white balance settings to ensure accurate color tones, especially when working with mixed lighting.
3. Focus on Candid Moments
While posed group shots are important, one of the hallmarks of great event photography is the ability to capture candid moments that showcase the true emotions of the event. Candid shots can tell the story of the day, providing a more personal and intimate view of the celebration.
Be Observant and Ready
To capture candid moments, you must remain observant and anticipate action. Keep an eye on the crowd, looking for natural interactions, emotions, and expressions. Whether it’s a joyful laugh, a loving glance, or an impromptu dance, these unscripted moments are often the most memorable.
Tip: Use a zoom lens to capture candid moments from a distance without disrupting the scene. A longer lens (e.g., 70-200mm) allows you to photograph without drawing attention to yourself.
4. Pay Attention to Composition
Strong composition is essential to creating visually engaging event photos. Event photography can be fast-paced, and you may need to work quickly to frame the perfect shot. Applying composition techniques such as the rule of thirds, leading lines, and framing can help you create balanced, dynamic photos.
Use the Rule of Thirds
The rule of thirds is a powerful composition tool that divides the image into a 3×3 grid. Placing your subject off-center, along one of the grid lines or intersections, can create a more visually interesting composition. For event photography, this might mean positioning key people or objects slightly to the side rather than in the middle of the frame.
Tip: Look for natural lines or objects in the environment (e.g., doorways, tables, or walls) that can help frame the subjects and create a sense of depth in your images.
Capture the Environment
In addition to close-up shots of people, make sure to include wide shots that capture the atmosphere and setting of the event. This helps tell the story and provides context to your photos. Wide shots of the venue, decor, and guests can add variety to your portfolio and offer a more complete picture of the event.
5. Capture Group Shots and Formal Portraits
While candid moments are important, group shots and formal portraits should also be part of your event photography collection. These types of shots often appear in albums and client presentations, so it’s important to make them look polished and professional.
Plan Group Shots in Advance
Plan and organize group shots by grouping people according to their relationships or roles in the event. For example, family photos at a wedding or a team photo at a corporate event. Make sure to communicate with the people in the shot and arrange them in a way that feels natural and balanced.
Tip: Use a wide-angle lens (e.g., 24-70mm) for group shots to fit everyone into the frame without distortion. For portraits, a 50mm or 85mm lens will create flattering results.
Direct Your Subjects
When posing people for group shots or formal portraits, give clear and gentle directions to help them feel comfortable and look natural. Avoid stiff or overly posed images by encouraging your subjects to interact and relax. A candid smile or a relaxed posture can make a huge difference in the final photo.
Tip: For larger groups, make sure everyone is well-lit and in focus. Use a smaller aperture (e.g., f/8 or f/11) to increase the depth of field and ensure everyone is sharp.
6. Stay Organized and Efficient
Event photography often requires you to shoot a lot of images in a short amount of time. Staying organized and efficient during the event will help you capture all the important moments without feeling overwhelmed.
Create a Shot List
Before the event, create a shot list of important moments and people you need to photograph. This can include key moments like speeches, cake cutting, or special performances, as well as specific guests or family members to photograph. A shot list helps you stay focused and ensures you don’t miss anything important.
Tip: Stay flexible and be prepared to adapt to the unpredictable nature of events. Sometimes the best shots come from unexpected moments.
7. Post-Processing and Editing
After the event, post-processing is essential to enhance your images and bring out their full potential. Editing helps you correct exposure, adjust colors, and refine the overall look of your photos.
Focus on Color and Lighting
Pay attention to white balance and exposure when editing event photos. Adjust the colors to make the skin tones look natural and the lighting balanced. For indoor shots with artificial lighting, you may need to correct color casts caused by the lighting.
Tip: Use Lightroom or Photoshop to adjust highlights, shadows, and contrast to enhance the mood of the image. Don’t over-edit—keep the natural look of the event intact.
Final Thoughts
Event photography is a fast-paced and rewarding genre that requires preparation, attention to detail, and creativity. By understanding lighting, composition, and the importance of candid moments, you can create stunning images that capture the essence of any event. With practice and experience, you’ll be able to deliver beautiful photos that tell a compelling story for your clients.
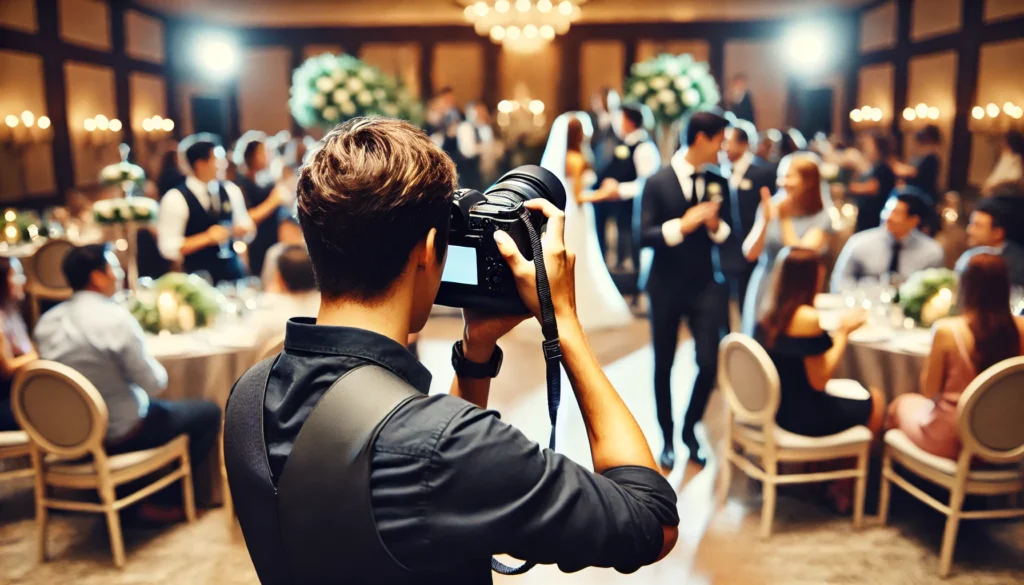
How to Use Wedding Photography to Capture Unique Moments
Wedding photography is much more than just documenting the events of the day—it’s about capturing the emotions, the special moments, and the unique stories that unfold. Each wedding is different, and as a wedding photographer, it’s your job to make sure you don’t just capture the obvious moments, but also the unique, candid, and meaningful interactions that tell the full story of the day. In this article, we’ll explore how you can use your skills and creativity to capture those special, one-of-a-kind moments in wedding photography.
1. Understand the Couple’s Vision
The first step to capturing unique moments at a wedding is understanding what the couple values most. Before the wedding, meet with the couple and ask them about their vision for the day. What moments are most important to them? Are there specific traditions, personal touches, or candid interactions they want captured?
Ask the Right Questions
- What are the must-have shots? These could include family portraits, the first kiss, or candid moments during the ceremony.
- Are there any special moments or traditions? Find out about any personal rituals, cultural practices, or family traditions that are important to the couple.
- What’s their style? Understanding their style will help you decide whether to lean into more traditional, posed shots or if they prefer a more documentary or candid approach.
Tip: The more information you gather from the couple, the better prepared you will be to anticipate moments that are meaningful to them. This helps you stay focused and proactive during the event.
2. Capture Candid Emotions
While posed group shots are essential in wedding photography, candid moments are where the true beauty and emotion of the day are often found. Candid shots capture the real, unscripted moments of joy, laughter, and love that make each wedding unique.
Be Observant and Ready
To capture these authentic moments, you need to be constantly aware of the surroundings and be ready to take the shot. Keep your camera on and set to a fast shutter speed, so you’re always prepared to catch fleeting moments as they happen.
Focus on Emotions
Look for subtle expressions, like the couple sharing a private moment, parents’ reactions during the ceremony, or friends’ laughter during the reception. These moments are often overlooked in favor of the more obvious photos, but they’re what make the event feel personal and emotional.
Tip: Use a longer lens (like a 70-200mm) to capture candid moments from a distance without interrupting the scene. This gives you the ability to shoot without being noticed, allowing you to capture natural, authentic emotions.
3. Pay Attention to Small Details
Wedding details often tell the story just as much as the big moments do. From the couple’s rings to the flowers, invitations, and decorations, every small detail plays a part in making the day special. Capturing these details helps tell the full story of the wedding, from start to finish.
Focus on the Details that Matter
When shooting details, think about what’s meaningful to the couple. These could include:
- The wedding rings: Capture the rings in creative ways, like close-ups or shots with the couple’s hands.
- The bouquet: A beautiful shot of the bridal bouquet can add a romantic touch.
- Personal touches: Any special items that hold sentimental value, such as heirlooms, gifts, or family photos, should be photographed.
Tip: Use macro lenses or close-up shots with a wide aperture (f/1.8 or f/2.8) to highlight the fine details, creating beautiful, artistic images.
4. Document the Atmosphere and Setting
The venue, decorations, and overall ambiance of the wedding are just as important as the people involved. By capturing wide shots of the venue and atmosphere, you can show the full scope of the event and create a sense of place in your photos.
Capture Wide Shots
Take wide-angle shots of the ceremony space, reception hall, and any other important areas. This helps convey the feeling of being there and immerses the viewer in the scene. Include both interior shots (like a beautifully decorated reception table) and exterior shots (like the venue’s architecture or outdoor garden).
Play with Lighting and Composition
Lighting can dramatically affect the mood of your wide shots. Try shooting during golden hour (the period just before sunset) to capture the venue in warm, flattering light. Alternatively, you can use the venue’s lighting to create dramatic or moody effects in your photos.
Tip: Use a wide-angle lens (such as a 24-70mm) to capture both the grandeur of the venue and the intricate details of the setting.
5. Be Creative with Perspectives
To make your wedding photos stand out, experiment with different perspectives and angles. Shooting from different vantage points can add depth, drama, and interest to your photos, helping you capture moments that others might miss.
Shoot from Above or Below
Try shooting from a higher angle to capture the overall layout of a room, or from a lower angle to make your subjects appear more dynamic and powerful. This works well for group shots, especially when you have large wedding parties or want to include both the guests and the venue in the frame.
Play with Reflections
Reflections can add a creative element to your wedding photography. Use mirrors, windows, or water to create unique compositions. A reflection of the bride and groom in a puddle or glass can make for a stunning, artistic shot.
Tip: Always keep an eye out for creative reflections and interesting angles. A fresh perspective can transform an ordinary scene into something extraordinary.
6. Capture the Couple’s Story
Above all, wedding photography is about telling the couple’s story. Focus on their connection, emotions, and the journey they’re starting together. Capture moments that showcase their love and the little details that make their relationship unique.
Get the Couple’s Reactions
Don’t just focus on posed shots of the couple—capture their reactions to the ceremony, their first dance, and quiet moments between the two of them. These intimate moments often reflect the true emotions of the day and tell the most personal part of the couple’s story.
The First Look
The first look—the moment when the couple sees each other for the first time on their wedding day—is a deeply emotional and intimate moment. Be prepared to capture the raw emotions in this moment, as it’s one of the most memorable parts of the day.
Tip: For the best first look photos, make sure you’re in position before the couple enters the scene. Use a wide aperture to blur the background and focus on their expressions.
7. Take Advantage of Special Moments and Surprises
Weddings often come with surprise moments, whether it’s a heartfelt speech, an unexpected dance, or a surprise guest appearance. These unique moments can be the highlight of your photos, so keep an eye out for them during the event.
Look for Emotional Moments
The best moments often happen unexpectedly—whether it’s the groom’s reaction to the bride walking down the aisle or a spontaneous toast during the reception. These moments are full of emotion and add depth to the wedding story you’re telling.
Tip: Stay alert and ready to capture these surprise moments. Don’t hesitate to shoot quickly, as these events often happen fast.
Final Thoughts
Wedding photography is about more than just capturing the traditional moments—it’s about finding the unique moments that tell the couple’s story. By staying observant, being creative with perspectives, and capturing candid emotions, you can create a wedding album that not only documents the day but also reflects the love, excitement, and joy of the couple’s special day.
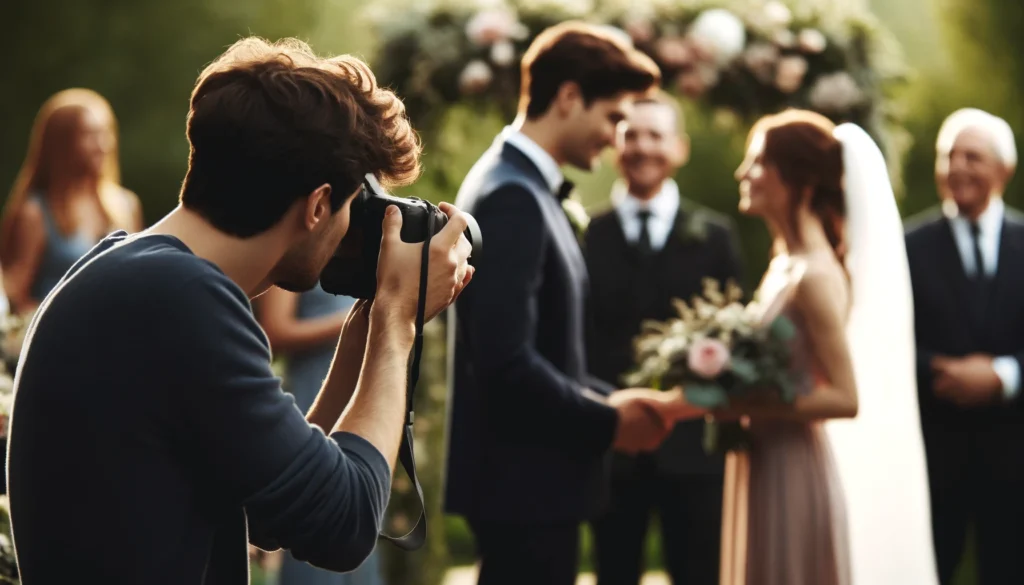
How to Prepare and Organize a Professional Photo Shoot
Whether you’re shooting portraits, events, or commercial products, proper preparation and organization are key to a successful photo shoot. Professional photo shoots can be complex, involving multiple subjects, locations, and equipment. By planning ahead, you can ensure that everything runs smoothly and that you get the best results. In this article, we’ll guide you through the steps to prepare and organize a professional photo shoot, from pre-shoot planning to post-shoot follow-up.
1. Understand the Client’s Vision
The first step to a successful photo shoot is understanding the client’s needs and vision. Before the shoot, have a detailed discussion with the client to understand what they want to achieve and how they envision the final product. Whether it’s a family portrait, a commercial shoot, or a fashion session, clear communication is essential.
Ask the Right Questions
- What is the purpose of the shoot? Are they looking for promotional images, family memories, or a personal project?
- What style do they want? Do they have a specific aesthetic or theme in mind, such as formal, casual, natural, or dramatic?
- Where will the shoot take place? Is it an indoor studio session or an outdoor shoot at a specific location?
Tip: If possible, ask the client to share mood boards, example photos, or inspiration images to help you visualize their expectations.
2. Plan the Shoot Details
Once you have a clear understanding of the client’s vision, it’s time to plan the details of the shoot. A well-thought-out plan ensures that everything runs smoothly on the day of the shoot and helps avoid last-minute issues.
Create a Shot List
Creating a shot list is a crucial step in organizing the shoot. The shot list outlines all the key shots that need to be captured, including group photos, close-ups, wide shots, or any specific poses or moments requested by the client. This will keep you on track and ensure you don’t miss any important shots.
Tip: Prioritize the most important shots and leave some flexibility in the schedule for spontaneous moments or creative shots.
Choose the Right Location
Selecting the right location for your shoot is essential to achieving the desired look. Whether you’re shooting in a studio, a client’s home, or an outdoor location, make sure the space aligns with the vision and style of the shoot. For outdoor shoots, consider factors such as lighting, accessibility, and potential distractions in the environment.
Tip: Visit the location in advance, if possible, to check for any lighting challenges, backdrop options, or space limitations.
3. Gather the Necessary Equipment
The equipment you bring to the shoot plays a significant role in the final result. Depending on the type of shoot, you may need different gear. Being prepared with the right equipment will help you avoid interruptions during the shoot and ensure you’re able to capture high-quality images.
Essential Gear
- Camera Bodies: Always bring at least two camera bodies as a backup in case of technical issues.
- Lenses: Bring a selection of lenses depending on the type of shoot. For portraits, a 50mm or 85mm lens is ideal for flattering, sharp shots with a blurred background. For events or group shots, a 24-70mm zoom lens is versatile and great for capturing a variety of angles.
- Tripod: A tripod is essential for long exposure shots or situations where you need the camera to remain stable.
- External Flash or Lighting Equipment: For indoor or low-light shoots, bring an external flash or studio lighting equipment. Softboxes or diffusers can help soften harsh light.
- Reflectors: Reflectors can be useful for bouncing natural light and filling in shadows, especially for outdoor shoots.
- Memory Cards & Batteries: Ensure you have plenty of high-capacity memory cards and extra batteries for your camera and lighting equipment.
Tip: Create an equipment checklist before the shoot to make sure nothing is forgotten.
4. Prepare the Subjects
If your photo shoot involves people, preparing the subjects is just as important as preparing the equipment. Proper preparation helps the subjects feel comfortable and confident, resulting in better photos.
Communicate with Your Subjects
If the shoot involves models or clients, provide them with clear instructions beforehand. Let them know what to expect, how to dress, and if any special preparation is required (such as hairstyling or makeup). For family portraits or group shoots, let your clients know what type of poses or groupings you’ll be doing in advance.
Help Your Subjects Feel Comfortable
Create a relaxed atmosphere where your subjects feel at ease. This will help them look more natural and relaxed in front of the camera. If they’re nervous, offer gentle direction or give them prompts to help bring out authentic emotions.
Tip: Play music, offer light conversation, or even give a little humor to help ease any tension and help your subjects feel comfortable.
5. Set Up Your Gear and Environment
On the day of the shoot, arrive early to set up your gear and ensure the environment is ready for the shoot. This includes adjusting lighting, setting up backgrounds, and testing your camera settings.
Test Your Lighting
For studio shoots, set up your lighting equipment early and test it to ensure the light is flattering and the subject is well-lit. If you’re shooting outdoors, consider the time of day and the natural lighting conditions. Be prepared to adjust your position to avoid harsh shadows or overexposed areas.
Choose Your Background
Choose a background that complements your subject and the style of the shoot. For portraits, use simple, neutral backgrounds to keep the focus on the subject. For events, ensure the background isn’t too busy or distracting.
Tip: If you’re shooting outdoors, look for natural elements like trees, fences, or walls that can serve as beautiful, simple backdrops.
6. Direct the Shoot
During the shoot, it’s important to provide clear directions to your subjects to achieve the desired results. Whether you’re shooting portraits or a commercial product shoot, guiding your subjects helps them know how to position themselves and what to expect.
Provide Clear, Positive Direction
Be specific about what you want from your subjects, whether it’s a particular pose, expression, or movement. Don’t be afraid to give positive feedback and encourage your subjects throughout the shoot. This will keep them engaged and help them feel more comfortable.
Experiment with Angles and Perspectives
Try shooting from different angles or using a variety of lenses to capture different perspectives of the subject. Moving around your subject and changing your height can lead to interesting and dynamic shots.
Tip: Take test shots and review them to make sure your lighting, composition, and focus are on point.
7. Post-Shoot Follow-Up
After the shoot, your work isn’t finished. Post-processing and client follow-up are key to providing a professional service and delivering high-quality results.
Organize and Edit Your Photos
Review and organize your photos after the shoot. Use editing software like Adobe Lightroom or Photoshop to enhance your images. Focus on adjusting exposure, color balance, and sharpness to make your photos look polished and professional.
Delivering the Final Product
Once you’ve edited the photos, deliver the final product in a timely manner. Provide the client with the images in their preferred format, whether it’s digital downloads, prints, or albums.
Tip: Communicate the expected delivery time upfront to manage client expectations. Aim to deliver the photos within a few days to a week, depending on the scope of the shoot.
Final Thoughts
Preparation and organization are essential to executing a successful professional photo shoot. By planning the details, understanding the client’s needs, and ensuring you have the right gear and setup, you’ll be able to create stunning, high-quality images. Whether you’re shooting portraits, events, or commercial work, taking the time to organize every aspect of the shoot will help you deliver exceptional results that exceed your client’s expectations.
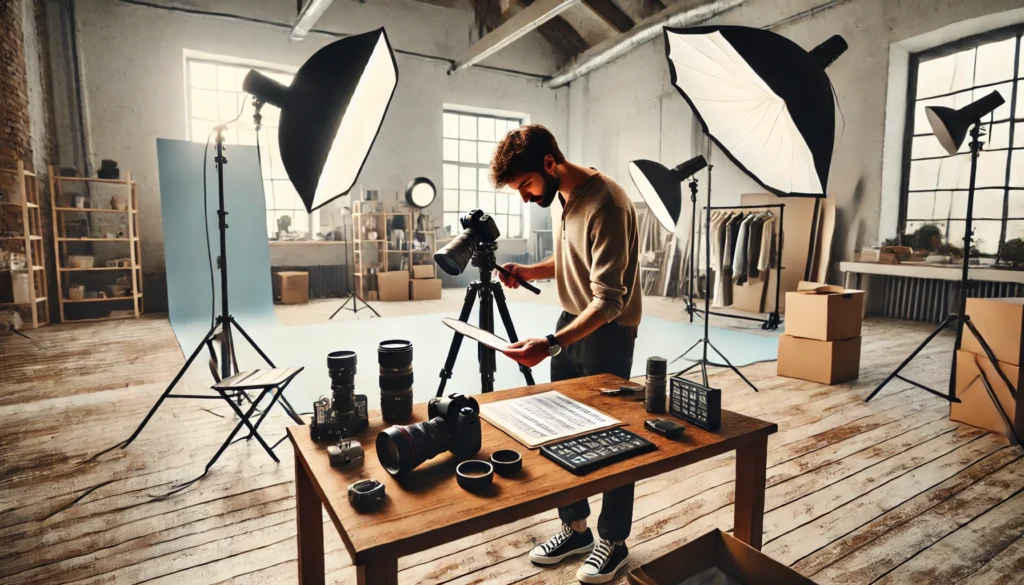
The Evolution of Photography: How Technology is Changing the Market
Photography has come a long way from its origins in the 19th century. From film to digital, manual cameras to smartphone photography, technological advancements have dramatically changed the way we capture and share images. Today, photography is more accessible, versatile, and powerful than ever before, influencing everything from personal memories to professional work. In this article, we’ll explore how technology has evolved in the field of photography and how it’s shaping the market today.
1. The Birth of Photography: A Revolution in Visual Storytelling
The history of photography dates back to the early 1800s, with the invention of the camera obscura and later the daguerreotype, the first commercially successful photographic process. Early photography was slow, expensive, and required specialized equipment, but it marked the beginning of visual storytelling in a way that had never been seen before.
Early Photographic Processes
The first permanent photograph, created by Joseph Nicéphore Niépce in 1826, required an eight-hour exposure. As photography progressed, more refined processes were developed, including the daguerreotype (1839), tintypes (1853), and the wet collodion process (1850s). These processes allowed for clearer and more detailed images, but they still required significant effort and expertise to produce.
Tip: The invention of photography was revolutionary because it allowed people to document and preserve moments in time, something that was previously impossible without expensive and complex artistic techniques like painting.
2. The Transition from Film to Digital Photography
The next major shift in the evolution of photography came in the late 20th century with the transition from film to digital cameras. The introduction of digital sensors allowed for instant image capture and storage, revolutionizing how we take and process photos.
The Rise of Digital Sensors
In the early 1990s, digital cameras began to replace traditional film cameras. The key innovation was the development of the image sensor, which converted light into electronic signals, enabling images to be stored as digital files. Over time, digital sensors became more affordable and accessible, and the image quality improved, leading to widespread adoption.
Tip: One of the key benefits of digital photography is the ability to instantly view and edit your photos, eliminating the need for film development. This opened up new creative possibilities for photographers and significantly reduced costs.
Early Digital Cameras
The first digital cameras were relatively low-resolution and expensive, with limited features. However, they quickly gained popularity, and by the early 2000s, digital cameras became more affordable and widely available. Compact digital cameras, SLRs, and point-and-shoot models offered greater convenience and flexibility compared to their film counterparts.
Tip: Digital photography’s biggest advantage was the ability to instantly review images, which was not possible with film photography. Photographers could take as many shots as they wanted without worrying about the cost of developing film.
3. The Rise of Smartphones and Mobile Photography
In the 2010s, the most significant change in the photography market came with the rise of smartphones. Today, smartphones have replaced dedicated cameras for many people, offering a combination of convenience, power, and ease of use that traditional cameras can’t match.
Mobile Photography Takes Over
Smartphones began integrating high-quality cameras with advanced features like autofocus, optical zoom, and image stabilization. Over time, manufacturers like Apple, Samsung, and Google developed sophisticated smartphone cameras capable of capturing professional-quality images in a portable device.
Tip: Mobile photography has become the go-to choice for casual photographers due to the convenience of having a camera always at hand. With features like portrait mode and AI-powered enhancements, smartphones are now capable of capturing stunning images.
The Impact of Social Media
With the advent of social media platforms like Instagram, Snapchat, and TikTok, photography has become a primary method of self-expression and communication. Social media has driven the demand for high-quality, instantly shareable photos, leading to rapid advancements in smartphone camera technology.
Tip: Mobile photography has made it easier than ever to share photos with a global audience. The rise of influencers and content creators has further pushed the demand for high-quality mobile photography.
4. The Advent of Mirrorless Cameras and Advanced Digital Tools
While smartphones have become a dominant force in photography, traditional cameras are still a crucial part of the market. One of the latest innovations in digital photography is the rise of mirrorless cameras. Mirrorless cameras offer the same high-quality imaging as traditional DSLR cameras but with a more compact design.
The Advantages of Mirrorless Cameras
Mirrorless cameras, such as the Sony Alpha series and the Canon EOS R line, have become popular among professional photographers. These cameras offer fast autofocus, improved image quality, and video capabilities while maintaining a smaller and lighter form factor. They’re ideal for travel photographers and professionals who need the versatility of a DSLR without the bulk.
Tip: Mirrorless cameras have significantly improved over the last few years, with faster processors, better sensors, and enhanced video capabilities. They’re now widely considered the future of professional photography.
Image Processing Software
The evolution of image processing software has also played a significant role in changing the market. Tools like Adobe Lightroom and Photoshop have become essential for photographers, offering advanced editing options that allow for precise color correction, retouching, and creative manipulation of images.
Tip: Software like Lightroom and Photoshop has democratized photography editing, giving photographers access to tools that were once only available to high-end studios. These tools have enabled photographers to push the boundaries of their creativity.
5. The Rise of AI and Computational Photography
One of the most exciting frontiers in photography is the integration of artificial intelligence (AI) and computational photography. AI technology is being used to enhance images, automate processes, and provide new creative possibilities for photographers.
AI in Camera Technology
Modern cameras, both mobile and traditional, are incorporating AI technology to improve various aspects of photography. AI-powered cameras can now detect and track subjects, adjust settings in real time, and even apply professional-grade edits automatically. Smartphones, for example, use AI to recognize scenes, adjust exposure, and enhance details, all while minimizing noise and improving color accuracy.
Tip: AI technology is making it easier for both amateur and professional photographers to achieve perfect shots with minimal effort. Features like AI-driven scene recognition and automatic editing are revolutionizing the way photos are taken and processed.
Computational Photography
Computational photography is another innovation that uses computational techniques to enhance image quality. This includes technologies like HDR (High Dynamic Range), portrait mode, and night mode, which rely on complex algorithms to merge multiple exposures and create images with greater depth, clarity, and detail.
Tip: The use of computational photography in smartphones has allowed for dramatic improvements in low-light performance, depth perception, and overall image quality, making professional-looking photos accessible to a wider audience.
6. The Future of Photography: What’s Next?
As technology continues to evolve, the photography industry is expected to undergo even more dramatic changes. From advances in AI to improvements in image resolution, the future of photography looks incredibly exciting. Innovations such as virtual reality (VR) photography, augmented reality (AR), and 360-degree imaging are already beginning to change the way we experience and share photos.
Tip: The future of photography is not just about better image quality, but also about new ways to interact with and experience photos. Stay on top of emerging trends, and be ready to adapt to the ever-changing technological landscape.
Final Thoughts
The evolution of photography has been shaped by technological advancements, from the invention of the first photograph to the rise of smartphones and AI-powered cameras. With each new innovation, the way we capture, process, and share images continues to evolve. As technology advances, photography becomes more accessible, and creative possibilities expand. Whether you’re a professional photographer or an enthusiast, staying up to date with the latest trends and tools is essential for staying competitive in today’s ever-changing market.
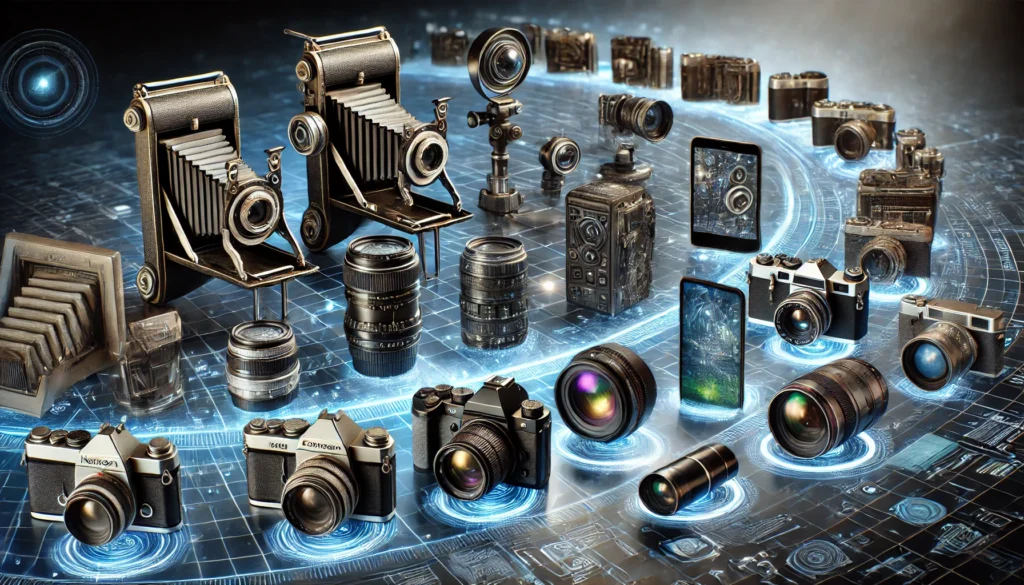
Product Photography: Techniques for Creating Attractive Images for Sales
Product photography is a critical component of online sales and marketing. Whether you’re selling on an e-commerce platform, showcasing products on a website, or creating promotional materials, high-quality product images are essential for attracting customers and driving sales. In this article, we’ll explore key techniques for creating attractive product images that highlight your product’s features and make it stand out in a competitive marketplace.
1. Understand the Product and Its Purpose
Before you begin shooting, take the time to fully understand the product you’re photographing. Knowing the product’s features, its intended use, and the target audience will help you determine how to photograph it effectively.
Research the Product
- Key Features: Identify the most important features or benefits of the product that you want to highlight. Is it the texture, the design, the functionality, or the color?
- Target Audience: Think about who will be buying this product. Are you selling to a luxury market, a casual audience, or a specific niche? The style of photography will vary depending on the product’s market and purpose.
Tip: Create a shot list that includes all the essential angles, details, and aspects of the product that need to be captured. This helps ensure that you don’t miss any important shots.
2. Lighting: The Key to Professional Product Photos
Lighting is one of the most important aspects of product photography. Good lighting enhances the product’s appearance, brings out details, and ensures that the colors look accurate. Whether you’re working with natural light or artificial lighting, you need to control it properly to achieve the best results.
Natural vs. Artificial Lighting
- Natural Light: When possible, use natural light, especially for products like clothing, jewelry, or food. Natural light is soft, flattering, and often creates a more authentic look. Position your product near a window with soft, diffused light.
- Artificial Light: For controlled lighting, use artificial lighting like softboxes, ring lights, or studio strobes. Softboxes create soft, even light that reduces harsh shadows and highlights, giving the product a clean, polished look.
Tip: Avoid direct sunlight, as it can cause harsh shadows and overexposed areas. If you’re shooting outdoors, shoot during the golden hour for softer, warmer lighting.
Use of Light Modifiers
Light modifiers like diffusers, reflectors, and bounce cards can help shape and control the light. These tools can soften harsh light, fill in shadows, and enhance the overall quality of your product shots.
- Diffusers: Soften the light and reduce shadows, creating a more flattering look.
- Reflectors: Bounce light back onto the product, especially in shadowed areas, to achieve more even lighting.
Tip: Experiment with the placement of your lights and modifiers to create the best look for your product. Take test shots and adjust until you achieve the desired effect.
3. Backgrounds and Props: Creating the Right Environment
The background and props you use in product photography play a significant role in how the product is presented. A clean, simple background allows the product to shine, while props can help set the scene and tell a story.
Choosing the Right Background
- White or Neutral Backgrounds: A plain white or neutral-colored background (like gray or beige) is a popular choice for e-commerce product photography. It keeps the focus on the product and ensures that the image looks clean and professional.
- Styled Backgrounds: For a more lifestyle-oriented look, consider adding context to the product by using a styled background that complements it. For example, for a beauty product, you might use a wooden table and natural elements like flowers or plants.
Tip: Make sure your background complements the product without overwhelming it. Keep the focus on the product, especially if you’re using props.
Using Props Effectively
Props can help showcase the product in action or provide context. For example, if you’re photographing a coffee mug, include some coffee beans, a spoon, or a napkin to create a lifestyle shot that tells a story. However, don’t overdo it—props should enhance the product, not distract from it.
Tip: Use props sparingly and ensure they fit the product’s aesthetic. For products like jewelry or electronics, less is more—focus on clean, simple backgrounds.
4. Angles and Composition: Capturing the Product’s Best Features
Choosing the right angle and composition is key to showcasing the product in the best light. Different products may require different approaches, so it’s essential to experiment with angles and framing to capture the most flattering shot.
Common Product Photography Angles
- Straight-On Shots: A classic, straightforward shot is perfect for showing the product’s front view and ensuring all details are clearly visible.
- 45-Degree Angle: Shooting at a 45-degree angle is a great way to add depth and dimension to the image, especially for products with multiple sides or intricate details.
- Top-Down Shots: For flat products, such as food, accessories, or stationery, a top-down shot can highlight the product in its entirety and create a visually pleasing layout.
- Close-Up Shots: Zoom in on small details, such as textures, patterns, or logos, to show the product’s craftsmanship or quality.
Tip: Use the rule of thirds to help create a balanced and visually appealing composition. Keep the product slightly off-center for a more dynamic shot.
Experiment with Framing
Don’t be afraid to experiment with creative framing. For example, use natural elements like doorways, windows, or frames within the scene to create depth and focus the viewer’s attention on the product.
Tip: Adjust the focal length of your lens to create the right perspective. A wide lens (e.g., 24mm) is good for larger products, while a standard lens (50mm) or macro lens is ideal for close-up shots.
5. Post-Processing and Editing: Perfecting Your Product Shots
Once the shoot is complete, post-processing is essential to bring out the best in your product photos. Editing can help you adjust exposure, remove imperfections, and enhance colors to make the product look its best.
Basic Editing Techniques
- Exposure and Contrast: Adjust the exposure to ensure the product is well-lit and visible. Increase the contrast to make the product stand out from the background.
- White Balance: Ensure the colors in your product image are accurate by adjusting the white balance. This is especially important for products where color accuracy is key, such as clothing or cosmetics.
- Sharpening and Clarity: Apply sharpening to bring out fine details in the product. Be careful not to overdo it, as too much sharpening can introduce noise.
Tip: Use Lightroom or Photoshop to make non-destructive edits, allowing you to fine-tune the image without permanently altering the original.
Retouching and Cleaning Up
If necessary, remove any dust, scratches, or imperfections that may have appeared during the shoot. Use the healing brush or clone tool in Photoshop to clean up your image, ensuring the product looks flawless.
Tip: When editing product photos, maintain a natural, realistic look. Avoid over-editing or applying heavy filters that may mislead potential buyers.
6. Optimize for E-Commerce
When uploading product images to an e-commerce platform, it’s important to optimize the images for the best performance and presentation.
Image Resolution and Size
Ensure that the images are high-resolution for clarity but not so large that they slow down page load times. The ideal resolution for product images on most platforms is 72 DPI (dots per inch), with dimensions that fit the platform’s requirements (e.g., 1000px by 1000px).
Tip: Save your images as JPEGs for a good balance between quality and file size. Consider using PNGs if your product images have transparent backgrounds.
Consistent Formatting
Maintain a consistent style across all product images in your store. This includes using similar backgrounds, angles, and lighting to create a cohesive look and feel. Consistency will help reinforce your brand identity and create a professional appearance.
Tip: If possible, use the same color backdrop and lighting setup for all product shots to ensure consistency across your catalog.
Final Thoughts
Product photography is a crucial part of marketing and sales, especially in the e-commerce world. By understanding your product, using the right lighting and background, experimenting with angles, and perfecting your post-processing, you can create stunning images that not only showcase your product but also attract and engage potential customers. Whether you’re a small business owner or a professional photographer, mastering product photography is essential for building a successful online presence.

How to Take High-Quality Photos Using Only Your Smartphone
Smartphone cameras have come a long way in recent years. With advancements in camera technology, smartphones are now capable of taking high-quality photos that can rival those captured with traditional cameras. Whether you’re an aspiring photographer or just someone who wants to take better pictures for social media, there are several techniques and tips you can use to elevate your smartphone photography. In this article, we’ll explore how to take high-quality photos using only your smartphone, without needing additional equipment or software.
1. Understand Your Smartphone Camera Settings
The first step in taking better photos with your smartphone is to familiarize yourself with your camera’s settings and features. Modern smartphones come equipped with various settings that can help you take your photography to the next level.
Adjust Exposure and Focus
Most smartphones allow you to adjust the exposure (brightness) and focus on specific parts of your image. To do this, tap on the screen where you want the camera to focus. A sun icon will appear, allowing you to adjust the exposure by sliding your finger up or down.
- Focus: Tap the subject you want to focus on to ensure it’s sharp and clear.
- Exposure: Slide the exposure icon to adjust the brightness. Lower exposure to reduce overexposure in bright areas or increase exposure in darker scenes.
Tip: Use the manual focus and exposure controls to adjust the image for the best result, especially in tricky lighting situations.
Use Grid Lines
Enable the grid lines on your smartphone’s camera settings. This is a simple yet effective way to improve your composition. The grid will help you follow the “rule of thirds,” which is a basic photography technique where you divide your frame into a 3×3 grid and place important elements along the grid lines or intersections.
Tip: Using grid lines will help you keep your shots balanced and aligned, leading to more visually appealing photos.
2. Use Natural Light to Your Advantage
One of the most important elements of photography is lighting. The best lighting for smartphone photography is natural light. Using natural light will help produce brighter, more vibrant images and reduce the harsh shadows that can come from using artificial lighting.
Shoot During Golden Hour
The golden hour, which occurs just after sunrise or before sunset, provides soft, warm light that is flattering for all subjects. The light during this time is diffused and provides a natural glow, perfect for portraits, landscapes, or still-life photography.
Tip: Take advantage of the golden hour to get stunning photos, especially when shooting people or landscapes. This light can help eliminate harsh shadows and create more even illumination.
Avoid Harsh Direct Sunlight
While natural light is ideal, direct sunlight can create harsh shadows and overexposed highlights. When shooting in the middle of the day, try to find shaded areas or shoot during times when the sun is lower in the sky (i.e., early morning or late afternoon).
Tip: If you must shoot in direct sunlight, use a reflector or your hand to diffuse the light and soften the shadows on your subject.
3. Keep Your Lens Clean
It may seem obvious, but a clean lens is essential for high-quality photos. Smudges, fingerprints, and dust on your smartphone’s lens can create blurry, hazy images, reducing their sharpness and clarity.
Clean Your Lens Before Shooting
Always give your lens a quick wipe with a microfiber cloth before taking photos. This simple step ensures that you capture clear, sharp images with no distracting smudges.
Tip: Keep a microfiber cloth or lens cleaning wipe in your bag or pocket so you’re always prepared for a spontaneous photo opportunity.
4. Experiment with Composition Techniques
Composition is key to creating visually appealing images, and your smartphone gives you plenty of creative freedom to experiment with different approaches. Here are a few techniques to help you improve your composition:
The Rule of Thirds
As mentioned earlier, use the grid lines to apply the rule of thirds. Position key elements of your image along the grid lines or intersections for a balanced and dynamic composition.
Leading Lines
Use leading lines to guide the viewer’s eye through the image. Roads, fences, rivers, or even shadows can create lines that lead to your subject, adding depth and visual interest to your photos.
Symmetry and Framing
Look for symmetrical scenes or natural frames, such as doorways or windows, that can add balance to your composition. Framing your subject can help draw attention to it and create a sense of harmony.
Tip: Don’t be afraid to try new angles. Smartphone cameras are portable and flexible, so try shooting from above, below, or from a side angle to add a fresh perspective.
5. Use Portrait Mode for Stunning Depth of Field
Many modern smartphones come equipped with a portrait mode feature that mimics the shallow depth of field you would get with a DSLR camera. This feature blurs the background while keeping your subject in sharp focus, making it ideal for portrait photography or shots where you want to highlight a particular subject.
How to Use Portrait Mode
Simply activate the portrait mode on your camera app, and it will automatically detect faces and blur the background. This feature works best in well-lit conditions and for close-up shots.
Tip: Be mindful of the background when using portrait mode. Cluttered or distracting backgrounds may interfere with the focus and blur effect.
6. Edit Your Photos Using Built-In Tools and Apps
While capturing high-quality images with your smartphone is important, post-processing can enhance your photos and make them even better. Fortunately, most smartphones come with built-in editing tools, and there are plenty of third-party apps available to give your photos that extra polish.
Basic Editing Tools
- Brightness/Exposure: Adjust the exposure to correct any underexposed or overexposed areas.
- Contrast: Increase or decrease the contrast to make the details pop.
- Saturation: Enhance the colors in your image by adjusting the saturation. Be careful not to overdo it, as it can make the image look unnatural.
- Sharpness: Increase the sharpness to bring out fine details in your photo, but avoid going too far, as it can introduce noise.
Use Third-Party Apps for More Control
If you want more control over your edits, consider using third-party apps like Snapseed, VSCO, or Lightroom Mobile. These apps offer advanced features such as selective editing, curves adjustments, and more creative filters.
Tip: Be subtle with editing. Aim to enhance the image rather than drastically change it, keeping the natural look and feel of the photo intact.
7. Take Advantage of Smartphone Camera Accessories
If you want to take your smartphone photography to the next level, consider using accessories that enhance your camera’s capabilities.
Tripods and Stabilizers
Using a tripod or stabilizer helps keep your phone steady and reduces blur, especially in low-light situations. A tripod is also useful for long exposure shots or when you want to take self-portraits without shaking the camera.
External Lenses
External clip-on lenses can help you achieve different effects and improve your smartphone’s camera versatility. Wide-angle, macro, and telephoto lenses can expand the types of shots you can take, from capturing more of a landscape to getting close-up details.
Tip: Invest in a portable tripod and external lenses to expand your creative possibilities and elevate the quality of your smartphone photos.
Final Thoughts
Smartphone cameras have come a long way and are now capable of producing high-quality images that rival traditional cameras. By understanding your phone’s settings, using proper lighting, experimenting with composition, and utilizing editing tools, you can create stunning photos with just your smartphone. With a little practice and creativity, you can take your smartphone photography to new heights, whether you’re shooting for personal use, social media, or professional work.
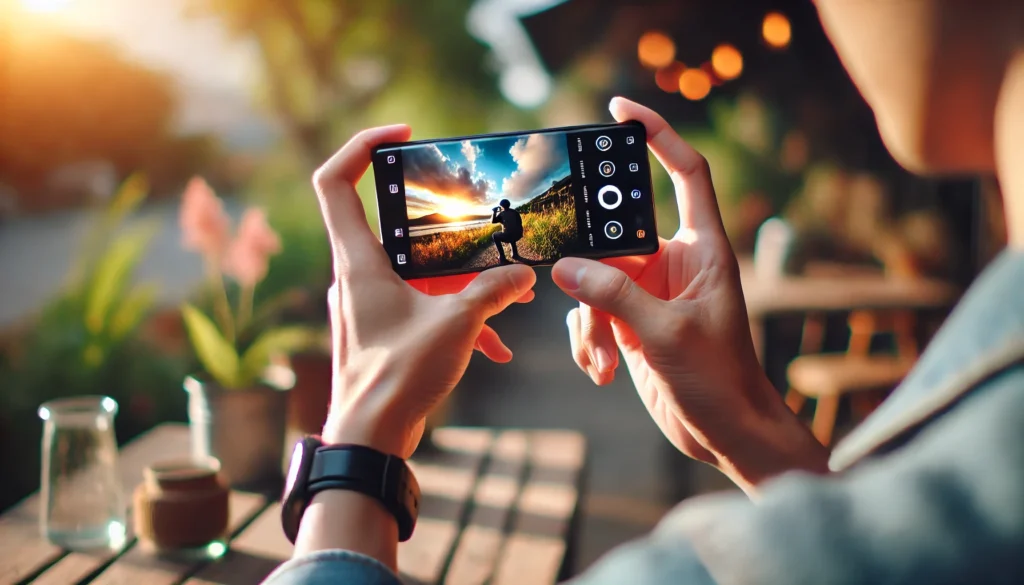
How Professional Photographers Capture Candid Moments
Candid photography is a powerful way to capture the raw, unfiltered emotions and moments that tell a story. Unlike posed portraits, candid moments often reveal a more authentic and intimate side of the subject, making them some of the most cherished photographs. Whether you’re shooting a wedding, family event, or a street scene, capturing these spontaneous moments requires skill, observation, and timing. In this article, we’ll explore how professional photographers capture candid moments and provide tips to help you improve your own candid photography.
1. Be Observant and Patient
One of the most important aspects of candid photography is being aware of your surroundings and remaining patient. Candid moments don’t happen on command—they occur naturally and unexpectedly. As a photographer, you need to be ready to capture them when they happen, which means staying alert and waiting for the right moment.
Stay Focused on the Scene
Keep your eyes on the action, whether it’s a couple sharing a private laugh, children playing, or a candid exchange between friends. Watch for subtle body language, expressions, and gestures that indicate a significant moment is about to unfold.
Tip: Try to anticipate the scene. If you’re at a wedding, for example, anticipate moments like the bride laughing with friends or the groom’s reaction to the ceremony. By being observant, you’ll be able to react faster when a moment arises.
Embrace Silence
Sometimes, the best candid moments happen in silence, so avoid making too much noise when photographing people. If you’re working with a subject, try to engage with them without disrupting the scene. The more natural the environment, the more likely it is to produce real, heartfelt moments.
Tip: Avoid giving too many directions. Instead, quietly observe and let people be themselves. This will help you capture genuine, relaxed expressions.
2. Use a Fast Shutter Speed
Timing is everything when it comes to candid photography. To ensure that you capture the moment at the perfect time, you need a camera that responds quickly and a shutter speed that’s fast enough to freeze the action.
Setting the Right Shutter Speed
To freeze motion and prevent blurriness, use a fast shutter speed, especially when shooting fast-moving subjects like children or animals. A good starting point is around 1/500s or faster, depending on how fast the action is. For slower-moving subjects or group shots, you can lower the shutter speed to around 1/250s.
Tip: If you’re photographing in low light, you may need to increase your ISO or use a wider aperture to maintain a fast shutter speed.
Continuous Shooting Mode
Many cameras have a continuous shooting or burst mode, which allows you to take several shots in quick succession. This is perfect for candid photography, as it ensures you don’t miss the perfect moment. Just hold down the shutter button and shoot multiple frames to capture the fleeting moment in different variations.
Tip: Use burst mode for unpredictable or fast-paced scenes, such as dance floors at weddings or children running and playing.
3. Blend Into the Environment
To capture candid moments, you need to avoid being noticed by your subjects. If people see you constantly aiming the camera at them, they’re more likely to pose or stiffen up, losing the authenticity of the moment. Blending into the environment allows you to photograph without disrupting the natural flow of the scene.
Be Discreet with Your Camera
Try to stay in the background and avoid calling attention to yourself. Use a smaller camera or a silent shutter mode to minimize noise and avoid drawing attention. With a larger camera, you may want to use a lens with a longer focal length, like a 70-200mm lens, which allows you to take photos from a distance without getting too close.
Tip: If you’re using a smartphone, keep it in a casual position and shoot without making it obvious that you’re photographing. This helps you capture natural, authentic moments without making your subjects feel self-conscious.
Use Natural Settings
For street photography or events, use the surrounding environment to your advantage. Capture people interacting with their surroundings, whether it’s a busy street corner, a coffee shop, or a park. The environment adds context to your images, telling a story beyond the subject itself.
Tip: Use the environment to frame your subjects. For example, shoot through doorways, windows, or between objects to create a more dynamic, layered image.
4. Capture Emotions and Interactions
The essence of candid photography is emotion. While posed portraits are often about the subject looking their best, candid moments are about real emotions, expressions, and interactions between people. To capture genuine emotions, look for moments that convey the story or mood of the scene.
Focus on Facial Expressions
Facial expressions are often the most telling part of a candid moment. A genuine smile, a thoughtful look, or a moment of surprise can convey powerful emotions. Look for these subtle moments and capture them without interrupting the flow of the scene.
Tip: Focus on the eyes, as they are the windows to emotion. Sharp, expressive eyes can make or break a candid photograph, so be sure to focus accurately when capturing close-up moments.
Capture Interactions Between People
Candid moments often involve interactions between people, whether it’s a laugh between friends, a family hugging, or a private moment shared between a couple. These interactions are the heart of candid photography, so pay close attention to how people are connecting and reacting to each other.
Tip: Look for moments of connection, such as a hand on a shoulder, a look shared across the room, or a warm embrace. These small moments of connection can be just as powerful as grand gestures.
5. Use Natural Light and Shadows
Natural light is one of the best ways to enhance your candid photography. It provides a soft, flattering look, and it’s often available in abundance, especially during the day. In addition to natural light, shadows can add drama and depth to your photos, making them more compelling and visually interesting.
Work with Available Light
Whether you’re shooting indoors or outdoors, make use of the light available to you. Position your subjects near windows, under trees, or in spots where the light is soft and diffused. Avoid harsh midday sunlight, which can create harsh shadows, and instead shoot during golden hour for warm, soft light.
Tip: Use reflectors to bounce light back onto your subject, especially when shooting in areas with uneven lighting, such as outdoor settings or shaded areas.
Play with Shadows
Shadows can be used creatively to add depth and dimension to your candid photos. Position your subjects in ways that cast interesting shadows, or use shadows to frame and highlight key elements in your images.
Tip: Look for natural shadows cast by architecture, trees, or people. Use them to add a layer of texture to your images.
6. Practice Discretion in Sensitive Situations
Candid photography often involves capturing personal, intimate moments. Be sensitive to your subjects’ feelings and privacy. If someone appears uncomfortable or asks you not to take their photo, respect their wishes. Photography should always be about capturing genuine moments while being mindful of the environment and the people in it.
Know When to Step Back
If a moment feels too personal or intrusive, don’t be afraid to step back and give the subject space. Sometimes the most powerful candid shots come from moments where the photographer was simply a quiet observer, capturing an interaction without interfering.
Tip: Always ask for permission if you’re photographing sensitive situations, especially in private spaces or events like weddings or family gatherings.
Final Thoughts
Candid photography is an art that requires patience, timing, and an understanding of human interaction. By staying observant, using the right settings, and respecting your subjects, you can capture moments that are not only beautiful but also meaningful. Whether you’re photographing weddings, street scenes, or family gatherings, candid moments will always be some of the most cherished and authentic photographs you can capture.
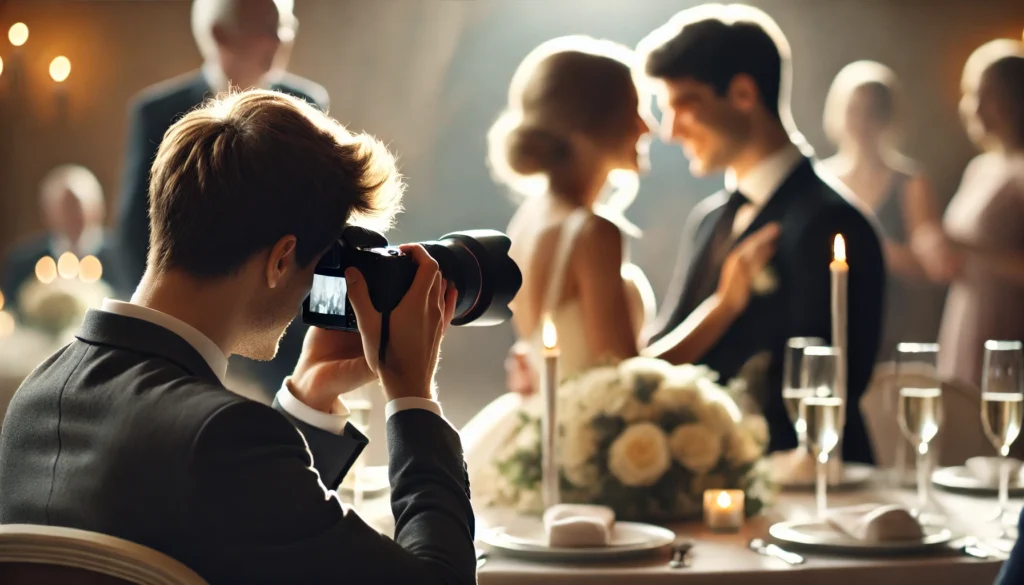
How to Create Creative Effects Using Macro Photography
Macro photography allows you to capture the intricate details of small subjects, revealing textures, patterns, and features that are often invisible to the naked eye. It’s a fascinating and creative way to explore the world, and it can produce stunning images full of surprises. Whether you’re photographing flowers, insects, or everyday objects, macro photography gives you the ability to create unique and visually striking effects. In this article, we’ll explore how to create creative effects using macro photography, from focusing on texture to experimenting with lighting and composition.
1. Choose the Right Subject for Macro Photography
The first step in creating creative macro images is selecting a subject that offers interesting details, textures, and patterns. Common macro subjects include:
- Nature: Flowers, leaves, insects, and water droplets provide a rich variety of textures and intricate details.
- Everyday Objects: Items like jewelry, fabric, or household items can offer unique perspectives when photographed up close.
- Textures: Macro photography is great for exploring textures—whether it’s the rough surface of a stone, the delicate veins in a leaf, or the grain of wood.
Look for Patterns and Details
When selecting your subject, look for patterns, lines, or textures that stand out. These features will help create more visually dynamic and interesting macro images. For example, photographing the patterns in the petals of a flower or the veins in a leaf can create a beautiful, almost abstract composition.
Tip: Start by observing your subject closely and finding areas of contrast or intricate details that will shine under a macro lens.
2. Use a Macro Lens for Close-Up Shots
To achieve true macro photography, you need a macro lens, which allows you to focus on subjects at a very close distance, capturing incredible detail. Macro lenses have a 1:1 magnification ratio, meaning that the subject will be captured at life-size scale on the camera sensor.
Benefits of a Macro Lens
- True Magnification: Macro lenses allow you to capture life-size images, perfect for photographing small subjects.
- Sharpness and Detail: These lenses are designed for sharpness and clarity, ensuring that fine details are captured crisply.
- Wide Aperture: Many macro lenses have wide apertures (e.g., f/2.8 or f/3.5), which can provide a shallow depth of field, creating beautiful background blur (bokeh).
Tip: If you don’t have a dedicated macro lens, you can use extension tubes or close-up filters to achieve macro-level magnification. However, a true macro lens is designed for the best results.
Focusing on Small Subjects
When shooting with a macro lens, be sure to focus on specific details that you want to highlight. Even small variations in focus can create dramatic effects. For example, focusing on a single drop of water on a petal or the texture of a bug’s wings can create a striking, high-impact image.
Tip: Use manual focus rather than autofocus to ensure precise control over what parts of the subject are in focus. At such close distances, autofocus can be less accurate.
3. Experiment with Depth of Field
One of the most creative aspects of macro photography is controlling depth of field. By using a wide aperture (a low f-stop like f/2.8 or f/4), you can create a shallow depth of field that isolates your subject and blurs the background.
Shallow Depth of Field
A shallow depth of field allows you to focus on a small portion of the subject while blurring everything else. This is great for isolating details, such as the center of a flower, a small insect, or the texture of an object.
- Create Bokeh: The blurred areas in the background (known as bokeh) can enhance the visual appeal of your photo, especially when you have light sources in the background that create soft, circular shapes.
Tip: Adjust your aperture to control the depth of field. The wider the aperture (smaller f-number), the shallower the depth of field. Experiment with different apertures to see how it affects your image.
Increased Depth of Field
If you want more of your subject in focus, especially for larger macro subjects, use a smaller aperture (higher f-number, such as f/8 or f/11). This will increase the depth of field, ensuring that more of the subject is in sharp focus.
Tip: Be aware that using smaller apertures can require slower shutter speeds, so make sure to use a tripod to prevent motion blur.
4. Play with Lighting for Creative Effects
Lighting plays a crucial role in macro photography, as it can reveal texture, enhance colors, and add depth to the image. The right lighting can completely transform a macro shot, creating dramatic effects and highlighting the fine details of your subject.
Use Natural Light
Natural light, especially soft, diffused light, is often ideal for macro photography. When shooting outdoors, try to photograph during the golden hour (the first or last hour of sunlight) for warm, soft lighting that adds a pleasing glow to your subjects.
- Avoid Harsh Sunlight: Direct sunlight can create harsh shadows and overexposed areas in macro photography. Instead, shoot on cloudy days or in shaded areas to achieve soft, even lighting.
- Reflectors: Use reflectors to bounce light onto your subject, filling in shadows and creating more even lighting.
Tip: If shooting indoors, position your subject near a window to take advantage of natural light, or use diffusers to soften the light.
Artificial Lighting and Light Modifiers
For more control over your lighting, consider using external light sources such as LED panels, flashes, or studio strobes. Softboxes and diffusers can help soften the light and prevent harsh shadows. You can also experiment with backlighting, which is when you position the light behind your subject to create a glowing, ethereal effect.
- Ring Light: A ring light is a popular tool in macro photography, especially for photographing small subjects like insects. The even, circular light it provides helps reduce shadows and highlights details.
Tip: Experiment with different light angles, such as side lighting or backlighting, to create interesting shadows and add depth to your macro shots.
5. Use Creative Backgrounds and Props
While the subject itself is the star of macro photography, the background and props can significantly enhance the creative effect of your image. By choosing the right background or adding props, you can complement the subject and help tell a story.
Simple Backgrounds for Clarity
For most macro shots, it’s best to use simple, uncluttered backgrounds that don’t distract from the subject. A plain, solid-colored backdrop or a blurred natural background (like leaves or grass) works well for most subjects.
Tip: Use a shallow depth of field to blur the background and keep the focus on the subject. The blurred background will also help isolate the subject and create a more visually pleasing composition.
Adding Props for Context
Props can add context or visual interest to your macro shots. For example, adding water droplets to a flower petal, or photographing a bee with a flower, can make the image feel more dynamic and connected to nature.
Tip: When using props, ensure that they complement the subject and don’t overpower it. Keep the focus on the main subject while using props to enhance the overall composition.
6. Post-Processing for Macro Photography
Post-processing can elevate your macro photos by enhancing details, correcting exposure, and improving color balance. While it’s important to get as much right in-camera as possible, editing can help bring out the finer details and create the desired mood.
Sharpening and Detail Enhancement
Macro photos often contain fine details that benefit from sharpening in post-processing. Use the sharpening tool in software like Adobe Lightroom or Photoshop to enhance the textures and details in your image.
Color Correction and Saturation
Adjust the color balance, contrast, and saturation to make your macro photos pop. Be careful not to over-saturate the image, as this can make the colors look unnatural.
Tip: Use selective editing tools (such as radial filters or adjustment brushes) to enhance specific areas of your image, like making the subject’s details crisper while leaving the background softer.
Final Thoughts
Macro photography allows you to explore the tiny details of the world around you, transforming everyday objects and natural subjects into captivating images. By using the right lens, controlling your depth of field, experimenting with lighting, and adding creative elements, you can produce stunning and unique photos. Whether you’re shooting insects, flowers, or abstract textures, macro photography opens up a world of possibilities for artistic expression.
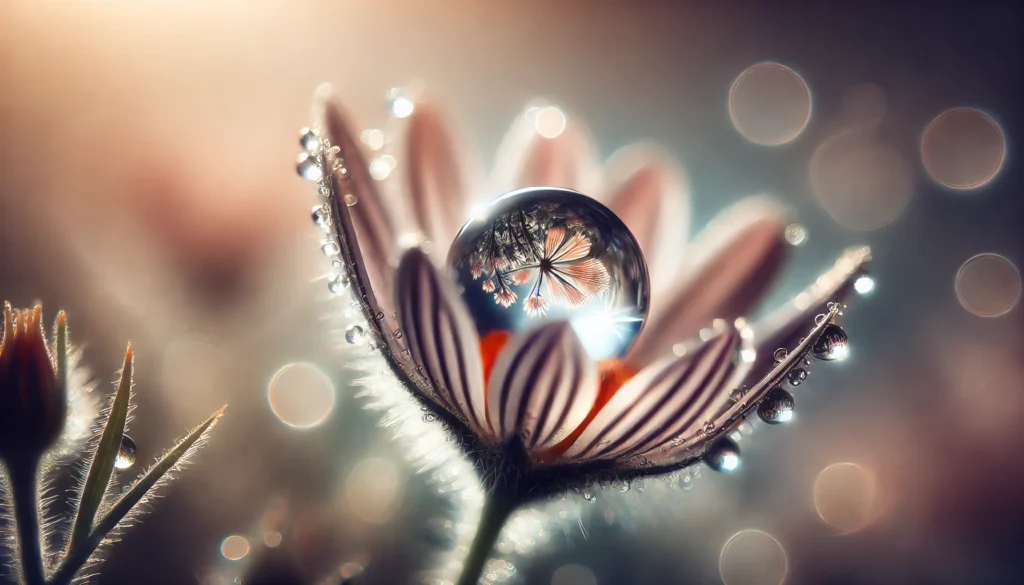
Travel Photography: How to Capture the Best Images During Your Adventures
Travel photography is a unique and rewarding genre that allows you to document your adventures and capture the beauty of the world around you. Whether you’re exploring a bustling city, hiking through serene landscapes, or immersing yourself in a new culture, travel photography helps preserve memories and share stories through stunning images. In this article, we’ll explore some tips and techniques to help you capture the best travel photos and make the most of your photography while on the go.
1. Plan Ahead and Research Your Destination
Before you embark on your travels, it’s important to do some research about your destination. Planning ahead will help you find the best locations to photograph and understand the cultural and environmental context of the places you’ll visit.
Research Iconic Landmarks and Hidden Gems
While iconic landmarks (such as the Eiffel Tower in Paris or the Great Wall of China) are a must-see, try to discover lesser-known spots that offer unique perspectives of the destination. Research local attractions, nature spots, and hidden gems that may not be as crowded but are equally photogenic.
- Use Travel Guides and Blogs: Check out travel blogs, Instagram, and photography websites for inspiration and tips on the best spots to shoot.
- Ask Locals: Once you arrive, ask locals for recommendations on scenic spots or photo opportunities they know about.
Tip: Always have a list of key locations and backup spots to shoot, in case the weather or lighting conditions aren’t ideal at the primary location.
2. Pack Light and Bring Essential Gear
When traveling, you’ll want to keep your gear light and portable, especially if you plan to walk, hike, or move through different environments. However, it’s also important to bring the right equipment to ensure you capture high-quality images.
Camera Body and Lenses
- Camera Body: A lightweight mirrorless or DSLR camera is ideal for travel photography. These cameras offer manual control and interchangeable lenses, allowing you to capture diverse subjects and environments.
- Lenses: Choose versatile lenses that are suitable for various types of shots. A standard zoom lens (e.g., 24-70mm) is perfect for landscapes, portraits, and general shots. A wide-angle lens (e.g., 16-35mm) is great for sweeping landscapes and architecture, while a telephoto lens (e.g., 70-200mm) helps capture distant subjects like wildlife or cityscapes.
Tip: If you’re hiking or traveling light, consider a prime lens (e.g., 35mm f/1.8 or 50mm f/1.8) for its compact size and excellent low-light performance.
Tripod and Accessories
While a tripod can be bulky, it’s a valuable tool for capturing sharp, long-exposure images, especially in low-light conditions like during sunrise, sunset, or night photography. A lightweight, travel-friendly tripod can help you stabilize your shots.
- Portable Tripod: Choose a small, lightweight tripod that’s easy to carry without taking up too much space.
- Spare Batteries and Memory Cards: Travel photography can be unpredictable, so bring extra batteries and memory cards to ensure you don’t run out of power or storage in the middle of a shoot.
Tip: A camera strap is also a useful accessory, allowing you to keep your hands free while exploring and protecting your camera from accidental drops.
3. Embrace Natural Light and Golden Hour
The best light for photography is often natural light. To make your photos stand out, try to shoot during the golden hour—the period just after sunrise or just before sunset—when the light is soft, warm, and flattering.
Shoot During Golden Hour
Golden hour is one of the most coveted times for photographers. The soft light during this time enhances colors, reduces harsh shadows, and adds a magical quality to your images. It’s especially great for portraits, landscapes, and architectural shots.
- Morning and Evening Light: In addition to the golden hour, shoot early in the morning or late in the evening to avoid harsh midday sun, which can create unflattering shadows and overexposed areas.
Tip: Plan your day so you can capture iconic spots during golden hour. This is when popular landmarks or nature scenes look their best.
Use Natural Light Creatively
While golden hour is ideal, natural light can still create stunning effects during the day. Look for ways to use the direction of light to your advantage, such as:
- Backlighting: Position your subject between the light source (e.g., the sun) and the camera to create silhouettes or highlight details like hair or foliage.
- Side Lighting: Use light coming from the side to create depth and texture, especially in landscapes or architectural shots.
Tip: If you’re shooting indoors or in shaded areas, use reflectors to bounce light onto your subject and brighten the scene without harsh shadows.
4. Capture Candid Moments and Local Culture
One of the best ways to capture the essence of a destination is by documenting the daily life and culture of the local people. Candid moments often tell the most authentic stories and give your photos a sense of place.
Be Respectful of Your Subjects
When photographing people, especially in foreign countries, always ask for permission first, particularly in more rural or intimate settings. Being respectful of your subjects helps you capture genuine expressions and moments without making them uncomfortable.
- Street Photography: Capture the hustle and bustle of local life, from markets and street vendors to people interacting in cafes or public spaces. These candid moments showcase the real character of a place.
Tip: If you’re photographing people, try to blend into the background and avoid drawing too much attention. The more natural the environment, the more authentic your photos will be.
Look for Unique Cultural Elements
Each destination has its own culture, architecture, food, and traditions. Look for these unique cultural aspects in your images. Whether it’s colorful street art, local cuisine, or traditional clothing, these elements help tell the story of the place.
- Details Matter: Focus on details that make the destination unique, such as textures, patterns, or architectural features. These small moments can be just as powerful as wide-angle shots.
Tip: Pay attention to the contrasts between old and new, modern and traditional, which can add an interesting dynamic to your photos.
5. Composition Tips for Travel Photography
Composition is crucial for making your travel photos visually engaging. By following a few simple composition rules, you can turn an ordinary shot into something extraordinary.
Rule of Thirds
Use the rule of thirds to position your subject off-center, creating a more dynamic and balanced composition. Place key elements along the grid lines or at the intersections to create a visually appealing frame.
Tip: Use the grid lines on your camera’s screen to help apply the rule of thirds.
Leading Lines
Look for natural leading lines that guide the viewer’s eye into the frame. Roads, rivers, fences, or pathways are perfect for creating a sense of depth and perspective.
Tip: Use leading lines to draw attention to your subject, such as a person walking down a path or a building in the distance.
Framing and Symmetry
Framing your subject with natural elements (e.g., arches, windows, or doorways) can help direct attention to the focal point of the photo. Symmetry adds balance and harmony, especially in architectural shots.
Tip: Look for symmetry in the environment, such as reflections in water, mirrored buildings, or rows of trees.
6. Edit Your Photos for Impact
Post-processing is an essential part of travel photography. It allows you to enhance your images, adjust colors, and bring out details that might not be visible in the raw photo. However, be careful not to over-edit and lose the natural feel of your photos.
Basic Adjustments
- Exposure and Contrast: Adjust the exposure to brighten or darken the image. Increase contrast to make your subject stand out and add depth.
- Saturation and Vibrancy: Enhance the colors in your images, but avoid oversaturating, as this can make the photo look unnatural.
- Sharpness: Apply selective sharpening to enhance the fine details in your images, such as textures and patterns.
Tip: Use Lightroom or other editing software to make non-destructive edits and preserve the original look of your photos.
Final Thoughts
Travel photography allows you to share your adventures with others, telling stories through the lens of your camera. By planning ahead, choosing the right gear, using natural light creatively, and capturing candid moments, you can create stunning travel photos that will leave a lasting impression. Whether you’re photographing landscapes, people, or street scenes, travel photography is a way to preserve memories and inspire others to explore the world.
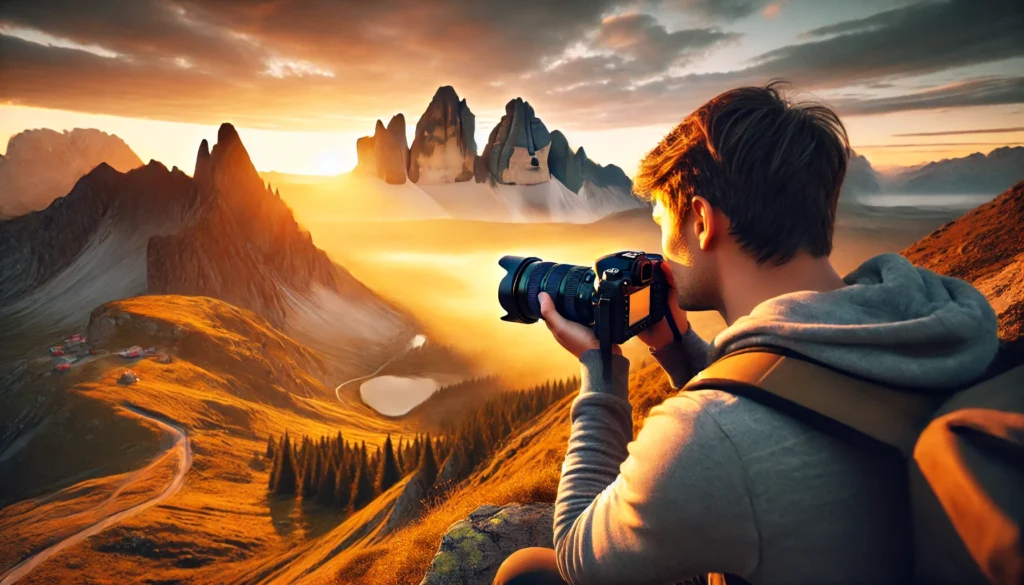
Tips for Creating Impactful Photographs at Parties and Events
Capturing the essence of parties and events through photography is both an exciting and challenging task. Whether you’re photographing a wedding, a birthday party, or a corporate event, your goal is to tell the story of the day by capturing genuine moments, emotions, and the atmosphere. In this article, we’ll explore tips and techniques that will help you create impactful photographs at parties and events, ensuring you preserve the most memorable moments in the best way possible.
1. Understand the Event and Set Expectations
Before you start snapping photos, it’s important to understand the event you’re photographing. Whether you’re shooting a wedding, birthday party, or corporate gathering, each type of event requires a different approach and level of involvement.
Get to Know the Event Schedule
Talk to the event organizer or client in advance to get a detailed timeline of the event. Knowing key moments, such as speeches, the cutting of the cake, or important announcements, will allow you to be in the right place at the right time to capture those crucial moments.
- Create a Shot List: Make a list of must-have shots for the event. This can include group photos, candid moments, and details like food, decorations, or guest interactions.
Tip: Anticipate key moments and prepare yourself to be in position before they happen. This way, you won’t miss important shots.
Communicate with the Hosts
Before the event, ask the hosts or clients about specific moments or people they want photographed. For example, they may want more pictures of a special guest, or they may want photos of the decoration for the event. Understanding their preferences will help you focus your efforts.
Tip: During the event, don’t hesitate to check in with the client to ensure they are happy with the photos you’re capturing. You may be able to adjust your approach based on their feedback.
2. Use the Right Equipment for the Event
For successful party and event photography, it’s important to have the right equipment. While you don’t need to carry every piece of gear in your arsenal, there are certain essentials that can help you achieve high-quality images.
Camera and Lenses
- Camera Body: A DSLR or mirrorless camera is ideal for event photography. A camera with fast autofocus and a high frame rate is essential for capturing fast-moving moments.
- Lenses: A fast lens (f/1.8 or f/2.8) is perfect for low-light conditions, such as indoor events. A zoom lens (24-70mm) is versatile for capturing both wide shots and close-ups, while a prime lens (50mm or 85mm) is great for portraits with beautiful bokeh.
Tip: Bring at least two camera bodies so you can switch between lenses quickly and have a backup if one camera malfunctions.
Flash and Lighting
Proper lighting is critical for event photography. Indoor events can often be low-light environments, so having external flash units or portable lighting is essential.
- External Flash: Use an external flash instead of the built-in flash for better light quality. Consider using a diffuser to soften the light.
- Reflectors: Reflectors are helpful for bouncing natural or artificial light to fill in shadows, especially when you’re working in low light.
Tip: Avoid harsh direct flash lighting, which can create unflattering shadows. Bounce the light off the ceiling or a wall for softer, more flattering lighting.
Backup Gear
Always carry backup gear, including extra memory cards, batteries, and flash equipment. Event photography can be long, and you may find yourself shooting for several hours, so having backups is essential to avoid any interruptions.
Tip: Consider bringing a lens cleaning kit and microfiber cloths to keep your lenses clean throughout the event, especially if you’re shooting in crowded or dusty areas.
3. Capture the Energy and Atmosphere
Event photography is about more than just capturing posed shots—it’s about conveying the energy and atmosphere of the event. Look for moments that reveal emotion, excitement, and the essence of the gathering.
Focus on Candid Moments
One of the best parts of event photography is capturing candid moments—when people are laughing, talking, dancing, or simply enjoying themselves. These moments often make the best photos because they reflect the true spirit of the event.
- Look for Natural Interactions: Focus on natural expressions and interactions between guests, such as laughter, hugs, or shared conversations. These genuine moments often convey more emotion than posed shots.
Tip: Use a zoom lens (70-200mm) to capture candid moments from a distance, allowing you to photograph without interrupting the scene.
Capture the Details
In addition to the people at the event, the small details are just as important. These could include the food, decorations, invitations, and any other elements that make the event unique.
- Close-Up Shots: Get close-up shots of the food, drinks, or other details that help tell the story of the event. These shots are often great for capturing the vibe and theme of the gathering.
- Wide Shots: Don’t forget to take wide shots that capture the full scene, showing the venue, guests, and decorations.
Tip: Pay attention to the lighting and composition when capturing the details to ensure the shots are visually engaging.
4. Master the Art of Posing
While candid moments are key to capturing the spirit of the event, there will also be times when posed shots are necessary, such as group photos, family portraits, or formal moments. Knowing how to direct people in a way that feels natural is an essential skill for event photographers.
Group Photos
For group shots, make sure everyone is positioned comfortably. Arrange people in a way that feels natural and ensures everyone is visible in the frame. Position taller people at the back and shorter individuals in front.
- Symmetry: Try to create balance in the group by positioning people evenly throughout the frame.
- Interaction: Encourage people to interact with each other during group shots to create a more dynamic and engaging composition.
Tip: Use a wide-angle lens (24-70mm) for group shots, especially if you need to fit a large group into the frame.
Family or Couple Portraits
For portraits, especially family or couple shots, take the time to make sure your subjects feel comfortable. Guide them to stand or sit in a relaxed position, and encourage natural expressions by having them interact with each other.
Tip: Keep your shots simple and avoid overcomplicating the composition. The focus should be on the people and the connection between them.
5. Edit Your Photos for Impact
Editing is an essential part of event photography, as it allows you to enhance the mood and make your images pop. Post-processing can help correct exposure, adjust white balance, and make colors more vibrant.
Adjust Exposure and White Balance
Correct any exposure issues and ensure that the colors in your images are accurate. Use Lightroom or Photoshop to fine-tune the exposure, contrast, and white balance, especially if the lighting conditions were challenging.
Enhance the Mood
Use editing tools to enhance the mood of the photos. For example, you might want to apply a warm tone to photos from a sunset event or increase contrast to make a party scene more vibrant and dynamic.
Tip: Use presets in Lightroom to speed up your editing process and create a consistent look for the entire set of photos.
Final Thoughts
Capturing impactful photographs at parties and events requires a combination of technical skill, creativity, and preparation. By understanding the event, using the right equipment, focusing on candid moments, and mastering posing, you can create memorable images that tell the story of the day. Whether you’re capturing intimate moments or large group celebrations, event photography is about preserving the emotion and energy of the occasion, so you can relive the memories long after the event is over.

How to Photograph Food Professionally for Social Media
Food photography is an art that requires more than just a good camera—it’s about capturing the essence of the dish, making it visually appealing, and telling a story through the image. In today’s world of Instagram and food blogs, high-quality food photos can make or break a brand’s social media presence. Whether you’re a food blogger, restaurant owner, or just someone passionate about sharing meals, learning how to take professional food photos is essential. In this article, we’ll cover tips and techniques for photographing food that will make it shine on social media.
1. Understand the Importance of Lighting
Lighting is one of the most crucial aspects of food photography. Good lighting can make a dish look fresh and appetizing, while poor lighting can make the food appear dull or unappealing. The goal is to create soft, natural light that brings out the textures, colors, and details of the food.
Use Natural Light for Soft, Flattering Results
Natural light is often the best option for food photography. It creates a soft, even light that is ideal for highlighting the texture and color of food. The key is to avoid harsh, direct sunlight, which can cause strong shadows and make the food look unappetizing.
- Shoot Near a Window: Position your food near a window where natural light can flood the scene. If the light is too harsh, diffuse it by using a sheer curtain or a reflector.
- Golden Hour: The best time for food photography is during the golden hour—just after sunrise or just before sunset. The light during this time is warm and soft, perfect for creating inviting and appetizing photos.
Tip: If shooting indoors, place your food near a large window, and use white foam boards or reflectors to bounce light onto the food and reduce shadows.
Artificial Light for Controlled Conditions
If you’re shooting indoors with limited natural light, you can use artificial lighting. Softboxes or LED panels are great for creating consistent, even light. These lights help you control the intensity and direction of the light, which is especially useful when you want to create a specific mood or effect.
- Use Softboxes: Softboxes diffuse the light and create soft shadows, making them ideal for food photography. Avoid harsh light sources that can create unappealing highlights.
- Control the Light Direction: Use diffusers or reflectors to direct light where you need it, ensuring your food looks natural and appetizing.
Tip: Keep the light source close to the food and at a 45-degree angle to avoid flat lighting.
2. Composition: Arranging the Food for the Best Shot
Composition is essential in food photography, as it helps guide the viewer’s eye and highlights the dish’s most attractive features. The way you arrange the food and props can have a significant impact on the final image.
Use the Rule of Thirds
The rule of thirds is a basic photography technique where you divide the frame into a 3×3 grid and place key elements along the grid lines or intersections. In food photography, this technique can help balance the image and create more visually engaging compositions.
- Place Key Elements on Grid Lines: Position the main dish or focal point along one of the vertical or horizontal lines, leaving space around it to avoid overcrowding the frame.
Tip: Don’t be afraid to leave some empty space in the frame. Negative space can help make the food stand out and give the photo a clean, professional look.
Use Leading Lines and Depth
Leading lines and depth can add visual interest to your food photos. Use utensils, napkins, or ingredients to create lines that lead the viewer’s eye to the main dish. Additionally, adding depth to the composition can make the photo feel more dynamic and engaging.
- Create Depth with Angles: Don’t just shoot from above—experiment with different angles (e.g., eye level, side shots) to add layers and depth to the image.
- Use Props to Enhance Composition: Include elements like glassware, fresh herbs, or plates to add context and enhance the overall aesthetic.
Tip: Use a shallow depth of field (wide aperture, like f/2.8) to blur the background and keep the focus on the food.
Show the Food in Context
Food looks more appetizing when it’s shown in context, such as in a dining setting. Add props like a place setting, napkins, or drinks to create a more immersive, lifestyle-oriented image.
Tip: Use natural elements like fresh ingredients, herbs, or wooden boards to create a rustic or organic feel. These small details can make the photo feel more authentic and appealing.
3. Focus on the Details: Textures and Close-Ups
Food is all about texture—whether it’s the glossy finish of a sauce, the fluffy texture of a cake, or the crispy crunch of a salad. Focus on these details to make the food look irresistible.
Close-Up Shots for Detail
Macro photography is a great way to capture the intricate details of food, such as the texture of a loaf of bread or the layers in a stack of pancakes. Close-up shots emphasize the food’s texture and make the image more immersive.
- Get Close to the Food: Use a macro lens or zoom lens to capture the finer details of the food. Focus on textures like the gloss of syrup, the seeds in fruit, or the crispiness of fried foods.
Tip: Use a wide aperture to create a shallow depth of field and keep the focus on the texture while blurring the background.
Show the Texture and Freshness
Make sure your food looks fresh by focusing on its natural textures. Capture the smoothness of a slice of cake, the shine of a freshly cut fruit, or the steam rising from a hot dish.
- Highlight the Gloss: Use lighting to highlight the natural gloss of sauces, cheeses, or glazes that can make food look more appetizing.
Tip: Spray water on fresh fruits or vegetables to make them look dewy and fresh before shooting.
4. Color: Enhancing and Balancing
Color is a vital element in food photography. The colors in your food should look vibrant, appealing, and balanced. Editing can help enhance these colors and make your photos more eye-catching.
Use Color Contrast
Contrast between colors can make your food images pop. For example, pairing green vegetables with red peppers or a colorful salad with a white plate can create a striking contrast that draws the viewer’s eye.
- Complementary Colors: Use complementary colors (e.g., red and green, orange and blue) to create vibrant and harmonious compositions.
Tip: Avoid using too many similar colors in the same shot, as this can make the food look flat. Look for contrasts to add energy to your photos.
Balance Warm and Cool Tones
Balance warm tones (e.g., yellows, oranges, reds) and cool tones (e.g., blues, greens) to create a visually harmonious image. Warmer tones tend to evoke comfort and indulgence, while cooler tones can give a more fresh or modern feel.
Tip: Adjust the white balance in post-processing if the colors look off. A slight tweak can make a huge difference in the overall warmth and vibrancy of your photo.
5. Post-Processing for Food Photography
Post-processing is essential for enhancing your food photos and making them look their best. Even if you get everything right in-camera, editing can help fine-tune the image and bring out the colors, textures, and details.
Basic Editing Adjustments
- Exposure: Make sure the exposure is correct. Brighten the image if necessary, but avoid overexposing highlights.
- Saturation and Vibrance: Increase the saturation and vibrance to make the colors pop, but be careful not to overdo it. The food should look natural and fresh.
- Sharpness: Apply sharpening to enhance the texture of the food, especially if you’re highlighting close-up details.
Tip: Use a non-destructive editing workflow in Lightroom or Photoshop so you can always return to the original image if needed.
Final Thoughts
Food photography is all about creating an image that makes the viewer feel like they can almost taste the dish. By focusing on lighting, composition, textures, and details, you can make your food photos stand out on social media. With the right equipment, creativity, and editing skills, you can turn any meal into a stunning visual experience that captures the essence of the dish and entices your audience. So get ready to bring your food photography to the next level and share your delicious creations with the world!
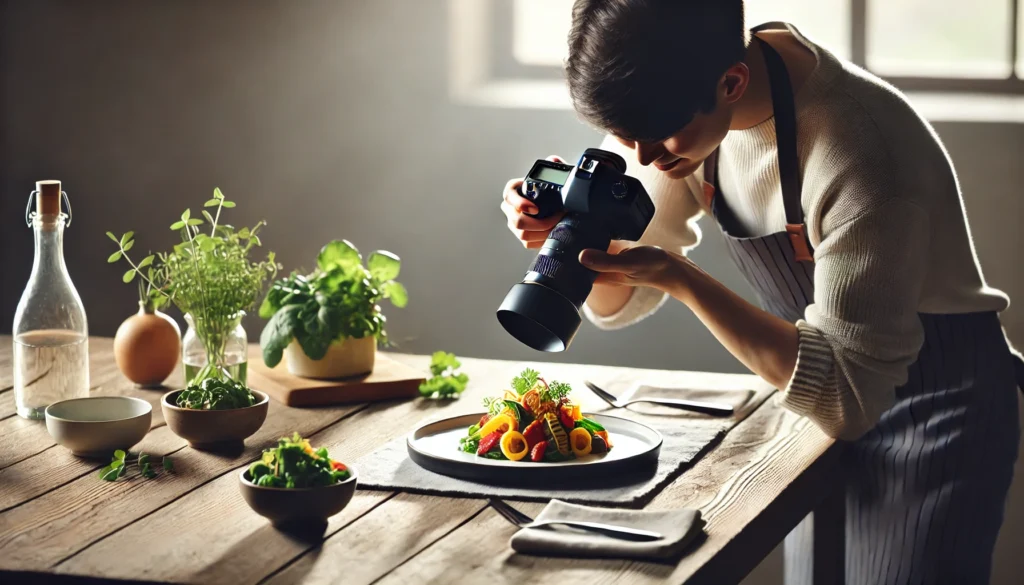
Fashion Photography: How to Capture Looks and Style Creatively
Fashion photography is about more than just showcasing clothes—it’s about capturing the essence of style, creating a mood, and telling a story through imagery. Whether you’re photographing models for a runway show, a lookbook, or a magazine editorial, your goal is to bring out the creativity and personality of the outfit while maintaining the artistic integrity of the shot. In this article, we’ll explore key tips and techniques for capturing fashion looks and styles creatively, from lighting to composition.
1. Understand the Concept and Style of the Shoot
Before you start photographing, it’s important to understand the concept and style of the shoot. Fashion photography often requires a clear vision to ensure the images match the intended aesthetic and tell the right story.
Collaborate with the Creative Team
Fashion shoots often involve a creative team, including stylists, makeup artists, and designers. Collaborate with them to understand the concept, the mood, and the message they want to convey. Whether the shoot is edgy, classic, avant-garde, or casual, understanding the vision will help you capture the right moments.
- Ask Questions: What is the intended mood or theme? Are there specific poses or details they want to focus on? Are they aiming for a high-fashion editorial look or a more relaxed, street-style vibe?
Tip: Review the clothing and accessories before the shoot so you can plan your shots accordingly. The details matter in fashion photography, and knowing the key elements can help you make creative decisions during the shoot.
Consider the Location and Setting
The location plays a significant role in setting the tone for the shoot. Whether you’re shooting in a studio, on location, or outdoors, the environment should complement the clothing and style of the shoot.
- Studio Shoots: Controlled environments where you can use studio lights and backgrounds to create a specific mood.
- On-Location Shoots: Urban or natural settings where the surroundings add to the fashion story. Street corners, rooftops, or parks can evoke different feelings and themes in fashion photography.
Tip: Think about how the setting will influence the composition and atmosphere of your shots. For example, urban backdrops might work better for streetwear, while a rustic outdoor setting might suit bohemian styles.
2. Focus on Lighting to Enhance the Look
Lighting is one of the most critical factors in fashion photography, as it can dramatically affect how clothing and accessories appear in a shot. The goal is to highlight the outfit’s details while creating the right mood for the shoot.
Use Soft, Diffused Lighting for Flattering Results
Soft lighting is often the most flattering for fashion photography, as it reduces harsh shadows and highlights, creating a more even look. Softboxes and diffusers are great tools for achieving soft, diffused lighting.
- Natural Light: If you’re shooting outdoors or near a window, make use of natural light, which creates soft, flattering shadows. Overcast days are perfect for fashion shoots as the clouds act as natural diffusers.
- Artificial Lighting: Use softboxes, umbrellas, or LED panels to create soft light in the studio. Position the light at a 45-degree angle to the model to avoid flat lighting and add dimension.
Tip: If you want more dramatic lighting, use hard light sources or experiment with shadows, but be careful not to overdo it, as it can overpower the clothing and distract from the look.
Create Mood with Directional Lighting
While soft light is often ideal, directional lighting can add depth, texture, and drama to your fashion shots. Hard light (from sources like a direct flash or a small, focused light) can create high-contrast shadows, which is perfect for more dramatic or editorial fashion styles.
- Side Lighting: Use side lighting to highlight textures, such as the folds in fabric or the structure of a jacket. This can also create interesting shadows that add depth to your photos.
- Backlighting: Backlighting can create a silhouette effect, which works well for certain fashion styles, such as high-fashion, avant-garde, or minimalist looks.
Tip: Experiment with the placement of light and shadows to create more dimensional shots. Play around with different angles to see how the light interacts with the fabric.
3. Composition: Creating Balanced and Dynamic Shots
In fashion photography, the composition is just as important as the lighting. A well-composed shot will make your subject and their clothing stand out, while poor composition can detract from the outfit and the message of the shoot.
The Rule of Thirds and Framing
The rule of thirds is a classic compositional technique where you divide the frame into a 3×3 grid and place the subject along the grid lines or intersections. This technique can make your image more dynamic and balanced, especially in fashion shots.
- Balance the Frame: Position your subject off-center to create a more interesting shot. If the model is looking to one side, leave more space in the direction they’re looking for a natural flow in the composition.
Tip: Experiment with asymmetry for more dynamic compositions, especially when shooting creative or editorial fashion shots.
Use Leading Lines and Diagonal Lines
Leading lines help guide the viewer’s eye toward the subject. These can be natural lines in the environment, such as roads, walkways, or the edges of furniture. Diagonal lines, in particular, can create a sense of movement and energy in fashion shots.
- Architectural Elements: Use walls, door frames, or other elements in the environment to frame your subject or create leading lines.
Tip: Use lines to emphasize the posture and movement of the model, helping to direct the viewer’s attention to the clothing and the model’s body language.
4. Posing and Model Interaction
Fashion photography isn’t just about capturing a good outfit—it’s about capturing the model’s personality and how they interact with the clothing. The way a model poses can enhance the outfit and convey the mood of the shoot.
Guide Your Model to Natural Poses
While it’s important to have a creative vision, it’s also essential to direct your model so that the poses feel natural and fluid. Overly stiff or forced poses can make the outfit look awkward.
- Body Language: Encourage the model to experiment with their body language. Small changes in the angle of the arms or head can dramatically change the mood of the shot.
- Movement: Have the model move or walk to create dynamic shots that show the fabric in motion. Action shots add a sense of life to the clothing and bring out the energy of the shoot.
Tip: Keep the atmosphere relaxed and fun. Models tend to perform better when they feel comfortable and confident, which results in more natural poses.
Focus on Details and Accessories
Pay attention to the small details that complete the look, such as accessories, hair, and makeup. These elements add to the overall aesthetic of the shoot and should be captured with as much attention as the clothing itself.
- Close-Up Shots: Take close-up shots of accessories like jewelry, shoes, and bags to highlight the finer details of the outfit.
Tip: Don’t just focus on the entire look—zoom in on specific details to tell a more complete story about the outfit.
5. Post-Processing: Enhancing Colors and Textures
After the shoot, editing is where you can enhance the details, adjust colors, and fine-tune the composition. The goal is to bring out the best aspects of the clothing and create a polished, professional look.
Adjust Exposure and Contrast
Correct any exposure issues and increase contrast to make the clothing stand out more. Fashion photography often benefits from higher contrast, which can add depth and highlight the textures of the fabric.
Enhance Colors and Textures
Use the saturation and vibrance tools to enhance the colors of the clothing without overdoing it. Adjust the clarity to sharpen the textures of fabrics, such as the stitching, folds, or intricate details.
Tip: If you’re shooting fashion in a studio, consider adjusting the white balance to make the colors more accurate and natural.
Final Thoughts
Fashion photography is a blend of creativity, technical skill, and collaboration. Whether you’re capturing high-fashion looks, street style, or casual wear, focusing on lighting, composition, posing, and post-processing will help you create images that are both visually captivating and true to the clothing’s style. By experimenting with different techniques, angles, and editing styles, you can develop a unique voice in fashion photography that resonates with your audience.
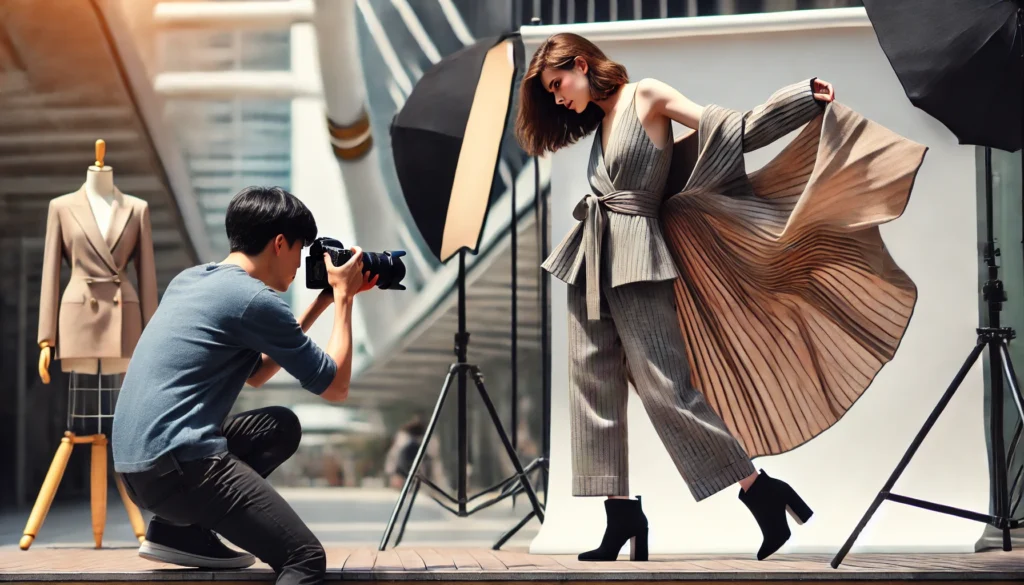
How to Work with Architectural Photography: Tips for Capturing Structural Details
Architectural photography is a specialized genre that focuses on capturing the beauty, design, and structure of buildings and spaces. It’s about more than just documenting a building—it’s about conveying the story of the design, the relationship between light and space, and the aesthetic details that make the structure unique. Whether you’re photographing modern skyscrapers, historic landmarks, or interior designs, architectural photography requires both technical skill and artistic vision. In this article, we’ll explore tips for capturing architectural details and creating stunning, professional architectural photos.
1. Understand the Purpose of Architectural Photography
Before you begin shooting, it’s important to understand the purpose of the architectural photography session. Are you capturing the building for a real estate listing, a magazine editorial, or an artistic portfolio? Each of these purposes requires a different approach.
Real Estate and Commercial Photography
For real estate or commercial photography, the goal is to present the space in the most appealing way while maintaining accuracy and clarity. These images should highlight the key features of the building or space, such as lighting, layout, and size.
- Wide Shots: Include wide-angle shots to capture the full scope of the space, making sure the interior and exterior are presented in the best possible light.
- Detail Shots: Focus on interesting design elements, such as unique finishes, architectural details, or furniture that adds to the overall style.
Editorial and Artistic Photography
When shooting for editorial or artistic purposes, you can take more creative liberties. The goal is to convey the mood, atmosphere, and aesthetic of the architecture while playing with light, angles, and composition.
- Experiment with Angles: Try shooting from unconventional angles to highlight unique perspectives and compositions. Experiment with reflections, shadows, and leading lines to create visually dynamic images.
Tip: Discuss with your client or team about the goals for the shoot before you begin. Understanding the purpose will help you decide on the best approach and style.
2. Master the Basics of Composition
Composition is crucial in architectural photography, as it helps you tell a visual story and highlight the structure’s most important features. Here are some essential tips for composing architectural photos:
Use the Rule of Thirds
The rule of thirds is a fundamental photography technique that involves dividing your frame into a 3×3 grid and placing important elements along the grid lines or intersections. This creates balance and visual interest in your photo.
- Place Key Features Along the Lines: In architectural photography, place elements like doors, windows, or structural lines along the grid to create a balanced composition.
Tip: The rule of thirds is particularly useful for framing building entrances, large architectural features, or stunning views through windows or arches.
Focus on Symmetry and Leading Lines
Architecture often features symmetrical designs and straight lines, making it a perfect subject for the rule of symmetry. Look for architectural elements that mirror each other on either side of the frame, creating a balanced, harmonious image.
- Leading Lines: Use the lines of the building—whether horizontal, vertical, or diagonal—to lead the viewer’s eye through the image. Roads, stairways, or beams can create a sense of depth and perspective.
Tip: Play with reflections, such as glass surfaces or water bodies, to create symmetry and add depth to your compositions.
Include Negative Space
Negative space (the empty space around your subject) is an effective compositional tool in architectural photography. It helps emphasize the subject of the photo while creating a clean, uncluttered look.
- Minimalist Approach: Use large, open areas in the frame to give your subject room to breathe. This can be especially effective when photographing modern or minimalist architecture.
Tip: Don’t feel compelled to fill the frame with every detail. Sometimes, the simplicity of negative space can elevate the image.
3. Utilize Lighting to Enhance Architectural Details
Lighting plays a significant role in architectural photography, as it helps to reveal the texture, material, and design of a structure. Different times of day, natural light, and artificial lighting can all affect the mood and feel of your images.
Shoot During the Golden Hour
The golden hour, which occurs just after sunrise or before sunset, is a great time to capture architectural photos. The soft, warm light during this time creates long shadows and highlights the textures of the building, giving it a more dramatic and flattering look.
- Soft, Warm Light: Use the golden hour to capture exterior shots of buildings or landscapes, as the warm tones of the light will make the structure appear more inviting.
Tip: Plan your shoot around the golden hour if you want to capture the building or space in the best possible light.
Use Artificial Lighting for Interior Shots
When shooting interiors, you may need to supplement natural light with artificial lighting. Flash or continuous lights can help illuminate dark corners and highlight design elements, such as artwork, furniture, or intricate details.
- Diffuse the Light: Use softboxes, diffusers, or bounce cards to soften the light and avoid harsh shadows.
- Accent Lighting: Highlight specific features of the space, such as lighting fixtures, textures, or focal points, by adding accent lighting.
Tip: Avoid using direct, harsh lighting, as it can create unwanted shadows and highlights that detract from the details of the structure.
4. Choose the Right Lens for Architectural Photography
The lens you choose for architectural photography has a huge impact on the composition and quality of your images. Different lenses provide different perspectives and control over distortion, which is especially important in architectural photography.
Wide-Angle Lenses
Wide-angle lenses (such as 16-35mm) are commonly used in architectural photography because they allow you to capture large buildings and expansive spaces in a single frame. These lenses are perfect for shooting wide exteriors or interiors.
- Capture Large Spaces: Wide-angle lenses help you fit more of the scene into the frame, making them ideal for capturing the grandeur of a building or room.
Tip: Be mindful of distortion when using wide-angle lenses. While they help capture expansive views, they can also exaggerate perspective, especially when shooting close to the subject.
Tilt-Shift Lenses
Tilt-shift lenses are specialized lenses used to correct perspective distortion, particularly when photographing tall buildings or structures from the ground up. These lenses allow you to maintain straight lines in the image, preventing the “leaning” effect that can occur with wide-angle lenses.
- Correct Distortion: Tilt-shift lenses are great for shooting tall buildings and minimizing distortion that can make the structure look unnaturally slanted.
Tip: If you don’t have a tilt-shift lens, you can correct distortion in post-processing, but it’s easier to capture straight lines in-camera using the right lens.
5. Pay Attention to Post-Processing
Post-processing is essential for architectural photography, as it allows you to refine the image, correct any distortion, and enhance details that may not have been visible in the raw shot.
Correct Exposure and Color Balance
Make sure your image is properly exposed. In architectural photography, highlights and shadows can sometimes be tricky, especially when shooting buildings under harsh light or in high contrast environments. Use the exposure adjustments in Lightroom or Photoshop to brighten or darken the image and bring out the details in both the shadows and highlights.
- White Balance: Ensure the colors in your photo are accurate, particularly for interior shots where artificial lighting can cast warm or cool tones.
Tip: Adjust the clarity to enhance the details of the structure, making the textures and materials pop.
Correcting Distortion
Use the lens correction tools in post-processing software to straighten lines and fix any lens distortion, particularly when using wide-angle lenses. This ensures that the building looks accurate and not unnaturally skewed.
Tip: Use perspective correction tools in Lightroom or Photoshop to straighten vertical lines and create a more polished, professional look.
Final Thoughts
Architectural photography is about more than just capturing buildings—it’s about telling a visual story through design, light, and composition. By understanding the purpose of your shoot, using the right lenses and lighting techniques, and paying attention to the details in post-processing, you can create stunning images that showcase the beauty and intricacy of architecture. Whether you’re photographing towering skyscrapers or intimate interior designs, architectural photography offers endless creative possibilities.
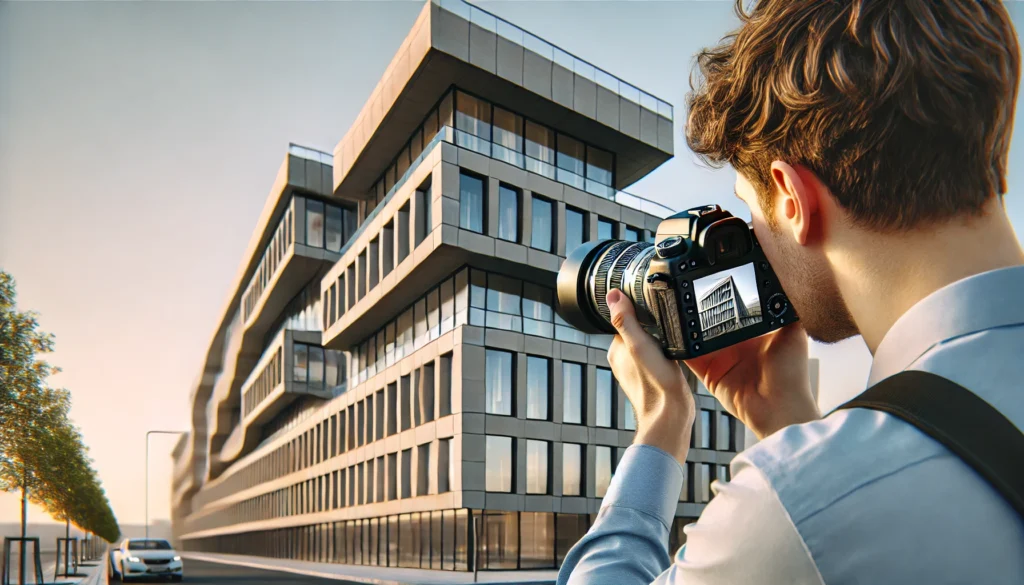
The Art of Documentary Photography: How to Tell Stories Through Images
Documentary photography is a powerful storytelling tool that captures real-life moments, events, and scenes with a focus on authenticity and emotion. Unlike other forms of photography, documentary photography doesn’t rely on staged setups or posed models—it’s about capturing life as it happens. The goal is to tell a story, evoke emotions, and preserve moments for future generations. Whether you’re documenting social issues, everyday life, or historical events, documentary photography requires patience, a keen eye for detail, and a deep understanding of the subject. In this article, we’ll explore the art of documentary photography and provide tips for telling compelling stories through images.
1. Understand the Purpose of Documentary Photography
Before you pick up your camera, it’s important to understand the purpose of documentary photography. Unlike commercial photography, which often focuses on selling a product, documentary photography is about telling a story and evoking emotions. It’s about capturing raw, unfiltered moments that reflect real-life experiences.
Focus on Real Stories and Authenticity
The key to documentary photography is authenticity. The best documentary photographers are able to capture real moments that tell a story, without manipulating or staging the scene. Whether you’re photographing a political rally, a family gathering, or a street scene, your goal is to present an honest and truthful representation of the subject.
- Emotionally Engaging: The most powerful documentary photos evoke emotions and make the viewer feel connected to the moment. Focus on capturing raw emotions, such as joy, sadness, fear, or hope.
Tip: Avoid over-editing your documentary photos. Keep the images natural and true to the moment, as the story should come from the authenticity of the scene, not from artificial enhancements.
Know the Story You Want to Tell
Documentary photography often involves a long-term project or series, and understanding the story you want to tell is crucial. Think about the bigger picture: What is the message or theme you want to convey? Are you documenting a social issue, cultural event, or personal story?
- Research the Subject: Whether you’re documenting an event or a place, take the time to learn about the subject beforehand. Research the background, history, and context to help you better understand the story and approach it with sensitivity and insight.
Tip: Keep the overarching story in mind as you shoot, and don’t be afraid to revisit the same subject multiple times to capture different facets of the story.
2. Capture Candid, Unposed Moments
One of the most important aspects of documentary photography is capturing candid, unposed moments. These genuine moments reflect real life and are often the most powerful images in a documentary series. It’s about being in the right place at the right time, and being able to react quickly to capture fleeting moments that tell the story.
Be Patient and Observant
Documentary photography requires patience. You may need to wait for the right moment to unfold, whether it’s a conversation, a gesture, or an expression. Being patient and observant will allow you to capture these authentic moments without disrupting the flow of the scene.
- Anticipate Moments: As you observe the scene, think ahead and anticipate what may happen next. This allows you to prepare for key moments, such as a smile, a handshake, or a gesture that will help tell the story.
Tip: Don’t rush the process. Allow yourself time to be present and aware of your surroundings, which will help you capture more meaningful, spontaneous moments.
Avoid Disrupting the Scene
In documentary photography, it’s important to remain unobtrusive. The subject should be unaware of your presence so that the moments you capture are authentic. This is especially true when photographing people in intimate settings, such as at home or in public spaces.
- Use a Long Lens: A long lens (such as a 70-200mm) allows you to shoot from a distance without interrupting the scene. This can help you capture natural, candid moments without drawing attention to yourself.
Tip: Stay low-key and blend into the environment. The less you interfere with the scene, the more natural and powerful your photos will be.
3. Focus on Composition and Framing
Composition is just as important in documentary photography as it is in any other genre. The way you frame your subjects, use lines, and organize the elements within the frame can help convey meaning and emotion.
Use the Rule of Thirds for Balanced Shots
The rule of thirds is a basic compositional technique that divides the image into a 3×3 grid. Place key elements along the grid lines or intersections to create a balanced and engaging image. In documentary photography, the rule of thirds can help you highlight your subject while allowing room for the environment to tell part of the story.
- Balance the Frame: Whether you’re photographing people or landscapes, aim for a balanced composition that guides the viewer’s eye through the image.
Tip: Don’t be afraid to break the rule of thirds for creative compositions. In some situations, centering the subject or using negative space can create a stronger emotional impact.
Focus on Details and Context
In documentary photography, the details matter. Whether it’s the expression on someone’s face, the texture of an environment, or the symbolism in an object, these small elements can add depth to your story.
- Environmental Portraits: If you’re photographing people, include elements of their environment that help tell their story. For example, a portrait of a farmer in a field with tools and crops in the background adds context and gives insight into their life and work.
Tip: Look for contrast and juxtaposition within the frame. For example, capturing a moment of joy in a chaotic or challenging environment can add a layer of depth to the story.
4. Use Light to Set the Mood
Lighting plays a critical role in documentary photography, as it can set the mood and help emphasize the emotion of the scene. The way you use light can transform a simple image into a powerful, evocative photograph.
Natural Light for Authenticity
Natural light is often the best choice for documentary photography, as it provides a soft, authentic feel. Shooting outdoors during golden hour or using window light indoors can create dramatic shadows and highlight key elements in the scene.
- Avoid Harsh Light: While some contrast can be effective, avoid overly harsh lighting, which can create distracting shadows and unflattering highlights.
Tip: Pay attention to how light interacts with your subject. Look for interesting patterns, such as the play of light and shadow on a subject’s face, or how light reflects off surfaces.
Experiment with Low and High-Key Lighting
Low-key lighting, which involves using shadows and limited light sources, can create a dramatic, moody atmosphere. On the other hand, high-key lighting, which uses soft, diffused light, creates a brighter, more neutral feel.
- Create Contrast: Use both high and low-key lighting to create contrast in your images, depending on the emotional tone you want to convey.
Tip: Experiment with different lighting setups to see how they affect the mood of your photos. Lighting can turn a simple documentary shot into a powerful image that resonates with the viewer.
5. Post-Processing for Impact
Post-processing is an essential part of documentary photography, as it allows you to refine your images and emphasize the story you want to tell. However, it’s important not to overdo it—documentary photos should remain authentic and true to the scene.
Keep It Natural
In documentary photography, the goal is to keep the images as natural as possible. Adjust exposure, contrast, and color balance, but avoid heavy manipulation or altering the essence of the image. Minor adjustments to highlights, shadows, and sharpness can enhance the mood without losing the authenticity of the moment.
- Convert to Black and White: Sometimes, black and white photography can help convey a sense of timelessness and focus the viewer’s attention on the emotion and composition of the scene.
Tip: Use a subtle editing approach to enhance the image’s details without changing the integrity of the moment. The goal is to highlight the real-life beauty of the scene.
Final Thoughts
Documentary photography is a powerful medium for capturing life’s most meaningful moments. Whether you’re documenting social issues, everyday scenes, or personal stories, the key to compelling documentary photography is authenticity. By focusing on candid moments, paying attention to composition and lighting, and using post-processing to refine the image, you can tell impactful stories that resonate with your audience and preserve memories for future generations.
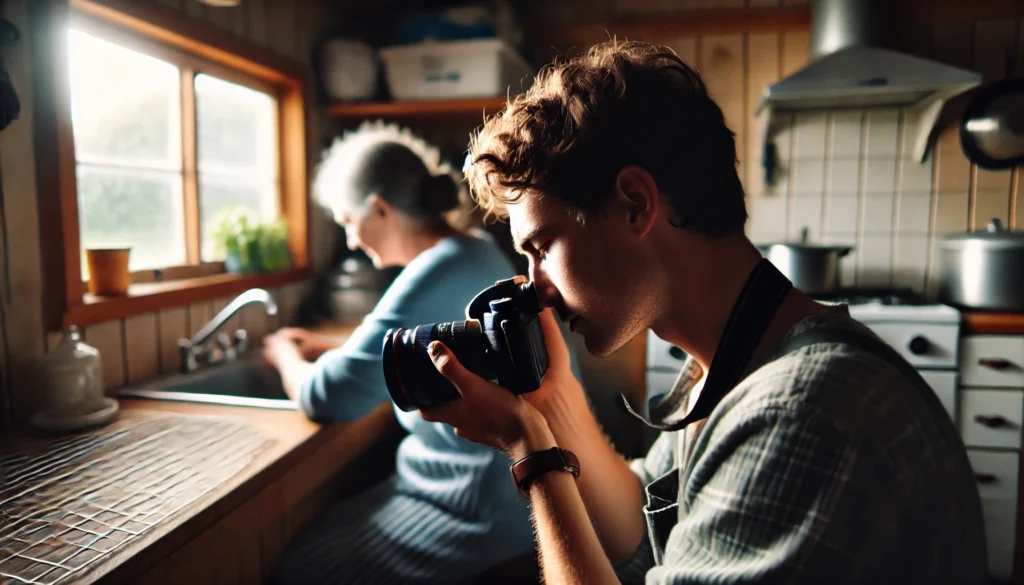
How to Control Exposure in Your Photos and Avoid Overexposed Images
Exposure is one of the most fundamental aspects of photography, and understanding how to control it is crucial for capturing the perfect shot. Exposure determines how light or dark your image will appear, and getting it right can make the difference between a beautifully lit photo and one that’s too dark or overexposed. In this article, we’ll discuss how to control exposure in your photos, how to avoid overexposed images, and tips to help you achieve perfectly balanced exposures every time.
1. Understanding Exposure: Aperture, Shutter Speed, and ISO
To control exposure, you need to understand the three main components that make up the exposure triangle: aperture, shutter speed, and ISO. Together, these three elements control how much light enters the camera, how that light is captured, and how it affects the overall brightness of the image.
Aperture (f-stop)
Aperture refers to the opening in the lens through which light passes into the camera. The size of this opening is controlled by the f-stop setting, with a lower f-number (such as f/2.8) corresponding to a larger opening and more light entering the camera, while a higher f-number (such as f/16) represents a smaller opening with less light.
- Wide Aperture (Low f-number): A wide aperture allows more light to enter, which is useful in low-light conditions or when you want to create a shallow depth of field (blurry background).
- Narrow Aperture (High f-number): A narrow aperture allows less light to enter, which is useful in bright conditions or when you want a deeper depth of field (everything in focus).
Tip: When shooting in bright light, use a narrow aperture (high f-number) to prevent overexposure and maintain sharp focus throughout the image.
Shutter Speed
Shutter speed refers to how long the camera’s shutter remains open to let light in. It is measured in fractions of a second (e.g., 1/500s) or full seconds (e.g., 1s). The longer the shutter is open, the more light enters, and the brighter the image will be.
- Fast Shutter Speed (e.g., 1/500s): A fast shutter speed allows less light in, which helps prevent overexposure and is great for capturing fast-moving subjects.
- Slow Shutter Speed (e.g., 1/30s): A slow shutter speed allows more light to enter, which is useful in low-light conditions but can result in overexposure if used in bright environments.
Tip: To prevent overexposure, avoid using too slow a shutter speed in bright conditions, as it will allow too much light to enter the camera.
ISO
ISO controls the sensitivity of your camera’s sensor to light. A lower ISO (e.g., ISO 100) is less sensitive to light, while a higher ISO (e.g., ISO 1600) is more sensitive. While higher ISO settings can help you shoot in low-light environments, they also introduce noise (grain) into the image.
- Low ISO (e.g., ISO 100): Ideal for bright conditions, where less sensitivity is needed.
- High ISO (e.g., ISO 1600): Useful in low-light environments but can lead to more noise and a reduction in image quality.
Tip: Use the lowest ISO possible for the given lighting conditions to avoid overexposure and reduce noise.
2. Balancing the Exposure Triangle
The key to getting the perfect exposure is balancing aperture, shutter speed, and ISO. If you adjust one element, you may need to compensate by adjusting one or both of the other settings to maintain the correct exposure.
The Right Balance
- Low Light: In low-light conditions, you may need to use a wider aperture (lower f-number) or a slower shutter speed to allow more light in. If the image is still too dark, you can increase the ISO, but be careful not to raise it too high, as this can introduce noise.
- Bright Light: In bright conditions, reduce the aperture (higher f-number) and use a faster shutter speed to limit the amount of light entering the camera. Lowering the ISO will also help prevent overexposure.
Tip: To achieve a well-balanced exposure, adjust the aperture and shutter speed first to get the desired depth of field and motion effect, then fine-tune the exposure by adjusting the ISO.
3. Using Exposure Compensation
Exposure compensation is a useful tool for adjusting the exposure without needing to manually change the settings of the exposure triangle. Most cameras allow you to adjust the exposure using a dial or button, typically denoted by a +/- sign.
Increasing or Decreasing Exposure
- Positive Exposure Compensation (+): Use this to brighten the image when it appears too dark, especially in high-contrast scenes or when shooting against a bright background.
- Negative Exposure Compensation (-): Use this to darken the image when it appears too bright or when shooting in bright light that may cause overexposure.
Tip: Exposure compensation is particularly useful when shooting in automatic or semi-automatic modes (such as aperture priority or shutter priority), where the camera automatically sets the exposure based on its metering. It allows you to quickly adjust the exposure without manually changing each setting.
4. Using the Histogram to Monitor Exposure
The histogram is a visual representation of the exposure in your image. It shows the distribution of light across the image, with the left side representing shadows (dark areas) and the right side representing highlights (bright areas).
Interpreting the Histogram
- Proper Exposure: A well-exposed image will have a balanced histogram, with data spread across the entire range from dark to light.
- Overexposed Image: If the histogram is pushed all the way to the right, it indicates that the image is overexposed, and the highlights are likely clipped (lost detail in the bright areas).
- Underexposed Image: If the histogram is pushed all the way to the left, it indicates that the image is underexposed, and the shadows may be too dark with lost detail.
Tip: Always check the histogram to ensure that your image isn’t overexposed or underexposed, especially when shooting in challenging lighting conditions.
5. Using Manual Mode for Full Control
While automatic modes can help you capture well-exposed images, manual mode gives you full control over aperture, shutter speed, and ISO, allowing you to fine-tune the exposure for the best results. With manual mode, you can adjust each setting independently to achieve the desired exposure, depth of field, and motion effects.
- Full Creative Control: Manual mode allows you to adjust the settings based on your artistic vision and the specific conditions of the scene.
- Metering Modes: Use the camera’s metering system to determine the exposure settings. Spot metering, matrix metering, and center-weighted metering can help you make adjustments based on the lighting of the scene.
Tip: Practice using manual mode in various lighting conditions to gain confidence and develop your understanding of how each setting affects exposure.
6. How to Avoid Overexposed Images
Overexposure occurs when too much light enters the camera, causing the highlights to become washed out and losing detail in bright areas of the image. To avoid overexposure:
- Use a Smaller Aperture: A smaller aperture (higher f-stop) reduces the amount of light entering the camera.
- Use Faster Shutter Speed: A faster shutter speed limits the time the light hits the sensor, reducing the exposure.
- Lower the ISO: Use the lowest possible ISO to prevent excessive sensitivity to light, which can cause overexposure.
- Monitor the Histogram: Always check the histogram to ensure you’re not pushing the highlights too far to the right, which can indicate overexposure.
Tip: If you notice areas in your image that are overexposed, adjust the settings and retake the shot to recover detail in the highlights.
Final Thoughts
Controlling exposure is an essential skill for any photographer. By understanding the exposure triangle—aperture, shutter speed, and ISO—and using tools like exposure compensation, the histogram, and manual mode, you can achieve well-balanced exposures in any situation. With practice, you’ll be able to capture images that are neither too dark nor overexposed, allowing you to highlight the details and create beautiful, properly exposed photos every time.
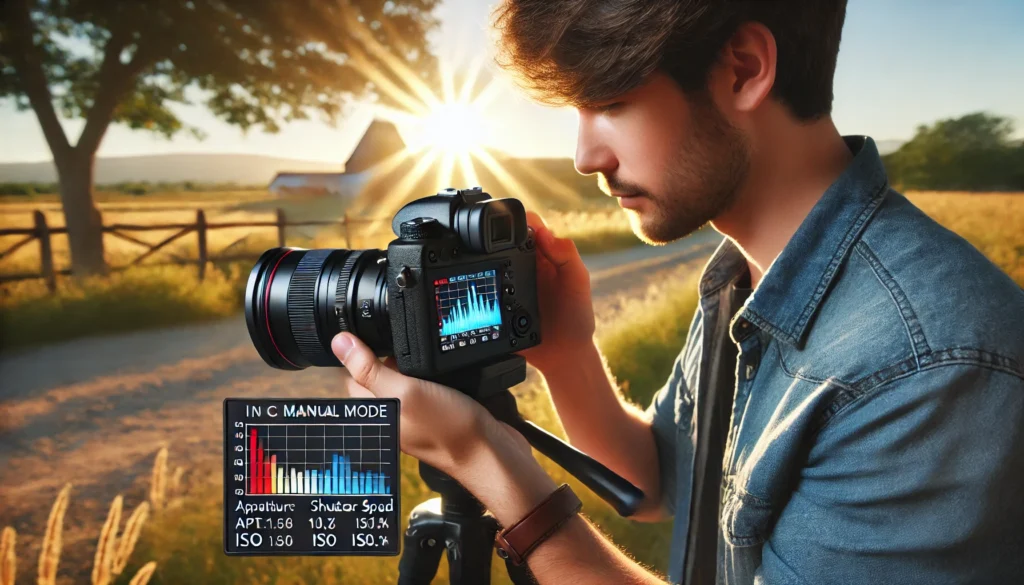
How to Create Impactful Images Using Only the Camera and Natural Light
Natural light is one of the most powerful tools a photographer can use. It’s free, abundant, and capable of creating beautiful, dynamic images without the need for complex lighting setups. Whether you’re shooting portraits, landscapes, or still life, natural light can transform an ordinary scene into something extraordinary. In this article, we’ll explore how to harness the power of natural light to create impactful images using only your camera and the environment around you.
1. Understand the Different Types of Natural Light
To make the most of natural light, it’s essential to understand the different types of light and how they affect your photos. The quality, direction, and intensity of the light can dramatically change the mood and feel of your images.
Soft vs. Hard Light
- Soft Light: Soft light occurs when light is diffused through clouds, windows, or other natural elements. It creates gentle, flattering shadows and highlights, which is ideal for portraits and still life photography.
- Hard Light: Hard light comes from direct sunlight, which creates sharp, defined shadows. This type of light is great for creating high-contrast, dramatic images, particularly in architectural or landscape photography.
Tip: To achieve soft light, shoot during the golden hour or when the sun is obscured by clouds. To capture hard light, shoot during midday when the sun is bright and high in the sky.
Direction of Light
The direction of light plays a significant role in the mood and composition of your image. Understanding how light moves throughout the day can help you position your subject for the best effect.
- Front Lighting: When the light hits the subject directly from the front, it evenly lights the subject and minimizes shadows. This works well for straightforward portraits or when you want to reveal details in a subject.
- Side Lighting: Side lighting creates interesting shadows and highlights, emphasizing texture and depth. It’s ideal for creating dramatic images, especially with subjects that have strong textures or features, like architecture or portraits.
- Backlighting: Backlighting occurs when the light source is behind the subject. This creates silhouettes, adding mystery or drama to the image. It’s great for artistic shots, such as portraits with glowing hair or capturing the outline of objects.
Tip: Experiment with the direction of light to see how it changes the look of your subject. Side and backlighting are excellent for adding dimension and mood to your photos.
The Golden Hour and Blue Hour
The golden hour, which occurs just after sunrise and before sunset, provides the softest, most flattering light. The light during this time is warm and rich, perfect for creating stunning portraits or landscape shots.
- Golden Hour: The warm, golden tones during this time can create a romantic or dreamy atmosphere in your images.
- Blue Hour: The blue hour happens just before sunrise and after sunset, when the sky takes on a cool, blue tone. This creates a calm, peaceful mood, especially for landscapes or cityscapes.
Tip: Plan your shoots around the golden and blue hours for the best natural light, especially when photographing outdoor scenes or portraits.
2. Use Reflectors to Enhance Natural Light
While natural light is a great tool, sometimes it needs a little help to achieve the desired effect. Reflectors are an easy and inexpensive way to manipulate natural light and enhance your photos.
Types of Reflectors
- White Reflectors: White reflectors create a soft, neutral bounce of light that fills in shadows without altering the color temperature. They are ideal for portrait photography when you want to gently brighten the subject’s face.
- Silver Reflectors: Silver reflectors create a stronger, more intense bounce of light, which adds contrast and highlights. They are great for outdoor portraits or fashion photography when you want to add more punch to the image.
- Gold Reflectors: Gold reflectors add a warm, golden tone to the image, making them perfect for capturing warm, sunlit tones in portraits or still life photography.
Tip: Use a reflector to fill in harsh shadows when shooting in bright sunlight or to create a softer look when shooting in the shade.
DIY Reflectors
You don’t need expensive equipment to use reflectors—simple items like a white foam board, a sheet of aluminum foil, or even a mirror can serve as makeshift reflectors. Get creative and experiment with different surfaces to manipulate the light and enhance your photos.
Tip: When using a DIY reflector, be mindful of how much light you’re bouncing onto your subject. Too much reflection can cause harsh highlights or overexposure.
3. Control Exposure Using the Camera’s Settings
When shooting in natural light, you’ll often have to adjust your camera’s settings to get the exposure just right. Understanding how to control exposure using aperture, shutter speed, and ISO will help you achieve the desired look for your images.
Aperture (f-stop)
Aperture controls the amount of light that enters your camera and affects the depth of field in your photos. A wide aperture (low f-number like f/2.8) allows more light to enter, while a narrow aperture (high f-number like f/16) lets in less light.
- Wide Aperture: A wide aperture is ideal for low-light conditions or when you want a shallow depth of field (blurry background) to isolate your subject.
- Narrow Aperture: A narrow aperture works well in bright conditions or when you want more of the scene to be in focus.
Tip: In low-light conditions, open up the aperture to allow more light in and prevent underexposure. In bright conditions, use a narrower aperture to avoid overexposure.
Shutter Speed
Shutter speed controls how long the camera’s shutter remains open to capture light. A fast shutter speed (e.g., 1/500s) will freeze motion, while a slower shutter speed (e.g., 1/30s) will allow more light in and can create a sense of movement.
- Fast Shutter Speed: Use fast shutter speeds to freeze motion and avoid motion blur in bright light or when photographing fast-moving subjects.
- Slow Shutter Speed: Use slow shutter speeds to allow more light in, especially in low-light conditions. This is helpful when shooting portraits or landscapes at sunset or sunrise.
Tip: When shooting in low light, slow down your shutter speed to allow more light to hit the sensor, but be careful not to introduce motion blur.
ISO
ISO controls the camera’s sensitivity to light. A lower ISO (e.g., ISO 100) is less sensitive to light and works best in bright conditions, while a higher ISO (e.g., ISO 1600) is more sensitive and helps when shooting in low-light conditions.
- Low ISO: Use low ISO in bright light to prevent overexposure and keep image quality sharp.
- High ISO: Use high ISO in darker conditions, but be cautious, as higher ISOs can introduce noise (grain) into your images.
Tip: In natural light, start with the lowest ISO possible to reduce noise and increase the quality of your photos. Increase the ISO only if necessary to maintain a proper exposure.
4. Shoot in RAW for Better Post-Processing Flexibility
When shooting with natural light, it’s always a good idea to shoot in RAW format rather than JPEG. RAW files retain more information, allowing you to make significant adjustments in post-processing without sacrificing image quality.
- RAW Files: Shooting in RAW gives you more control over exposure, white balance, and color correction in post-processing, which is especially useful when working with natural light, where conditions can change quickly.
Tip: Shooting in RAW is especially helpful when you need to recover details in the shadows or highlights, or when the light is inconsistent during the shoot.
Final Thoughts
Natural light is a powerful tool for creating beautiful, impactful images. By understanding how to use different types of natural light, working with reflectors, and mastering your camera’s settings, you can create stunning photos without the need for complex lighting setups. Whether you’re shooting portraits, landscapes, or still life, natural light can help you achieve professional-looking images with a sense of authenticity and beauty. So, grab your camera and start experimenting with the light around you—you’ll be amazed at what you can create using only natural light.
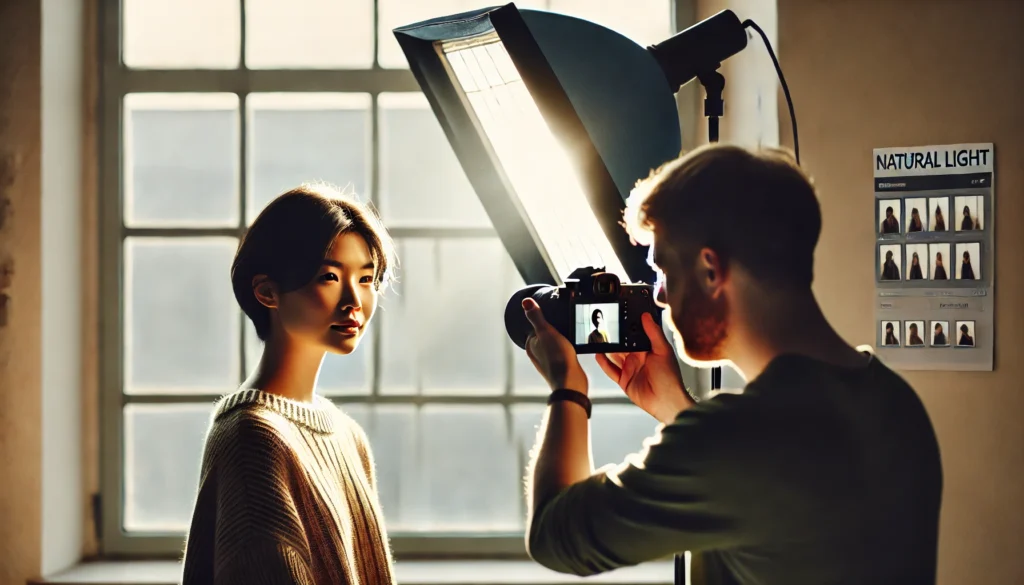
How to Create Stunning Architectural Photography at Night
Architectural photography at night offers a unique opportunity to capture a building’s design in a new light. The contrast between the artificial lights and the dark sky can bring out the intricate details of the structure, adding drama and atmosphere to the shot. Whether you’re photographing modern skyscrapers or historical landmarks, nighttime photography can reveal architectural beauty in a way that daylight shots often can’t. In this article, we’ll explore techniques for creating stunning architectural photography at night and the tools you’ll need to capture breathtaking images.
1. Prepare for the Right Time and Conditions
Nighttime architectural photography requires careful planning. Unlike daytime photography, when natural light is abundant, you’ll need to rely on artificial lighting and your ability to manage exposure effectively. Here are a few things to consider before you begin shooting:
Choose the Right Time
The best time to shoot architectural photography at night is just after the sun has set and before it gets too dark, during what is known as the blue hour. The blue hour offers a balance between the fading light and the emerging artificial lights of the buildings, creating a dramatic yet natural atmosphere.
- Blue Hour: The time just after sunset or before sunrise when the sky is still illuminated but the artificial lights begin to shine. This creates an ethereal, cool-toned environment that enhances architectural features.
- Night: As the sky darkens, the artificial lights of the building will become more pronounced, making the structure stand out against the dark sky.
Tip: The blue hour is ideal for capturing a mix of natural and artificial light, while the darker hours will showcase the building’s lights more vividly.
Check the Weather
The weather plays a big role in architectural photography, especially at night. Clear skies with no rain or fog will ensure that you capture the sharpest details, while stormy or cloudy weather can create a dramatic effect.
- Clear Skies: If you’re looking for clean lines and sharp details, clear skies are your best bet. They provide a smooth, dark background that allows the building’s lights to stand out.
- Cloudy Skies: Cloud cover can add mood and texture to your images, but be aware that it may soften the light and reduce the contrast.
Tip: Always check the weather forecast to plan your shoot and make sure you’ll get the best conditions for your desired outcome.
2. Use Long Exposure for Detail and Light Trails
Long exposure is one of the most powerful techniques in nighttime architectural photography. It allows you to capture more light, reveal intricate details, and create stunning effects like light trails from passing cars.
Understanding Long Exposure
Long exposure involves using a slow shutter speed, which allows more light to hit the camera’s sensor. This technique is great for capturing cityscapes, illuminating building details, and creating light trails from moving cars.
- Slow Shutter Speed: A slow shutter speed (e.g., 10-30 seconds) will allow you to capture the full range of artificial light in the scene, revealing the architectural features and the dynamic movement of traffic or pedestrians.
- Light Trails: Long exposure is also great for capturing light trails, such as the headlights and taillights of cars moving past the building. This adds a dynamic element to the composition, contrasting the static architecture with the movement of light.
Tip: Use a tripod to keep your camera steady during long exposures, as even slight camera movement can result in blurry images.
Aperture and ISO Settings for Long Exposure
When using long exposure, you’ll need to adjust your aperture and ISO to get the right exposure.
- Narrow Aperture (High f-stop): Use a narrow aperture (such as f/8 or f/11) to ensure that more of the scene is in focus and to prevent overexposure during long exposures.
- Low ISO: Keep your ISO low (around ISO 100 or 200) to reduce noise and maintain the sharpness of your photo.
Tip: Experiment with different shutter speeds to see how the amount of time you expose the scene affects the light and movement. A longer exposure will capture more light and create more dramatic effects.
3. Use a Wide-Angle Lens for Expansive Shots
A wide-angle lens is perfect for capturing architectural photography at night, especially when you want to showcase the grandeur of a building or cityscape. Wide-angle lenses allow you to capture more of the scene in a single frame, highlighting both the architecture and the surrounding environment.
Wide-Angle Lenses for Dramatic Perspective
Wide-angle lenses (e.g., 16-35mm) help you capture sweeping views of buildings and cityscapes at night. These lenses emphasize the vastness of the structure and allow you to include more of the environment in the shot.
- Exaggerate the Perspective: When shooting with a wide-angle lens, you can create dynamic compositions by positioning the camera low to the ground or at an angle to emphasize the scale and height of the building.
- Capture the Surrounding Environment: A wide-angle lens also allows you to include the surrounding streets, lights, and cityscape, creating a more complete image of the scene.
Tip: Be mindful of lens distortion, especially at the edges of the frame. While wide-angle lenses are great for dramatic compositions, they can sometimes create curved lines or exaggerated perspectives.
4. Embrace Reflections for Creative Compositions
Reflections can add a creative and artistic dimension to your architectural photos at night. Puddles, glass windows, and water features all provide opportunities to capture interesting reflections of the building or surrounding lights.
Look for Reflective Surfaces
- Water Reflections: After it rains, puddles on the ground can act as mirrors, reflecting the lights and details of the building. This can create a symmetrical and balanced composition, enhancing the visual impact of the photo.
- Glass and Windows: Buildings with glass facades or windows can also reflect light, creating additional layers of interest. Look for reflections that add depth or highlight the surrounding environment.
Tip: Use a slow shutter speed to capture the reflection clearly, as well as the movement of traffic or people in the background, adding depth and dynamism to the composition.
5. Post-Processing for Nighttime Architectural Photos
Post-processing plays an essential role in enhancing the quality of your nighttime architectural photos. While you want to maintain the integrity of the scene, editing can help bring out the details, adjust exposure, and correct any color imbalances.
Adjust Exposure and Contrast
- Increase Contrast: Nighttime photos often benefit from higher contrast, as this helps separate the bright lights from the dark shadows, enhancing the structure’s details.
- Correct Exposure: Use the exposure sliders in Lightroom or Photoshop to adjust the overall brightness and ensure that details in both the shadows and highlights are visible.
Enhance Colors and Details
- Boost Vibrancy: Use vibrance or saturation adjustments to bring out the colors of the artificial lights in the scene, such as the warm tones of streetlights or the cool blues of a night sky.
- Sharpen the Image: Apply subtle sharpening to enhance the details in the architecture and light sources without introducing noise.
Tip: Be careful not to over-process nighttime photos. The goal is to enhance the details and mood of the scene while keeping it as natural and realistic as possible.
Final Thoughts
Architectural photography at night offers a chance to showcase buildings in a dramatic and creative light. By using long exposure, wide-angle lenses, and reflections, you can create stunning images that capture the beauty of architecture against the backdrop of the night sky. With careful planning, the right equipment, and thoughtful post-processing, you can turn nighttime photography into a powerful storytelling tool that brings buildings to life in ways daytime shots simply cannot.
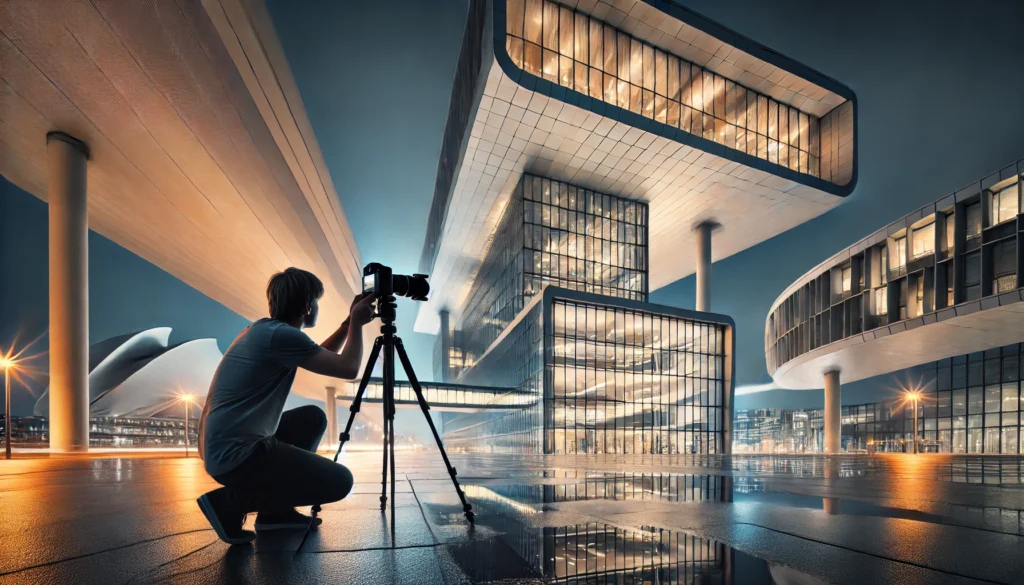
Product Photography for E-commerce: Tips for Attractive Photos
In the world of e-commerce, product photography plays a crucial role in driving sales and creating a professional, trustworthy image for your brand. High-quality images can help potential customers understand the product, showcase its features, and ultimately encourage them to make a purchase. In this article, we’ll explore the best practices and techniques for creating attractive product photos that stand out and boost your e-commerce sales.
1. The Importance of Good Product Photography for E-commerce
When shopping online, customers can’t physically touch or try out a product. This makes product images the most critical element of an e-commerce store. High-quality product photography not only showcases the item in its best light but also builds trust with your audience.
First Impressions Matter
Your product photos are the first impression customers will have of your products. Poorly lit, blurry, or low-quality images can make your products seem unprofessional or low-quality, which could deter potential buyers. On the other hand, high-quality, well-lit photos can convey professionalism and encourage customers to trust your brand.
- Professional Look: High-quality images can make your store look more polished, leading customers to believe in the value of your products.
Tip: Invest time and effort into product photography, as it’s one of the most important factors in converting visitors into buyers.
2. Lighting Is Key
Good lighting is one of the most important aspects of product photography. Lighting can make or break the overall quality of your photos. It highlights the details, colors, and textures of the product, ensuring your customers get a true representation of what they’re buying.
Natural vs. Artificial Lighting
- Natural Lighting: Natural light can create a soft, flattering look for products, especially in home or lifestyle photography. Shoot near a large window during the day to take advantage of soft, diffused sunlight.
- Artificial Lighting: When shooting indoors or at night, use softboxes or LED lights to ensure even lighting. These light sources eliminate harsh shadows and ensure the product is evenly lit.
Tip: If you’re shooting products at home, try using a white bedsheet or light-colored wall to reflect the natural light back onto the product, filling in any shadows.
Avoid Harsh Shadows
Harsh shadows can distract from your product and create an unprofessional look. Use diffusers or softboxes to diffuse the light and eliminate harsh shadows. Alternatively, you can use reflectors to bounce light onto the product and reduce dark spots.
Tip: Experiment with different light angles and setups until you find a lighting arrangement that showcases your product’s details without harsh shadows or overexposure.
3. Choose the Right Background
The background of your product photos can have a significant impact on how the product is perceived. A cluttered or distracting background can take the focus away from the product, while a clean, simple background keeps the attention where it belongs.
Simple and Neutral Backgrounds
For most e-commerce product photography, a simple, neutral background works best. A white or light-colored background keeps the focus on the product, creates a clean look, and ensures the product’s colors are accurately represented.
- Seamless White Backdrops: A seamless white backdrop is a standard choice in product photography because it provides a neutral, distraction-free background that highlights the product.
Lifestyle Backgrounds for Context
While a neutral background is essential for clean, product-focused images, lifestyle backgrounds can add context to your photos, especially for items like clothing, furniture, or accessories. A lifestyle background helps customers visualize how the product will look in their own environment.
- Add Props or Context: For instance, when photographing clothing, consider including a model. For furniture or decor, show the item in a well-styled room.
Tip: Keep your background consistent throughout your e-commerce store for a cohesive, professional look.
4. Show Multiple Angles and Close-Ups
When customers shop online, they can’t physically touch or inspect the product. To make up for this, it’s essential to show the product from multiple angles and provide close-up shots of important details. This gives potential customers a better understanding of what they’re buying and helps build trust.
Wide Shots
Wide shots show the full product, allowing customers to see its size, shape, and overall design. This is particularly important for large items like furniture or electronics.
- Full Product View: Ensure your wide shots capture the product in its entirety. You can also use these shots to show the product in its intended environment, such as a piece of furniture in a living room.
Close-Up Shots
Close-up shots allow customers to examine the finer details of the product, such as textures, stitching, or labels. These shots are essential for products with intricate features, like jewelry, clothing, or electronics.
Tip: Use a macro lens or zoom lens for sharp, detailed close-ups, and make sure the product is in focus throughout the shot.
5. Use a Tripod for Stability and Sharpness
Camera shake can ruin your product photos, causing them to appear blurry or soft. A tripod is a simple yet essential tool to ensure your camera remains stable, allowing you to capture sharp, clear images.
Keep Your Camera Steady
Using a tripod ensures that your camera is steady, even during longer exposure times. This is especially important when shooting in low-light conditions or using smaller apertures for greater depth of field.
Tip: When setting up your product shots, take the time to adjust the tripod height and angle to achieve the best framing and composition.
6. Editing Your Photos for Maximum Impact
After capturing your product photos, editing them is the next step to ensure they look their best. Proper editing can enhance the colors, remove imperfections, and make the images more consistent across your store.
Basic Adjustments
- Exposure and Contrast: Adjust exposure to ensure the product is well-lit and the colors are accurate. Increase contrast to make the product pop.
- White Balance: Correct the white balance to ensure the colors in the image look true to life. This is particularly important for products with vibrant colors.
Retouching for Perfection
- Remove Dust and Imperfections: Clean up any dust spots, wrinkles, or other imperfections that may distract from the product.
- Sharpening: Apply subtle sharpening to ensure the product details are crisp and clear.
Tip: Keep editing minimal to maintain a natural look. Over-editing can make the product look unrealistic, which may reduce trust with potential customers.
7. Optimize for E-commerce Platforms
Once you’ve captured and edited your product photos, it’s time to optimize them for your e-commerce platform. Different platforms may have different image size and quality requirements, so it’s important to ensure that your images meet the specifications.
Image Size and Resolution
- Resolution: Ensure that your product images are high-resolution to prevent them from appearing pixelated when customers zoom in. A resolution of 1500px or higher is recommended for most e-commerce platforms.
- File Size: Keep the file size manageable so that your pages load quickly without sacrificing image quality. Compress images without compromising sharpness or detail.
Tip: Use image editing software like Adobe Photoshop or Lightroom to resize, compress, and optimize your images for fast loading times.
Final Thoughts
Product photography is a vital component of any successful e-commerce business. By focusing on lighting, backgrounds, angles, and editing, you can create professional, high-quality product photos that attract customers and increase sales. With the right equipment, attention to detail, and editing skills, you can ensure that your products look their best and stand out in a competitive online marketplace.
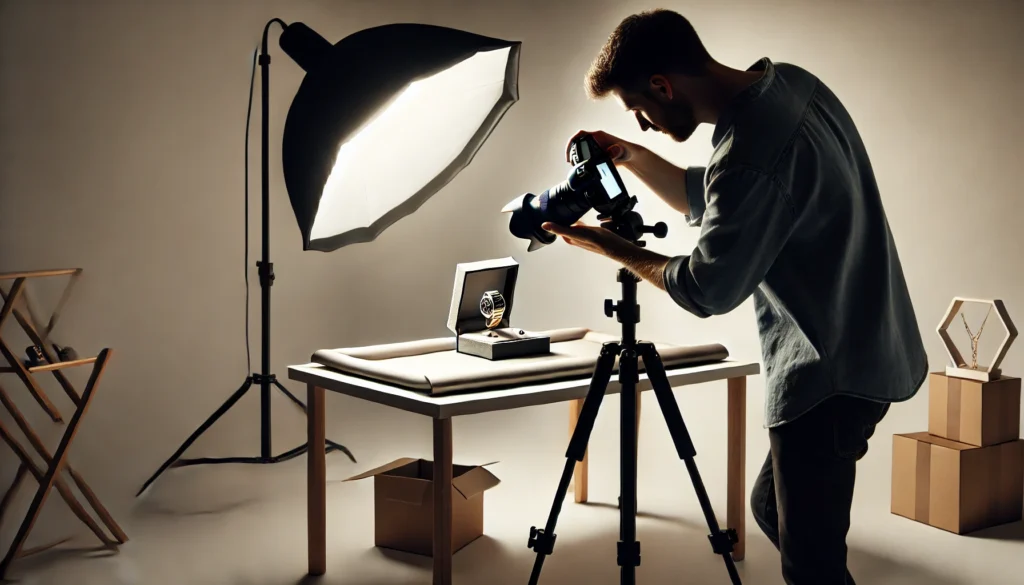
Street Photography Techniques: How to Capture Everyday Moments
Street photography is one of the most dynamic and accessible genres of photography. It allows you to capture the beauty and complexity of everyday life, often in urban environments. Whether it’s the candid moment of a passerby or a fleeting interaction between strangers, street photography tells stories and documents life in a raw, unfiltered way. In this article, we’ll explore essential techniques for street photography and how to capture compelling everyday moments that resonate with your audience.
1. Embrace the Unpredictability of the Streets
Street photography is about spontaneity, capturing unplanned moments as they unfold. It’s about being ready to react quickly and not waiting for the “perfect” shot.
Be Open to the Unexpected
When you’re out shooting in the streets, don’t expect every moment to be perfectly staged. Sometimes the best shots come from the most unexpected moments. Be patient and ready to capture candid scenes, whether it’s an interesting interaction, a powerful expression, or an unusual juxtaposition of elements.
- Keep Your Camera Ready: Always have your camera ready and set to go. You may not have much time to adjust settings before a moment passes.
Tip: Trust your instincts and be open to capturing the raw moments around you. Let the streets tell their own story.
Shoot in Continuous or Burst Mode
Street photography often requires fast reflexes to catch fleeting moments. Shooting in continuous or burst mode will help you take multiple shots in quick succession, increasing the chance of capturing that perfect moment.
- Capture Movement: Use burst mode to capture the motion of people, vehicles, or anything that adds dynamism to your shot.
- Candid Moments: Candid expressions or spontaneous interactions are hard to predict, so burst mode will give you more chances to catch the right moment.
Tip: Use burst mode when photographing people or scenes with fast movement to increase your chances of getting the perfect shot.
2. Understand Your Environment and Composition
While street photography is about spontaneity, your compositional skills play a big role in making your images stand out. Understanding the environment and using compositional techniques will help you capture more compelling shots.
Look for Strong Visual Elements
When you’re out on the streets, take time to notice the key elements in your environment that will make the photo more interesting. Look for patterns, textures, and contrasts that tell a story.
- Juxtaposition: The contrast between different elements (e.g., a well-dressed person in a rundown alley) can create powerful imagery.
- Leading Lines: Use streets, sidewalks, or architectural elements to lead the viewer’s eye toward the subject.
Tip: Try to frame your subject with interesting background elements. A clean, uncluttered background will make the subject stand out.
Follow the Rule of Thirds
The rule of thirds is a compositional guideline that divides the frame into a 3×3 grid. By positioning key elements along the grid lines or at the intersections, you create a more dynamic and engaging image.
- Subject Placement: Instead of centering your subject, place them along one of the grid’s lines or intersections for a more balanced composition.
Tip: While the rule of thirds is a helpful guideline, don’t be afraid to break it when the moment calls for it. Experiment with different placements and compositions.
3. Capture Emotion and Human Interaction
Street photography is powerful because it captures real emotions, expressions, and human interactions. Whether it’s a joyful moment or a fleeting glance, these emotional connections are what make street photos so impactful.
Focus on Faces and Expressions
People’s faces and expressions are often the heart of street photography. A candid smile, a thoughtful gaze, or a look of surprise can tell a story and evoke emotion in the viewer.
- Close-Up Shots: When appropriate, zoom in or get close to your subject to capture emotions in their face.
- Moment of Connection: Look for interactions between people, whether it’s a moment of kindness, confrontation, or simple curiosity.
Tip: Be respectful and subtle when taking close-up shots of people, especially in candid situations. Avoid making them feel uncomfortable.
Capture Gestures and Body Language
Body language is another essential aspect of street photography. People’s posture, gestures, and movements can convey emotions and help tell a more complete story about the scene.
- Natural Gestures: Pay attention to how people move, whether it’s someone walking with purpose or another adjusting their clothing in an unexpected way.
- Frame Full Body Shots: Sometimes full-body shots of individuals or groups can be more telling than close-up portraits, showing how people interact with their environment.
Tip: Keep your distance when capturing people’s gestures to maintain authenticity. Be mindful of cultural and social boundaries.
4. Use Natural Light to Your Advantage
Natural light is one of the most important tools in street photography. The light on the streets can change dramatically throughout the day, and it can add mood, drama, or subtlety to your images.
Shoot During the Golden Hour
The golden hour, just after sunrise or before sunset, provides soft, warm lighting that enhances the mood of your photos. The long shadows and diffused light help create depth and add visual interest to your street scenes.
- Flattering Lighting: Golden hour light is flattering for portraits, especially when it falls on a person’s face, highlighting their features with a soft glow.
- Beautiful Skies: During golden hour, the sky often has rich, warm tones that add to the atmosphere of the photo.
Tip: Plan your street photography sessions around golden hour for the best natural lighting, especially for capturing portraits.
Embrace Harsh Light for Drama
While soft light is great for many types of street photography, harsh light can also create dramatic effects. Shooting during midday, when the sun is high, can produce strong shadows and high contrast, which can add impact to your photos.
- Shadow Play: Harsh light creates sharp, dramatic shadows that can be used creatively to frame subjects or add depth to the image.
- Contrast: The contrast between bright highlights and dark shadows can give your photo a more dramatic, gritty feel.
Tip: Use harsh sunlight to capture bold, graphic compositions or to highlight specific details in the scene.
5. Be Respectful and Ethical
Street photography often involves capturing people without their knowledge or consent. While this is part of what makes street photography authentic, it’s important to respect people’s privacy and adhere to ethical guidelines.
Respect Privacy and Boundaries
If someone notices you taking their photo and asks you to stop, respect their wishes. Street photography should never invade someone’s personal space or make them feel uncomfortable.
- Seek Permission When Needed: In some cases, it’s appropriate to ask for permission, especially if you’re photographing someone up close.
- Avoid Sensitive Situations: Be mindful of the context, and avoid photographing sensitive moments or individuals in distress without their consent.
Tip: If you feel uncomfortable taking a photo or think it might be invasive, it’s okay to walk away and find another subject.
Final Thoughts
Street photography is about capturing the essence of life as it happens, in all its unpredictability, emotion, and complexity. By embracing spontaneity, mastering composition, and respecting your subjects, you can create compelling, authentic images that tell powerful stories. Remember, street photography is not just about the technical aspects—it’s about being present in the moment and connecting with the people and environments around you. So grab your camera, hit the streets, and start capturing the everyday moments that make life extraordinary.
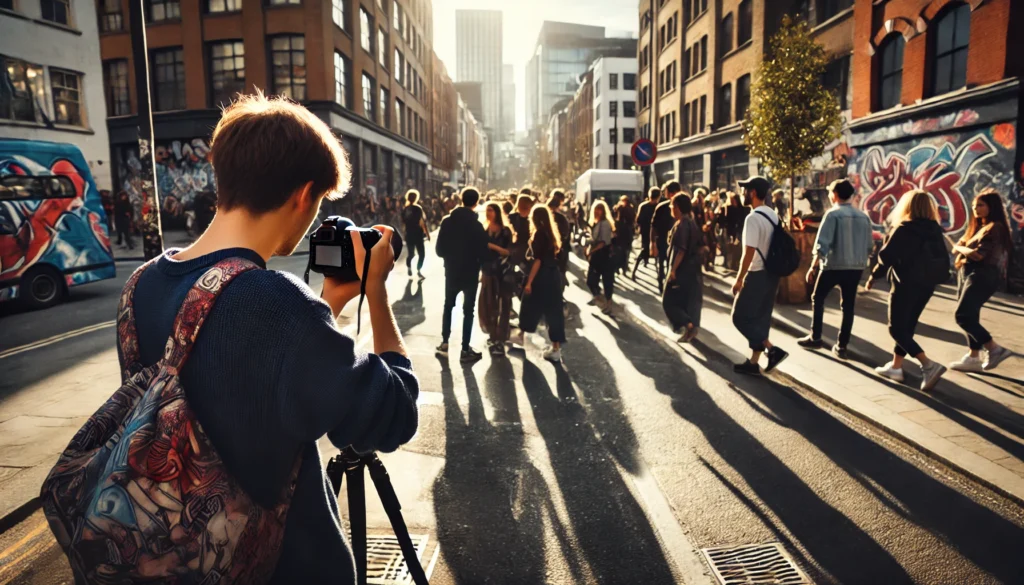
How to Create Artistic Photography Using Reflectors and Shadows
Photography is a blend of art and technique, and one of the most powerful ways to create unique and artistic images is by mastering the use of light, reflectors, and shadows. While we often think of shadows as something to avoid or correct, they can actually be used creatively to add depth, contrast, and drama to your photos. Similarly, reflectors can help manipulate light to enhance your subject, making them essential tools for any photographer looking to create stunning, artistic images. In this article, we’ll explore how to effectively use reflectors and shadows in photography to achieve artistic effects.
1. Understanding the Role of Light in Photography
Light is the most important element in photography—it shapes the way we see our subjects and sets the mood of an image. When you manipulate light with reflectors and shadows, you have the ability to create dramatic, visually striking photographs that tell a compelling story.
The Power of Shadows
Shadows aren’t just dark areas in a photo—they can be used to define shapes, add texture, and create contrast. Whether you’re using natural or artificial light, the way shadows interact with your subject can enhance the composition and add an artistic flair.
- Shape and Form: Shadows can emphasize the shape and structure of your subject, turning a simple object into something visually dynamic.
- Depth and Dimension: Properly placed shadows can add depth to a two-dimensional photograph, giving the image a sense of realism and dimension.
- Mood and Atmosphere: Shadows can evoke a certain mood in your photo—dark, harsh shadows can create a sense of mystery or drama, while soft, diffused shadows can evoke calmness or subtlety.
Tip: Don’t shy away from shadows—embrace them! Experiment with different light angles and intensities to see how they can transform your image.
The Role of Reflectors
Reflectors are tools that help bounce light onto your subject. Whether you’re using a basic handheld reflector or a more advanced setup, reflectors can help you control and manipulate light, giving you more control over the look and feel of your photos.
- Bounce Light: Reflectors work by bouncing light back onto the subject, filling in shadows, softening harsh light, and reducing the contrast.
- Enhance Natural Light: Reflectors are especially useful when working with natural light. They allow you to direct the light onto your subject in ways that enhance details and highlight specific features.
- Create Soft, Even Lighting: Reflectors can diffuse light, creating a softer, more flattering look that works well for portraits or delicate objects.
Tip: Keep a reflector on hand, especially for outdoor shoots, to enhance your photos without the need for complex lighting setups.
2. Using Shadows Creatively in Photography
Shadows can be an artist’s secret weapon. They are often overlooked or seen as a flaw, but when used thoughtfully, they can transform a photograph. Here are some ways to use shadows creatively:
Experiment with Light Angles
The angle of the light source plays a crucial role in how shadows fall in a photograph. By changing the position of the light, you can create a variety of shadow effects that will add intrigue and depth to your images.
- Side Lighting: When light comes from the side of your subject, it creates long, dramatic shadows that can highlight the texture and details of your subject. This is perfect for creating contrast and visual interest.
- Backlighting: When the light source is behind your subject, it can create silhouettes, adding a mysterious and artistic effect to the image. Backlighting can emphasize shapes and create interesting contrasts with the background.
- Top Lighting: Lighting from above can create shadows that highlight the shape of your subject and can even cast unusual or artistic patterns on the ground or surrounding surfaces.
Tip: Try different light angles to see how shadows change the mood of your photos. Experiment with hard and soft light to see how it affects the shadows.
Play with Shadow Shapes and Patterns
Shadows can be used to create interesting shapes and patterns in your photos. These shapes can add abstract elements to your composition, making your image feel more artistic and dynamic.
- Geometric Shapes: Shadows from objects like fences, windows, or trees can create geometric patterns on the ground or walls. These patterns can be a focal point of the photo, giving it an architectural or modern feel.
- Organic Shadows: Shadows created by organic objects, such as plants, clothing, or hair, can have more flowing, curved shapes that bring a sense of movement to the image.
Tip: Look for opportunities to use shadows as a compositional element. You can incorporate both the object casting the shadow and the shadow itself into the frame, making both part of the visual story.
3. Using Reflectors to Enhance Your Subject
Reflectors are simple tools that can have a big impact on your photos. They are great for controlling light and can be used to enhance your subject, soften shadows, or create more flattering light.
Fill in Shadows
One of the primary uses of a reflector is to fill in shadows, especially when you’re shooting in harsh sunlight. A reflector can bounce light back onto your subject, reducing the harsh shadows and creating a more even light across the image.
- Use White Reflectors: A white reflector creates a soft, neutral bounce of light that can fill in shadows without changing the color temperature of the light. This is perfect for portrait photography, where you want the subject’s face to be evenly lit without being too harsh.
- Use Gold or Silver Reflectors: Gold reflectors add a warm, golden glow to your subject, perfect for creating a sunset-like effect or enhancing the warmth of skin tones. Silver reflectors create a cooler, more intense bounce of light, making them ideal for brightening up dark areas.
Tip: Experiment with different reflector colors to see how they affect the mood and look of your photos.
Add Catchlights to the Eyes
A catchlight is the reflection of a light source in the eyes of your subject. Catchlights bring life to portraits by making the eyes sparkle and appear more expressive. Reflectors are a great way to add catchlights, especially when shooting outdoors or in soft lighting conditions.
- Position the Reflector Near the Subject’s Eyes: By positioning the reflector near your subject’s face, you can direct light into their eyes, creating a natural catchlight and making their eyes look bright and engaged.
Tip: Position the reflector at an angle to your subject’s face to ensure the catchlights are visible and look natural.
4. Combining Reflectors and Shadows for Artistic Effects
By combining reflectors and shadows, you can create powerful visual effects that enhance the overall composition and mood of your image. Here’s how you can use both elements together:
Use Shadows to Frame the Subject
Shadows can be used creatively to frame the subject or draw attention to certain parts of the image. By placing your subject near an object that casts interesting shadows, you can create a natural frame around your subject.
- Position Reflectors to Highlight the Subject: While the shadows add depth and dimension, use reflectors to highlight the subject, ensuring they remain the focal point of the image. The contrast between the shadowed areas and the lit subject will add visual interest and drama.
Tip: Try positioning the reflector at different angles to illuminate your subject without overwhelming the shadows. The key is to maintain balance between the light and dark areas.
Use Contrasting Shadows and Highlights
Contrasting shadows and highlights can add visual tension and drama to your photos. Play with light and shadow placement to create depth and dimension while ensuring the subject is well-lit by the reflector.
- Sharp Shadows for Drama: If you want to create a moody or dramatic image, use hard shadows combined with bright highlights on the subject. This creates a stark contrast and can evoke strong emotions in the viewer.
- Soft Shadows for Elegance: Soft shadows and gentle highlights create a more elegant, flattering look, perfect for portraits or lifestyle shots.
Tip: Experiment with the direction of the light, the size of the shadows, and the placement of the reflector to find the right balance for your desired artistic effect.
Final Thoughts
Reflectors and shadows are essential tools for any photographer looking to create more artistic and visually engaging photos. By using shadows creatively and manipulating light with reflectors, you can add depth, dimension, and drama to your images. Whether you’re capturing portraits, still life, or outdoor scenes, these techniques will help you create photos that tell a story and captivate your audience. So, grab your reflectors, experiment with light and shadows, and start capturing artistic photographs that stand out.
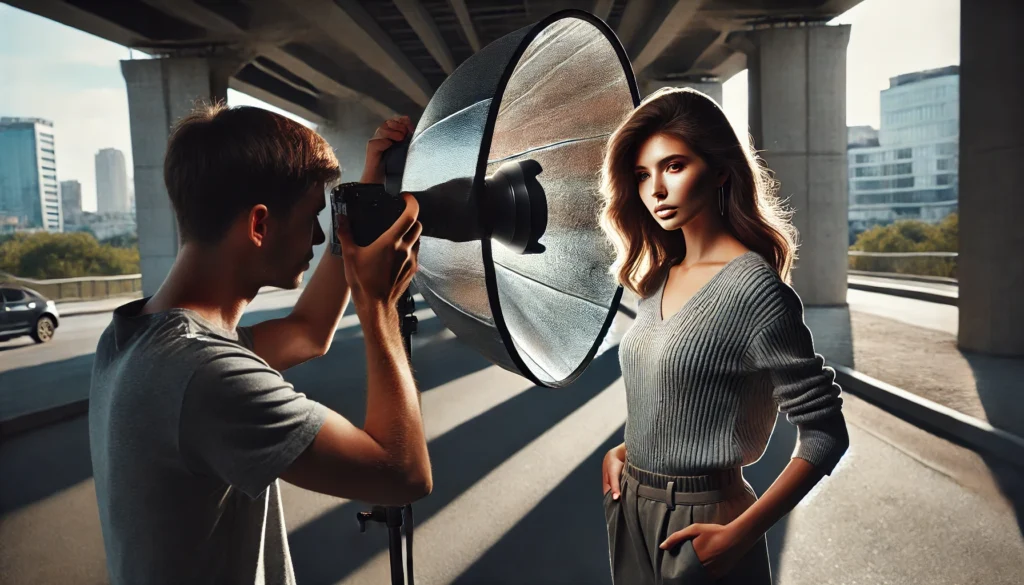
How to Use Special Effects in Photography to Surprise Your Followers
Photography is not just about capturing reality—it’s also about creating art and telling a story. One way to take your images to the next level and surprise your followers is by using special effects. These effects can add drama, intrigue, and creativity to your photos, making them more engaging and visually striking. Whether you’re shooting portraits, landscapes, or conceptual images, special effects can transform ordinary photographs into extraordinary ones. In this article, we’ll explore various techniques to incorporate special effects into your photography and how to use them to captivate your audience.
1. Use Long Exposure for Motion and Light Trails
Long exposure photography is a fantastic way to add movement and dynamism to your images. By using a slow shutter speed, you can capture the movement of subjects, lights, or even the natural environment. This technique allows you to turn what would otherwise be a still image into something that feels alive and in motion.
Light Trails
Light trails are one of the most common and captivating long exposure effects. They can be created by photographing moving lights, such as car headlights, streetlights, or sparklers. The result is a stunning visual effect that adds energy and intrigue to the image.
- How to Create Light Trails: To create light trails, set your camera to a slow shutter speed (usually between 5-30 seconds) and photograph moving light sources.
- Best Subjects: Cars, cyclists, or even fireworks can create beautiful, glowing trails.
Tip: Use a tripod to avoid camera shake, and experiment with different shutter speeds to find the ideal length for capturing the motion of the lights.
Smooth Water and Clouds
Long exposure can also be used to create smooth, ethereal effects with water or clouds. When photographing moving water (like rivers or oceans), a long exposure blurs the movement, creating a serene, misty look.
- Waterfalls and Rivers: Set your camera to a slow shutter speed to capture the flowing movement of water and smooth out rough surfaces.
- Clouds: Capturing clouds with a long exposure creates a soft, dreamy effect as they appear blurred and fluid.
Tip: Use an ND (Neutral Density) filter to reduce the amount of light entering your camera, allowing for longer exposure times even during the day.
2. Experiment with Reflections for Creative Effects
Reflections can add depth, symmetry, and visual interest to your images. Whether you’re shooting in a city with glass buildings, at a lake, or using a reflective surface like a mirror, reflections can be used to create artistic compositions and surprise your viewers.
Reflections in Water
Reflective surfaces like lakes, ponds, or puddles are perfect for creating stunning mirror images. These reflections can create a symmetrical, visually pleasing composition and add layers to your photo.
- Perfect for Landscapes and Portraits: Capture the reflection of a building, tree, or mountain in the water, or use the water’s surface to reflect your subject’s face in a portrait.
Tip: Shoot during golden hour when the light is soft and warm to enhance the reflection and add warmth to the image.
Using Mirrors or Glass
Mirrors and glass can create interesting layered effects and allow for creative compositions. You can experiment with positioning mirrors to reflect parts of your subject or create abstract images using glass surfaces.
- Self-Portraits: Use a mirror to capture self-portraits or unique angles of your subject, adding an extra dimension to the photo.
- Reflections in Glass Buildings: When photographing architecture, use the glass windows of buildings to capture reflections of your surroundings or the building itself.
Tip: Keep an eye on reflections that might distract from the main subject. The goal is to use them to enhance the image without creating visual clutter.
3. Create Motion Blur for Dynamic Effect
Motion blur is a special effect that can convey movement and energy in your photos. By intentionally blurring moving subjects, you can create a sense of speed or action, adding excitement and a unique perspective to your image.
Panning for Motion Blur
Panning is a technique where you follow the subject with your camera as it moves, using a slow shutter speed to capture the motion blur. This effect is commonly used in sports photography, car photography, or any scenario where you want to show the motion of a fast-moving subject.
- How to Do It: Use a slower shutter speed (around 1/30s or slower) and move your camera in the direction of the subject’s movement.
- Best Subjects: Cars, cyclists, runners, or animals in motion.
Tip: Practice panning with different shutter speeds to find the right balance between motion blur and sharpness of the subject.
Intentional Blur in Static Subjects
Motion blur can also be applied to static subjects by intentionally shaking the camera during the exposure. This effect can add an abstract, dreamlike quality to your images and surprise your viewers with something unexpected.
- How to Do It: Set your camera to a slower shutter speed (around 1/15s or slower) and slightly shake the camera during the exposure to create blurred motion.
- Best for Abstract Photography: This technique works best for subjects that don’t require sharp detail, such as landscapes, urban scenes, or street photography.
Tip: Use this effect sparingly, as it can be overwhelming if used in every image. It’s most effective when you want to create a sense of movement or mystery.
4. Experiment with Double Exposure for a Surreal Effect
Double exposure is a special effect that blends two images into one frame, creating a surreal or dreamlike composition. This effect can be used to combine portraits with landscapes, textures, or any other images that complement the main subject.
Create a Surreal Mood
To create a double exposure effect, you can either shoot two images and blend them in post-processing or use in-camera settings (available on some cameras). This effect is often used to convey deep emotions, add conceptual meaning, or create abstract art.
- Portrait and Landscape Combinations: A popular double exposure technique is to combine a portrait with a natural landscape or cityscape, creating an image that feels both personal and environmental.
- Overlay Textures: You can also overlay textures or patterns onto portraits, adding depth and complexity to the image.
Tip: Start with simple, high-contrast images to achieve the clearest double exposure effect. Experiment with different combinations to see what works best for your concept.
5. Play with Color Effects and Filters
Adding color effects and filters to your photos can dramatically alter their mood and tone, making them feel more artistic or stylized. Whether you use filters in-camera or in post-processing, color effects can help you surprise your followers with bold, unique images.
Use Color Grading for Mood
Color grading is a technique where you adjust the colors of your image to create a specific mood or atmosphere. You can warm up or cool down your photos, create vintage looks, or even use complementary colors to create striking contrasts.
- Cinematic Style: Use teal and orange color grading to create a cinematic look or apply a sepia tone for a vintage feel.
- Bold Colors: Play with unnatural, vibrant colors to create an eye-catching image that stands out from the crowd.
Tip: Use color grading sparingly and ensure it enhances the story you want to tell with your photo.
Apply In-Camera Filters
In-camera filters, such as colored gels or lens filters, can add creative effects during the shoot. These filters can create dramatic color shifts, distortions, or soft focus effects that aren’t easily replicated in post-processing.
- Colored Gels: Use gels to add colored light to your subject, creating a unique, otherworldly look.
- Soft Focus Filters: Use soft focus filters to create a dreamy, romantic look with a subtle blur.
Tip: Experiment with different filters and see how they change the mood of your photo. In-camera filters can add spontaneity and surprise to your work.
Final Thoughts
Special effects are a powerful tool for adding creativity, surprise, and intrigue to your photography. By experimenting with techniques like long exposure, reflections, motion blur, double exposure, and color effects, you can create visually stunning images that captivate your audience and stand out on social media. The key is to think outside the box, push the boundaries of traditional photography, and have fun with the process. So, grab your camera, try these effects, and watch your images come to life in new and exciting ways!
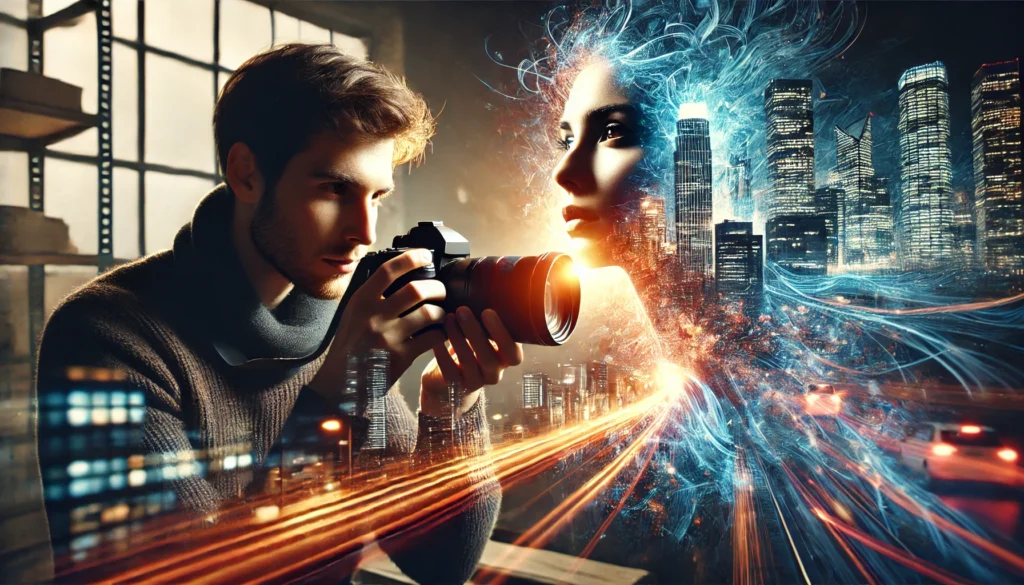
How to Use the Bokeh Effect in Your Portrait Photography
Introduction
The bokeh effect is one of the most popular and visually appealing techniques used in portrait photography. This blur effect in the background helps emphasize the subject and adds a sense of depth to your images. In this article, we’ll explore what bokeh is, how to achieve it in your photos, and how to use it to create stunning portrait shots.
What is the Bokeh Effect?
Bokeh, derived from the Japanese word “boke,” refers to the quality of the out-of-focus areas in a photograph. The term is often used to describe the aesthetically pleasing blur that occurs when a photographer uses a shallow depth of field. The quality of bokeh is influenced by the lens used, aperture settings, and the distance between the subject and the background.
How to Achieve Bokeh in Portrait Photography
To create beautiful bokeh in your portrait photography, follow these simple steps:
- Use a Wide Aperture (Low f-stop): A larger aperture (smaller f-number, such as f/1.4, f/2.8) creates a shallow depth of field, which will result in more blur in the background and emphasize the subject.
- Increase the Distance Between Subject and Background: The greater the distance between your subject and the background, the more pronounced the bokeh will be.
- Use Longer Focal Lengths: Telephoto lenses (such as 85mm or 135mm) are ideal for creating strong bokeh. They naturally compress the scene and enhance background blur.
- Position the Light Effectively: The bokeh effect can be enhanced by using light sources in the background, such as city lights, street lamps, or fairy lights.
Tips for Improving the Bokeh Effect
- Experiment with Lens Choice: Different lenses produce different types of bokeh. Prime lenses, especially those with wide apertures like the 50mm f/1.8 or 85mm f/1.4, are popular for portraiture.
- Use Creative Backgrounds: For added creativity, try using textured or patterned backgrounds like leaves, lights, or reflections. The shapes of these elements can affect the appearance of the bokeh.
- Maintain Proper Focus on the Subject: While the background is blurred, it’s crucial to keep your subject in sharp focus to ensure that the portrait remains the center of attention.
Conclusion
The bokeh effect is a powerful tool in portrait photography. By mastering the use of a wide aperture, adjusting the focal length, and positioning your subject and background correctly, you can create portraits with a beautiful, blurred background that highlights the subject and adds artistic depth to your photos.
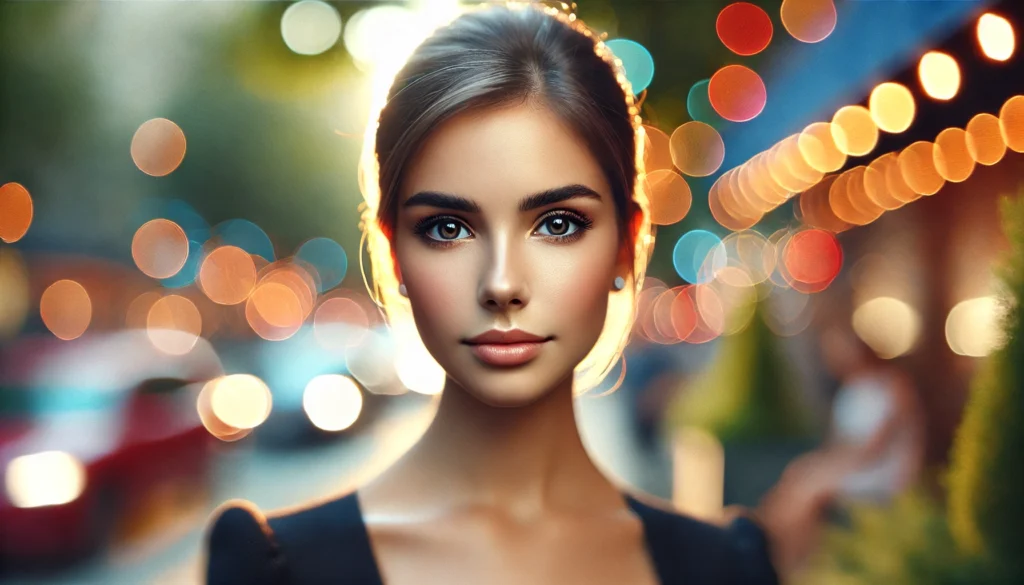
Tips to Improve Your Interior Architecture Photography
Introduction
Interior architecture photography is a specialized genre that captures the beauty, design, and structure of interior spaces. Whether you’re photographing homes, offices, or commercial spaces, there are specific techniques you can use to elevate the quality of your images. In this article, we’ll share expert tips on how to improve your interior architecture photography and create striking, professional images.
1. Use a Wide-Angle Lens
A wide-angle lens is essential for interior photography, as it allows you to capture more of the space in a single shot. Lenses in the 14mm to 24mm range for full-frame cameras are great for capturing tight spaces or large rooms. A wider field of view helps emphasize the design and layout of the interior.
2. Pay Attention to Composition
The composition of your shots is key to creating a balanced and visually appealing image. When shooting interiors, try the following:
- Use the Rule of Thirds: Place key elements (such as furniture or architectural features) along the lines or intersections of the grid to create a sense of harmony.
- Straight Lines: Ensure that walls, windows, and doorframes are aligned straight, avoiding any distortion. Use a tilt-shift lens to minimize perspective distortion if needed.
- Depth and Layers: To add depth, include foreground elements like furniture, plants, or décor that lead the viewer’s eye into the space.
3. Lighting is Crucial
Lighting plays a huge role in interior architecture photography. Here are a few tips for controlling light:
- Natural Light: Use natural light from windows to create a soft, inviting atmosphere. Shoot during the golden hour (early morning or late afternoon) for warm, pleasant lighting.
- Supplementary Lighting: If the space is dim or you need to enhance specific areas, consider using artificial lighting such as softbox lights, LED panels, or floor lamps. Keep lighting consistent throughout the room to avoid harsh contrasts.
- Avoid Mixed Lighting: Different light sources (such as tungsten bulbs and daylight) can create color inconsistencies in your images. Use a color temperature balance to ensure a cohesive look.
4. Use a Tripod for Stability
Interior photography often requires long exposure times to capture enough light, especially in dimly lit rooms. A tripod is essential to prevent camera shake and ensure sharp images. It also allows you to shoot at lower ISO settings, which reduces noise and improves image clarity.
5. Shoot Multiple Exposures
For scenes with a wide range of light (bright windows and dark interiors), shoot multiple exposures with different settings (bracketing). You can later combine these images in post-processing to create an image with optimal exposure throughout, ensuring that both the bright and dark areas are properly exposed.
6. Post-Processing Tips
Post-processing is crucial in interior photography to enhance details and correct any imperfections. Some key steps include:
- Correcting Perspective: If using wide-angle lenses, you may experience lens distortion. Use editing software (like Lightroom or Photoshop) to straighten vertical lines and correct any barrel distortion.
- Color Correction: Adjust the white balance to ensure colors look natural and accurate, particularly when mixing artificial and natural light sources.
- Enhancing Details: Use selective sharpening to bring out textures in materials like wood, metal, or fabric, making the interior look more detailed and crisp.
Conclusion
Improving your interior architecture photography involves mastering a combination of techniques, from using the right lens and composition to controlling lighting and post-processing. With these tips, you can elevate your photos and create stunning images that showcase the beauty and design of any interior space.
Corporate Event Photography: How to Capture Important Moments
Introduction
Corporate events, from conferences to gala dinners, offer unique opportunities for photographers to capture moments that tell the story of a company’s success, culture, and achievements. These events are crucial for marketing, PR, and internal communication, which is why it’s essential to get the right shots. In this article, we will discuss how to capture important moments at corporate events and provide tips for delivering high-quality images to clients.
1. Understand the Event’s Purpose
Before you even pick up your camera, take time to understand the event’s objectives. Is it a conference, a team-building event, a product launch, or a celebration of company milestones? Knowing the purpose will help you anticipate key moments and focus on the people, activities, and elements that reflect the core theme of the event.
- Product Launches: Capture moments that showcase the product, audience reactions, and key speakers.
- Conferences or Seminars: Focus on speakers, audience engagement, and the general atmosphere of learning.
- Gala Dinners or Award Ceremonies: Photograph key moments like awards being handed out, speeches, and group photos.
2. Prepare for the Event
Corporate events are fast-paced, and preparation is key to capturing every important moment. Here are a few tips for being fully prepared:
- Arrive Early: Arriving ahead of time gives you the opportunity to get familiar with the venue, the lighting conditions, and the event schedule. It also allows you to take establishing shots of the venue before guests arrive.
- Check the Schedule: Get an overview of the event’s itinerary so you know when the key moments are happening. This includes speeches, panel discussions, product demos, or entertainment segments.
- Equipment Checklist: Ensure you have the right gear. A DSLR or mirrorless camera with a variety of lenses (wide-angle, portrait, and zoom lenses) will cover most situations. A flash or lighting kit is also essential, especially in poorly lit venues.
3. Capture Key Moments
Corporate events often feature key moments that require your attention and expertise. Some of the most important things to photograph include:
- Speakers and Presentations: Focus on capturing speakers in action, with audience interaction if possible. A close-up of the speaker, along with wide shots of the audience, will help convey the energy of the event.
- Networking and Interactions: Many corporate events involve networking, which is an essential part of the experience. Look for candid shots of people shaking hands, exchanging business cards, or engaging in meaningful discussions.
- Group Shots: At the end of a conference or seminar, clients often request group photos of the attendees or speakers. Make sure to gather everyone, ensure they’re aligned properly, and capture the moment with natural expressions.
- Award Presentations: When presenting awards, capture both the recipient’s reaction and the moment they receive their trophy or certificate.
4. Focus on Details
While large moments are important, so are the small details that tell the story of the event:
- Venue Details: Photograph the event space, especially if it’s uniquely decorated or features impressive branding.
- Food and Drink: If the event has catering or a buffet, consider shooting close-up shots of food and drink displays, especially for events like galas or corporate parties.
- Event Branding: Take photos of banners, signage, and other branding elements that represent the company hosting the event. These can be useful for marketing materials or future campaigns.
5. Lighting Tips
Event spaces can have varying lighting conditions, so you need to be prepared to adapt. Here are some tips for handling lighting at corporate events:
- Use Natural Light When Possible: If the event is in a well-lit area, use available light to keep the atmosphere relaxed and natural.
- Utilize Flash and External Lights: In dimly lit venues, you may need to use a flash or external lighting equipment to enhance your shots. Softbox lights can provide even lighting, while a bounce flash helps avoid harsh shadows.
- Avoid Overexposing: Be cautious with bright spots or backlit subjects, especially during speeches or presentations. Use manual settings or exposure compensation to avoid overexposure.
6. Post-Processing for Corporate Event Photography
Post-processing is crucial to ensuring your images look polished and professional. Here are some key steps in editing:
- Correct Color and Exposure: Adjust the white balance to ensure colors are accurate and warm, particularly in indoor settings with mixed lighting.
- Cropping and Framing: Crop images to remove unnecessary distractions and improve the composition.
- Retouching: Remove any blemishes, distractions, or imperfections from the photos, but keep the edits natural to maintain authenticity.
Conclusion
Corporate event photography is about more than just taking pictures—it’s about capturing the essence of the event and telling the story of the company’s culture and achievements. By understanding the event’s purpose, preparing in advance, focusing on key moments, and mastering your lighting and post-processing techniques, you can create high-quality images that clients will appreciate for marketing, documentation, or internal use.

The Difference Between Professional and Amateur Photography
Introduction
The line between professional and amateur photography may seem blurry to some, but there are distinct differences that set apart the work of seasoned photographers from those who take pictures as a hobby. Professional photographers have mastered the technical and artistic aspects of photography, while amateurs are still refining their skills. In this article, we will explore the key differences between professional and amateur photography, from gear and technique to post-processing and client expectations.
1. The Level of Technical Knowledge
One of the biggest differences between professional and amateur photographers is their level of technical knowledge. Professionals have a deep understanding of how cameras, lenses, and other equipment work, as well as how to optimize these tools for specific situations.
- Manual Mode Mastery: Professionals are experts at using manual mode on their cameras, controlling shutter speed, aperture, and ISO to achieve the perfect exposure. Amateurs, on the other hand, may rely more on automatic settings or presets.
- Advanced Techniques: Professional photographers use advanced techniques such as long exposure, high dynamic range (HDR), focus stacking, and macro photography. Amateurs may still be learning and experimenting with basic techniques like composition and lighting.
2. Use of Professional Equipment
While amateurs often rely on entry-level cameras and lenses, professionals typically invest in high-end gear designed for maximum performance and versatility. Here’s a breakdown of the gear differences:
- Camera Bodies: Professional photographers use cameras with higher megapixel counts, better low-light performance, and advanced features like dual card slots for backup. Professional-grade cameras, such as the Canon EOS 5D Mark IV or the Nikon D850, are designed for reliability and durability in challenging conditions.
- Lenses: A pro photographer will own a variety of lenses suited for different types of photography, including prime lenses with wide apertures (for portraiture) and telephoto lenses (for wildlife or sports photography). Amateurs may use kit lenses or a limited range of lenses.
- Accessories: Professionals also use accessories like tripods, external flashes, reflectors, and softboxes to ensure optimal lighting and composition. These accessories allow them to have full control over every aspect of the shoot.
3. Creative Vision and Composition
Professional photographers have a unique creative vision and know how to compose images in ways that draw the viewer’s eye and convey emotion. Composition is a key factor in differentiating pro images from amateur ones.
- The Rule of Thirds: Professionals master the rule of thirds and other compositional techniques like leading lines, symmetry, and framing. They understand how to use these techniques to create visually engaging images.
- Storytelling: Every image captured by a professional tells a story. Whether it’s a wedding, a portrait session, or a documentary shoot, the photographer uses composition, lighting, and subject placement to communicate a narrative.
- Attention to Detail: Professionals are meticulous about details. They know how to eliminate distractions, adjust the background, and enhance the subject to create a balanced and powerful composition.
4. Post-Processing and Editing
Post-processing is where much of the magic happens in photography. Professional photographers spend a significant amount of time editing their images to ensure they meet the highest standards of quality.
- Advanced Editing Software: Professionals use software like Adobe Lightroom and Photoshop to fine-tune images, adjust exposure, and enhance colors. They also use tools like noise reduction, sharpening, and retouching to create polished, professional-looking photos.
- Non-Destructive Editing: Professional photographers understand the importance of non-destructive editing, where changes are made using layers and masks, allowing them to revert back to the original image if necessary.
- Color Grading: Professionals often apply color grading techniques to give their photos a cohesive look, enhancing mood and tone. This is especially important for commercial photography, where consistency is key.
5. Client Expectations and Professionalism
One of the biggest differences between amateur and professional photographers is the level of professionalism when dealing with clients. Professional photographers are accustomed to working with clients, understanding their needs, and delivering high-quality results under pressure.
- Contracts and Agreements: Professionals understand the importance of formal contracts that outline the scope of work, payment terms, and usage rights for images. Amateurs may not be as familiar with these legalities and may not offer formal agreements.
- Time Management: Meeting deadlines is essential in professional photography. Professionals are skilled at managing their time, delivering images promptly, and ensuring the client is satisfied. Amateurs may not be as efficient in managing a large workload.
- Customer Service: Professionals go above and beyond to ensure that their clients are happy, offering a high level of customer service, from initial consultations to final image delivery. They know how to handle client feedback and make revisions as needed.
6. Experience and Portfolio
A professional photographer has years of experience and a well-curated portfolio that showcases their best work. A portfolio is essential for attracting clients and demonstrating expertise in a particular niche.
- Specialization: Many professionals specialize in specific areas such as portrait, wedding, commercial, or fashion photography. This specialization allows them to develop expertise in those areas and consistently produce high-quality work.
- Building Reputation: Professionals build their reputation over time by consistently delivering exceptional work. They also receive testimonials, reviews, and referrals from clients, which further solidify their position in the industry.
Conclusion
While both professional and amateur photographers share a passion for capturing images, the differences in technical knowledge, equipment, creativity, editing skills, and client expectations set them apart. Professionals have honed their craft over time, developed a creative vision, and mastered their gear, while amateurs are still in the process of learning and experimenting. By understanding these differences, aspiring photographers can better assess where they are in their journey and what they need to improve to take their photography to the next level.