Introduction
Setting up a simple and affordable lighting setup at home is easier than it seems. With creativity and basic knowledge, it’s possible to achieve professional results using accessible resources.
In this article, we’ll show you how to create a well-lit environment for photography or videos using low-cost materials. The goal is to democratize access to quality lighting, even on a limited budget.
Both beginners and professionals will find practical tips to assemble a functional and efficient setup without leaving home.
The importance of lighting in photography
How light transforms the image
Light is the main element in any photograph. It defines shapes, textures, volumes, and even the mood of the image. Good lighting enhances the photographed subject and makes post-editing easier. In controlled lighting environments, it’s easier to maintain visual consistency between different sessions.
Natural light vs. artificial light
Natural light is abundant and free, but also unstable. Artificial light, on the other hand, offers complete control: intensity, direction, and temperature. A simple and affordable lighting setup can combine both sources for greater versatility. At times like early morning or late afternoon, natural light reaches its ideal point, offering soft and diffused lighting.
Accessible materials to get started
Essential equipment
To build your basic setup, you’ll need:
- Light source (LED lamps, desk lamp, or ring light)
- Light modifier (parchment paper, nonwoven fabric, or white sheet)
- Improvised reflector (cardboard with aluminum foil or white poster board)
- Support or tripod (or a stack of books, if preferred)
Efficient homemade solutions
Everyday objects can replace expensive gear. For example:
- Cardboard box with parchment paper as a softbox
- Small mirrors to bounce light
- Translucent curtains to soften sunlight
- Aluminum foil on foam board to direct light more precisely
Step-by-step setup guide
Choosing the location
Choose a room with light-colored walls, good ventilation, and access to natural light. This reduces the need for artificial lighting and improves light diffusion. Avoid rooms with many colored walls, as they may affect the image’s color temperature.
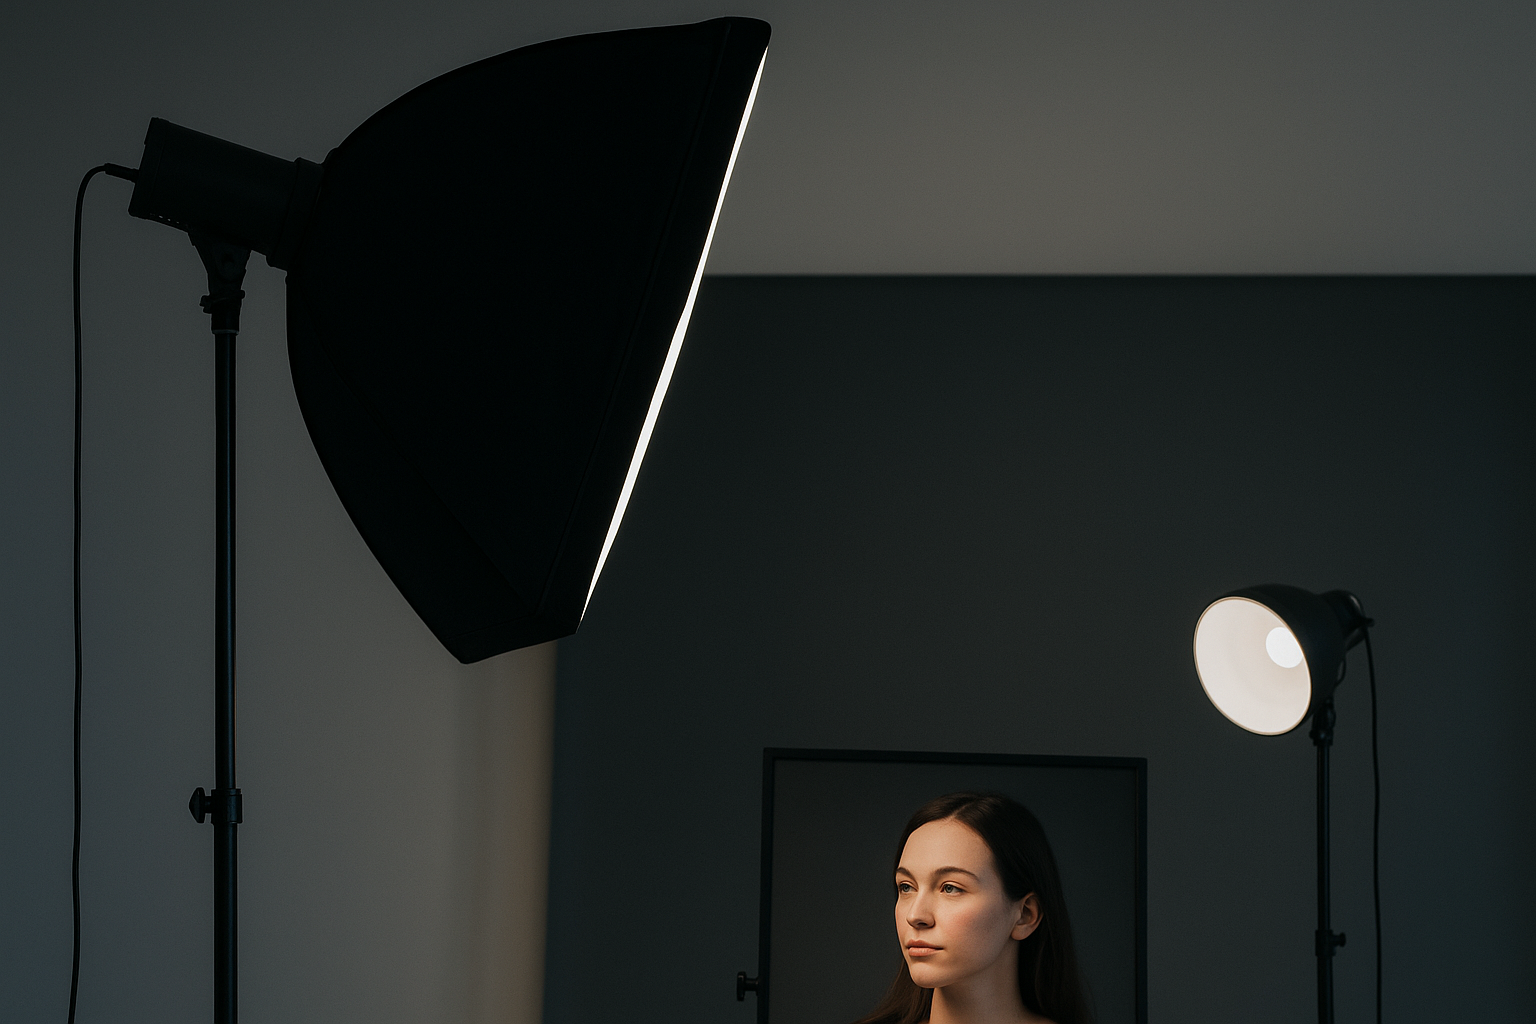
Light positioning
- Place the main light (key light) at a 45º angle to the subject.
- Use a reflector on the opposite side to soften shadows.
- Optionally, add a backlight to create separation.
- Use diffusers to control intensity and avoid direct glare into the subject’s eyes.
Controlling shadows and reflections
Use diffusers to avoid harsh shadows. If the photographed surface is reflective, adjust the light angle or apply filters to reduce excessive glare. Position elements at different distances from the background to add depth and eliminate unwanted shadows.
Tips to enhance lighting on a budget
Economical LED lighting
White LED lamps (5500K) are ideal for photography. They don’t overheat, have good durability, and consume little power. Rechargeable versions are great for mobile setups and save money in the long run.
DIY reflectors and modifiers
Use white poster board as a reflector or foam board to fill shadows. A regular white umbrella can act as a diffuser when placed between the light and the subject. You can also use an opened milk carton as a homemade light directional tool.
Support apps
Free apps like Lux Light Meter or LightMeter help evaluate light intensity. This way, you can fine-tune exposure even without professional gear. Many of these apps simulate light meters and suggest aperture and ISO settings based on ambient readings.
Practical setup examples
For portraits
Soft side lighting, reflector on the opposite side, neutral background. Use a desk lamp with parchment paper to diffuse light. Position the model one meter away from the wall to avoid harsh background shadows.
For videos and live streams
Frontal lighting at eye level, diffuser to reduce skin shine, and softly lit background for depth. A secondary light in the background can help separate the speaker from the environment.
For product photography
Use top and side lighting with a white background and side reflectors. This highlights the object and eliminates harsh shadows. Try shooting inside a homemade lightbox made from cardboard and parchment paper.
Common mistakes to avoid
- Mixing warm and cool light in the same scene
- Placing the light directly over the face
- Using reflective surfaces without control
- Leaving the background under- or overexposed
- Ignoring the camera’s white balance, which can affect color accuracy
Master lighting with simplicity
With planning and creativity, it’s possible to build a simple and affordable lighting setup and still produce professional-quality images. The key lies in controlling light—not in how much you spend. Try different configurations, observe the results, and adjust as needed.
Good lighting is within your reach. You just need to know where to position it, how to diffuse it, and when to test it. Now it’s your turn!


