Introduction
Learning how to use reflectors in lighting is a fundamental step for anyone looking to master light in photography. Reflectors are simple, accessible, and incredibly versatile tools that can completely transform the quality of an image.
Whether in professional studios or outdoor photo shoots, reflectors help control shadows, direct light, and balance contrast—all without adding artificial light sources.
In this article, you’ll learn how to choose, position, and use reflectors effectively, taking your photos to a new level of visual quality.
What Are Reflectors in Photography?
Purpose and Function
Reflectors are surfaces that redirect existing light (natural or artificial) to specific areas of a scene. They do not produce light but rather reflect it to fill in shadows or highlight details.
They are especially useful when there is only one light source and the photographer needs to soften contrast or illuminate secondary areas of the subject. Additionally, reflectors simulate secondary light sources, adding depth and richness to the image.
Why Are They So Important?
Reflectors allow precise control of light without relying on expensive or complex equipment. With just a simple white board or a portable reflector, you can:
- Shape a subject’s face;
- Highlight details in a product;
- Soften shadows in outdoor environments;
- Create atmosphere with reflected light;
- Enhance texture and contours;
- Guide the viewer’s attention effectively.
Furthermore, reflectors are sustainable tools, as they utilize existing light strategically, reducing energy consumption in photography productions.
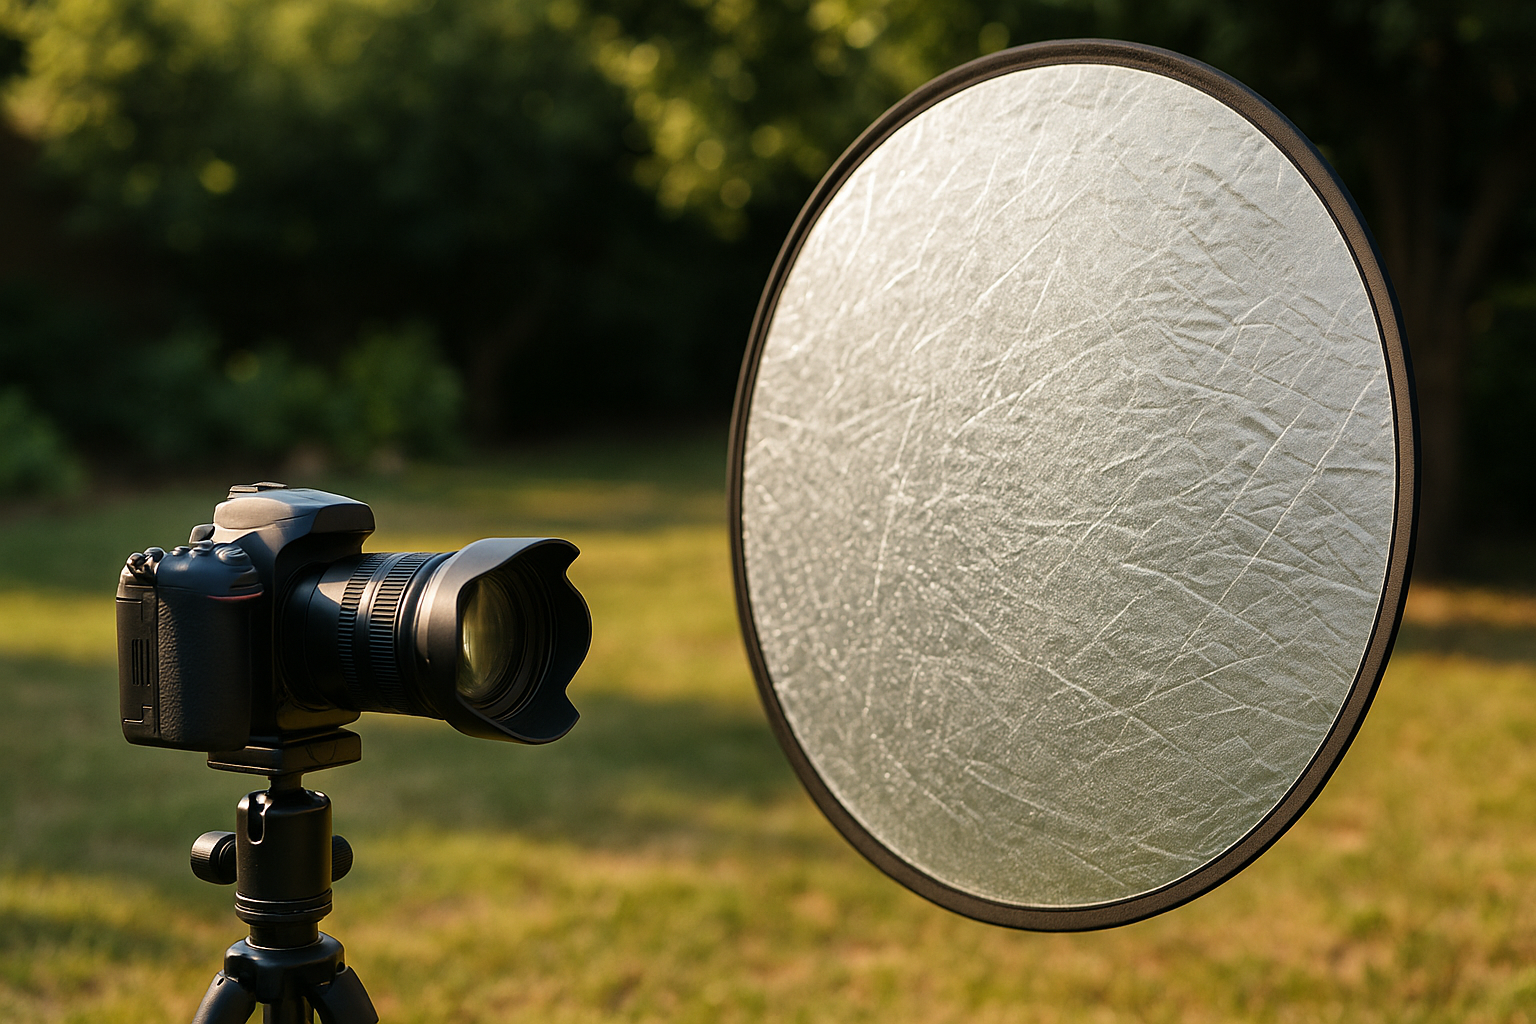
Types of Reflectors and Their Characteristics
Foldable Reflectors (5-in-1)
These are the most common on the market. They consist of a flexible frame with interchangeable surfaces:
- White: soft and neutral reflection;
- Silver: high intensity, cooler and brighter light;
- Gold: warm light, ideal for skin tones;
- Black: blocks or enhances shadows;
- Translucent: diffuses direct light.
These reflectors are compact, foldable, and easy to carry—ideal for photographers who work in various locations.
Rigid Panels and DIY Surfaces
You can improvise reflectors using:
- Styrofoam boards (cheap and effective);
- White or laminated poster board;
- Mirrors (for intense and focused reflection);
- Stretched white fabric;
- PVC or painted wood panels.
Creativity is a powerful ally when working on a tight budget. Many professional photographers use homemade solutions with excellent results.
Colors and Materials: White, Silver, Gold, Black, and Translucent
Each color has a unique impact:
- White: ideal for soft fill without color shift;
- Silver: great for enhancing eyes, hair, or metallic objects;
- Gold: warms the scene, flattering darker skin tones;
- Black: used as a “flag” to control or block light;
- Translucent: softens harsh light, creating even illumination.
Always align your reflector choice with the image’s visual intent and the scene’s color palette.
How to Choose the Ideal Reflector for Each Situation
Outdoor Photography vs. Studio Work
- Outdoors: opt for lightweight and foldable reflectors. Silver and gold are useful under direct sunlight, great for quick sessions and mobility.
- Studio: larger reflectors or fixed panels can be mounted on stands. White and translucent reflectors provide control and consistency.
Color Temperature Control
Reflector color affects the tone of reflected light:
- White maintains neutrality and doesn’t affect skin tones;
- Gold warms the image—ideal for golden hour lighting;
- Silver slightly cools the image, useful for daylight balance.
This subtle variation can enhance your creative storytelling.
Portability and Cost-Effectiveness
5-in-1 reflectors are compact, affordable, and versatile. Styrofoam and poster board are inexpensive and effective for home use. Ideally, have multiple options for different contexts and shooting styles.
If you work solo, consider reflectors with adjustable arms or articulating stands. These offer flexibility and independence during shoots.
Techniques for Using Reflectors Effectively
Filling Shadows
Use reflectors on the opposite side of the light source to soften shadows on the face or subject. Perfect for outdoor portraits with harsh side lighting or to balance sunlight and shadow.
Directing Natural Light
In indoor environments with windows, position reflectors strategically to redirect light and balance scene exposure. You can simulate side lighting using only daylight and a well-placed reflector.
Creating Contrast and Depth
In addition to softening shadows, reflectors help define volume. Bouncing light on specific body parts creates contrast and emphasizes form, adding dimension and visual interest.
Bouncing Light from Flash or Continuous Sources
Use reflectors to redirect flash light, simulating multiple sources. They also work well with LED or spotlights to create side light or fill. Position reflectors close to the main light to subtly reinforce light direction.
Strategic Reflector Positioning
Angle, Height, and Distance
- Position the reflector at a 45º angle to the subject for soft fill.
- Adjust height to avoid reflections in the eyes or shiny surfaces.
- Distance affects intensity: the closer it is, the stronger the fill.
Experiment with small adjustments and observe how the light changes with each variation. Light control starts with a trained eye.
Reflector with Assistant vs. Floor Stand
- With assistant: offers quick and flexible angle changes, especially in dynamic environments.
- With stand: more stability, ideal for solo photographers or video work.
Some stands have articulating arms for precise placement, useful in complex lighting setups.
Tips to Avoid Unwanted Shadows
Avoid placing the reflector directly below or above the subject’s face, which can create vertical shadows or harsh highlights. Always test the effect before shooting.
Also, ensure the reflector doesn’t alter the direction of the original light source—unless that’s your creative goal.
Practical Use Examples
Outdoor Sessions with Natural Light
- Use a silver reflector to enhance sunlight in late afternoon portraits.
- Use a white reflector under the face to illuminate the eyes and soften dark circles.
- In backlight situations, a reflector can recover facial details.
Studio Setup with Flash and Reflector
- Side flash as key light + white reflector on the opposite side for fill.
- Add gold reflector to warm skin tones in fashion portraits.
- Combine with black background and rim light for dramatic portraits.
Product Photography with DIY Reflectors
- Place white poster board on both sides of the object to reduce shadows.
- Use Styrofoam under the product to light the base and define contours.
- Try small mirrors to create highlights in specific spots.
Common Mistakes and How to Avoid Them
Overexposure in Reflected Areas
Reflectors too close or angled directly at the subject can blow out highlights. Adjust angle and distance to soften the effect.
Wrong Color That Alters Skin Tone
Too much gold can turn skin orange. Silver can create a metallic look when overused. Test each color per scene and fine-tune with white balance adjustments.
Unwanted Reflections and Glare
Avoid pointing reflectors at reflective surfaces like glasses or chrome. This can cause lens flare or exaggerated light spots. Use diagonal angles to minimize risk.
Master Light Creatively with Reflectors
Mastering the use of reflectors in lighting is one of the simplest and most effective ways to control light without relying on expensive gear. With creativity and observation, you can transform any light source into an expressive tool.
Explore different colors, distances, and angles. Practice in various lighting conditions and times of day. Observe how the reflector affects mood, detail, and imperfections.
Reflectors are not just technical accessories—they are creative allies that expand the possibilities of any photographer committed to lighting quality and strong visual storytelling.
With technical mastery and aesthetic sensibility, the reflector becomes more than a tool—it becomes an extension of the photographic eye.


