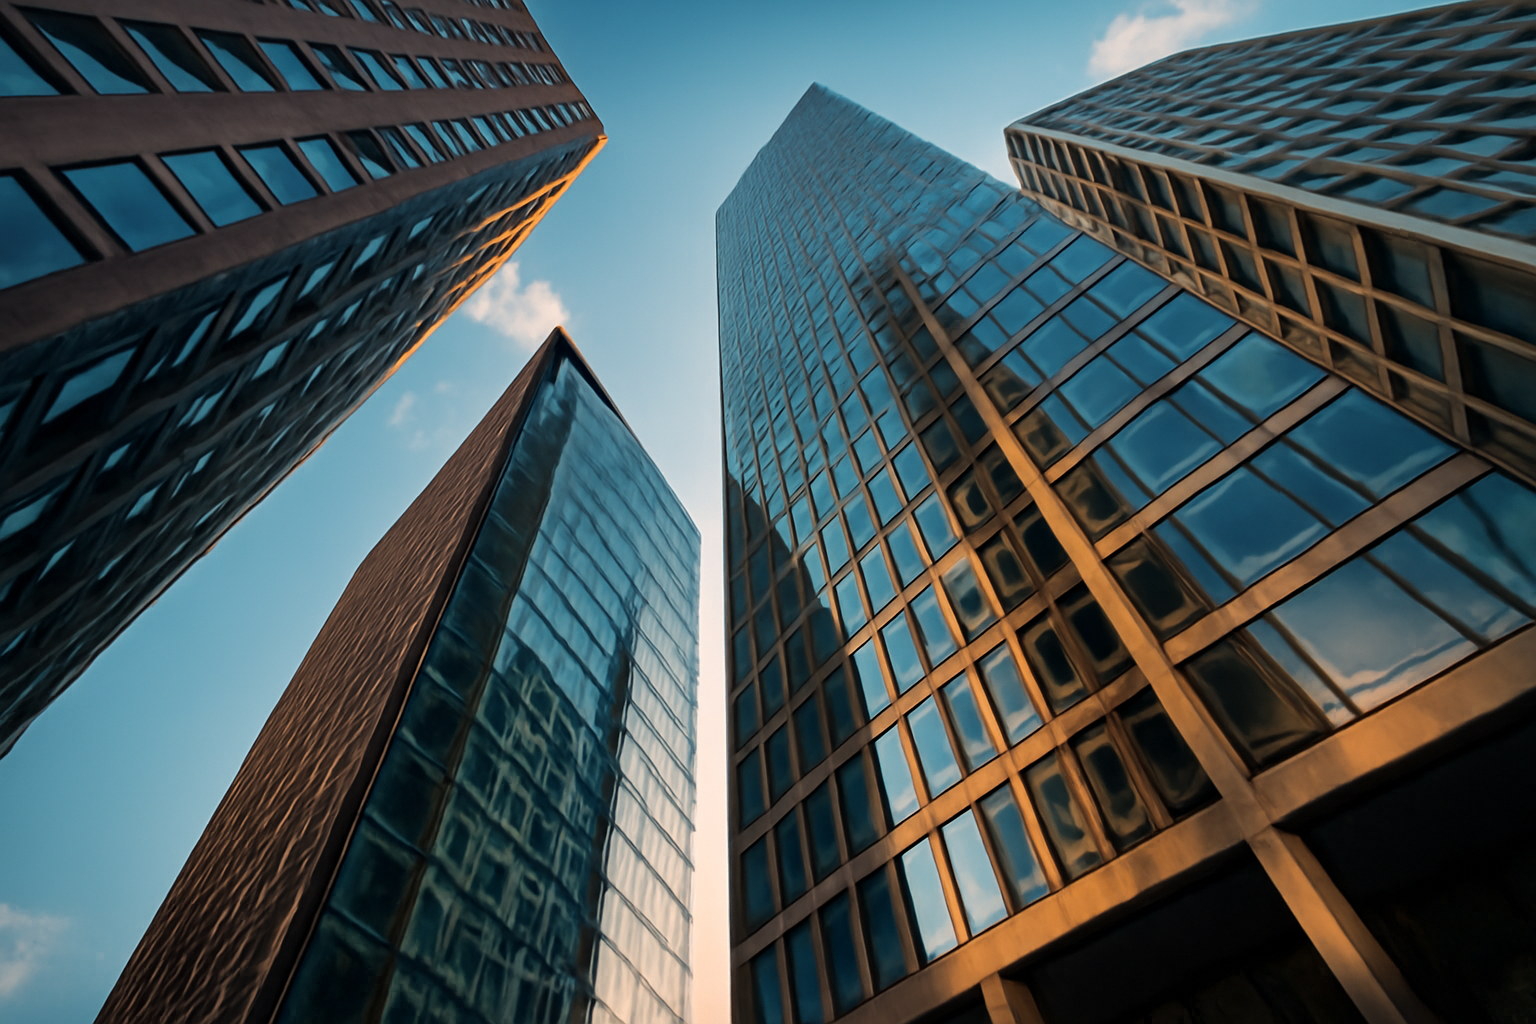
Architecture photography has its own technical and creative demands. Capturing the grandeur and details of a structure requires not only good composition but also precise editing to enhance the lines, shapes, and perspectives of the buildings. Photoshop offers powerful tools to improve and perfect your architecture photos, whether it’s correcting distortions, adjusting light, or enhancing the details. In this article, we will explore how to use Photoshop to enhance your architecture photos and create professional and impressive images.
1. Preparing the Image in Photoshop
Importing the Image
The first step in editing your architecture photos in Photoshop is importing the image. Open the program, click File > Open, and select the architecture photo you want to edit. If possible, create a copy of the image so the original file remains intact during the editing process.
Organizing the Layers
Working with layers is essential in Photoshop. If you’re making significant changes, such as color adjustments, brightness, and distortions, keep the original layer intact and create a duplicated layer for the edits. This will allow you to easily return to the original image if needed.
Tip: Organize your layers clearly and name them to avoid confusion, especially when working with multiple complex edits.
2. Correcting Distortions and Perspective
Correcting Perspective with the Transformation Tool
In architecture photos, it’s common for vertical and horizontal lines to become distorted due to the shooting angle. The transformation tool in Photoshop lets you correct these distortions by aligning the vertical and horizontal lines so that they appear straight.
Step-by-Step:
- Select the image layer.
- Go to Edit > Transform > Distort or use Ctrl+T (Cmd+T on Mac) to enter the transformation mode.
- Adjust the handles to correct the lines in the photo, ensuring the vertical and horizontal lines are aligned properly.
Tip: Using guides can help ensure that the lines are truly straight. To add guides, go to View > Guides.
Using the Lens Correction Tool
If the distortion in the perspective is more complex, you can use the Lens Correction Tool. Go to Filter > Lens Correction, and in the panel that appears, enable the perspective correction option. This will automatically adjust the perspective of the photo to a more natural and realistic view.
Tip: Always check that the perspective of the buildings is correct. Architecture requires precision, and correcting the perspective helps avoid a “tilted” or “skewed” image.
3. Adjusting Exposure and Contrast
Adjusting Exposure with Adjustment Layers
The exposure control is essential to ensure that the details in the shadows and the lighter areas of the photo are visible. Photoshop offers adjustment layers that allow you to alter the exposure of the image in a controlled manner.
Step-by-Step:
- Create an Exposure Adjustment Layer (click on the adjustment layers icon at the bottom of the layers palette and select Exposure).
- Adjust the exposure, offset, and gamma to correct the brightness of the image and reveal more details.
Tip: When editing architecture photos, be mindful of highlight areas, such as reflections in windows and facades. Use the highlight control to avoid losing details in those areas.
Adjusting Contrast with the Curves Tool
To increase the depth and sharpness of the lines and shapes in the photo, you can use the Curves Tool. This tool allows for much more precise contrast adjustments than the basic contrast control.
Step-by-Step:
- Create a Curves Adjustment Layer and open the Curves Panel.
- Adjust the curve to increase the dark areas (shadows) and the light areas (highlights), creating a sharp and dynamic contrast.
Tip: Be careful not to overdo the contrast, as it can make the image look artificial. Use subtle adjustments to maintain a natural look.
4. Enhancing Colors and Details
Adjusting Color Balance with Hue/Saturation Tool
If the color in the image is faded or unbalanced, you can use the Hue/Saturation Tool to adjust the colors in the photo. This is especially useful when you need to enhance the colors of the buildings or correct unwanted colors like green or magenta tones.
Step-by-Step:
- Create a Hue/Saturation Adjustment Layer.
- Adjust the hue to change the tone of the colors and the saturation to intensify the colors.
Tip: For architecture photos, try to keep the colors natural and avoid going overboard. Use the luminance tool to adjust the intensity of the color without changing the overall contrast of the image.
Using the Adjustment Brush
The Adjustment Brush tool allows for localized adjustments to specific areas of the photo. In architecture photos, this can be useful for improving details such as the texture of walls, windows, or architectural features.
Step-by-Step:
- Select the Adjustment Brush from the toolbar.
- Adjust the exposure, clarity, and saturation controls as needed.
- Paint over the areas you want to enhance, such as shadows under beams or the brightness of windows.
5. Creating Creative Effects in Architecture Photos
Adding Vignette to Focus on the Subject
The vignette technique can be used to add a subtle darkening effect to the edges of the photo, helping focus attention on the center of the image. This can be useful to highlight the main architectural feature of the photo, such as the facade of a building or a tower.
Step-by-Step:
- In the Filter panel, enable the Vignette option.
- Adjust the intensity to achieve a soft, subtle effect.
Tip: Use the vignette effect moderately to keep the photo looking natural and not overly stylized.
Adding Graphic Elements
Adding graphic elements such as lights, reflections, or abstract patterns can help create a more interesting composition. Photoshop offers tools to import and manipulate these elements.
Step-by-Step:
- Create a new layer for the graphic element.
- Use the Shape Tool to draw geometric elements or import external images to create the desired effect.
6. Finalizing the Edit and Saving the Image
Final Adjustments
After applying all the effects and adjustments, review the image to ensure that the architectural lines are well-defined and the colors are balanced. Make sure the shadows and highlights are in harmony, and the focus is on the main point of interest.
Saving and Exporting the Image
When you’re satisfied with the edit, export the image in a suitable format for printing or social media. For print, choose a 300 dpi resolution, and for online use, select a 72 dpi resolution to ensure good web optimization.
Tip: For social media, adjust the image size to 1200px wide to ensure the best quality and optimization.
Conclusion: Enhancing Your Architecture Photos with Photoshop
Photoshop is a powerful tool for improving your architecture photos. By using techniques for perspective correction, exposure adjustments, color enhancement, and adding creative effects, you can transform your photos into impressive images that highlight the beauty of buildings and structures. Learning to use these tools will allow you to create sharper, well-composed, and visually appealing photos.


