There’s something magical about beach photography. The golden glow of the sun, the sparkling water, and the endless sky create the perfect canvas for unforgettable shots. But capturing that beauty through the lens isn’t always easy—especially under intense sunlight or when dealing with unpredictable beach conditions. Whether you’re a beginner learning the ropes or an experienced photographer looking to refine your beach shots, this guide is crafted to help you take stunning, sun-soaked photos that truly tell a story.
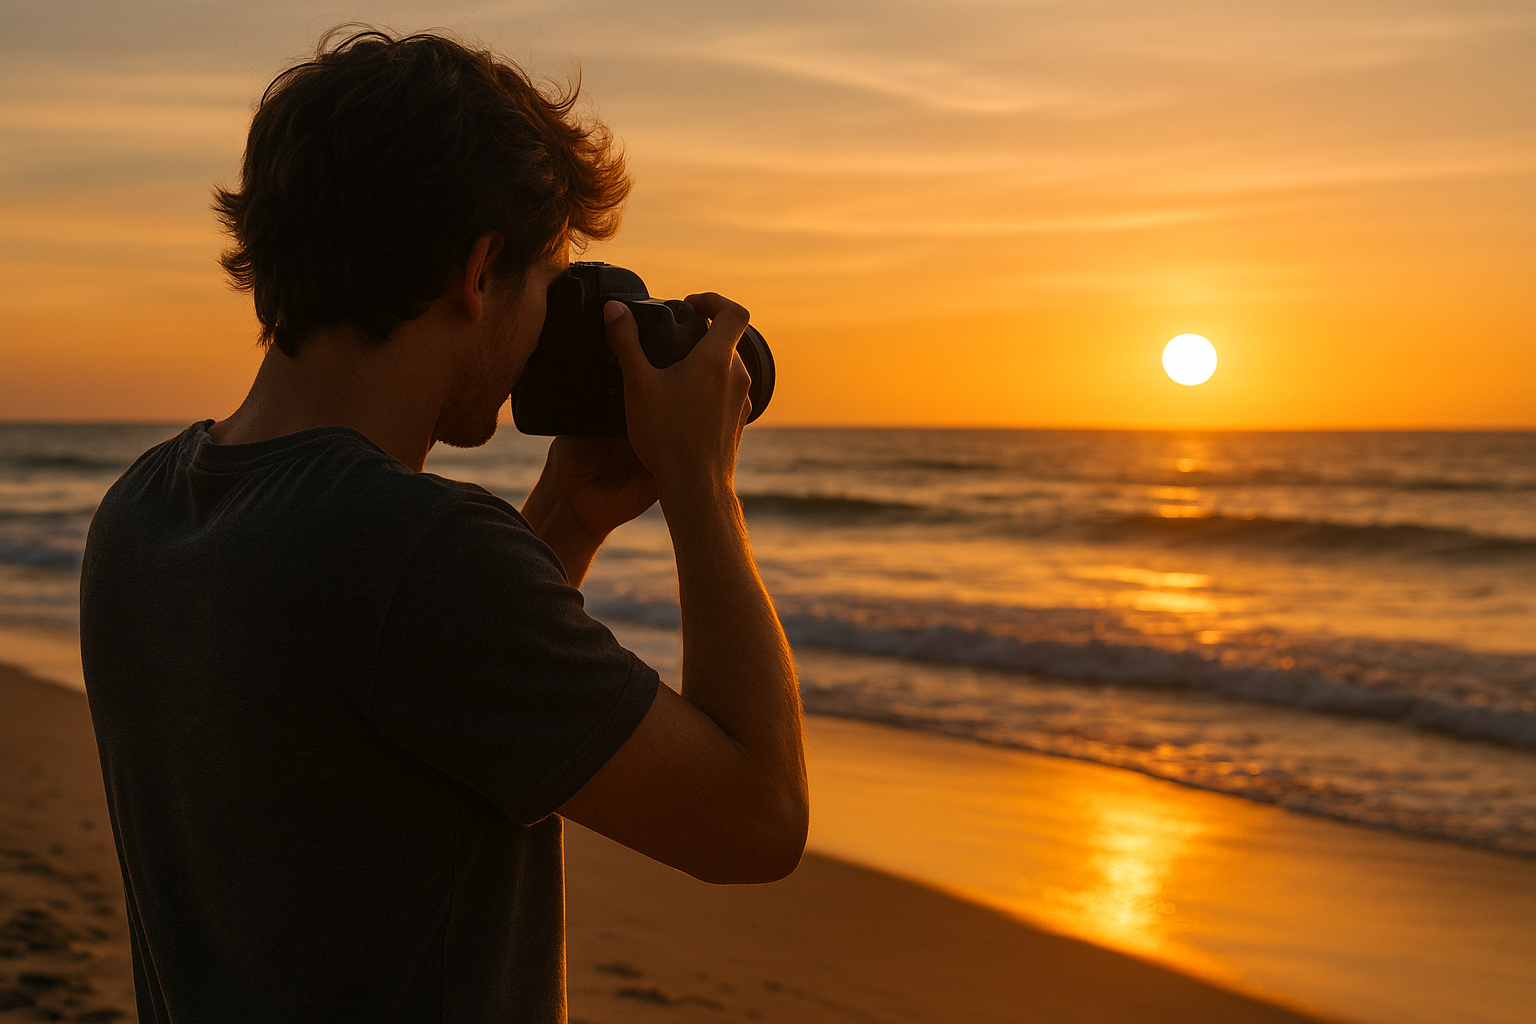
Understand the Light: The Sun Is Both a Friend and a Foe
Photographing at the beach means dealing with bright, direct sunlight—and while it can help illuminate your shots, it can also create harsh shadows and blown-out highlights.
Try to avoid shooting at midday, when the sun is at its highest and brightest. Instead, aim for the golden hours—shortly after sunrise or just before sunset. During these times, the sunlight is softer, more golden, and adds a dreamy warmth to your beach photos.
But don’t completely dismiss midday. With the right composition and understanding of exposure, you can create high-contrast, striking images that showcase the intensity of a summer day. Use hats, beach tents, or palm trees to play with shadows. And when possible, position yourself so the sun is behind your subject to create natural backlighting or even lens flares for artistic effects.
Use the Right Camera Settings
Shooting in bright conditions means you’ll need to adjust your camera settings to avoid overexposed images.
- Lower your ISO: Keep it as low as possible—around 100 or 200—to maintain sharpness and reduce noise.
- Use a fast shutter speed: The beach is often full of movement—crashing waves, flying seagulls, kids running in the surf—so a fast shutter speed (1/1000 or faster) helps you freeze the action.
- Adjust your aperture: For landscapes, use a higher f-stop (like f/8 to f/16) to keep everything in focus. For portraits with creamy backgrounds, go wider (f/2.8 to f/5.6).
In extremely bright conditions, consider using exposure compensation to slightly underexpose your image. This prevents the highlights from being blown out, and you can always recover details in the shadows during post-processing.
Polarizing Filters: A Beach Photographer’s Secret Weapon
A polarizing filter is one of the most valuable tools for beach photography. It helps cut down on reflections and glare from the water and wet surfaces, making colors richer and skies more dramatic. It also deepens the contrast between the sky and the clouds—perfect for that “postcard” look.
If you’re using a DSLR or mirrorless camera, invest in a circular polarizer. For smartphone photographers, there are clip-on lenses that simulate the effect. Some high-end phones even allow for software-based polarization, which can be effective for basic correction.
Pro tip: Rotate your polarizing filter while looking through the viewfinder until you see the effect you want. It can significantly improve the vibrancy of your shot.
Protect Your Gear from Sand and Water
Beaches are beautiful—but brutal on gear. Sand can get into lenses and buttons, and salty air isn’t camera-friendly.
- Use a UV filter or lens protector to shield your lens from fine sand particles.
- Consider a rain cover or plastic bag for your camera if you’re shooting near the water.
- Never change lenses in windy conditions unless you’re in a protected area.
- Wipe your camera with a microfiber cloth after shooting to remove salt residue.
Additionally, keep a small blower brush with you to clean sand off delicate parts. For smartphone users, carry a microfiber cloth and check your lens frequently—pocket lint and smudges can ruin clarity.
Composition Tips: Think Beyond the Horizon
The beach is more than just water and sky. To make your photos stand out, focus on composition and storytelling.
- Use leading lines: Footprints in the sand, pier railings, or the curve of the shoreline can guide the viewer’s eye through the image.
- Add foreground interest: Seashells, beach towels, or driftwood can add depth to your shot.
- Frame your subject: Use natural frames like trees, umbrellas, or rocky outcrops.
- Include people: Candid shots of people enjoying the beach add life and emotion to your photos. Whether it’s kids jumping in the waves or a couple walking hand-in-hand, people make your photo relatable.
Don’t underestimate the power of a unique angle—try getting low to the sand, or shooting from above if you’re near a dune or cliff. A change in perspective can turn an ordinary scene into something special.
Capture the Details That Others Miss
Most beach photos look the same because people take the same kinds of shots: the wide view of the ocean, the bright sun, the sand.
Look closer. Some of the best beach photos come from focusing on the small things—the bubbles in the foam as the tide rolls in, the delicate patterns the wind makes in the sand, the texture of a weathered piece of driftwood.
Consider creating a series of detailed shots that tell a complete story. Think of it like a visual diary—sandals tossed on a towel, sunscreen bottles on the edge of a cooler, sunglasses reflecting the water, a melting ice cream cone. These vignettes feel personal and nostalgic, resonating deeply with viewers.
Experiment with Silhouettes and Shadows
Sunlight at the beach offers an ideal opportunity to experiment with silhouette photography. During sunrise or sunset, position your subject between the camera and the light source, then expose for the background. You’ll end up with beautiful, moody images where the subject is in shadow, but the background is rich with color.
Silhouettes work especially well for storytelling. A lone surfer, a couple holding hands, a child flying a kite—all of these can become powerful images when reduced to outline and posture.
Shadows, too, offer creative potential. Capture the stretched shadow of a person walking along the beach, or the patterns cast by a palm leaf. These subtle elements can elevate a simple composition into something artistic.
Use Props to Add Personality
Don’t be afraid to incorporate props into your beach photos. Surfboards, hats, beach balls, towels, and even books can add character to your images.
Props can help create a specific mood—a straw hat and sunglasses suggest relaxation, while a surfboard implies adventure. Choose objects that align with your personal style and the story you want to tell.
For travel bloggers or content creators, props are also a great way to include brand colors or personal touches that make your work stand out visually.
Don’t Forget About Editing
Even the best beach photos can benefit from a little post-processing.
- Increase contrast and clarity to make the clouds and ocean pop.
- Adjust white balance to bring out the golden hues during sunset or tone down overly warm midday shots.
- Boost vibrancy but avoid over-saturation—it’s tempting to make the blues and oranges explode, but subtle adjustments often look more natural.
- Crop and straighten: Make sure your horizon is level and your subject is well-placed.
For mobile users, editing apps like Lightroom Mobile, Snapseed, or VSCO offer powerful tools with user-friendly interfaces. Lightroom in particular allows you to apply selective adjustments, giving you precise control over highlights, shadows, and specific color tones.
For those editing on desktop, consider experimenting with tone curves, split toning, and gradients to create a cinematic finish to your beach shots.
Tell a Story, Not Just Take a Picture
At its core, great photography is about storytelling. Anyone can point a camera at the ocean and click—but what are you trying to say with your photo?
Are you capturing peace and solitude? Joy and playfulness? Adventure? Try to have a theme or feeling in mind before you start shooting. This will help guide your composition, subject choices, and editing style.
For example, if you’re aiming to capture a tranquil morning at the beach, focus on soft colors, still water, and empty spaces. If you’re going for an energetic vibe, shoot people playing, the splash of the waves, bright towels, and colorful umbrellas.
Document transitions, too—people arriving, setting up, relaxing, and leaving. These stages show the flow of time and add narrative depth to your beach gallery.
Be Patient—and Keep Shooting
The beach is an ever-changing environment. Clouds move, waves crash, birds appear out of nowhere. The same scene can look completely different from one moment to the next.
So be patient. Take your time. Try different angles, compositions, and settings. Move your feet, lie down in the sand, climb a dune. The more you experiment, the better your chances of capturing that one magical shot.
Be ready for the unexpected moments—a child splashing, a dog running across your frame, a sudden burst of light through the clouds. Sometimes, those unplanned instances become the most memorable images in your collection.
And most importantly—enjoy the process. You’re in a beautiful place, doing something creative. That passion and presence will shine through in your images.
Let the Beach Inspire You
Beach photography is more than just snapping pretty pictures of the ocean. It’s about capturing the emotion of a place that means something to people. It’s about sunlight, laughter, nature, texture, and motion—all working together in a frame.
Whether you’re an aspiring travel photographer building your portfolio, a content creator looking for eye-catching images, or just someone who wants to remember a perfect day by the sea, these tips will help you create beach photos that feel as good as they look.
Let the beach inspire your creativity. Embrace the challenges of sunlight, sand, and surf—and turn them into your greatest photographic assets.


