Night photography offers unique challenges and opportunities. Capturing the beauty of the night sky, city lights, or starry landscapes requires special techniques and editing skills. Using the right tools in Photoshop, you can transform your night shots into breathtaking images that reveal more details, enhance colors, and bring out the atmosphere of the scene. In this article, we will explore how to edit night photography to enhance the overall effect and atmosphere.
1. Preparing the Image for Editing in Photoshop
Importing the Image
The first step in editing night photography is to import the image into Photoshop. Open Photoshop, click on File > Open, and select your night photo. If you’re working with a raw file, it’s a good idea to open it in Adobe Camera Raw first to make basic adjustments before bringing it into Photoshop.
Tip: Always work on a duplicate of the original image to preserve the original file. You can create a copy of the image by pressing Ctrl + J (Cmd + J on Mac).
Organizing Layers
Once the image is imported, it’s important to work with layers in Photoshop. Create a duplicate of the original image layer so you can apply edits non-destructively. Working with layers allows you to revert changes easily and keep the original intact.
Tip: If you have multiple edits, consider organizing your layers into folders. This will help keep things organized and manageable.
2. Enhancing the Exposure and Shadows
Adjusting the Exposure
In night photography, the exposure can often be a challenge. Sometimes, the image may appear too dark, or there could be areas that lack detail. One of the best tools to use is the Exposure Adjustment Layer in Photoshop.
Step-by-Step:
- Go to Layer > New Adjustment Layer > Exposure.
- Adjust the Exposure, Offset, and Gamma Correction sliders to lighten the image and bring out more details in the dark areas.
- Make sure not to overexpose the highlights, as you might lose important details.
Tip: If your night shot has very dark shadows, use the Shadows/Highlights tool under Image > Adjustments to recover some of those details.
Using the Shadows/Highlights Tool
This tool helps bring back details that might be lost in the shadows and highlights. It’s especially useful for night photography where the contrast between the sky and artificial lights can create very dark areas.
Step-by-Step:
- Go to Image > Adjustments > Shadows/Highlights.
- Increase the Shadows slider to reveal more details in the dark parts of the image.
- Adjust the Highlights slider to recover the bright areas, like city lights or streetlights.
3. Adjusting Colors for a More Vibrant Night Scene
Enhancing the Colors with Vibrance
Night photography often features dim colors that can look dull when first captured. The Vibrance adjustment tool in Photoshop helps enhance these colors without oversaturating the image.
Step-by-Step:
- Go to Layer > New Adjustment Layer > Vibrance.
- Increase the Vibrance slider to enhance the colors. This will boost the muted tones in the image without affecting the already saturated areas.
- Use the Saturation slider if you want to enhance the colors further.
Tip: Be careful not to oversaturate the image, as this can create unnatural colors. Focus on enhancing the cool blues of the night sky and the warm yellows and oranges of streetlights.
Creating a Cool Night-Time Effect
If you’re capturing cityscapes or starry skies, the colors of the night scene should convey a cool atmosphere. You can adjust the Temperature and Tint sliders in Camera Raw or use a Color Balance adjustment layer to shift the tones toward cooler colors.
Step-by-Step:
- Create a Color Balance adjustment layer.
- Shift the Midtones and Highlights sliders toward the blue or cyan side to create a cooler atmosphere.
Tip: For starry night shots, you can also increase the blue tones in the shadows and highlights to make the stars and sky pop.
4. Improving the Details with Clarity and Sharpness
Using Clarity for a Crisper Image
Night photos can sometimes appear soft or lacking detail. The Clarity adjustment helps enhance the midtone contrast, making the photo appear sharper and more defined.
Step-by-Step:
- Create a Clarity Adjustment Layer.
- Increase the Clarity slider to bring out more detail in the image. This is especially useful for emphasizing textures in buildings, streets, or landscapes.
Tip: Use Clarity subtly, as too much can create an unnatural look. It’s best for bringing out architectural details and textures in cityscapes.
Sharpening the Image
To make your night shots look crisper, apply sharpening to the image. However, be cautious when sharpening, as night images often have noise that can become more prominent.
Step-by-Step:
- Select the layer you want to sharpen.
- Go to Filter > Sharpen > Unsharp Mask or use Filter > Camera Raw Filter > Detail Panel for more control.
- Adjust the Amount, Radius, and Threshold to sharpen the image without enhancing noise.
Tip: For a cleaner result, you can apply sharpening selectively to the areas of the image that need it most, such as the subject or architectural details.
5. Adding Creative Effects to the Night Photo
Creating Light Trails with Motion Blur
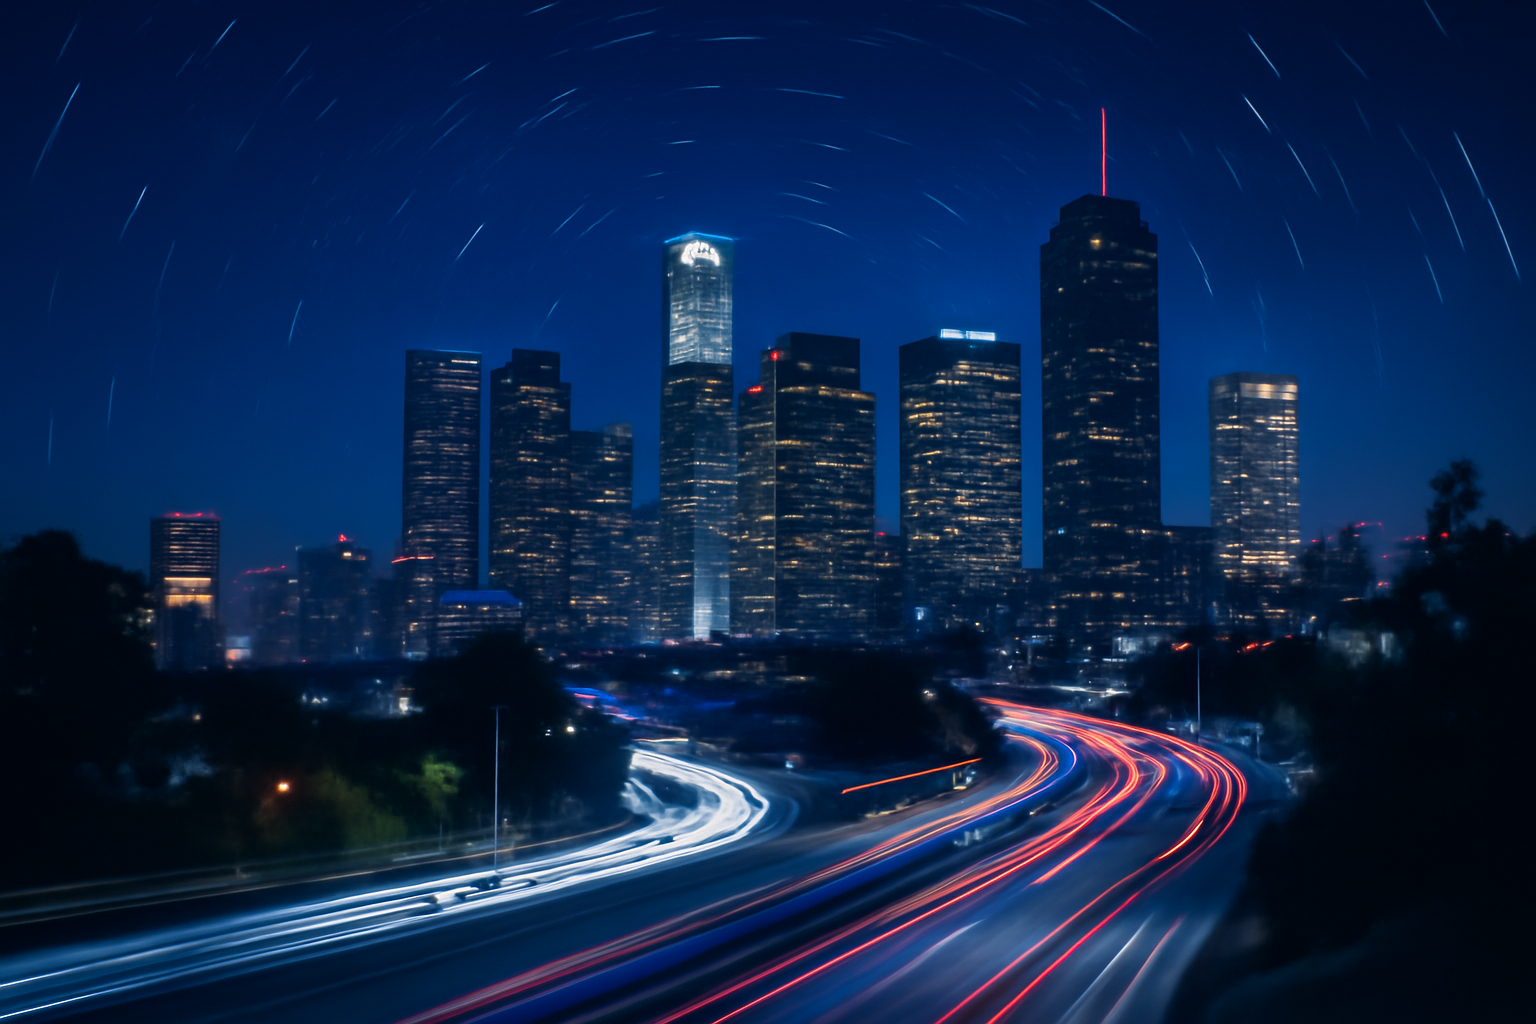
Light trails, such as car headlights or moving traffic, are a popular feature in night photography. You can add these effects in Photoshop using the Motion Blur filter.
Step-by-Step:
- Duplicate the background layer and go to Filter > Blur > Motion Blur.
- Adjust the angle and distance to simulate the movement of lights.
- Apply this effect selectively to areas where you want to show motion, like car lights.
Tip: Using motion blur can help create a dynamic feel in your cityscape or night scene, simulating the busy life of a city at night.
Adding Star Trails or Glow Effects
If you are shooting the stars or a night sky, adding star trails or glow effects can make the image more interesting. Use brushes or glow effects to create glowing or star-like elements.
Step-by-Step:
- Use the Brush Tool to paint glowing elements like stars or the moon.
- Apply a Gaussian Blur or Outer Glow to soften the effect and make it appear more natural.
6. Finalizing the Image and Saving
Final Adjustments
Once you’ve enhanced the exposure, colors, and details, take a step back and assess the overall balance of the image. Adjust the exposure and colors if necessary and fine-tune any effects you’ve applied.
Saving the Image
When you’re satisfied with your edited image, save it in the appropriate format. For print, choose a 300 dpi resolution, and for web use, export the image at 72 dpi to ensure the best quality.
Tip: Save your image in PSD format if you want to preserve all layers and effects for future editing. For final use, export as JPEG or PNG.
Conclusion: Enhancing Your Night Photography with Photoshop
Editing night photography in Photoshop can elevate your photos by bringing out the details, enhancing colors, and creating dynamic lighting effects. By using tools like exposure adjustments, clarity, and creative effects, you can transform a dark and flat photo into a vibrant, high-quality image. Learning how to properly edit your night shots allows you to showcase the beauty of the night, whether it’s a starry sky, a cityscape, or a stunning light trail.


