Photography is not just about capturing images; it’s about telling stories, evoking emotions, and creating powerful visual representations. For professional photographers, having the right equipment is crucial. While creativity and skill are key, your tools also play an essential role in the quality and efficiency of your work. In this article, we’ll discuss the importance of photography equipment and how it can impact your professional success.
Why Equipment Matters in Photography
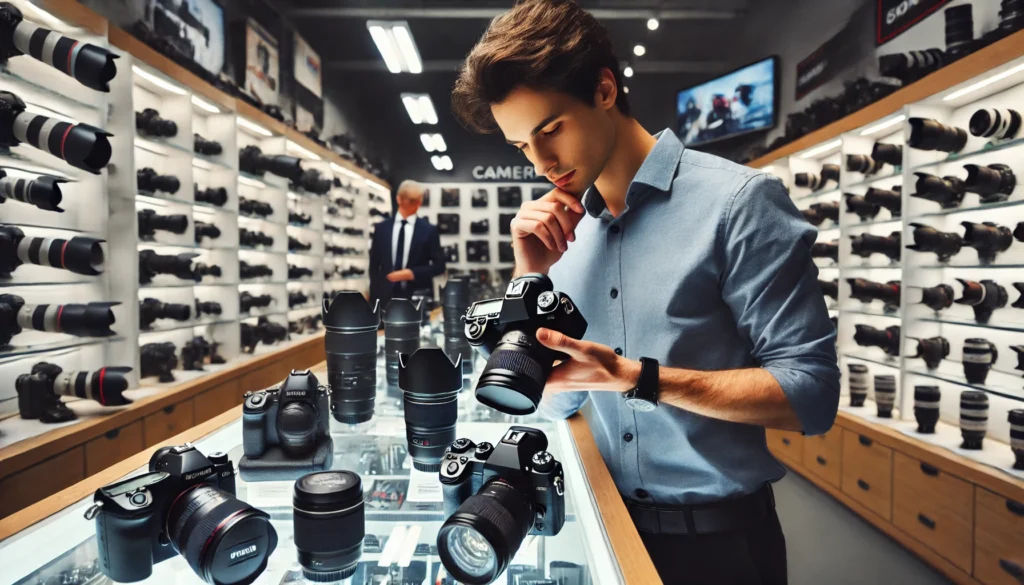
When you think about professional photography, the equipment is often one of the first things that come to mind. This is because the right gear can make a significant difference in the outcome of a shoot. While talent and experience are important, having the appropriate tools for the job allows photographers to capture high-quality images in various environments.
- Image Quality: High-quality cameras, lenses, and accessories allow photographers to produce sharp, detailed images with accurate color reproduction. Professional-grade equipment also performs better in low-light conditions and provides greater dynamic range, resulting in photos that appear more vibrant and true to life.
- Efficiency and Workflow: Investing in quality equipment helps streamline a photographer’s workflow. Fast autofocus, longer battery life, and more durable gear allow professionals to focus on their craft rather than worrying about equipment failures or limitations. It also reduces the time spent on post-processing, as the initial quality of the images is higher.
- Versatility: With the right equipment, a photographer can handle a wide range of projects, from portrait photography to landscape photography to product photography. Professionals need gear that can adapt to different settings and lighting conditions, ensuring they can deliver consistent results no matter the assignment.
Key Pieces of Photography Equipment for Professionals
While each photographer’s needs may vary depending on their niche, certain pieces of equipment are essential for anyone working professionally in the field. Let’s take a look at the most important tools every professional photographer should have.
1. Camera Body
The camera body is the heart of a photographer’s gear. Professional cameras offer advanced features like high-resolution sensors, faster processors, and greater control over settings. The camera body is what allows you to capture high-quality images and take full advantage of your lenses and accessories.
- DSLR vs. Mirrorless: There are two main types of cameras that professionals use: DSLR (Digital Single-Lens Reflex) and mirrorless. DSLR cameras are known for their optical viewfinder, extensive lens options, and long battery life. Mirrorless cameras are lighter, more compact, and offer faster autofocus, making them an excellent choice for photographers on the go.
- Full-frame vs. Crop Sensor: Full-frame cameras have larger sensors, which allow for better image quality, especially in low light. Crop sensor cameras are more affordable and offer greater reach with telephoto lenses, but they have slightly lower image quality.
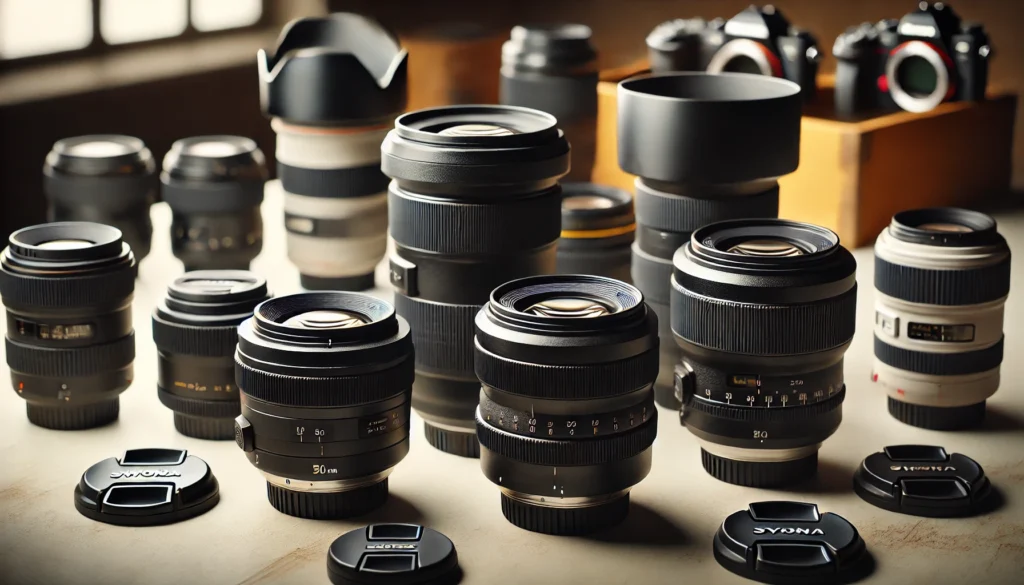
2. Lenses
Lenses are just as important, if not more so, than the camera body itself. The lens you choose will determine the look and feel of your images. Different lenses are suited for various types of photography, and investing in quality lenses can make a huge difference in the results you achieve.
- Prime Lenses: These lenses have a fixed focal length (e.g., 50mm or 35mm) and often produce sharper images with better low-light performance. They’re great for portrait photography and shooting in controlled environments.
- Zoom Lenses: Zoom lenses, like a 24-70mm or 70-200mm, offer flexibility by allowing you to change focal lengths without moving. These lenses are ideal for event photography, weddings, and wildlife photography, where you may need to adjust your framing quickly.
- Wide-Angle and Telephoto Lenses: Wide-angle lenses (e.g., 16-35mm) are essential for landscape and architectural photography, while telephoto lenses (e.g., 70-200mm) are perfect for capturing distant subjects, like wildlife or sports events.
3. Tripods and Stabilization Tools
A tripod is an essential tool for photographers who need stability, especially in low-light situations or when using slow shutter speeds. Whether you’re shooting landscapes, architecture, or long-exposure shots, a sturdy tripod is key to preventing camera shake and ensuring sharp, clear images.
- Monopods: A monopod is another stabilization tool, offering mobility while still providing some stability. It’s great for photographers who need support but don’t want to carry a full tripod.
- Gimbals and Stabilizers: For video shooters, gimbals and handheld stabilizers are essential for smooth footage. These devices help eliminate shaky footage when shooting on the move.
4. External Lighting
Lighting is everything in photography, and for professionals, natural light isn’t always enough. Flash units, softboxes, and reflectors are essential for controlling and manipulating light to achieve the desired effect in your images.
- Speedlights: These small, portable flashes are perfect for event and portrait photographers. They offer flexibility and can be used both on-camera and off-camera.
- Studio Lighting: For controlled environments, studio lighting setups with softboxes and umbrellas provide soft, even lighting that flatters your subject. Studio lighting is ideal for portrait photography, product shoots, and fashion photography.
- Continuous Lighting: For video work and certain types of photography, continuous lighting is a great choice. LED panels provide constant light and are adjustable, giving you more control over your shots.
5. Editing Software
Once you’ve captured your images, post-processing is essential to refine them. Professional photographers rely on advanced editing software like Adobe Lightroom and Photoshop to adjust exposure, color balance, contrast, and sharpness.
- Lightroom: Lightroom is perfect for batch editing and organizing your photos. It offers powerful tools for adjusting exposure, contrast, and color, making it the go-to software for most photographers.
- Photoshop: Photoshop provides advanced editing capabilities, such as retouching, compositing, and detailed image manipulation. It’s ideal for fine-tuning images and achieving creative effects.
6. Memory Cards and Storage
High-resolution images and videos take up a lot of space, so having fast and reliable memory cards is essential. Professional photographers need memory cards with high write speeds and large capacities to handle continuous shooting.
- SD Cards: SD cards are the most common type of memory card for DSLR and mirrorless cameras. It’s a good idea to invest in high-quality cards from trusted brands like SanDisk or Lexar.
- External Hard Drives: To keep your photos and videos safe, invest in external hard drives for backup. Having multiple copies of your work is essential to avoid data loss.
Conclusion
Having the right photography equipment is essential for any professional photographer. While creativity and technique are crucial, the right gear ensures that you can capture the best images and perform your work efficiently. Whether you’re a portrait photographer, landscape photographer, or videographer, investing in quality equipment can elevate your work and help you deliver exceptional results to your clients. Remember, equipment is just one part of the equation; experience, skill, and dedication are what will truly make you a successful photographer.
How to Choose the Right Camera for Your Photography Style
When starting out in photography, one of the most important decisions you’ll make is choosing the right camera. With so many options available, it can be overwhelming to know where to start. The camera you choose will significantly impact the quality of your photos and how you approach different styles of photography. In this article, we’ll guide you through the process of selecting the right camera based on your photography style and needs.
Understanding Different Types of Cameras
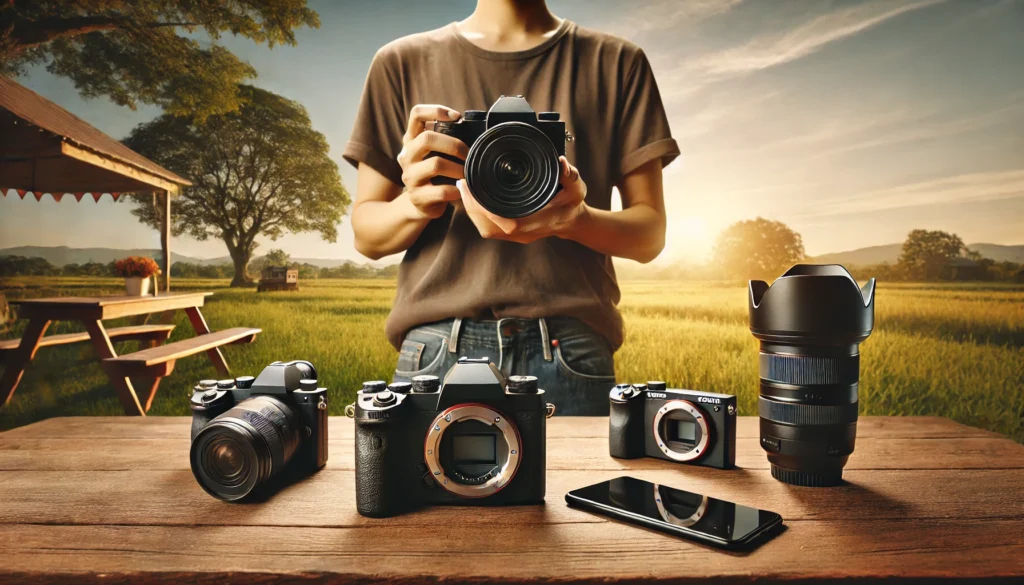
Before we dive into specific recommendations, it’s important to understand the different types of cameras available in the market. Each type offers distinct features that are suited for different photography styles.
1. DSLR Cameras (Digital Single-Lens Reflex)
DSLR cameras are one of the most popular choices among professional photographers due to their versatility, image quality, and wide selection of lenses. These cameras use a mirror mechanism to reflect light from the lens to the optical viewfinder, allowing you to see exactly what you’re capturing.
- Advantages: DSLRs are known for their excellent image quality, fast autofocus, and large selection of lenses. They also offer great battery life and ergonomic controls, which are ideal for photographers who need to shoot for extended periods.
- Best For: Portrait photography, landscape photography, event photography, and professional work.
- Popular Models: Canon EOS 5D Mark IV, Nikon D850, Canon EOS Rebel T7i.
2. Mirrorless Cameras
Mirrorless cameras are a newer alternative to DSLRs, and they have gained popularity due to their smaller size and advanced technology. Unlike DSLRs, mirrorless cameras don’t have a mirror, which allows them to be more compact and lightweight while still offering high-quality images.
- Advantages: Mirrorless cameras are smaller and lighter, making them a great option for photographers who prioritize portability. They also offer faster autofocus, higher frame rates, and silent shooting, which is ideal for shooting fast-moving subjects or in quiet environments.
- Best For: Street photography, travel photography, portrait photography, and videography.
- Popular Models: Sony A7 III, Canon EOS R6, Fujifilm X-T4.
3. Compact Cameras (Point-and-Shoot)
Compact cameras, or point-and-shoot cameras, are designed for ease of use and portability. These cameras are small, lightweight, and ideal for everyday photography. They typically have a fixed lens and limited manual controls, making them suitable for beginners or casual photographers.
- Advantages: Compact cameras are easy to use and offer automatic settings that make them great for beginners or casual photographers who want to capture moments without worrying about settings.
- Best For: Casual photography, travel, family events, and social gatherings.
- Popular Models: Canon PowerShot G7 X Mark III, Sony RX100 VII, Panasonic Lumix TZ200.
4. Action Cameras
Action cameras are small, rugged, and designed to capture action-packed moments in challenging environments. These cameras are often used for sports, adventure photography, and vlogging, thanks to their compact size and waterproof capabilities.
- Advantages: Action cameras are built to withstand harsh conditions, such as water, dust, and extreme temperatures. They also have wide-angle lenses that are perfect for capturing dynamic, fast-paced scenes.
- Best For: Sports, adventure photography, underwater photography, vlogging, and travel.
- Popular Models: GoPro HERO10 Black, DJI Osmo Action, Insta360 ONE X2.
5. Medium Format Cameras
Medium format cameras are a step up from DSLR and mirrorless cameras in terms of image quality. These cameras use larger sensors than full-frame cameras, which allows for incredibly detailed, high-resolution images. They are often used by professional photographers for commercial, fashion, and landscape photography.
- Advantages: The larger sensor size allows medium format cameras to capture more detail and produce higher-quality images with better color depth and dynamic range. They are known for their ability to produce images with exceptional sharpness and clarity.
- Best For: Commercial photography, fashion photography, landscape photography, and studio work.
- Popular Models: Hasselblad X1D II 50C, Fujifilm GFX 100, Phase One XF IQ4.
Key Factors to Consider When Choosing a Camera
Once you have a better understanding of the different camera types, it’s important to consider your specific photography needs. Here are the key factors to keep in mind when choosing the right camera:
1. Your Photography Style and Subjects
Your photography style will greatly influence the type of camera you should choose. If you’re into portrait photography, you’ll want a camera with excellent autofocus and portrait-friendly lenses. For landscape photography, a camera with high resolution and dynamic range is important.
- Tip: Consider what types of subjects you plan to photograph most often. If you’re shooting landscapes, look for cameras with large sensors and good color accuracy. For action shots, you may want a camera with fast autofocus and high frame rates.
2. Image Quality (Sensor Size and Resolution)
The size of the camera’s sensor plays a critical role in the image quality. Larger sensors (like full-frame and medium format sensors) are capable of capturing more light, which results in better image quality, especially in low-light situations. A higher resolution will also allow for more detail in your images.
- Tip: If you plan to print large photos or crop heavily in post-processing, consider a camera with a higher resolution and a larger sensor.
3. Autofocus and Speed
If you plan to photograph fast-moving subjects (like sports or wildlife), autofocus speed and accuracy will be important. Mirrorless cameras tend to offer faster and more accurate autofocus than DSLRs, especially when tracking moving subjects.
- Tip: Look for cameras with fast autofocus systems and high frame rates for shooting action.
4. Portability
If you travel frequently or need a camera for casual use, portability is an important factor. Compact and mirrorless cameras are generally smaller and lighter, making them more convenient for photographers on the go. DSLRs tend to be bulkier, which might not be ideal for travel or street photography.
- Tip: Consider how often you’ll need to carry your camera and whether portability is a priority for your needs.
5. Lens Compatibility and Options
The availability of lenses is another crucial factor. Some camera systems, like DSLRs, have an extensive selection of lenses to choose from, while others, like mirrorless cameras, may have fewer lens options (though this is changing as more mirrorless lenses are developed).
- Tip: Research the lens options available for your chosen camera system and make sure they align with your photography needs.
6. Budget
Camera prices can vary greatly depending on the brand, model, and features. While it’s tempting to go for the most expensive camera, it’s important to balance your budget with the features you need. Remember that lenses and accessories can add significant costs to your overall gear.
- Tip: Set a realistic budget for your camera and gear. Consider buying a camera body first and adding lenses and accessories over time as your needs grow.
Conclusion
Choosing the right camera is an important step in your photography journey, and the best camera for you will depend on your specific needs and style. Whether you’re a professional photographer looking for the highest image quality, a beginner exploring different genres of photography, or a travel enthusiast seeking portability, there’s a camera out there that suits your needs.
Take the time to evaluate your photography style, subjects, and budget to find the best camera for you. Remember, the most important thing is not the camera itself, but how you use it. With the right camera in hand, you’ll be ready to capture stunning photos that reflect your vision and creativity.
How to Choose the Best Camera for Photography Beginners
Photography is an exciting and rewarding hobby, and with the right camera, you can capture stunning moments and create lasting memories. However, with so many options available in the market, it can be overwhelming to choose the best camera for beginners. This guide will help you navigate the choices and select the ideal camera to kickstart your photography journey.
1. Understanding the Types of Cameras
Before diving into specific camera models, it’s essential to understand the different types of cameras available. Each has its unique advantages, and the right choice depends on your needs and how you plan to use the camera.
DSLR Cameras
Digital Single-Lens Reflex (DSLR) cameras have been the go-to choice for photographers for years. They are known for their versatility, high image quality, and wide range of lens options. DSLR cameras are perfect for beginners who want to learn the fundamentals of photography, as they allow for full manual control and offer great image clarity. However, they tend to be bulky and expensive compared to other types of cameras.
Mirrorless Cameras
Mirrorless cameras are a more compact alternative to DSLRs. They don’t use a mirror mechanism, which makes them lighter and smaller. Despite their smaller size, mirrorless cameras often deliver image quality comparable to that of DSLRs. They are an excellent choice for beginners who want high-quality results without the bulk of a traditional DSLR.
Point-and-Shoot Cameras
Point-and-shoot cameras are simple to use and typically offer automatic settings for ease of use. While they may not offer the same level of manual control as DSLRs or mirrorless cameras, they are perfect for beginners who want to snap great photos without learning the technical aspects of photography. Point-and-shoot cameras are portable, lightweight, and affordable.
Smartphone Cameras
Modern smartphones come with impressive cameras that rival many point-and-shoot models. Smartphone cameras are great for beginners because they are easy to use and always available. While they may lack the advanced features of DSLRs or mirrorless cameras, they are an excellent choice for casual photography and on-the-go shots.
2. Key Features to Consider
When choosing a camera, there are several features that you should keep in mind to ensure you’re making the right decision for your needs.
Image Sensor
The image sensor is one of the most crucial components of a camera, as it determines the overall image quality. Cameras with larger sensors typically produce sharper, clearer images, especially in low-light conditions. Full-frame sensors are found in high-end cameras, but many beginner-friendly cameras come with crop sensors, which offer good quality at a more affordable price.
Megapixels
While megapixels (MP) are often mentioned as a selling point, they are not the most critical factor for beginners. Higher megapixels mean larger images, but they don’t necessarily guarantee better photo quality. For most beginners, a camera with 12–24 megapixels will be sufficient to produce high-quality images for personal use or social media.
Lens Compatibility
If you’re considering a DSLR or mirrorless camera, lens compatibility is an important factor to consider. These cameras allow you to change lenses depending on the type of photography you’re doing. Beginners should look for cameras with a wide range of lens options and affordable kit lenses that come bundled with the camera.
Autofocus and Continuous Shooting
For those interested in capturing fast-moving subjects, autofocus speed is essential. Look for a camera with a fast and accurate autofocus system. Continuous shooting mode, or burst mode, allows you to take multiple shots in quick succession, which is useful for action photography or capturing fleeting moments.
Battery Life
Battery life can be a significant concern for photographers, especially those who plan to shoot for extended periods. Mirrorless cameras, in particular, tend to have shorter battery life than DSLRs. Be sure to check the camera’s battery life and consider purchasing an extra battery for long shooting sessions.
3. Budget Considerations
As a beginner, it’s essential to choose a camera that fits your budget. High-end cameras can cost thousands of dollars, but there are plenty of affordable options that still offer great performance. You don’t need to buy the most expensive model to get good results. Consider how much you’re willing to spend and weigh that against the features and quality offered by each camera.
In addition to the camera body itself, remember to factor in the cost of accessories such as memory cards, lenses (for DSLRs and mirrorless cameras), a camera bag, and a tripod. These extras will help you get the most out of your camera and keep your equipment safe.
4. Recommended Cameras for Beginners
Here are a few popular options that offer great value for beginners:
Canon EOS Rebel T7 (DSLR)
The Canon EOS Rebel T7 is a fantastic entry-level DSLR camera. It features a 24.1-megapixel sensor, fast autofocus, and an intuitive interface, making it ideal for beginners. The camera also offers a variety of lenses that can be purchased separately as you advance in your photography skills.
Nikon D3500 (DSLR)
The Nikon D3500 is another excellent choice for beginners. It offers a 24.2-megapixel sensor, a simple guide mode to help you learn the basics, and long battery life. It’s compact for a DSLR and offers superb image quality.
Sony Alpha a6000 (Mirrorless)
The Sony Alpha a6000 is a compact mirrorless camera with impressive features, including a 24.3-megapixel sensor and rapid autofocus. It’s a great option for beginners who want to explore mirrorless cameras and enjoy high-quality images in a portable design.
Canon PowerShot G7 X Mark III (Point-and-Shoot)
For beginners looking for a high-quality point-and-shoot camera, the Canon PowerShot G7 X Mark III is a solid choice. It’s compact, easy to use, and has excellent video and image quality. It’s perfect for vlogging, travel photography, and social media content.
iPhone 14 Pro (Smartphone)
If you’re primarily interested in smartphone photography, the iPhone 14 Pro offers exceptional image quality, powerful editing tools, and a variety of advanced features like Night Mode and ProRAW. It’s an ideal choice for beginners who want great photos without needing to carry extra gear.
5. Learning and Growing as a Photographer
Once you’ve chosen your camera, the next step is to start learning and practicing. Understanding your camera’s settings, experimenting with different lenses, and shooting in various lighting conditions will help you improve your skills over time. Don’t be afraid to make mistakes—photography is all about trial and error.
Many online resources, such as tutorials and photography communities, can help you learn new techniques and connect with other photographers. As you gain experience, you can gradually invest in more advanced equipment, such as different lenses or lighting kits, to enhance your photography.
Final Thoughts
Choosing the best camera for photography beginners doesn’t need to be complicated. Focus on your budget, the camera’s features, and how you plan to use it. Whether you opt for a DSLR, mirrorless, point-and-shoot, or smartphone, the key is to get started and enjoy the creative process. With practice, you’ll be capturing stunning photos in no time!
How to Choose the Ideal Equipment for Wedding Photography
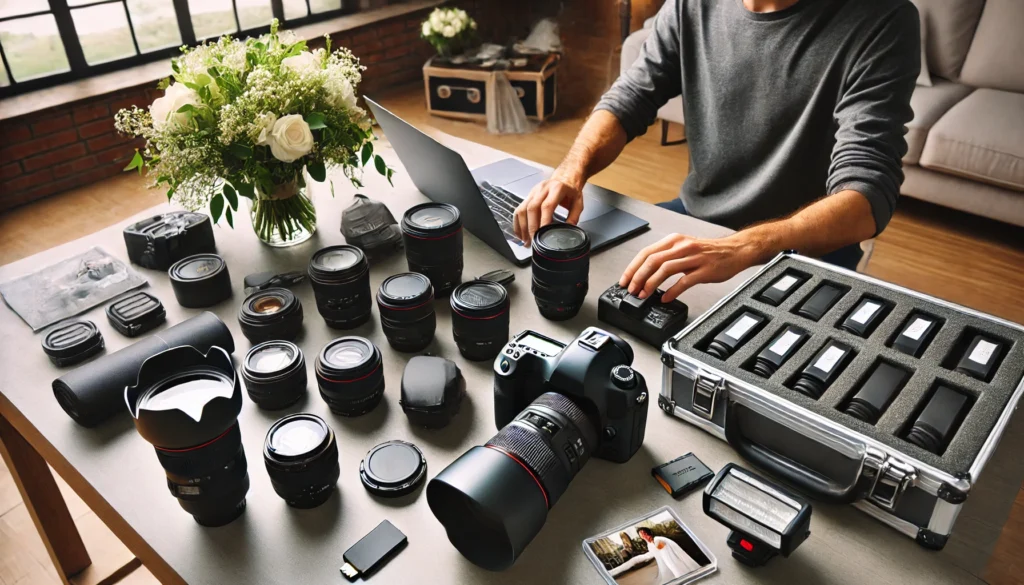
Wedding photography is one of the most rewarding yet demanding fields in photography. It requires not only technical skill but also the right equipment to capture every precious moment of a couple’s big day. From the ceremony to the reception, wedding photographers must be prepared for a variety of lighting conditions and settings. In this article, we’ll guide you through the essential equipment you need to successfully shoot a wedding and deliver stunning photos to your clients.
1. Camera Bodies
The camera body is the cornerstone of your photography setup. It’s essential to choose a camera that is reliable, fast, and capable of producing high-quality images in various conditions. Since weddings are often fast-paced, having two camera bodies is recommended to avoid missing any important moments.
Full-Frame vs. Crop Sensor
Full-frame cameras are the go-to choice for wedding photographers due to their superior image quality, especially in low-light situations. They provide a wider field of view and better depth of field control, which is perfect for creating professional-quality portraits and landscapes. Popular full-frame cameras for wedding photography include the Canon EOS 5D Mark IV, Nikon D850, and Sony A7 series.
Crop-sensor cameras, while not as ideal for low-light shooting, can still produce excellent results and may be a more budget-friendly option for beginners. They are often lighter and more compact, which can be beneficial for photographers on the go.
Tip: Always have two camera bodies for a wedding shoot. This gives you the backup you need in case of technical difficulties and allows you to switch lenses quickly during the event.
2. Lenses
Choosing the right lenses is crucial for capturing the different moments and styles of wedding photography, from the ceremony to candid shots. The lenses you choose will help you control depth of field, focal length, and the overall look of your images.
Essential Lenses for Wedding Photography
- Standard Zoom Lens (24-70mm f/2.8): This versatile lens is ideal for most wedding situations, allowing you to capture wide-angle shots as well as close-up portraits with beautiful bokeh. Its constant aperture of f/2.8 is perfect for low-light conditions, such as indoor ceremonies or receptions.
- Prime Lens (50mm f/1.8 or 85mm f/1.4): Prime lenses are great for portraits, offering sharpness and a shallow depth of field to blur the background. The 50mm and 85mm lenses are ideal for capturing intimate, beautiful moments during the ceremony or portraits of the couple.
- Wide-Angle Lens (16-35mm or 24mm): A wide-angle lens is essential for capturing grand venue shots, group photos, or architectural details of the wedding. It allows you to include more of the scene, which is especially useful in tight spaces or when photographing the entire wedding party.
- Telephoto Lens (70-200mm): A telephoto lens allows you to capture candid moments from a distance without disturbing the event. It’s perfect for shooting the ceremony from the back of the room or capturing emotional moments during the reception without being intrusive.
Tip: Always bring at least two or three lenses to a wedding, including a versatile zoom lens and a prime lens for portraits. Having different lenses allows you to adapt to various shooting situations.
3. Flash and Lighting Equipment
Lighting is one of the most important aspects of wedding photography. Weddings often take place in low-light environments, such as dimly lit churches or reception halls, and proper lighting equipment is crucial for ensuring clear, well-exposed images.
External Flash
An external flash is a must-have for wedding photographers. The built-in flash on your camera may not provide enough power or control, especially in larger venues. An external flash gives you more flexibility, allowing you to bounce light off walls or ceilings to create soft, natural-looking lighting.
Popular flashes for wedding photographers include the Canon Speedlite 600EX-RT, Nikon SB-5000, and Godox V1.
Light Modifiers
To create soft, flattering light, consider using light modifiers like softboxes, umbrellas, or diffusers. These accessories help soften the light, reducing harsh shadows and creating more even lighting for portraits. If you’re shooting a wedding outdoors, a bounce reflector can also help fill in shadows when shooting in natural light.
LED Lighting for Reception Shots
During the reception, low-light conditions can make it challenging to get sharp, high-quality photos. LED lights are a great option for providing consistent, continuous lighting in these situations. They can be used to light up the dance floor or highlight the cake cutting, helping you get better-lit images without using a flash.
Tip: Practice using your flash and modifiers before the wedding day to get comfortable with them. Also, bring extra batteries for your flash, as weddings can be long, and you’ll need to rely on it throughout the day.
4. Tripods and Monopods
While tripods are not always necessary for wedding photography, they can be useful in certain situations. A tripod is essential when shooting long exposure shots (e.g., for light trails during the reception or slow shutter speeds for creative wedding portraits). It’s also helpful for capturing group photos, ensuring the camera remains steady and aligned.
A monopod can also be useful for supporting your camera during long hours of shooting. It provides stability without the bulk of a tripod, making it ideal for capturing images during the ceremony or reception without slowing you down.
Tip: Use a tripod for wide shots and long exposures, and bring a monopod if you need more mobility but still want the support of a stable camera setup.
5. Backup Gear and Storage
Weddings are once-in-a-lifetime events, and you don’t want to risk losing important shots due to equipment failure. It’s critical to bring backup gear to the event, including extra cameras, lenses, and memory cards.
Extra Camera Bodies
As mentioned earlier, always have at least two camera bodies on hand. This allows you to switch between cameras with different lenses and provides a backup in case one camera malfunctions. A second camera body also reduces the amount of time spent switching lenses during the event.
Memory Cards and Storage
Wedding photography involves shooting many high-resolution images, so having plenty of memory cards is crucial. Bring extra cards to ensure you never run out of storage during the event. Additionally, make sure you have a secure way to back up your photos after the wedding, either by using a portable hard drive or cloud storage.
Tip: Consider using high-speed memory cards (e.g., UHS-II cards) to ensure fast write speeds and smooth shooting during fast-paced moments, such as the first dance or ceremony highlights.
6. Editing Software
Post-processing is an essential part of wedding photography. After the event, you’ll need to edit your images to enhance color, contrast, and sharpness. Editing software like Adobe Lightroom and Photoshop is the industry standard for wedding photographers.
Workflow Tips
- Start with global adjustments in Lightroom, such as exposure, white balance, and contrast.
- Use Photoshop for detailed retouching (e.g., skin smoothing, removing distractions, and correcting imperfections).
- Organize your photos into collections or folders for easy access, and prioritize editing the most important shots (e.g., couple portraits, first dance, family photos).
Tip: Create a preset or a batch edit for your wedding photos to ensure consistency across your images.
Final Thoughts
Choosing the right equipment for wedding photography is crucial for ensuring you’re ready to capture every important moment. By investing in high-quality camera bodies, versatile lenses, proper lighting gear, and reliable backup equipment, you’ll be well-prepared to deliver beautiful images that your clients will cherish forever. Remember, the most important tool in your wedding photography kit is your creativity, so make sure you’re equipped to bring your vision to life!
How to Set Up a Home Photography Studio: Equipment and Tips
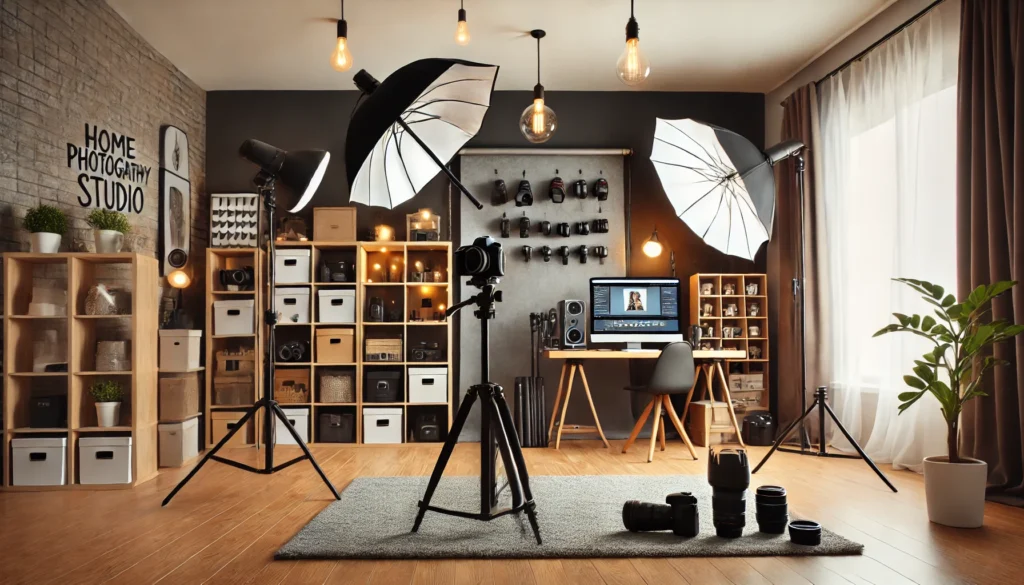
Setting up a home photography studio can be a great way to create professional-quality photos without the overhead costs of renting a commercial space. Whether you’re a budding photographer or an experienced pro, having your own studio allows for complete creative control and convenience. In this article, we’ll guide you through the steps to set up a home photography studio, including the essential equipment you need and tips for creating a versatile and efficient space.
1. Choose the Right Space for Your Studio
The first step in setting up a home photography studio is selecting the right space. Ideally, you’ll want a room that is spacious enough to accommodate your gear, your subject(s), and your lighting equipment. Whether it’s a spare bedroom, a basement, or a section of your garage, here are some factors to consider:
Space and Size
- Room Size: Choose a room that offers enough space to move around your subject, set up lights, and experiment with different compositions. A room with at least 10-15 feet of space in both directions is ideal for shooting portraits or products.
- Ceiling Height: A higher ceiling is beneficial for certain lighting setups, especially if you plan to use softboxes or other large modifiers. Taller ceilings give you more flexibility when positioning your lights.
Lighting Conditions
- Natural Light: If you plan to use natural light, choose a room with large windows that allow ample light during the day. However, keep in mind that natural light can be unpredictable, so you may still want to supplement it with artificial lighting.
- Control Over Light: Ideally, the room should be able to block out external light when needed. Consider blackout curtains or blinds for controlling light during indoor shoots, especially if you’re shooting at different times of the day.
Tip: A room with neutral-colored walls and minimal distractions is ideal. Avoid overly bright or patterned walls, as they can reflect light and create unwanted color casts on your subject.
2. Invest in the Right Photography Equipment
Once you’ve selected the space, it’s time to invest in the equipment that will make your home photography studio functional and versatile. Here are the key pieces of gear you’ll need:
Camera and Lenses
While your camera body depends on your personal preference and style, it’s essential to have at least one versatile lens. A 50mm f/1.8 lens is a great option for portraits, while a 24-70mm zoom lens is perfect for capturing a variety of shots, including wide-angle shots and close-ups.
- Camera: Invest in a DSLR or mirrorless camera with manual settings so you can control exposure, shutter speed, and aperture.
- Lenses: A prime lens (50mm f/1.8) is excellent for portraits with a shallow depth of field, while a zoom lens (24-70mm f/2.8) provides flexibility for various compositions.
Tip: Choose lenses based on the type of photography you’ll primarily be doing. For portraits, a 50mm or 85mm lens is ideal, while for product photography, a macro lens may be needed to capture fine details.
Lighting Equipment
Lighting is one of the most crucial elements of photography, and setting up the right lighting will help you achieve professional results. While you can use natural light, investing in good-quality artificial lighting will give you more control over your shots.
- Softboxes or Umbrella Lights: Softboxes and umbrellas help diffuse light, producing soft, flattering light for portraits or product shots. Softboxes are ideal for close-up product photography and portraits, while umbrellas can provide broader, softer light for wider shots.
- Studio Strobes or Flash Units: If you need more power, consider investing in studio strobes or external flash units. These provide consistent, high-intensity light and are often used for portrait photography or commercial shoots.
- Continuous Lights: For video or product photography, continuous lighting is a great option. LED panels or softboxes with continuous light allow you to see exactly how the light will fall on your subject before you take the shot.
Tip: Invest in a set of light stands and clamps to secure your lights in place. This will give you flexibility in adjusting the positioning of your lights and modifiers.
Backdrops
The right backdrop helps create the atmosphere you want for your photos. You can choose from a wide variety of backdrops depending on the style of photography you’re doing.
- Seamless Paper Backdrops: These are great for clean, professional-looking shots. Available in various colors, they provide a smooth, uniform background.
- Fabric Backdrops: Fabric backdrops like muslin are versatile and can be draped to create textured or dramatic effects. They’re also great for portraits or artistic shots.
- Portable Backdrop Stands: Invest in a backdrop stand to easily set up and change your backdrops. This is especially useful if you plan on switching between different backgrounds quickly.
Tip: If you’re doing product photography, a simple white or neutral-colored background works well to highlight your subject. For portraits, consider adding textured or colored backdrops to enhance the mood.
3. Set Up Your Studio Layout
Now that you have the basic equipment, it’s time to arrange your studio for optimal workflow and flexibility. Here’s how to set up your studio layout for different types of shoots:
Portrait Photography Setup
- Lighting Placement: Position one main light (key light) at a 45-degree angle from your subject to create a natural and flattering effect. Add a fill light or reflector on the opposite side to reduce harsh shadows.
- Backdrop: Set up a neutral-colored backdrop behind your subject. If possible, use a backdrop stand to ensure the backdrop is smooth and wrinkle-free.
Product Photography Setup
- Table for Products: For smaller products, set up a clean surface (like a white table or a seamless backdrop) where you can place your products. Use a macro lens for close-up shots to capture intricate details.
- Lighting: Position softboxes or LED lights on either side of the product to create even lighting. You can also use reflectors to bounce light onto the product from different angles.
Tip: When photographing reflective products, such as jewelry or glass items, be mindful of reflections. Use black backgrounds or black flags to reduce unwanted reflections and control the light.
Flexibility for Different Types of Shoots
Keep your layout flexible, allowing for easy adjustments between different types of shoots. Use portable light stands, adjustable backdrop systems, and modular furniture to adapt your studio setup for various subjects and styles.
Tip: Always leave space for a tripod, and keep additional equipment (such as reflectors or props) easily accessible.
4. Organize and Store Your Equipment
To keep your home photography studio efficient, it’s essential to organize your gear and keep everything in its place. Proper storage prevents clutter and ensures that you have easy access to all your equipment when you need it.
Storage Ideas
- Shelving Units: Use shelving units to store camera gear, lenses, and accessories. Label each shelf or container to easily find your items.
- Tote Bags and Camera Cases: Keep smaller equipment like flashes, batteries, and memory cards in labeled bags or cases to keep them organized and protected.
- Cable Management: Use cable organizers or clips to prevent cables from tangling and taking up unnecessary space. Keeping cables neat and tidy will help prevent accidents and save time.
Tip: Invest in sturdy storage solutions to protect your gear from dust and damage, especially if your studio is in a high-traffic area.
5. Optimize for Workflow
A well-organized studio layout helps streamline your workflow. Set up a dedicated editing space where you can quickly review and edit your photos. Ensure your workspace has proper lighting, a comfortable chair, and easy access to your computer or laptop.
Digital Workflow
- Use a Fast Computer: A computer with good processing power will help you handle large image files efficiently. Consider investing in a desktop with a fast processor and plenty of storage space.
- Editing Software: Adobe Lightroom and Photoshop are the industry standards for editing photos. If you’re working with video as well, consider software like Adobe Premiere Pro or DaVinci Resolve.
Tip: Create shortcuts or file naming systems to speed up your post-production process.
Final Thoughts
Setting up a home photography studio allows you to create high-quality images in a comfortable and cost-effective environment. By selecting the right space, investing in essential equipment, and optimizing your studio layout for different types of shoots, you can build a versatile home studio that meets all your photography needs. With the right setup, you’ll be ready to capture stunning images and take your photography to the next level.
How to Use a Tripod for Sharper and More Stable Images
Introduction
A tripod is an essential tool for any photographer, whether you’re a beginner or a seasoned pro. It ensures sharper, more stable images by eliminating camera shake, which is crucial in situations where long exposures, low light, or precise compositions are required. In this article, we will explore how to use a tripod effectively to capture clearer, more stable images in different photography scenarios.
1. Why Use a Tripod?
When shooting without a tripod, even the slightest camera shake can result in blurry images, especially in low-light conditions or when using slow shutter speeds. A tripod eliminates this issue by stabilizing your camera, allowing for longer exposure times without introducing motion blur. It’s an indispensable tool for night photography, landscape shots, architecture, and product photography.
2. Choosing the Right Tripod
Selecting the right tripod is key to maximizing its effectiveness. When choosing a tripod, consider the following:
- Material: Tripods are typically made of aluminum, carbon fiber, or steel. Aluminum is affordable but may be less sturdy, while carbon fiber is lightweight and highly durable.
- Height and Size: Ensure the tripod is tall enough to comfortably accommodate your height when using it. A tripod that’s too short can cause back pain, while one that’s too tall may be cumbersome to carry.
- Weight Capacity: Choose a tripod that can support the weight of your camera and lens. A tripod with insufficient capacity may be unstable or risk toppling over.
3. Setting Up Your Tripod
Once you’ve chosen the right tripod, it’s time to set it up properly:
- Level the Tripod: Use the built-in level (if available) to ensure your tripod is completely level. This is particularly important for landscape or architectural shots where alignment is crucial.
- Stabilize the Legs: Extend the legs to their maximum length, but don’t over-extend them as this can make the tripod unstable. If your tripod has additional stabilizing features, such as a hook for sandbags, make sure to use them for extra support.
- Adjust the Head: The tripod head should be adjusted to align with your subject. Use the pan-and-tilt head, ball head, or fluid head, depending on the type of shots you plan to take. For most still photography, a ball head is the most versatile.
4. How to Achieve Stability
Even with a tripod, it’s important to reduce any potential sources of instability:
- Avoid Touching the Camera: When capturing a shot, avoid physically touching the camera to prevent any inadvertent shake. Instead, use a remote shutter release or the camera’s timer function.
- Use a Low ISO Setting: To further reduce the risk of blur, set your camera to a low ISO. This will help produce cleaner, sharper images by minimizing digital noise.
- Activate Mirror Lock-Up (for DSLR Users): On certain cameras, when the mirror flips up before exposure, it can cause slight vibrations. Use the mirror lock-up function to prevent this.
5. Using a Tripod in Different Photography Scenarios
Tripods can be beneficial in various photography situations, including:
- Night Photography: Longer exposure times are necessary for capturing images in low-light settings, such as cityscapes or star trails. A tripod ensures that your camera remains perfectly still during these long exposures.
- Landscape Photography: To achieve sharp, detailed landscape images, using a tripod stabilizes your camera during the shot and helps with composition, especially in wide-angle shots.
- Product Photography: A tripod ensures consistency when photographing products, particularly when taking multiple shots for online listings. This consistency helps maintain the same framing and focus in all images.
- Long Exposure Photography: Whether you’re capturing silky waterfalls or light trails, long exposure photography requires precise camera stability. A tripod allows you to achieve sharp, steady images without any unwanted motion blur.
6. Post-Processing Tips
While a tripod ensures sharper images, it’s always a good idea to inspect your images during post-processing:
- Check for Minor Blurring: Even with a tripod, minor camera shake can sometimes occur. Use software like Lightroom or Photoshop to sharpen the image and correct any softness.
- Cropping: If your image isn’t perfectly aligned, crop it to ensure the composition is exactly how you want it. This can also help if you’ve unintentionally cut off parts of the frame.
Conclusion
A tripod is an invaluable tool for achieving sharp, stable images, especially in situations where long exposures or precision are required. By choosing the right tripod, setting it up properly, and using it effectively, you can dramatically improve your photography and create stunning images with enhanced clarity and stability.
How to Choose the Best Lens for DSLR and Mirrorless Cameras
Introduction
Choosing the right lens for your DSLR or mirrorless camera is essential for achieving the best image quality and creative flexibility. The lens you select influences the field of view, depth of field, and the overall aesthetics of your photos. Whether you’re a beginner or a professional photographer, understanding which lens to use for different situations will help you get the most out of your camera. In this article, we’ll explore the factors to consider when choosing the best lens for your camera and highlight some of the most popular lens options available.
1. Understand Different Lens Types
There are several types of lenses, each designed for specific photographic needs. Here’s an overview of the most common lens types:
- Standard Lenses: These lenses have a focal length between 35mm and 50mm, offering a natural perspective similar to the human eye. They’re great for everyday photography, portraits, and street photography.
- Wide-Angle Lenses: Typically with focal lengths ranging from 14mm to 35mm, wide-angle lenses allow you to capture expansive scenes, making them ideal for landscape, architecture, and interior photography.
- Telephoto Lenses: These lenses have long focal lengths, usually over 70mm, allowing you to photograph subjects at a distance. Telephoto lenses are perfect for wildlife, sports, and portrait photography, providing a narrow field of view and beautiful background blur.
- Macro Lenses: Used for extreme close-up photography, macro lenses allow you to capture intricate details of small subjects like insects, flowers, or textures.
2. Consider the Focal Length
Focal length plays a significant role in determining the perspective and composition of your photos. It affects how zoomed in or zoomed out the scene will appear. Here are the key points to consider:
- Wide Focal Length (14mm-35mm): Wide-angle lenses capture more of the scene, ideal for sweeping landscapes or large group shots.
- Standard Focal Length (35mm-50mm): These lenses provide a natural, balanced perspective that’s great for portraits, street photography, and general shooting.
- Long Focal Length (70mm-200mm): Telephoto lenses are designed for distant subjects, such as wildlife or sports, and allow you to achieve a shallow depth of field, isolating the subject from the background.
3. Aperture Size and Depth of Field
The aperture is the opening in the lens that allows light to pass through to the camera’s sensor. The size of the aperture affects the amount of light entering the camera and the depth of field in your photos. A larger aperture (smaller f-number, like f/1.4) allows more light in, creating a shallow depth of field with a blurred background, which is perfect for portrait photography. A smaller aperture (larger f-number, like f/16) provides a deeper depth of field, keeping more of the scene in focus, ideal for landscape photography.
When choosing a lens, consider the aperture size:
- Fast Lenses (f/1.2 – f/2.8): These lenses allow more light in, making them ideal for low-light conditions and achieving a blurred background (bokeh effect).
- Slower Lenses (f/4 and above): These lenses are more affordable and are suitable for daytime shooting or in bright conditions, but they don’t perform as well in low-light situations.
4. Lens Compatibility
Before purchasing a lens, make sure it’s compatible with your camera. DSLR and mirrorless cameras use different lens mounts, so always check if the lens is designed for your camera system (Canon, Nikon, Sony, etc.). Some camera brands, like Canon and Nikon, have their own lens lineups, while other brands like Sigma, Tamron, and Samyang offer lenses that fit multiple systems.
5. Prime vs. Zoom Lenses
When choosing a lens, you’ll often need to decide between prime and zoom lenses:
- Prime Lenses: These lenses have a fixed focal length (e.g., 50mm, 35mm). While they don’t offer zoom functionality, prime lenses typically provide better image quality, sharper details, and faster apertures for low-light situations.
- Zoom Lenses: These lenses offer a range of focal lengths (e.g., 24-70mm, 70-200mm). They are more versatile since they allow you to zoom in or out without changing lenses. While zoom lenses are often less sharp than prime lenses, modern zoom lenses offer excellent performance for most photographers.
6. Lens Quality and Build
When selecting a lens, consider its build quality and materials:
- Build Quality: Professional lenses are often built with better materials, such as metal bodies, weather-sealing, and sturdier mounts. These lenses can withstand rough conditions and last longer.
- Weight and Portability: Some lenses, especially telephoto and professional-grade lenses, can be heavy and bulky. If portability is a priority, look for lightweight lenses that still offer great image quality.
7. Popular Lenses for Different Photography Styles
To make it easier to choose the best lens, here are some of the most popular lens options for different types of photography:
- Portrait Photography: A 50mm f/1.8 or an 85mm f/1.4 lens is ideal for portraits, offering sharp focus on the subject with a beautiful background blur.
- Landscape Photography: A wide-angle lens, such as a 16-35mm f/4 or 24mm f/2.8, is perfect for capturing expansive scenes with plenty of detail.
- Wildlife Photography: A telephoto lens, such as a 70-200mm f/2.8, is excellent for capturing distant wildlife while keeping the background blurred.
- Street Photography: A standard lens like a 35mm f/1.4 or a 50mm f/1.8 is ideal for candid street shots, offering a natural perspective.
Conclusion
Choosing the right lens is crucial to enhancing your photography. Understanding the different types of lenses, focal lengths, aperture sizes, and build qualities will help you select the perfect lens for your style and needs. Whether you’re capturing portraits, landscapes, or wildlife, the right lens can make all the difference in the quality of your images. Consider your photography goals and budget when making your choice, and invest in lenses that will allow you to explore your creative potential.