Photography is an art form that blends technical skill with creative expression. Whether you’re a beginner capturing your first sunset or a seasoned photographer working on your next portfolio piece, there are always new techniques to learn and improvements to make. The beauty of photography lies in its versatility—you can shoot portraits, landscapes, wildlife, architecture, and much more, all while experimenting with different styles, settings, and compositions.
In this article, we’ll explore some essential photography tips for photographers of all levels. From mastering exposure to finding your unique perspective, these tips will not only help you improve your skills but also inspire you to push the boundaries of your creativity.
1. Understand the Exposure Triangle
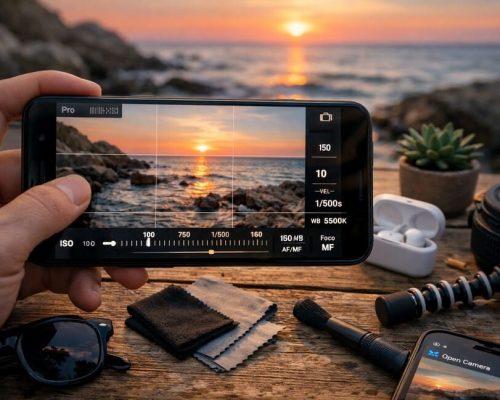
Exposure is the foundation of any great photograph. It controls how light or dark an image appears, and understanding the relationship between three key settings—aperture, shutter speed, and ISO—is essential to creating well-exposed images. Together, these elements form what’s known as the exposure triangle.
Aperture: The opening in your lens that controls how much light enters the camera. A wider aperture (a lower f-number like f/1.8) lets in more light, which is great for low-light conditions or creating a shallow depth of field. A smaller aperture (higher f-number like f/16) lets in less light, ideal for bright conditions or when you want more of your scene in focus.
Shutter Speed: The length of time the camera’s sensor is exposed to light. A fast shutter speed (like 1/1000) is perfect for freezing fast motion, such as a bird in flight. A slow shutter speed (like 1/30) allows you to capture motion blur, such as flowing water or moving traffic.
ISO: The sensitivity of your camera’s sensor to light. A lower ISO (e.g., 100 or 200) produces less noise and is ideal for bright conditions. Higher ISOs (e.g., 1600 or 3200) allow you to shoot in low light, but they can introduce noise into the image.
- Pro Tip: The goal is to balance these three settings to get the right exposure without overexposing or underexposing your image. Start by adjusting one setting and compensating with the others. For example, if you want to keep a fast shutter speed for action shots, you might need to open the aperture or increase the ISO to get a well-lit image.
2. Master Composition Techniques
Composition is key to creating visually compelling photographs. It’s not just about taking a picture—it’s about arranging the elements in your frame to tell a story, evoke emotion, and capture the viewer’s attention. Here are some key composition techniques to elevate your images:
The Rule of Thirds
One of the most widely known and effective composition rules is the rule of thirds. Imagine dividing your image into a 3×3 grid, both horizontally and vertically. The most important elements in your frame should be placed along these lines or at their intersections. This creates a sense of balance and makes your image more dynamic.
- Pro Tip: Avoid centering your subject every time. For instance, when photographing a landscape, place the horizon along the top or bottom third of the frame, depending on whether you want to emphasize the sky or the ground.
Leading Lines
Leading lines guide the viewer’s eye through the image, creating depth and drawing attention to the subject. Roads, rivers, fences, or architectural features can all act as leading lines.
- Practical Tip: Use leading lines to direct the viewer’s gaze to the subject of the photo. Try placing the lines at an angle to make the image feel more dynamic.
Framing the Subject
Framing involves using elements in your environment to encircle or partially cover your subject. This technique helps focus attention on the subject and adds a layer of depth to the photo.
- Pro Tip: Look for natural frames like doorways, windows, trees, or arches to isolate your subject. This can be especially effective in portrait photography or when capturing architectural details.
3. Use Natural Light to Your Advantage
Lighting can make or break a photograph, and while artificial lighting offers flexibility, nothing compares to the beauty and warmth of natural light. Understanding how to use natural light to your advantage will elevate your photos, especially when shooting outdoors or in natural settings.
Golden Hour and Blue Hour
The golden hour is the time shortly after sunrise and before sunset, when the sunlight is soft, warm, and diffused. This is the ideal time for shooting portraits or landscapes, as the light creates long shadows and a beautiful glow.
Blue hour, on the other hand, happens just before sunrise and after sunset, when the light takes on a cooler, more dramatic tone. This period is perfect for capturing cityscapes, landscapes, and even star trails.
- Pro Tip: Make use of both golden and blue hour to create different moods in your photos. When shooting portraits, position your subject so the light hits their face at an angle to create dimension and highlight features.
Avoid Harsh Midday Sun
While the midday sun is often too harsh, it can create dramatic shadows that can add interest to certain subjects. However, if you want soft, flattering light for portraits or nature shots, aim to shoot early in the morning or late in the afternoon.
- Practical Tip: If you must shoot during midday, find shaded areas where the light is diffused. Alternatively, you can use a reflector or diffuser to soften the light on your subject.
4. Experiment with Different Perspectives and Angles
Changing your perspective can completely transform a scene. Instead of shooting from eye level, experiment with different angles and viewpoints to give your images more depth and intrigue.
Get Low or High
Shoot from ground level to capture the texture of the foreground or give your subject a larger-than-life feel. Alternatively, shooting from a higher angle can offer a broader view of the scene and create interesting patterns or compositions.
- Pro Tip: When photographing nature or architecture, try shooting from a low angle to make the subject appear taller and more imposing. Conversely, a high-angle shot can provide a fresh and comprehensive perspective.
Use Reflections
Reflective surfaces like water, windows, or even mirrors can create striking symmetry and add interest to your shots. Look for opportunities to include reflections in your photos, especially when shooting landscapes or architecture.
- Practical Tip: When shooting reflections, make sure to adjust your exposure to balance both the reflected image and the subject. You can use the reflection to create a sense of depth and add a layer of complexity to the composition.
5. Focus on the Details
While wide shots and grand landscapes are beautiful, sometimes the magic is in the details. Macro photography allows you to explore the world up close, capturing intricate textures, patterns, and small subjects that might otherwise go unnoticed.
Capture Textures and Patterns
Look for interesting textures and patterns in nature, architecture, or everyday objects. The subtle details, like the lines on a leaf, the rough surface of a rock, or the repeating shapes in a building, can make for captivating photos.
- Pro Tip: When photographing textures, get as close as possible to the subject and use a macro lens or the macro mode on your camera to highlight the intricate details.
Isolate Your Subject
Isolating your subject against a simple background can create powerful and impactful images. Use a shallow depth of field to blur the background, allowing your subject to stand out. This technique works especially well in portrait, still life, and nature photography.
- Practical Tip: To achieve a blurred background, use a wide aperture (such as f/2.8 or f/1.8) and focus on the subject while keeping the background out of focus.
6. Edit Your Photos with Purpose
Once you’ve captured your images, the next step is editing. Post-processing is where you can fine-tune your photos to bring out the best in them. Whether you’re using Photoshop, Lightroom, or a mobile editing app, editing allows you to enhance colors, adjust exposure, and refine details.
Don’t Overdo It
While editing is important, it’s easy to get carried away with filters and adjustments. Aim for a natural look that enhances the image rather than transforming it into something unrecognizable.
- Pro Tip: Focus on subtle adjustments—like adjusting exposure, contrast, and white balance—to make the image pop without losing the natural feel.
Crop and Straighten
Don’t be afraid to crop or straighten your photos during the editing process. A little cropping can improve composition and remove distracting elements from the frame.
- Practical Tip: When cropping, use the rule of thirds to ensure the subject remains properly positioned in the frame. A slight rotation can also make your image feel more balanced and polished.
Conclusion: Continuous Learning and Experimentation
The most important photography tip of all is to never stop learning. Photography is an evolving art form, and as technology advances, new tools and techniques emerge. Keep practicing, experimenting with different settings, and seeking inspiration from other photographers.
Remember, photography is about more than just taking pictures—it’s about capturing moments, telling stories, and expressing your creativity. By implementing these tips and staying curious, you’ll continue to grow as a photographer and create stunning images that leave a lasting impact.

