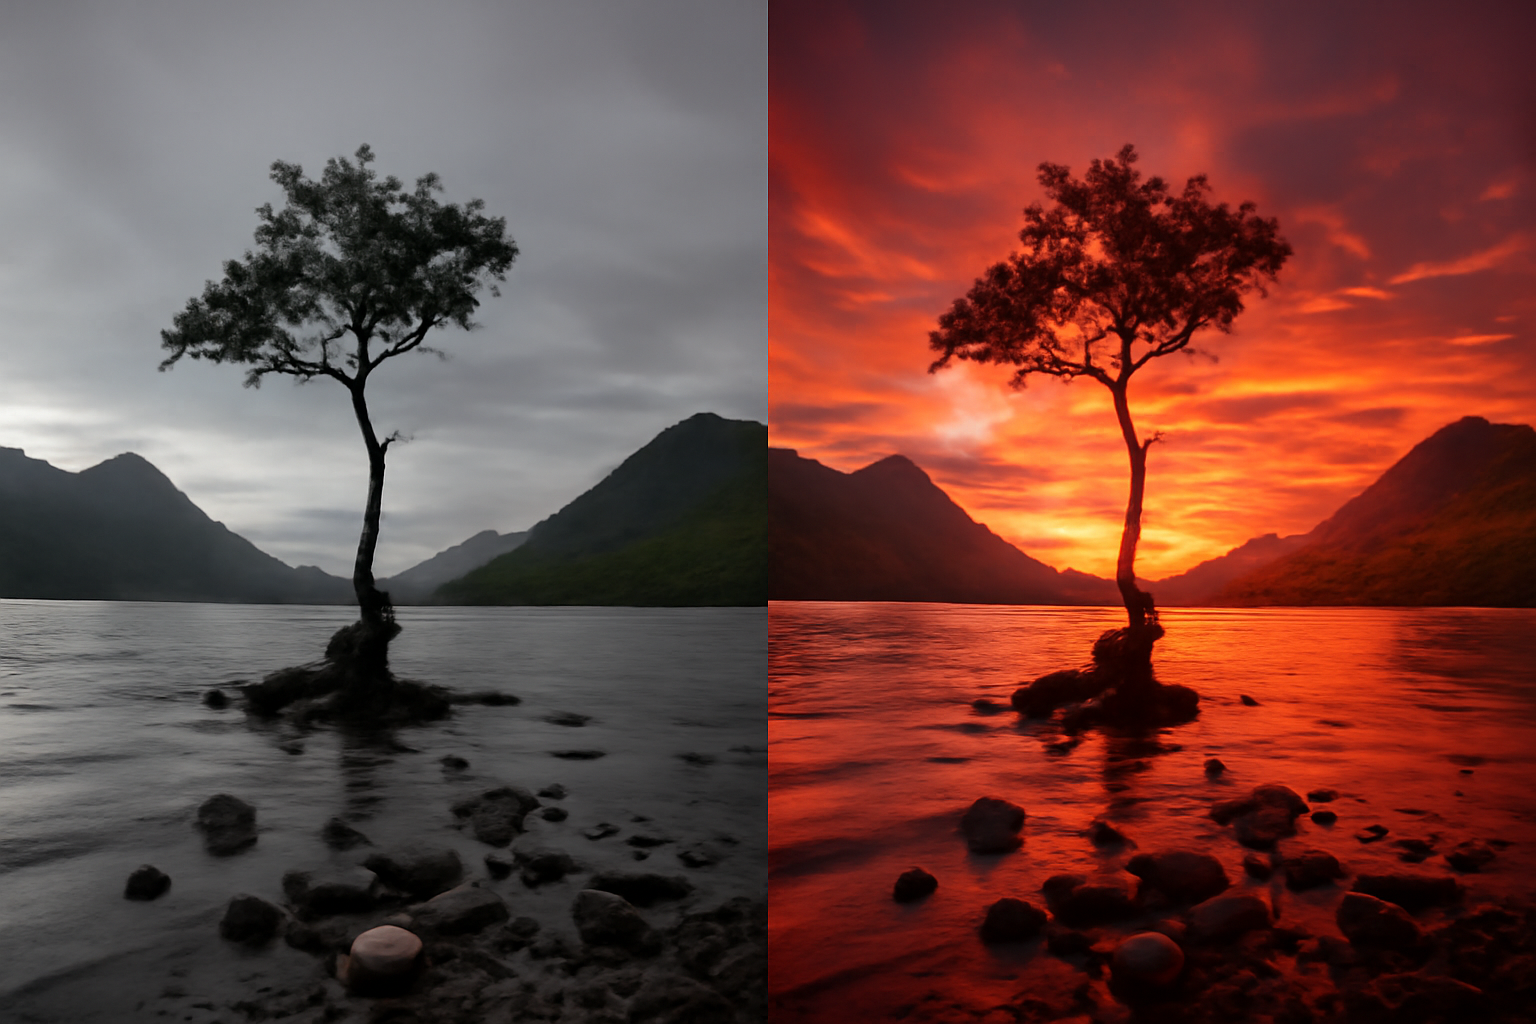
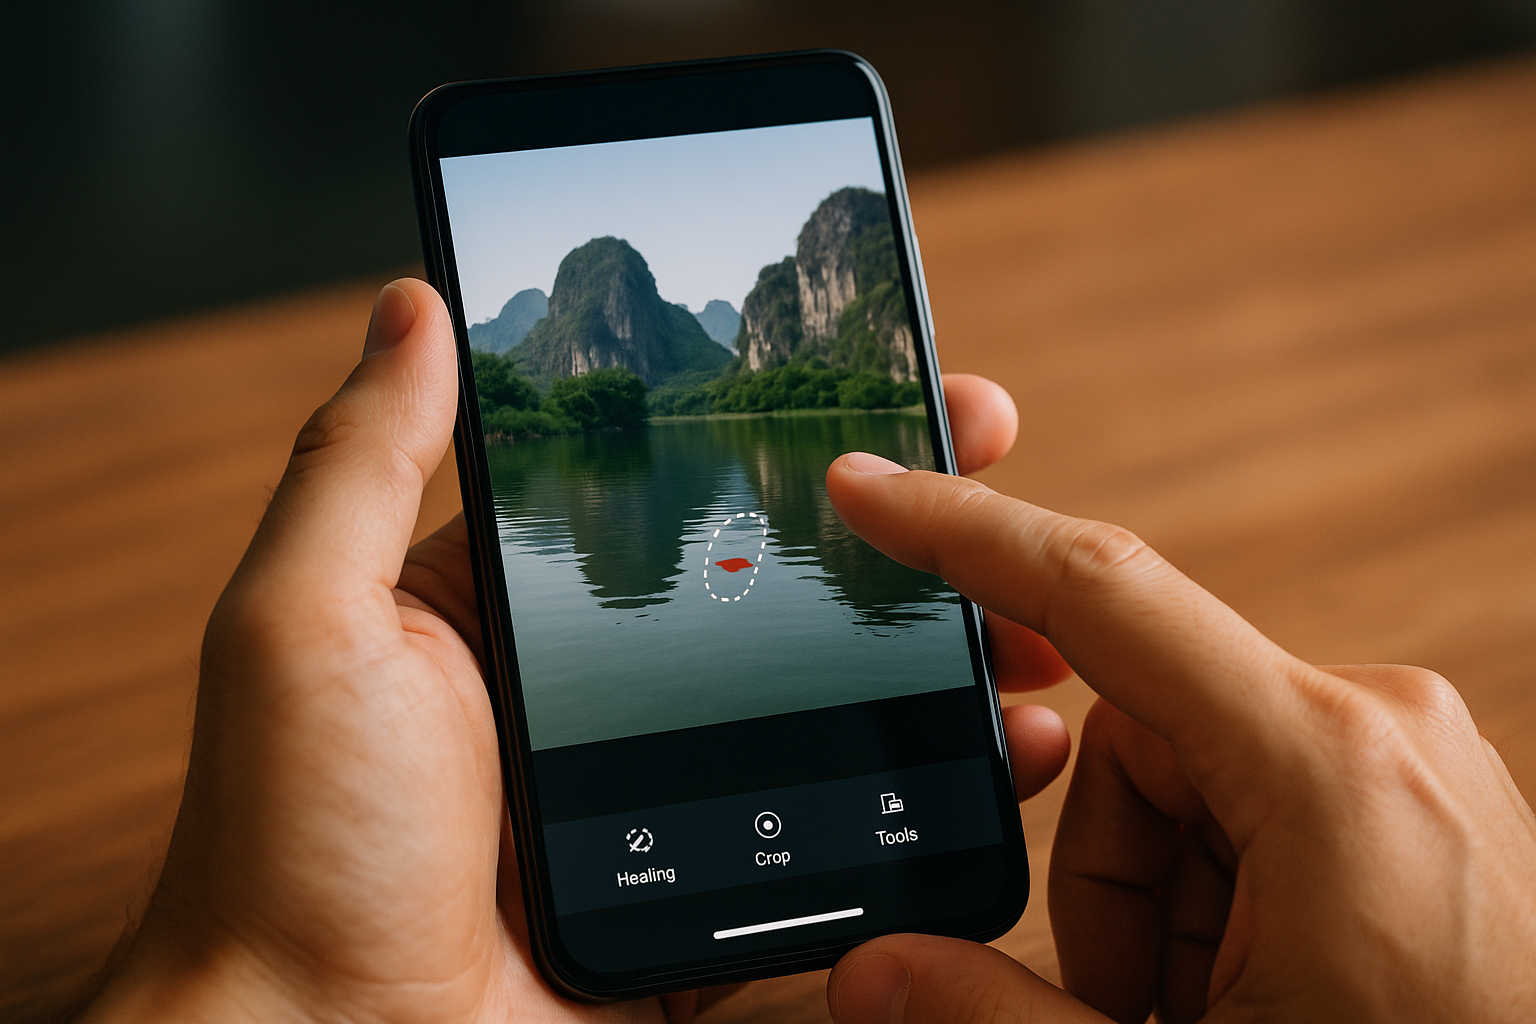
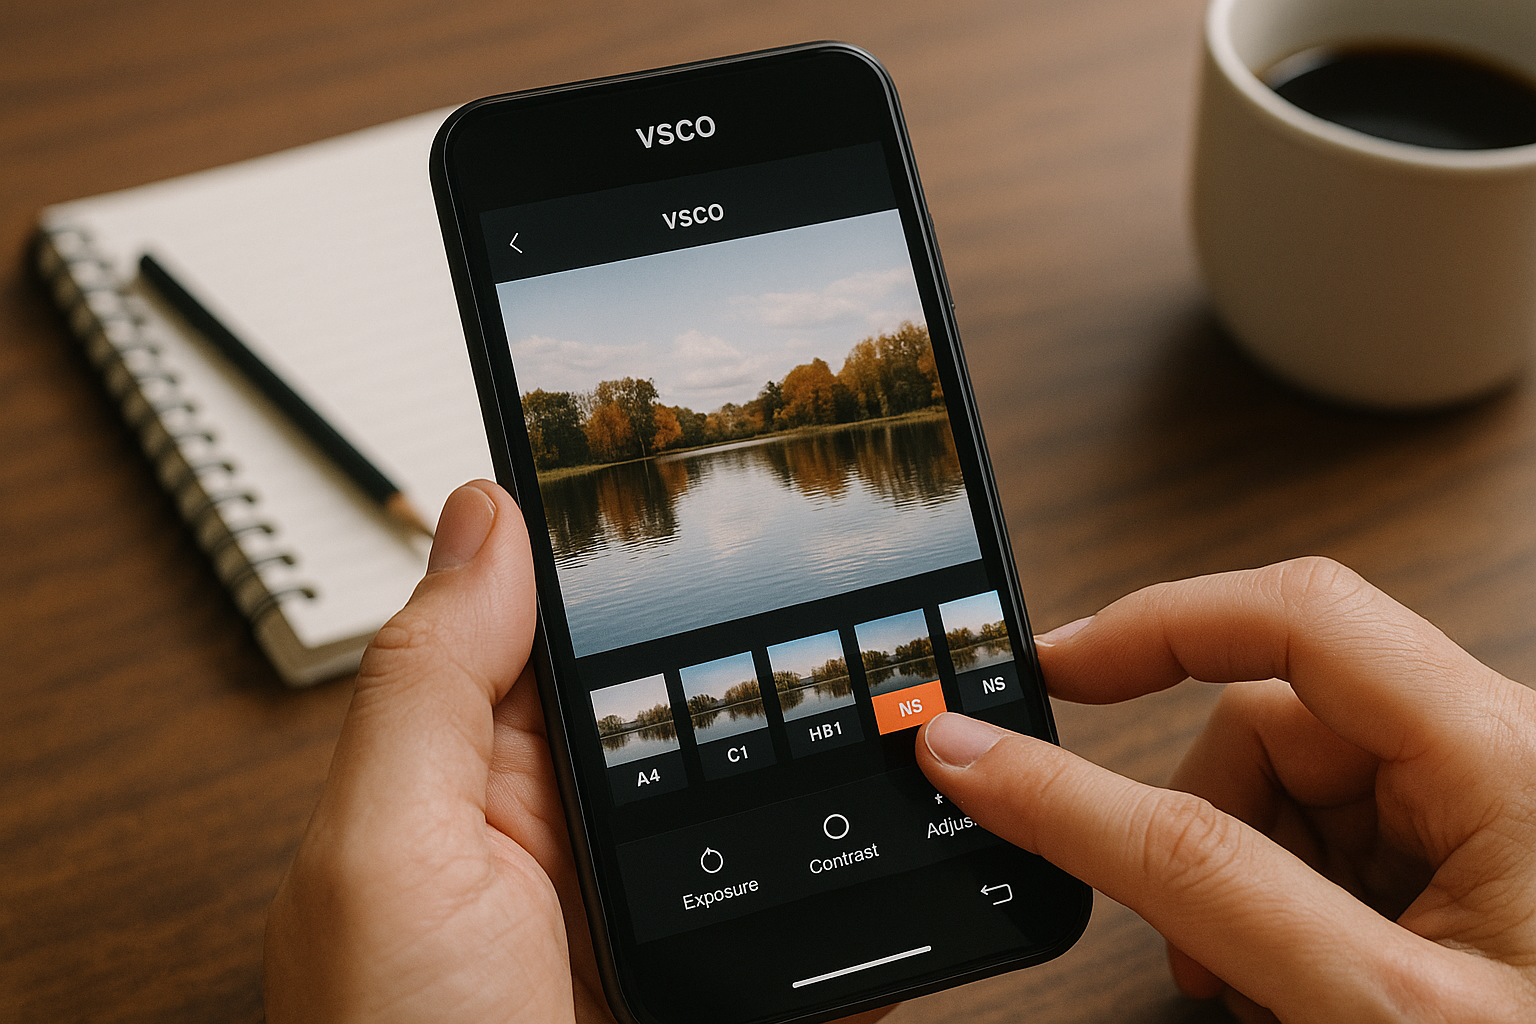
Photography doesn’t end when you press the shutter—it starts there. What separates a nice photo from a striking, professional-looking one is often the editing process. And if you’re just stepping into the world of photography, the idea of photo editing might sound technical or intimidating. But here’s the truth: it’s not about mastering dozens of tools—it’s about understanding what makes a photo work and using the right touches to bring it to life. This guide is for beginners who want to make their photos pop—not through filters or gimmicks, but through thoughtful, artistic decisions that enhance what’s already there. Why Photo Editing is More Than a Touch-Up Let’s get one thing straight: editing isn’t cheating. Think of editing as the digital darkroom. Back in the days of film, photographers spent hours developing photos manually, adjusting exposure, dodging and burning areas, and experimenting with tone and contrast. Today, those same techniques exist—but they’ve moved to your screen. Editing allows you to: And perhaps most importantly, editing helps you express your voice as a photographer. Choosing the Right Tool for the Job You don’t need to spend a fortune to start editing. In fact, many excellent tools are free or offer generous trial versions. Here’s how to decide what fits your current level: For Total Beginners Snapseed: Incredibly intuitive, with pro-level tools wrapped in a clean interface.Photoscape X: Simple layout, great for first-time desktop editors.Lightroom Mobile (Free version): Offers sliders, presets, and non-destructive editing. For Intermediate Growth Lightroom (Desktop): Ideal for consistent, detailed edits and batch processing.Photoshop: More advanced and flexible—great for retouching, composites, or commercial work.Affinity Photo: Powerful alternative to Photoshop, but with a one-time fee. Tip: Start small. You don’t need every tool at once—what matters is mastering the basics. Step-by-Step Editing Workflow Let’s break down a basic photo edit, whether you’re using Lightroom, Snapseed, or another editor. Start with Cropping and Straightening Remove dead space. If the horizon is tilted, fix it. Crop in a way that strengthens composition—think rule of thirds, leading lines, or symmetry. Example: A portrait with too much headroom can be cropped to bring attention to the eyes and face. Tweak Exposure and Contrast Adjust brightness if the image is too dark or overexposed. Use contrast to separate lights and darks, which adds depth and sharpness to the image. Tip: Don’t just slam the contrast slider—learn how to use highlights, shadows, whites, and blacks individually for nuanced control. Adjust White Balance (Color Temperature) An image too cool (blue) or too warm (orange) can feel off. Use the temperature slider to bring the image closer to how the scene felt in real life—or how you want it to feel. Example: A sunset photo may benefit from adding warmth, even if it wasn’t as orange in person. Add Clarity, Texture, and Sharpness These sliders enhance fine details. But be gentle—too much texture can exaggerate skin imperfections in portraits. Tip: Use Clarity for adding punch to landscapes, and Texture for drawing out detail in things like bark, bricks, or fabric. Saturation and Vibrance These adjust color intensity. Saturation affects all colors equally. Vibrance targets the more muted ones—making it the safer, more natural option. Advice: A little vibrance can bring life. Too much saturation can turn a beach scene into a cartoon. Use Selective Tools Many apps offer selective edits. You can brighten just the face in a portrait, or reduce highlights in a specific area of the sky. Example: In Lightroom, the brush and radial filter are your best friends here. Remove Distractions Whether it’s a trash can in the background or a pimple on someone’s face—spot healing tools let you clean things up. Tip: Zoom in! It’s easier to fix issues when you’re working close. Think Like an Artist, Not Just an Editor What are you trying to say with this photo? Editing is a chance to guide the viewer’s eye, emphasize emotion, and create atmosphere. Ask yourself: There’s no right or wrong—just make sure your edits are intentional. Real Talk: A moody black and white portrait might hide distractions and highlight emotion. A bright, vibrant street shot may benefit from extra contrast and punchy colors. Developing Your Own Editing Style Style doesn’t happen overnight. But it does grow with practice. Start saving your favorite edits as presets or templates. Over time, patterns will emerge—maybe you favor high-contrast looks, or soft, pastel tones. Your “look” becomes part of your identity as a photographer. Keep a folder of inspiration: photographers you admire, color palettes you love, or edits that made you say “wow.” Common Mistakes (And How to Avoid Them) Even the best editors made these mistakes early on. Here’s what to watch out for: Over-editing skin: It’s tempting to smooth skin into oblivion, but it ends up looking unnatural.Too much clarity: Especially in portraits, it can make people look older or overly textured.Crushing the blacks: Lifting shadows too much can make the image look flat or “foggy.”Adding heavy vignettes: A soft vignette can add focus—but a strong one just feels forced. Rule of thumb: If you can see the edit before the photo, it’s too much. Practice: The Real Secret to Improvement You won’t learn editing by reading about it—you learn by doing. Take five of your own photos and edit them differently: Compare them side by side. Which feels more you? Challenge: Edit the same photo in three different styles. It’ll teach you just how much power editing holds. Editing by Genre: What Changes? One of the biggest shifts in your editing journey will be learning how to approach different types of photography. A good edit for a landscape might look completely wrong on a portrait. Portraits With portraits, skin tone is everything. Overediting can easily lead to plastic-looking skin or loss of detail in the eyes. Tips: Landscapes Landscapes often benefit from bold contrast and color, but be careful not to push the saturation too far. Tips: Street Photography Street photography is about storytelling. Focus on emotion, light, and composition. Tips: The Emotional
Tips to Make Your Photos Sharper and More Detailed
There’s nothing more frustrating than capturing a beautiful moment — only to realize later that your photo is soft, blurry, or lacking in detail. Sharpness is one of the first things people notice in a photo, and it can instantly elevate the perceived quality of your work. But making your photos sharp and detailed isn’t just about having the latest gear. It’s about knowing how to use what you have — understanding how light, focus, shutter speed, and camera handling all come together. This guide covers real, practical tips that will help you create sharper, clearer images — whether you’re shooting portraits, landscapes, street photography, or products. Why Sharpness Matters Sharpness adds clarity, texture, and impact. A sharp photo draws the viewer in and makes them feel closer to the subject. Whether you’re photographing a person’s eyes, the texture of a leaf, or the fine lines of a building, detail helps tell the story. In commercial photography, sharpness can mean professionalism. In personal projects, it makes memories more vivid. It’s a skill worth mastering. Use a Fast Enough Shutter Speed One of the most common reasons photos turn out blurry is because the shutter speed was too slow. A slow shutter speed allows motion blur — either from camera shake or the movement of the subject. A good rule of thumb: your shutter speed should be at least 1 divided by the focal length. For example, if you’re using a 50mm lens, aim for 1/50s or faster. For a 200mm lens, go with 1/200s or faster. If your subject is moving — like a child running, a pet playing, or someone walking — you’ll need an even faster shutter speed, like 1/500s or higher. Stabilize Your Camera Even with a fast shutter speed, hand movement can still cause blur. That’s why camera stabilization is key. Use a tripod or monopod whenever possible. Especially helpful for landscapes, product photography, or low-light situations. Turn on image stabilization (IS or VR) if your lens or camera body offers it — but be aware that some systems should be turned off when using a tripod. Hold your camera properly: tuck your elbows in, support the lens with your left hand underneath, and keep your posture steady. Use a remote shutter or 2-second timer to eliminate the shake from pressing the button manually. Focus with Precision It sounds obvious, but the way you focus matters. Cameras often try to guess what you want in focus — and they don’t always get it right. Use single-point autofocus (AF-S or One Shot) for still subjects. Choose the focus point manually and place it exactly where you want, like the subject’s eyes. Use continuous autofocus (AF-C or AI Servo) for moving subjects. The camera will keep tracking and adjusting as the subject moves. Use manual focus for macro, product, or still-life shots where precision matters. Zoom in using live view to ensure tack-sharp results. Aim for the Eyes If you’re photographing a person or animal, the eyes must be sharp. It’s what people instinctively look at first. Even if the rest of the image is slightly soft, a sharp eye creates a strong connection and emotional pull. Modern cameras with eye detection autofocus are incredibly helpful, but even without it, train yourself to focus on the eye closest to the lens. Choose the Right Aperture Your aperture setting (f-stop) affects depth of field — and that directly impacts what’s in focus. Wider apertures (like f/1.8 or f/2.8) create shallow depth of field. Great for portraits, but you need to be extra careful with focus — just a small movement can shift sharpness. Narrower apertures (like f/8 or f/11) give you more depth and are ideal for landscapes or group shots. Be cautious with very small apertures (like f/22) — they may reduce sharpness due to diffraction. Most lenses are sharpest between f/5.6 and f/11. Use the Lowest ISO Possible (Without Sacrificing Exposure) High ISO introduces noise, which can reduce the apparent sharpness of your photo — especially in shadows or darker areas. Stick to ISO 100 or 200 whenever possible. In low light, balance ISO with shutter speed and aperture. It’s often better to raise ISO slightly than to risk a blurry photo from a too-slow shutter. Noise can be reduced in post-processing, but lost sharpness from blur cannot. Master the Light Light reveals detail. If your lighting is flat or insufficient, your photo will look dull and soft — even if technically in focus. Side lighting or backlighting brings out texture in surfaces like skin, fabric, wood, and stone. Natural light from a window is fantastic for portraits and still life — it’s soft, diffused, and directional. Avoid harsh midday sun — it can wash out details and cause hard shadows. Instead, shoot during golden hour or use diffusers. Use reflectors to bounce light and lift shadows without flattening your subject. Keep Your Lens Clean It may sound simple, but a dirty lens can ruin even the best shot. Use a lens cloth or blower to remove dust and smudges regularly. Avoid touching the front glass — even fingerprints can degrade clarity. Check for internal fog or moisture if shooting in humid environments. Also, be cautious with filters. Low-quality UV filters can degrade image sharpness. If you’re using one, make sure it’s from a reputable brand — or remove it when sharpness is a priority. Shoot in RAW Format RAW files contain much more data than JPEGs. This gives you more flexibility in post-processing, allowing you to sharpen, reduce noise, and enhance details without destroying the image. JPEGs often apply in-camera sharpening, but also compression that can smear details. RAW gives you full control over how your photo is processed — especially useful for professionals or serious enthusiasts. Use the Right Lens for the Job Some lenses are sharper than others. Prime lenses (fixed focal length) tend to be sharper than zooms, especially cheaper zooms. A 50mm f/1.8 prime lens is inexpensive and famously sharp. If
Tips for Photographing People Naturally
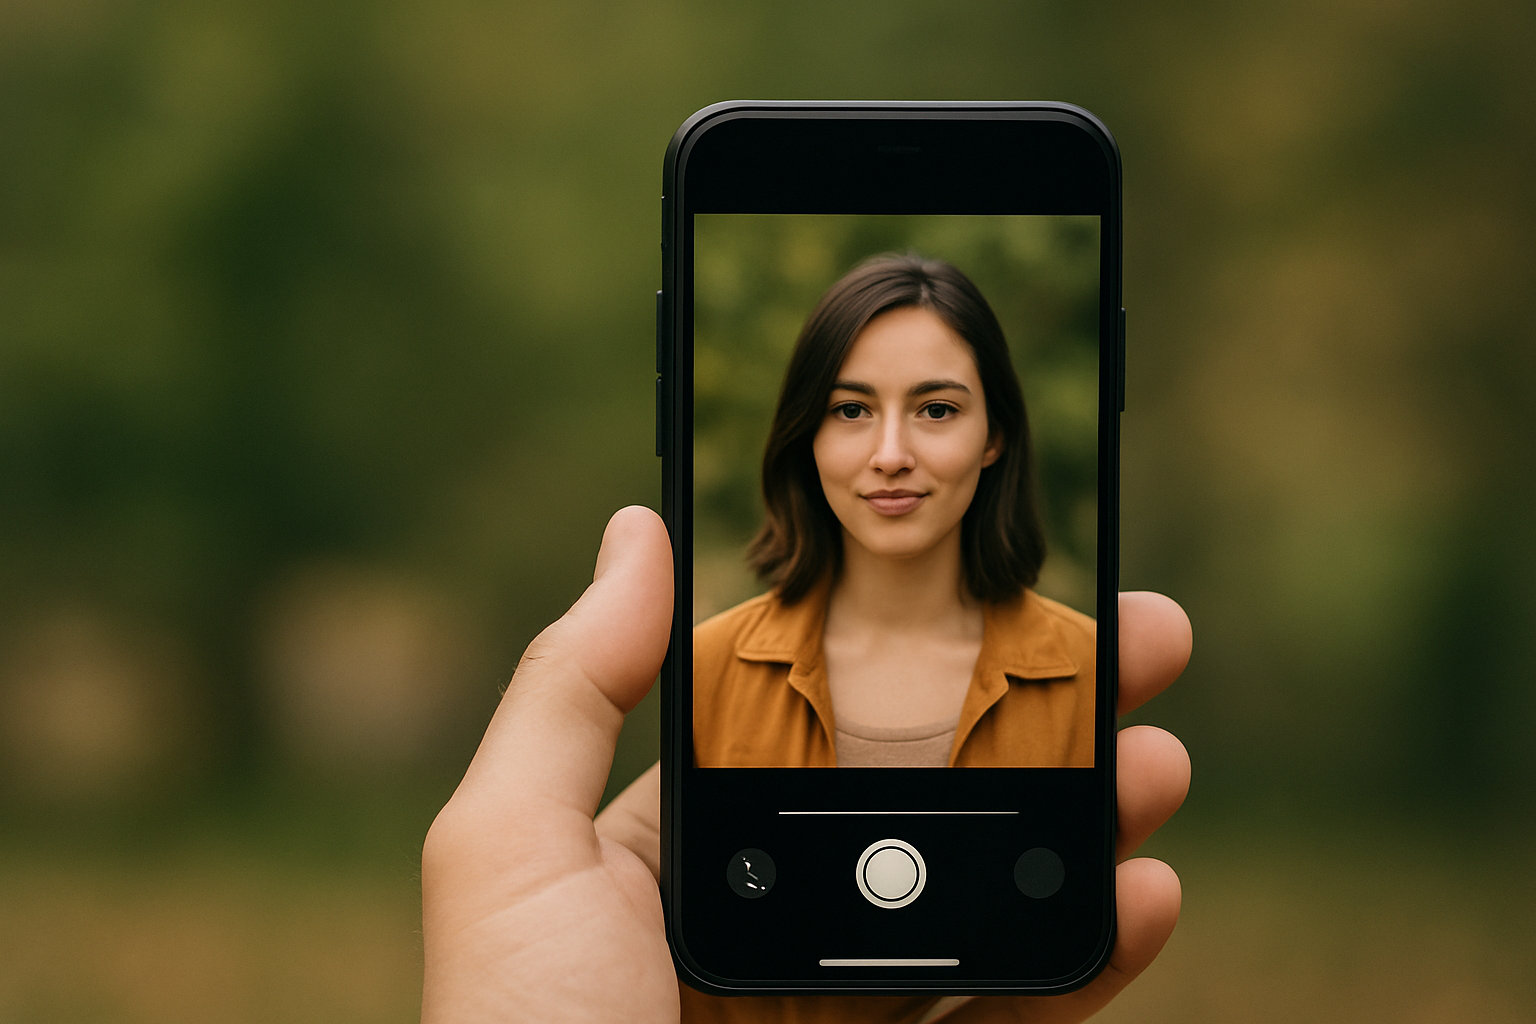
There’s something incredibly powerful about a photo of a person that feels honest — not overly posed, not artificial, just real. Natural portraits connect with the viewer because they reflect life, emotion, and presence. But capturing people in a natural, authentic way is not as easy as it looks. It takes patience, sensitivity, and a real connection between the photographer and the subject. If you’ve ever felt like your portraits look stiff or overly staged, this guide is for you. Let’s explore practical tips and insights to help you photograph people more naturally — with emotion, flow, and real human energy. Understand What “Natural” Really Means Before diving into techniques, let’s clarify something: natural doesn’t mean unplanned. It doesn’t mean you just point the camera and hope for the best. Natural photography is intentional — but it prioritizes comfort, authenticity, and mood over rigid control. In portraits, “natural” can mean: It’s about making the subject feel seen, not just captured. Start with a Conversation, Not a Camera One of the simplest and most powerful things you can do is talk to your subject before taking a single shot. Whether it’s a friend, client, or stranger, give yourself a few minutes to connect. Ask about their day, their music taste, what they’re into. Make eye contact. Smile. Let the camera stay down for a moment. Real story: I once photographed a man who looked incredibly tense in front of the camera. Only after 10 minutes of talking about jazz (his favorite subject) did his whole posture change — and that’s when the magic happened. People aren’t props. When they feel respected, relaxed, and heard, they open up. Location: Choose a Place That Feels Comfortable Your choice of location influences the entire mood of a portrait. Busy places can feel chaotic. Empty fields can feel distant. Neutral backgrounds can feel flat. If your goal is to photograph someone naturally, choose a location where they feel like themselves. For example: You don’t need exotic scenery. You need a place where the person can breathe and be real. Tip: Ask them, “Where do you feel most like yourself?” The answer often leads to great locations. Lighting: Soft Is Best Harsh lighting (like midday sun) often creates strong shadows that feel dramatic and unnatural. For natural portraits, soft, diffused light is your best friend. Here are some go-to light sources for natural-looking results: If you must shoot in harsh light, try using open shade — like under a tree, awning, or the side of a building. Let the Subject Move Posed doesn’t always mean stiff — but holding a position for too long can kill the vibe. One way to keep portraits looking natural is to encourage movement. Ask them to: These micro-movements often lead to in-between moments — where real expression lives. That glance, that shrug, that soft smile… that’s where the gold is. Pro tip: Keep your camera ready during transitions. Some of the best shots happen when the subject thinks you’re not shooting. Give Direction Without Controlling You don’t have to leave everything to chance. But instead of barking orders like, “Turn your head 15 degrees to the right,” try giving visual or emotional cues. Here are some ways to direct naturally: These types of prompts produce real responses — not mannequin poses. Use a Longer Lens (If Possible) Wide-angle lenses are great for environments but tend to distort facial features when used too close. For natural portraits, try using a lens between 50mm and 135mm (full-frame equivalent). A longer focal length: If you’re using a phone, try stepping back and zooming slightly (without digital zoom). Even that subtle distance can help with comfort and naturalness. Don’t Force Eye Contact Some of the most natural portraits are the ones where the subject isn’t looking directly at the camera. Encourage your subject to: These small changes can transform the mood from “posed headshot” to cinematic storytelling. Shoot a Lot — But Be Selective Part of capturing natural expressions is being present — and fast. Don’t hesitate to shoot a lot during a session. Sometimes, you’ll get the shot in a burst of 5–10 frames. But quantity doesn’t mean chaos. In post-processing, be ruthless about what you keep. One natural, emotional, well-lit photo is better than 20 “okay” ones. Look for: Pro insight: Trust your gut. If something makes you feel something, it will likely do the same for others. Black and White Can Elevate Natural Moments Sometimes, stripping away color brings attention to the emotion. Don’t be afraid to convert natural portraits to black and white — especially when: Black and white can give a timeless, honest feel that works especially well for natural, candid shots. Edit Lightly — Keep It Real When editing natural portraits, less is often more. Avoid filters or presets that change skin tones too dramatically or create unnatural contrast. Focus on: The goal is to preserve the feeling of the moment, not overwrite it. Let Silence Do the Work You don’t need to talk constantly during a shoot. In fact, quiet moments often lead to the most genuine expressions. Once your subject is comfortable, give space. Let them settle. Let them breathe. Then, lift the camera and quietly click. Silence invites reflection — and reflection creates real emotion. Tell a Story Through the Series If you’re photographing someone for a series — not just one shot — think about how to show different sides of them. Maybe you start with close-ups, then move to wider shots. Or begin with quiet, introspective images and shift toward joyful energy. Storytelling through portraits isn’t about costumes or themes — it’s about showing the complexity of a real human being. Use Props or Activities to Create Natural Context One of the easiest ways to make people forget about the camera is to give them something to do — not as a distraction, but as a way to engage them naturally. Here are a few examples that work great: These small actions
Tips for Photographing Couples Naturally
Photographing couples should feel like storytelling—not posing. The best couple portraits aren’t about forced smiles or staged embraces. They’re about connection, emotion, and the subtle energy that flows between two people. As a photographer, especially one passionate about travel and human stories, your job is to capture that connection in the most authentic way possible. Whether you’re documenting love on a cobblestone street in Prague or under the golden light of a vineyard in Tuscany, photographing couples naturally takes more than technical skill. It takes empathy, creativity, and a deep respect for the people in front of your lens. This guide shares practical, heartfelt tips to help you photograph couples in a way that feels real, relaxed, and timeless. Create a Comfortable Atmosphere Before you even raise your camera, your couple needs to feel at ease. Nervous energy shows. Your first priority should be to build trust and rapport. Start with conversation. Ask how they met, what they love to do together, why they chose this place. Keep it light, personal, and open. The more they talk, the more they relax. Be human, not just professional. Let them know it’s okay to laugh, mess up, or just be themselves. When couples feel seen and respected, they let their guard down—and that’s when the magic happens. Guide, Don’t Pose Instead of saying “stand here and smile,” try giving prompts. Ask one person to whisper something sweet or silly in the other’s ear. Tell them to walk hand-in-hand and bump shoulders playfully. These moments create natural movement and real emotion. Your goal isn’t perfection. It’s honesty. Look for how their bodies lean into each other, how they look when they think no one’s watching. Those are your real portraits. Offer gentle direction only when needed. Focus on interaction, not position. Encourage touch, eye contact, laughter, and pauses. Let moments unfold, then capture them. You can also demonstrate what you mean with body language rather than technical terms—show, don’t tell. Choose Meaningful Locations Place matters. The right location can elevate the emotional tone of the photos and help couples feel more connected. Ask if they have a favorite café, park, or travel memory. If you’re shooting in a new destination, look for quiet spots with natural light and some space to move. Natural backdrops like cliffs, forests, beaches, or old streets work beautifully. Urban environments with textures, reflections, and depth can also be stunning. Choose locations that allow intimacy. Somewhere they can be close without distractions, somewhere they can move freely and enjoy the experience together. Consider shooting in multiple nearby locations to give the couple variety and new energy during the session. Observe and Anticipate Pay attention to how they interact when they think you’re not shooting. Their natural body language, private jokes, and comfortable silences are clues. Anticipate gestures: a forehead kiss, a shared laugh, hands finding each other. Be ready—not to stage the moment, but to catch it when it comes. Sometimes the best shots happen between poses, in the seconds of stillness or spontaneous joy. Keep your camera up and your energy relaxed. Use quiet moments as storytelling tools—observe how their expressions shift in different environments or light. Use Movement to Loosen Them Up Stillness can feel awkward for many couples. Movement adds comfort and spontaneity. Have them walk, dance, spin, sway, or run. Play music if it helps. Ask them to mirror each other’s movements. These actions distract them from the camera and focus their attention on each other. Movement also helps loosen facial expressions and adds flow to your compositions. A walking shot with one quick glance or hand squeeze often carries more emotion than a static pose. Let them lead the movement at times—it reveals dynamics and often sparks genuine laughter or intimacy. Focus on Emotion, Not Perfection Perfect lighting, perfect clothes, perfect smiles—none of that matters if the emotion isn’t real. Prioritize feeling over flawless technique. Let go of technical perfection when it gets in the way. If the light is soft and the moment is strong, click the shutter. If the expression is true but the composition is off, take it anyway. Emotion is timeless. A blurry photo full of love is better than a sharp one that feels cold. Look for micro-expressions and subtle gestures—those quiet signs of affection often become the most powerful images. Incorporate the Environment Use the surrounding scene to complement the couple’s story. Frame them in a window, behind hanging vines, or between architectural lines. Let the location become part of the narrative. Reflections in puddles, shadows on walls, sun flares, or motion blur can all add atmosphere. Just be sure the couple remains the emotional focus. You’re not just documenting faces—you’re capturing context. Where they are can say as much as how they feel. Even background sounds—waves, city bustle, leaves—can subtly shape the energy of your images if you let the moment unfold naturally. Work With Natural Light Natural light enhances natural moments. Look for soft light during golden hour, gentle shadows during overcast days, and warm tones during sunrise or sunset. Avoid harsh midday light unless you’re using shade or reflectors. Let light fall gently across faces and skin. Backlighting can add glow and softness. Travel offers amazing light variety—city reflections, mountain haze, beach sunsets. Learn to adapt quickly and use available light creatively. Observe how the light interacts with your couple and your environment. Be flexible and ready to reposition quickly when a magical beam appears. Encourage Intimacy, Respectfully Couples express love in different ways. Some are openly affectionate; others are subtle. Respect their dynamic and never push for moments they’re not comfortable with. Encourage closeness by reminding them why they’re there. Share their story back to them. Create moments that feel safe and organic. A quiet forehead touch, hands clasped, a shared laugh—these gestures speak volumes. Intimacy doesn’t always mean kisses or embraces. It means presence. Trust-building is key here. If they feel safe, they’ll show you their real love—not the version they think
Tips for Photographing Concerts and Live Events
Concerts and live events are thrilling, chaotic, emotional—and visually stunning. For photographers, they offer a dynamic playground filled with dramatic lighting, raw energy, and fleeting expressions. But capturing these moments is not as simple as pointing and shooting. From navigating low-light conditions to handling fast-moving subjects and unpredictable crowds, photographing live events requires a mix of technical skill, creative intuition, and practical know-how. Whether you’re shooting a local indie gig or a major music festival, mastering the art of live event photography can lead to some of the most powerful and memorable images in your portfolio. Here’s how to approach the challenge and capture the essence of a concert like a pro. Know the Event Before You Arrive Preparation is everything. Before the show, learn as much as you can about the event: Familiarize yourself with the artists and their stage presence by watching past performances or music videos. Understanding their energy will help you anticipate key moments. Check the venue rules about photography. Some events may have restrictions on professional gear, flash use, or where photographers can stand. Having a shot list or visual goals in mind will also help you stay focused and ready. Think about the story you want to tell. Use the Right Gear When it comes to concerts, low light and fast motion are the norm. Here’s what you need: Bring extra batteries and memory cards. If allowed, consider ear protection—venues can be LOUD. Keep your gear bag minimal and organized for quick access in tight spaces. A dual-camera setup (one wide, one telephoto) can be invaluable for switching compositions on the fly. Also consider lens hoods to help control stage glare. Master Low-Light Shooting Concerts are notoriously dim, but that doesn’t mean your photos have to be. Embrace the light you have: Shoot in RAW to give yourself more flexibility in post-processing. If the lighting changes frequently, set your white balance to auto and correct it later. Use histogram and highlight alerts to avoid blown-out lights or underexposed shadows. Don’t rely on the LCD preview alone. Work With Stage Lighting, Not Against It Stage lighting is dramatic and beautiful—but tricky. Use it to your advantage: Avoid using flash—it’s disruptive, often prohibited, and ruins the natural ambiance. Think like a cinematographer: use contrast, shadows, and lighting direction to enhance your story. Don’t shy away from moody, high-contrast scenes. They often carry more impact. Learn to read lighting setups and anticipate transitions. Anticipate the Action Live events move fast. To catch decisive moments, you have to think ahead: Keep both eyes open: one in the viewfinder, the other observing the scene. Great event photographers are part journalist, part dancer—always moving, always ready. Position yourself where you can see expressions and body language clearly. Anticipation often makes the difference between good and great. Find Strong Compositions Even in chaos, there’s structure. Look for: Get a variety of angles—wide shots of the whole stage, tight shots of expressions, close-ups of instruments. Try to include contextual elements like the venue, banners, or fans to tell a fuller story. Don’t be afraid to crop in post to isolate strong visual moments. Use symmetry, patterns, and negative space creatively. Capture the Audience Too The crowd is half the story. Don’t forget to turn around: These images add emotion and immersion to your concert story. Moments of connection between performer and audience are golden—don’t miss them. Crowd reactions can sometimes tell the story better than the stage. Capture emotions and movement that complement the energy onstage. Move With Purpose You’ll likely be working in a packed, energetic environment. Move respectfully and deliberately: Quick feet and quiet movement go a long way. Build relationships with venue staff and be professional. It can open doors for future access. Use smaller movements to reduce motion blur in tight spaces. Move with intention—not just instinct. Tell a Story With Your Photos Don’t just shoot random moments—craft a narrative. A cohesive photo story can live on blogs, portfolios, or social media galleries. Include backstage or behind-the-scenes images if you have access—they give rare insight. Tell the story of the experience, not just the performance. Let your photos reflect the music’s tone and emotion. Be Mindful of the Vibe Concerts have emotional energy. Respect it. Blend in and let your presence be subtle. Being unobtrusive builds trust and earns better access. Let the energy guide your composition style—calm for acoustic sets, bold for rock. Each genre tells its story differently—reflect that in your framing and post-processing choices. Post-Process With Purpose Editing concert photos takes finesse: Create black and white versions for mood and timelessness. Batch process to maintain consistency if you’re delivering a set. Use presets or LUTs to develop a consistent style across events. Your editing style becomes part of your visual signature. Respect Legal and Ethical Boundaries Some events and artists have strict rules: If you plan to sell or publish images, confirm what usage rights you have. Ethical photography builds long-term reputation and trust. When in doubt, ask. Transparency always wins. Respect for artists and attendees builds long-term relationships. Build a Portfolio, Then Get Published Once you’ve captured great live event shots: Use these experiences to grow your network and credibility. Photography at concerts isn’t just art—it’s community, culture, and collaboration. Consistency and professionalism can turn your passion into a career. Show not just talent, but reliability. Stay Passionate and Keep Learning Every event teaches you something new. Embrace it: The more you shoot, the more intuitive your timing, settings, and creative voice will become. Consider assisting or shadowing experienced photographers to accelerate your growth. Attend workshops or photo meetups focused on live events. Final Thought: Capture the Feeling In the end, it’s not about sharpness or settings—it’s about emotion. When someone looks at your photo, they should hear the music, feel the lights, and remember the moment. Concert photography is more than technical skill—it’s storytelling with rhythm, light, and heart. So next time you step into a venue with your camera, don’t just
Tips for Photographing Children: A Beginner’s Guide
Photographing children is a unique experience. It can be chaotic, emotional, hilarious, unpredictable—and also incredibly rewarding. Whether you’re a beginner photographer looking to expand your skills or a parent who wants to capture more authentic moments of your kids, learning how to photograph children well is both an art and a process. Unlike adults, children don’t pose naturally, rarely sit still, and almost never follow instructions exactly the way you plan. And that’s what makes it beautiful. This guide is made for you, the beginner photographer who wants real, useful advice—not robotic steps or complicated gear setups. You’ll find practical tips, real-world insights, and inspiration to help you approach children’s photography with more confidence and creativity. Understand That Kids Aren’t Miniature Adults The first mindset shift you need is this: photographing kids is completely different from photographing adults. Adults will try to cooperate (even if they’re shy), but kids? They’ll test your patience, ignore your direction, and do their own thing—until they forget the camera is there. And that’s when the magic happens. Don’t try to force children into rigid poses or control every moment. Your job is to observe, guide gently, and anticipate rather than direct. Expect spontaneity. Embrace it. Tip 1: Build Connection Before You Shoot Children don’t trust strangers instantly—and that includes you, the photographer. Before you even pick up the camera: Even two minutes of friendly engagement can change the whole session. Once they see you as a fun adult, not just a camera-holder, they’ll be far more relaxed. A relaxed child = better expressions, more authenticity, less resistance. Tip 2: Use Natural Light as Much as Possible Kids move. A lot. Which means you need fast shutter speeds and forgiving light. Whenever possible, use natural light: Avoid harsh midday sun unless you’re using shade or diffusers. Indoors, turn off artificial lights to prevent mixed color temperatures and shoot near a big window. And don’t be afraid of a cloudy day—it gives you an even, soft light that’s perfect for child portraits. Tip 3: Keep It Short and Sweet Children have very short attention spans. Expect that. Plan for mini-sessions: It’s better to get 10 great images in 20 minutes than to push for an hour and end with a frustrated child (and parents). Photographing kids is like fishing: be patient, stay alert, and be ready when the moment comes. Tip 4: Let Them Move! Trying to get a child to “stand here” and “smile” is often a losing battle. Instead, incorporate movement into the shoot. Some ideas: Action brings out genuine expressions, bursts of laughter, and natural poses you couldn’t have choreographed. Set your shutter speed high (1/500 or faster) and capture the energy. Bonus: you’re also building trust because you’re allowing them to be themselves. Tip 5: Be a Silent Observer One of the most powerful approaches to child photography is becoming invisible. Instead of constantly giving direction, step back. Let the child engage with a toy, explore the environment, interact with their parent or sibling—and quietly observe. This is where you’ll catch the pure, unscripted moments: Candid moments speak louder than posed smiles. And for parents, these images hold emotional value for life. Tip 6: Shoot from Their Level One of the most common beginner mistakes? Shooting children from adult height. To create images that feel immersive and connected, get down to the child’s level. Kneel, squat, or lie on the ground if needed. When you’re on their eye line, the composition becomes more powerful, intimate, and personal. Bonus tip: also try some shots from unusual angles—overhead, behind the child, or focusing on little details like hands or feet. Variety keeps the gallery more interesting. Tip 7: Focus on the Eyes (But Be Flexible) In portrait photography, the eyes are everything—especially with children, whose expressions change in a heartbeat. Use continuous autofocus (AF-C or AI Servo) with face/eye detection if your camera allows it. Set your aperture wide enough to blur the background (around f/2.8 to f/4), but not so shallow that you risk missing focus. That said, some magical moments aren’t perfectly sharp. A blurry giggle or a motion-blurred twirl can still carry more emotion than a technically perfect image. Don’t be so obsessed with sharpness that you miss the story. Tip 8: Keep Your Gear Simple You don’t need tons of gear to photograph children. In fact, less is often more. What you need: If you’re photographing indoors, consider a reflector or a portable LED light—but only if the child is comfortable with it. Big lights or modifiers can be intimidating to little ones. Focus more on your connection than on your kit. Tip 9: Involve the Parents (But Set Boundaries) Parents can be helpful—or distracting. Before the session: During the shoot: Sometimes, including the parent in the frame (even partially) creates beautiful images full of warmth and security. Don’t be afraid to invite that interaction. Tip 10: Capture the In-Between Moments Some of the best photos happen between the “official” shots: Always keep your camera up. Watch for transitions. A yawn, a glance, a stretch—they’re all storytelling gold. This also builds a more honest and emotionally rich gallery for the family. Tip 11: Bring Distractions (the Right Kind) Kids get bored fast. Come prepared. Have a small bag of: Use them sparingly—just enough to spark laughter or surprise. You don’t want to over-stimulate the child. A well-timed giggle can create magic, but constant entertainment can ruin focus. Also, don’t forget the classic trick: ask them to show you their silliest face — and be ready to capture the real smile that follows. Tip 12: Accept Imperfection Child photography isn’t about symmetry, perfect backgrounds, or clean compositions. It’s about emotion, energy, and authenticity. You’ll have missed shots. Some photos will be crooked, noisy, or chaotic. That’s okay. What matters is that the images feel alive. Learn to love the realness. Parents aren’t hiring you for textbook technique—they want photos that remind them who their child really is. Bonus: Communicate With
Essential Photography Tips for Every Photographer: Unlocking the Secrets to Stunning Shots
Photography is an art form that blends technical skill with creative expression. Whether you’re a beginner capturing your first sunset or a seasoned photographer working on your next portfolio piece, there are always new techniques to learn and improvements to make. The beauty of photography lies in its versatility—you can shoot portraits, landscapes, wildlife, architecture, and much more, all while experimenting with different styles, settings, and compositions. In this article, we’ll explore some essential photography tips for photographers of all levels. From mastering exposure to finding your unique perspective, these tips will not only help you improve your skills but also inspire you to push the boundaries of your creativity. 1. Understand the Exposure Triangle Exposure is the foundation of any great photograph. It controls how light or dark an image appears, and understanding the relationship between three key settings—aperture, shutter speed, and ISO—is essential to creating well-exposed images. Together, these elements form what’s known as the exposure triangle. Aperture: The opening in your lens that controls how much light enters the camera. A wider aperture (a lower f-number like f/1.8) lets in more light, which is great for low-light conditions or creating a shallow depth of field. A smaller aperture (higher f-number like f/16) lets in less light, ideal for bright conditions or when you want more of your scene in focus. Shutter Speed: The length of time the camera’s sensor is exposed to light. A fast shutter speed (like 1/1000) is perfect for freezing fast motion, such as a bird in flight. A slow shutter speed (like 1/30) allows you to capture motion blur, such as flowing water or moving traffic. ISO: The sensitivity of your camera’s sensor to light. A lower ISO (e.g., 100 or 200) produces less noise and is ideal for bright conditions. Higher ISOs (e.g., 1600 or 3200) allow you to shoot in low light, but they can introduce noise into the image. 2. Master Composition Techniques Composition is key to creating visually compelling photographs. It’s not just about taking a picture—it’s about arranging the elements in your frame to tell a story, evoke emotion, and capture the viewer’s attention. Here are some key composition techniques to elevate your images: The Rule of Thirds One of the most widely known and effective composition rules is the rule of thirds. Imagine dividing your image into a 3×3 grid, both horizontally and vertically. The most important elements in your frame should be placed along these lines or at their intersections. This creates a sense of balance and makes your image more dynamic. Leading Lines Leading lines guide the viewer’s eye through the image, creating depth and drawing attention to the subject. Roads, rivers, fences, or architectural features can all act as leading lines. Framing the Subject Framing involves using elements in your environment to encircle or partially cover your subject. This technique helps focus attention on the subject and adds a layer of depth to the photo. 3. Use Natural Light to Your Advantage Lighting can make or break a photograph, and while artificial lighting offers flexibility, nothing compares to the beauty and warmth of natural light. Understanding how to use natural light to your advantage will elevate your photos, especially when shooting outdoors or in natural settings. Golden Hour and Blue Hour The golden hour is the time shortly after sunrise and before sunset, when the sunlight is soft, warm, and diffused. This is the ideal time for shooting portraits or landscapes, as the light creates long shadows and a beautiful glow. Blue hour, on the other hand, happens just before sunrise and after sunset, when the light takes on a cooler, more dramatic tone. This period is perfect for capturing cityscapes, landscapes, and even star trails. Avoid Harsh Midday Sun While the midday sun is often too harsh, it can create dramatic shadows that can add interest to certain subjects. However, if you want soft, flattering light for portraits or nature shots, aim to shoot early in the morning or late in the afternoon. 4. Experiment with Different Perspectives and Angles Changing your perspective can completely transform a scene. Instead of shooting from eye level, experiment with different angles and viewpoints to give your images more depth and intrigue. Get Low or High Shoot from ground level to capture the texture of the foreground or give your subject a larger-than-life feel. Alternatively, shooting from a higher angle can offer a broader view of the scene and create interesting patterns or compositions. Use Reflections Reflective surfaces like water, windows, or even mirrors can create striking symmetry and add interest to your shots. Look for opportunities to include reflections in your photos, especially when shooting landscapes or architecture. 5. Focus on the Details While wide shots and grand landscapes are beautiful, sometimes the magic is in the details. Macro photography allows you to explore the world up close, capturing intricate textures, patterns, and small subjects that might otherwise go unnoticed. Capture Textures and Patterns Look for interesting textures and patterns in nature, architecture, or everyday objects. The subtle details, like the lines on a leaf, the rough surface of a rock, or the repeating shapes in a building, can make for captivating photos. Isolate Your Subject Isolating your subject against a simple background can create powerful and impactful images. Use a shallow depth of field to blur the background, allowing your subject to stand out. This technique works especially well in portrait, still life, and nature photography. 6. Edit Your Photos with Purpose Once you’ve captured your images, the next step is editing. Post-processing is where you can fine-tune your photos to bring out the best in them. Whether you’re using Photoshop, Lightroom, or a mobile editing app, editing allows you to enhance colors, adjust exposure, and refine details. Don’t Overdo It While editing is important, it’s easy to get carried away with filters and adjustments. Aim for a natural look that enhances the image rather than transforming it into something unrecognizable. Crop and Straighten
Outdoor Photography Tips: What Every Beginner Should Know
Outdoor photography is one of the most captivating ways to explore photography. Natural light, open environments, and the unpredictability of the world outside make every shot a unique experience. But for beginners, all these variables can feel overwhelming. How do you deal with light? What’s the best time of day? How do you compose a solid image without fancy gear? This guide is for you — someone starting out in outdoor photography and looking to avoid common mistakes while growing with confidence and creativity. Natural Light: Your Best Friend (or Worst Enemy) The first thing every beginner needs to understand is that natural light is everything in outdoor photography. But it can either be your best friend or your worst nightmare. Golden Hour: This is the time just after sunrise and just before sunset. The light is soft, warm, and diffused — perfect for portraits, landscapes, nature shots, and any scene with emotional impact. Midday: Avoid it when you can. The light is harsh, direct, and creates strong shadows — especially unflattering for portraits. If shooting at midday is unavoidable, find open shade under trees or buildings to soften the light. Cloudy Days Are Gold: It might seem counterintuitive, but cloudy skies act as natural diffusers. The light becomes even and shadowless. Great for portraits and detail shots. Pro Tip: Even with limited light, it’s better to learn to work with it than to rely too heavily on editing afterward. Shift your angle, reposition your subject, or wait for the right moment. Know Your Gear (Even If It’s a Phone) Many beginner photographers think they need an expensive camera to take great photos. That’s a myth. What you really need is to master what you already have. Modern smartphones have incredible cameras. Learn how to use the manual or “pro” mode if available. Understand your gear’s limits. Knowing what your equipment can and can’t do saves frustration. Invest in a small tripod — especially helpful in low light or when exploring long exposure shots. Real-World Example: A beginner with a phone and a good eye can easily take better photos than someone with a $2,000 DSLR who doesn’t know what they’re doing. Composition: The Eye Behind the Lens Composition is what transforms an ordinary image into a memorable photograph. The good news is: you can train your photographic eye. Some essential techniques: Rule of Thirds: Divide the frame into 9 parts (two vertical and two horizontal lines). Place your main subjects at the intersections or along these lines. Leading Lines: Use paths, roads, fences, or rivers to guide the viewer’s eye through the image. Natural Frames: Branches, windows, doorways — use them to frame your subject. Fill the Frame: Don’t be afraid to get close. Sometimes, less background creates more impact. Golden Rule: Go beyond “pretty scenery.” Ask yourself: What do I want the viewer to feel when they see this? Understand the Scene Before You Shoot Too many beginners arrive at a location and start shooting right away. But pausing for five minutes to observe the light, movement, and surroundings can make all the difference. Walk around without your camera up to your eye. Watch how light hits different surfaces. Listen to the environment. Feel it. Imagine the photo before taking it. Personal Insight: My best outdoor shots came from patience and observation, not speed. Practice Anywhere — Literally You don’t need a magical forest or an international trip to improve. Sometimes, all it takes is a park bench, a well-lit plant, or a bike leaning against a wall at sunset. Train yourself to see the extraordinary in the ordinary. Shoot from different angles: from above, below, the side, far, or close. Shift your perspective. Get low. Climb higher. Challenge your viewpoint. Keep Your Gear Clean and Safe This might seem basic, but many beginners forget it: outdoor photography means dirt, dust, moisture, sand, wind. Take care of your gear. Always carry a dry microfiber cloth. Use waterproof bags or plastic covers if there’s any chance of rain. Don’t change lenses in windy or dusty areas (if using DSLR/Mirrorless). Bring extra batteries — especially in cold weather, which drains them faster. Learn From Your Mistakes (And Celebrate the Wins) You’re going to mess up. That’s a good thing. Mistakes mean you’re trying. But even more importantly: learn why something didn’t work. Is the photo blurry? Your shutter speed may have been too slow. Is the image too dark? Maybe you needed to adjust exposure. Is the scene boring? Consider changing the composition. Photographer’s Advice: Review your shots after every session. Identify what worked, what didn’t. Over time, you’ll make fewer mistakes — and shoot with more purpose. Shoot With Intention, Not Just Technique A good photo isn’t just technically correct. It should say something. The sky can be perfectly blue, the focus razor-sharp… but if the image doesn’t evoke anything in the viewer, it falls flat. Think about emotion, story, and connection. A photo of an elderly woman walking alone down an old street can be more powerful than a postcard-perfect sunset. Let your photos show how you see the world. Streamline Your Outdoor Workflow Beyond the shoot itself, beginners often overlook that photography is also about process: Plan your session in advance. Bring the right tools. Save your photos safely. Select your best shots. Edit with purpose. Pro Tip: Organize your files from the beginning. Create folders with clear names like: /Photos/2025-09-03-CityPark/RAW and /Edited. Staying organized early will save you hours later. Post-Processing Matters (Even Just a Little) Some beginners think editing is cheating. It’s not. Post-processing is part of the art — even a minimal edit can make a huge difference. Fix exposure issues. Enhance contrast and colors. Crop intentionally for better composition. Remove distractions in the background. Beginner-friendly tools: Snapseed (mobile), Lightroom Mobile, Lightroom or Capture One (desktop). Even subtle edits can elevate your image from decent to striking. Develop Your Style — Slowly and Honestly It’s normal at first to imitate photos you admire.
Mobile Photography: How to Take Amazing Pictures with Your Phone
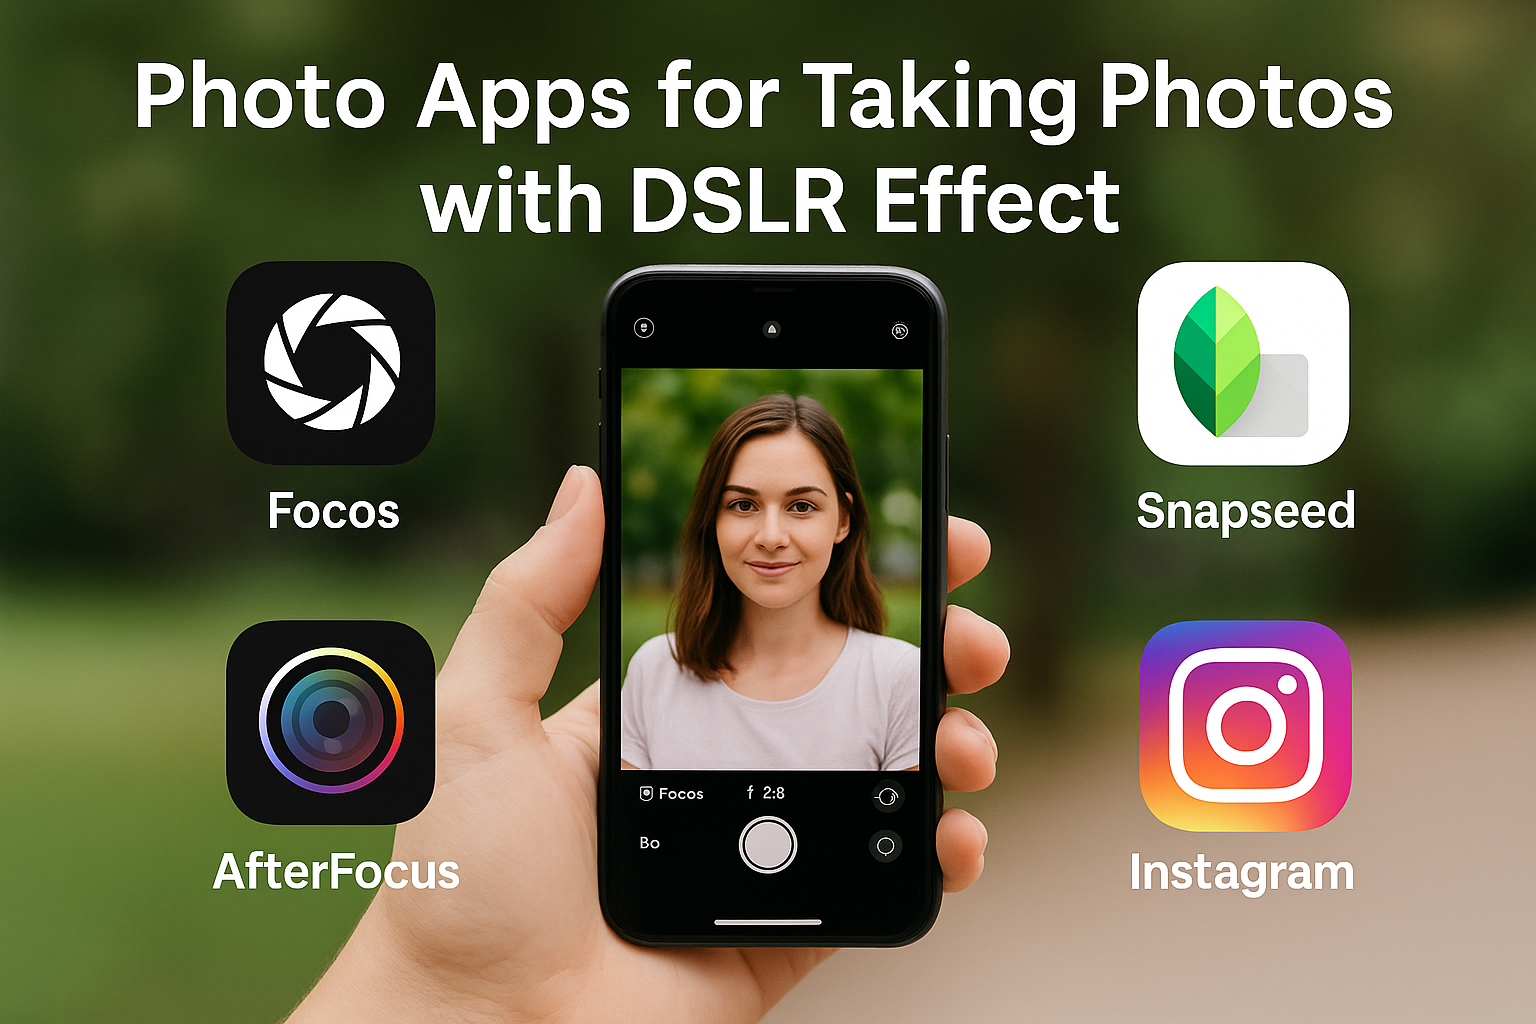
Not so long ago, taking professional-looking photos required expensive cameras and bulky lenses. Today, your smartphone has the power to capture stunning images that rival dedicated cameras. Mobile photography has become an art form in itself—accessible, creative, and always within reach. The key, however, isn’t just having the latest phone. It’s learning how to see like a photographer and use your device to its fullest potential. In this guide, I’ll share practical tips, real-world examples, and personal insights to help you take amazing pictures with nothing more than your phone. Why Mobile Photography Matters The best camera is the one you have with you. Smartphones are always in your pocket, making them perfect for capturing: With mobile photography, you don’t need to wait for the perfect setup. You can act on inspiration instantly. Know Your Phone’s Camera Features Before diving into tips, get familiar with your phone’s camera settings. Many beginners stick to automatic mode, but modern smartphones offer much more. Spend time experimenting with these modes. The more you understand your camera’s features, the more control you’ll have over your shots. Lighting Is Everything Great photography starts with light. Phones have smaller sensors, so lighting makes an even bigger difference. Tips for Better Lighting: Pro tip: Always be mindful of the direction of light. Front lighting flattens features, while side lighting adds depth and drama. Composition: Think Before You Tap Smartphone photography is as much about composition as it is about gear. Apply classic techniques: Exercise: Next time you’re out, take three photos of the same subject using different compositions. Compare and see which one tells the best story. Keep It Steady Blurry shots are a common issue in mobile photography. To improve sharpness: If your phone has night mode, combine it with a tripod for impressively sharp low-light images. Get Closer Instead of Zooming Digital zoom reduces quality, so avoid pinching to zoom. Instead: Exception: If your phone has multiple lenses (wide, telephoto, ultra-wide), switch between them instead of relying on digital zoom. Experiment with Angles Changing your perspective can transform an ordinary subject into something striking. Try photographing everyday objects from unexpected viewpoints—it’s a simple way to train your eye. Use Portrait Mode Wisely Portrait mode can make photos look professional, but use it carefully: Test portrait mode in different conditions to understand when it enhances your shots and when it doesn’t. Pay Attention to Backgrounds A cluttered background can ruin a great subject. Before taking a shot, scan the frame: Editing: The Secret Ingredient Editing is where good photos become great. Apps like Lightroom Mobile, Snapseed, and VSCO make it easy to polish your shots. Key Edits: Important: Don’t overdo it. Subtle edits maintain a natural look. Use Grids and Leading Lines in Urban Photography City environments are full of strong shapes, patterns, and lines. Train your eye to spot: These elements add structure and interest to your shots. Embrace Minimalism Sometimes less is more. A single flower on a table, a lone figure walking in an empty street, or a shadow on a wall can make a powerful image. Minimalist photos allow viewers to focus on the essence of the subject, making them memorable and striking. Storytelling with Your Phone Great photos don’t just show—they tell. With mobile photography, think about the narrative behind your shots. When you infuse storytelling into your photos, even a simple phone snapshot becomes meaningful. Practice with Challenges To keep improving, try photography challenges: These exercises build discipline and push your creativity. Learn from Mistakes Not every shot will be perfect—and that’s okay. The beauty of mobile photography is that mistakes cost nothing but time. Look at your missed shots and ask: Mistakes are stepping stones toward developing your unique style. Use Accessories to Elevate Your Shots While a phone alone is powerful, a few inexpensive accessories can take your images to the next level: These small tools can make a big difference, especially if you’re serious about mobile photography. Mobile Photography for Different Situations 1. Travel Capture wide landscapes with your phone’s ultra-wide lens. Use leading lines like roads or rivers to create depth. Don’t forget to turn the camera on yourself too—self-portraits during travel add personality to your memories. 2. Food Photography Natural light is your best friend. Shoot near a window, and avoid harsh overhead lights. Use portrait mode carefully to make the dish pop, but keep enough detail in the surroundings to tell a story. 3. Street Photography Blend in by keeping your phone low and discreet. Capture candid expressions and everyday life. Try shooting from the hip for unposed, authentic moments. 4. Portraits Always prioritize the eyes—tap to focus on them. Use natural light whenever possible, and experiment with side lighting for more dramatic effects. Common Mobile Photography Mistakes to Avoid Avoiding these mistakes will make your photos look instantly more professional. Quick Exercises to Train Your Eye with a Phone If you want to sharpen your vision as a photographer, here are some simple phone-only exercises: These exercises not only train your eye but also help you discover new ways of seeing with the device you already use every day. Final Thoughts: Your Phone, Your Vision Taking amazing pictures with your phone isn’t about owning the latest model. It’s about being intentional, observant, and creative with the tool you already have. Your smartphone is more than a gadget—it’s a gateway to storytelling, memory-making, and personal expression. With practice and awareness, you can transform ordinary moments into extraordinary images. So, keep your phone handy, your eyes open, and your imagination active. The world is waiting for your perspective. And with every photo you take, you’re not just recording life—you’re shaping how it’s remembered.
How to Take Creative Photos in Everyday Places
You don’t have to travel to exotic destinations or wait for perfect sunsets to create stunning photographs. Some of the most compelling images are born from the everyday—moments that most people overlook, scenes that seem too familiar to notice. The magic of photography is not just in what you see, but in how you see it. Whether you’re a seasoned traveler stuck at home or a beginner eager to improve your skills, learning to take creative photos in everyday places will challenge your eye, sharpen your creativity, and open up a whole new world of photographic possibilities. Here’s how to make the mundane extraordinary—one photo at a time. Shift Your Mindset: See with Fresh Eyes Creativity begins with curiosity. Before you even pick up your camera, train yourself to look at your environment differently. Ask: Challenge yourself to see your surroundings as if you were visiting for the first time. That hallway, coffee mug, or rainy window may hold more photographic potential than you think. Don’t underestimate the emotional value of what’s familiar. Often, our most nostalgic memories are tied to everyday visuals. Use Constraints to Fuel Creativity Sometimes, limitations bring out the best in us. Instead of waiting for ideal conditions, embrace the constraints of your environment: These restrictions force you to get inventive and think beyond the obvious. Creative photography often comes from problem-solving—not from perfection. You can even try time-based constraints: five minutes to shoot, or one photo an hour. Boundaries foster creative breakthroughs. Explore Light Like a Painter Light transforms ordinary scenes into extraordinary compositions. Learn to study how light interacts with surfaces, textures, and shadows in your space. Even artificial light sources like lamps or refrigerator lights can create moody or cinematic effects if used intentionally. Experiment with long exposures during low-light conditions to discover creative patterns. Focus on Composition Over Subject You don’t need a grand subject to make a great photo. Composition is key. Think in terms of lines, shapes, colors, and balance. Train your eye to find order in chaos—or beauty in minimalism. A well-composed image of a doorknob can be more impactful than a poorly shot landscape. Also, don’t be afraid to break traditional composition rules once you understand them. Try isolating your subject completely against a simple backdrop for added impact. Get Low, High, or Weird Perspective changes everything. Shoot from your knees. Stand on a chair. Press your camera to the ground. Explore reflections in puddles or glass. These shifts in perspective inject novelty and emotion into even the most familiar settings. Try shooting from behind translucent surfaces or using objects in the foreground to create depth. Play with mirrors, door peepholes, or reflections on metal surfaces for surprising effects. Find Texture and Detail Zoom in. Way in. Macro or close-up shots reveal the world in a way our eyes don’t usually perceive. Use shallow depth of field to isolate textures and let the background blur into softness. Experiment with unusual surfaces, such as condensation, frost, or dust, to add emotion to your textures. Textures tell tactile stories. They evoke sensory memories that words often can’t. Tell Micro-Stories A photograph doesn’t need to be sweeping to be meaningful. Try telling micro-stories—small visual narratives captured in a single image. These simple moments can evoke mood, memory, and atmosphere. Use captions or titles sparingly, just enough to spark curiosity or emotional connection. Each image becomes a short poem—visually minimal, emotionally rich. Embrace Imperfection and Spontaneity Creative photography isn’t about technical perfection—it’s about expression. Let go of control. Let accidents happen. Blur, grain, off-center framing—these can add emotion and honesty to your image. Don’t be afraid to break rules when the moment calls for it. Try setting your camera on burst mode to catch candid expressions and spontaneous interactions. Even a failed shot can spark your next creative idea. Use Color Intentionally Color is one of your most powerful storytelling tools. Use it to create mood, contrast, or cohesion. Even a single pop of bright color in a neutral setting can draw the eye and elevate a simple composition. Consider how colors influence mood—warm colors often energize, while cool tones may calm. Deliberate color grading in post-processing can also enhance your creative intent. Create Photo Series or Themes Sometimes, a single photo can’t fully express an idea—but a series can. Choose a theme and build a small project around it. Ideas: Photo series train your creative muscle and help you see with intent. They also build a stronger visual story when shared together. Consider presenting your series as a visual diary or seasonal journal. Think of themes not just as visuals, but as emotions—create a series around “quiet,” “melancholy,” or “joy.” Play With Motion Movement adds life to stillness. Explore slow shutter speeds or intentional camera movement. Even subtle movement, like a curtain in the wind, adds dynamism and rhythm to your composition. Experiment with time-lapse or GIFs to extend the impact of motion in your creative workflow. Try using motion to contrast stillness—mix blurred motion with a static subject. Include People—Even Yourself Everyday places feel more relatable with human presence. Include friends, family, or self-portraits to add narrative and emotion. You don’t always need faces. A silhouette, hand, or posture can speak volumes. Capture your own reflection in mirrors, windows, or shadows to add a poetic layer. The personal becomes universal when shared honestly. Practice Daily (Even for 10 Minutes) Creativity thrives with consistency. Make photography part of your daily routine—even if just for 10 minutes. Daily practice not only improves skill but also rewires your brain to see photographically. Over time, these tiny moments accumulate into a meaningful body of work. Keep a folder of your daily shots and review them monthly—you’ll be surprised at your growth. Edit With a Light Touch Post-processing is part of creative expression—but it’s not about over-editing. Enhance your vision, don’t mask it. Let your edits reflect your intention, not trends. Batch edit your images for consistency in your series or thematic posts. If