Introduction Learning how to use reflectors in lighting is a fundamental step for anyone looking to master light in photography. Reflectors are simple, accessible, and incredibly versatile tools that can completely transform the quality of an image. Whether in professional studios or outdoor photo shoots, reflectors help control shadows, direct light, and balance contrast—all without adding artificial light sources. In this article, you’ll learn how to choose, position, and use reflectors effectively, taking your photos to a new level of visual quality. What Are Reflectors in Photography? Purpose and Function Reflectors are surfaces that redirect existing light (natural or artificial) to specific areas of a scene. They do not produce light but rather reflect it to fill in shadows or highlight details. They are especially useful when there is only one light source and the photographer needs to soften contrast or illuminate secondary areas of the subject. Additionally, reflectors simulate secondary light sources, adding depth and richness to the image. Why Are They So Important? Reflectors allow precise control of light without relying on expensive or complex equipment. With just a simple white board or a portable reflector, you can: Furthermore, reflectors are sustainable tools, as they utilize existing light strategically, reducing energy consumption in photography productions. Types of Reflectors and Their Characteristics Foldable Reflectors (5-in-1) These are the most common on the market. They consist of a flexible frame with interchangeable surfaces: These reflectors are compact, foldable, and easy to carry—ideal for photographers who work in various locations. Rigid Panels and DIY Surfaces You can improvise reflectors using: Creativity is a powerful ally when working on a tight budget. Many professional photographers use homemade solutions with excellent results. Colors and Materials: White, Silver, Gold, Black, and Translucent Each color has a unique impact: Always align your reflector choice with the image’s visual intent and the scene’s color palette. How to Choose the Ideal Reflector for Each Situation Outdoor Photography vs. Studio Work Color Temperature Control Reflector color affects the tone of reflected light: This subtle variation can enhance your creative storytelling. Portability and Cost-Effectiveness 5-in-1 reflectors are compact, affordable, and versatile. Styrofoam and poster board are inexpensive and effective for home use. Ideally, have multiple options for different contexts and shooting styles. If you work solo, consider reflectors with adjustable arms or articulating stands. These offer flexibility and independence during shoots. Techniques for Using Reflectors Effectively Filling Shadows Use reflectors on the opposite side of the light source to soften shadows on the face or subject. Perfect for outdoor portraits with harsh side lighting or to balance sunlight and shadow. Directing Natural Light In indoor environments with windows, position reflectors strategically to redirect light and balance scene exposure. You can simulate side lighting using only daylight and a well-placed reflector. Creating Contrast and Depth In addition to softening shadows, reflectors help define volume. Bouncing light on specific body parts creates contrast and emphasizes form, adding dimension and visual interest. Bouncing Light from Flash or Continuous Sources Use reflectors to redirect flash light, simulating multiple sources. They also work well with LED or spotlights to create side light or fill. Position reflectors close to the main light to subtly reinforce light direction. Strategic Reflector Positioning Angle, Height, and Distance Experiment with small adjustments and observe how the light changes with each variation. Light control starts with a trained eye. Reflector with Assistant vs. Floor Stand Some stands have articulating arms for precise placement, useful in complex lighting setups. Tips to Avoid Unwanted Shadows Avoid placing the reflector directly below or above the subject’s face, which can create vertical shadows or harsh highlights. Always test the effect before shooting. Also, ensure the reflector doesn’t alter the direction of the original light source—unless that’s your creative goal. Practical Use Examples Outdoor Sessions with Natural Light Studio Setup with Flash and Reflector Product Photography with DIY Reflectors Common Mistakes and How to Avoid Them Overexposure in Reflected Areas Reflectors too close or angled directly at the subject can blow out highlights. Adjust angle and distance to soften the effect. Wrong Color That Alters Skin Tone Too much gold can turn skin orange. Silver can create a metallic look when overused. Test each color per scene and fine-tune with white balance adjustments. Unwanted Reflections and Glare Avoid pointing reflectors at reflective surfaces like glasses or chrome. This can cause lens flare or exaggerated light spots. Use diagonal angles to minimize risk. Master Light Creatively with Reflectors Mastering the use of reflectors in lighting is one of the simplest and most effective ways to control light without relying on expensive gear. With creativity and observation, you can transform any light source into an expressive tool. Explore different colors, distances, and angles. Practice in various lighting conditions and times of day. Observe how the reflector affects mood, detail, and imperfections. Reflectors are not just technical accessories—they are creative allies that expand the possibilities of any photographer committed to lighting quality and strong visual storytelling. With technical mastery and aesthetic sensibility, the reflector becomes more than a tool—it becomes an extension of the photographic eye.

Soft Light vs. Hard Light: Understand the Differences and When to Use Each
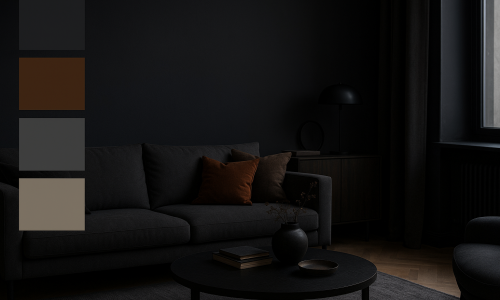
Introduction Soft light vs. hard light is an essential discussion in the world of photography. Understanding how each type of light affects the image is fundamental to creating visually coherent, expressive, and high-quality compositions. Whether in portrait, product, fashion, or documentary photography, the choice between hard or soft light directly influences the atmosphere, texture, and emotional impact of the image. In this guide, you’ll learn what differentiates these two types of light, how to identify them, and, most importantly, when and why to use each one in a technical and creative way. What is soft light and what is hard light? Definition and visual characteristics Soft light is characterized by diffused shadows, smooth transitions, and even illumination. It reduces contrast and provides a more delicate, uniform look—ideal for creating calm atmospheres or conveying comfort and warmth. Hard light, on the other hand, creates well-defined shadows with abrupt transitions between light and dark. It increases contrast and highlights details, textures, and volumes more intensely. This quality is useful when you want to emphasize lines, shapes, or create visual impact. How light interacts with the subject Soft light tends to “wrap” the subject, filling in shadows and softening imperfections. It’s commonly used for portraits and emotional scenes because it flatters facial features without harshness. Hard light emphasizes shapes, contours, and surfaces. It can convey drama, tension, or raw realism. It’s ideal for creating visual impact and enhancing texture, especially in more journalistic or artistic photography. Factors that determine the softness or hardness of light Size of the light source in relation to the subject A larger light source relative to the subject tends to be softer. Large softboxes, broad windows, or wide LED panels create diffused, enveloping light, allowing for more gradual transitions between light and shadow. Small sources like direct flashes, small reflectors, or midday sunlight create hard light because they can’t “wrap around” the subject, resulting in marked shadows and high contrast. Distance of the light source The farther the light source is, the harder the light becomes. That’s because the illuminated surface receives light from a narrower angle, increasing shadow definition. Bringing the light source closer increases its angular size, softening shadows and reducing contrast. This is especially useful in portraits or food photography. Presence of diffusers, reflectors, or modifiers Diffusers (like translucent fabrics or softboxes) spread the light, making it softer and less directional. Reflectors help fill in shadows created by hard light, softening the overall result. Modifiers such as beauty dishes, umbrellas, or snoots help control softness or directionality depending on the photographer’s creative intent. Advantages and applications of soft light Portraits Soft light flatters the skin, conceals expression lines, and creates a welcoming atmosphere. Ideal for feminine portraits, baby photos, and elderly subjects. It also reduces the need for extensive post-processing. Fashion and newborn photography In fashion, soft light enhances fabrics without casting harsh shadows. In baby photography, it’s essential to convey delicacy, purity, and comfort. It ensures that eyes are well-lit without harsh reflections. Ambient lighting and video Spaces lit with soft light feel more natural and pleasant to viewers. It’s perfect for interviews, educational videos, vlogs, and home recordings. In cinema, it’s also used to create realistic or intimate scenes. Advantages and applications of hard light Product photography With textured objects, hard light is excellent for highlighting relief, edges, and details. It creates a tactile sensation, especially useful for materials like wood, leather, or metal. Dramatic effects and strong contrast Theater scenes, masculine portraits, or bold editorials benefit from hard light to convey strength and intensity. It directs the viewer’s eye to specific areas of the image, increasing visual impact. Creative and artistic lighting Hard light allows for playing with defined shadows, geometric shapes, and minimalist compositions with strong visual appeal. It’s also used to create patterns, natural framing, or striking silhouettes. When to choose soft or hard light? Evaluating aesthetic intent If the goal is to convey emotion, softness, and comfort, soft light is more appropriate. To convey energy, tension, or dynamism, hard light is more effective. The desired aesthetic should always guide lighting choices. Considering photographic style Fashion, advertising, and portrait photographers often alternate between the two styles depending on the shoot’s concept. In photojournalism, hard light can reinforce realism and urgency. In artistic photography, hard light enables a more graphic visual narrative. Controlling light in studio or outdoor environments In the studio, you have full control: softboxes, reflectors, flags, and diffusers are at your disposal. Outdoors, using natural shade, reflectors, or fabric can help soften harsh sunlight. In both cases, the photographer’s position relative to the light source significantly affects the outcome. Techniques for turning hard light into soft light (and vice versa) Diffusers, softboxes, and reflectors Light direction and distance Creating shadows and shaping contrast Common mistakes when using hard and soft light Lack of exposure balance With hard light, it’s common to overexpose highlights and underexpose shadows. Use the histogram and light meter to control the scene’s dynamic range. Improper use for the subject Using hard light for delicate portraits may be too aggressive. Using soft light for highly textured products might result in “dull” images. Always align lighting with the visual message and target audience. Light as visual language: exploring its expressiveness The choice between soft light vs. hard light goes far beyond technique. It’s a visual language that communicates feelings, ideas, and aesthetic stimuli. Each light source has character and contributes to the final image’s identity. Learning to manipulate these two extremes with intentionality and mastery is essential for any photographer who seeks not just to capture images but to build impactful visual narratives. Light doesn’t just reveal—it interprets. Study, experiment, and practice with different sources, distances, and modifiers. Over time, you’ll master the art of controlling light with precision and creativity, making it your ally in crafting memorable imagery.

The Direction of Light in Photographic Composition
Introduction The direction of light in photographic composition is one of the fundamental pillars for creating images with depth, emotion, and visual impact. Although often overlooked by beginners, the way light strikes the subject is crucial to the final result of the photograph. This article aims to inform and inspire both beginners and professionals to understand, master, and apply the direction of light as a creative and technical element in composition. Why the direction of light is essential in photography The role of light in defining visual narrative Light has narrative power. Depending on how it hits the subject, it reveals or hides details, highlights shapes, evokes sensations, and creates atmospheres. Side lighting can suggest drama or mystery. Frontal light tends to flatten volumes, conveying neutrality. Backlighting, on the other hand, can create symbolic silhouettes. Relationship between light direction and depth perception The direction of light is crucial for building three-dimensionality. Shadows and highlights created by lighting from different angles help the human eye interpret depth and form. Photos without directional contrast tend to look flat or lifeless. Types of light direction and their visual effects Frontal light: definition, advantages, and limitations Frontal light hits the subject directly from the camera’s viewpoint. It minimizes shadows, softens wrinkles and imperfections, making it popular in beauty portraits. However, it can also flatten volumes and reduce depth. Side light: adding texture and drama Side lighting is highly valued for highlighting textures and creating contrast between light and shadow. It adds depth and drama to the image. Commonly used in artistic portraits and food photography where texture is key. Backlight: silhouettes and atmospheres Backlighting points toward the camera and can create silhouettes, halos, or outline highlights. When used well, this direction adds a cinematic feel and mood. It requires balancing exposure between the background and the subject. Top and bottom lighting: special effects and symbolism Light from above simulates sunlight or ceiling lights. It’s natural but can cast shadows over the eyes. Bottom lighting is unusual and used to create eerie or surreal effects, often seen in horror films. How to identify and use light in different environments Natural light: how to make the most of it Sunlight varies throughout the day. In the morning and late afternoon, it offers soft, golden side lighting—ideal for portraits. At noon, light is harsh and overhead. Windows can serve as natural side light sources depending on the time of day. Artificial light: control and repeatability Artificial light offers full control over intensity, color, and direction. It can be shaped using softboxes, reflectors, or snoots. In studio setups, it’s common to use three lights: key light (main), fill light (softens shadows), and back light (creates separation), each from a different direction. Mixing light sources: when and how to balance them Environments with both natural and artificial light require attention to color temperature. The direction of each light source must match the creative intent. Use gels, diffusers, and reflectors to balance mixed lighting effectively. Techniques to control light direction Positioning the subject and light source Moving the subject relative to the light source is the simplest way to change light direction. Small adjustments can make big differences in shadow, volume, and texture. Using reflectors, diffusers, and flags Reflectors fill shadows without changing the light’s direction. Diffusers soften harsh light. Flags block or redirect light, creating contrast. These tools give photographers greater technical control. Tips to create specific effects with light direction Practical cases and applied examples Portrait with soft side light A 45° side light with a diffuser produces gentle shadows that enhance facial features. Ideal for emotional or editorial portraits. Product shot with dimensional lighting To highlight products, use side key light and a soft backlight to separate the subject from the background. This emphasizes volume and detail perception. Rim light in the studio Rim light (or kicker light) is placed behind and slightly to the side of the subject. It outlines the shoulders and hair, separating the subject from the background without lighting the face directly. Common mistakes and how to avoid them Poorly positioned light that flattens the subject Avoid direct frontal light without diffusion—it removes natural shadows that convey depth. Excessive contrast or unresolved shadows When the light is too harsh, shadows can become distracting. Use reflectors or adjust the light angle to fix this. Mastering light direction to create memorable images Understanding and applying the direction of light in photographic composition is a skill that sets amateurs apart from professionals. The right direction transforms an ordinary scene into a powerful visual statement. Study the work of photography masters, experiment with different light sources and angles, observe how light interacts with real-world scenes. When well-directed, light becomes a visual language. And mastering this language is essential for anyone aiming to tell unforgettable visual stories.

Simple and Affordable Lighting Setup
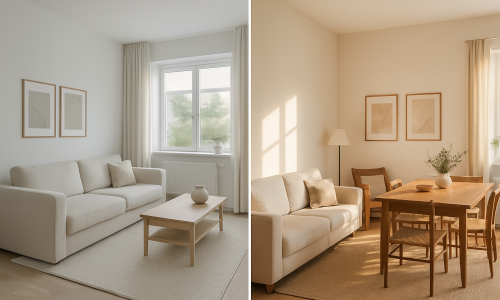
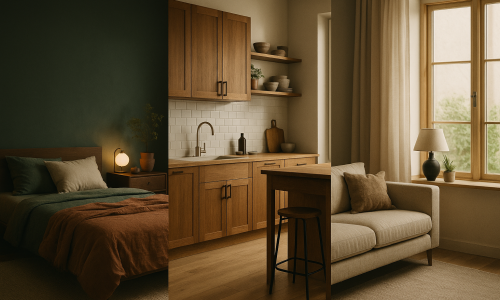
Introduction Setting up a simple and affordable lighting setup at home is easier than it seems. With creativity and basic knowledge, it’s possible to achieve professional results using accessible resources. In this article, we’ll show you how to create a well-lit environment for photography or videos using low-cost materials. The goal is to democratize access to quality lighting, even on a limited budget. Both beginners and professionals will find practical tips to assemble a functional and efficient setup without leaving home. The importance of lighting in photography How light transforms the image Light is the main element in any photograph. It defines shapes, textures, volumes, and even the mood of the image. Good lighting enhances the photographed subject and makes post-editing easier. In controlled lighting environments, it’s easier to maintain visual consistency between different sessions. Natural light vs. artificial light Natural light is abundant and free, but also unstable. Artificial light, on the other hand, offers complete control: intensity, direction, and temperature. A simple and affordable lighting setup can combine both sources for greater versatility. At times like early morning or late afternoon, natural light reaches its ideal point, offering soft and diffused lighting. Accessible materials to get started Essential equipment To build your basic setup, you’ll need: Efficient homemade solutions Everyday objects can replace expensive gear. For example: Step-by-step setup guide Choosing the location Choose a room with light-colored walls, good ventilation, and access to natural light. This reduces the need for artificial lighting and improves light diffusion. Avoid rooms with many colored walls, as they may affect the image’s color temperature. Light positioning Controlling shadows and reflections Use diffusers to avoid harsh shadows. If the photographed surface is reflective, adjust the light angle or apply filters to reduce excessive glare. Position elements at different distances from the background to add depth and eliminate unwanted shadows. Tips to enhance lighting on a budget Economical LED lighting White LED lamps (5500K) are ideal for photography. They don’t overheat, have good durability, and consume little power. Rechargeable versions are great for mobile setups and save money in the long run. DIY reflectors and modifiers Use white poster board as a reflector or foam board to fill shadows. A regular white umbrella can act as a diffuser when placed between the light and the subject. You can also use an opened milk carton as a homemade light directional tool. Support apps Free apps like Lux Light Meter or LightMeter help evaluate light intensity. This way, you can fine-tune exposure even without professional gear. Many of these apps simulate light meters and suggest aperture and ISO settings based on ambient readings. Practical setup examples For portraits Soft side lighting, reflector on the opposite side, neutral background. Use a desk lamp with parchment paper to diffuse light. Position the model one meter away from the wall to avoid harsh background shadows. For videos and live streams Frontal lighting at eye level, diffuser to reduce skin shine, and softly lit background for depth. A secondary light in the background can help separate the speaker from the environment. For product photography Use top and side lighting with a white background and side reflectors. This highlights the object and eliminates harsh shadows. Try shooting inside a homemade lightbox made from cardboard and parchment paper. Common mistakes to avoid Master lighting with simplicity With planning and creativity, it’s possible to build a simple and affordable lighting setup and still produce professional-quality images. The key lies in controlling light—not in how much you spend. Try different configurations, observe the results, and adjust as needed. Good lighting is within your reach. You just need to know where to position it, how to diffuse it, and when to test it. Now it’s your turn!

Get to Know the Types of Light and How Each One Influences Your Photos
Light is the soul of photography. It defines the atmosphere, emotion, contrast, and sharpness of an image. Understanding and using different types of light is essential for anyone looking to improve in photography—whether using a professional camera or a smartphone. In this article, you’ll learn about the main types of light used in photography, how each one affects the final result, and when to use them to enhance the visual impact of your photos. Light in Photography: More Than Brightness, It’s a Visual Language Many people think light is just there to “brighten” a scene. But in truth, light communicates. The position, intensity, temperature, and softness of the light say a lot about the style, mood, and focus of the image. Mastering the types of light is like learning to use different brushes and paints—each has a specific purpose. The Most Common Types of Light in Photography Natural Light This is light from the sun, and it’s one of the most used by photographers, especially beginners. It can be direct (on sunny days) or diffused (on cloudy days or in the shade). Characteristics: Influence on the photo: Tip: Observe the sun’s direction and use it to create depth or highlight specific details. Continuous Artificial Light These are light sources that stay on, like lamps, LEDs, spotlights, and ring lights. Characteristics: Influence on the photo: Tip: Combine different intensities and directions to avoid unwanted shadows. Flash (Strobe Light) Flash is a powerful and quick light source, commonly used to freeze motion or light up dark scenes. Characteristics: Influence on the photo: Tip: Avoid using built-in flash directly—prefer to bounce it or use diffusers. Hard Light Hard light produces defined shadows and high contrast. It comes from a small and direct light source like midday sun or undiffused flash. Characteristics: Influence on the photo: Tip: Control the light’s position to avoid harsh shadows on faces or eyes. Soft Light Soft light produces gentle shadows and smooth transitions between highlights and shadows. It usually comes from large or diffused sources. Characteristics: Influence on the photo: Tip: Use diffusers, softboxes, or shoot near windows with sheer curtains to achieve this effect. Backlight This is when the light source is behind the subject, creating silhouettes or halo effects. Characteristics: Influence on the photo: Tip: Use HDR mode or a reflector to balance foreground exposure. Side Light This comes from the side of the subject, creating one side lit and the other in shadow. Characteristics: Influence on the photo: Tip: Move the light source or subject to test various angles and effects. How to Choose the Ideal Type of Light? Your choice depends on the photo’s goal, style, and environment conditions. Ask yourself: With these answers, you can mix different types of light to achieve professional-looking results—even with simple gear. Final Thoughts: Light as a Creative Tool More than just illumination, light brings life to your photography. Understanding its types, effects, and best uses is key to creating striking, emotional, and professional images. Experiment, observe, and try different sources and angles. Photography is an art that requires practice—and light is your most powerful tool. When used wisely, it can turn any scene into a meaningful visual story.

Practical Tips for Shooting in Low-Light Environments
Photographing in low-light environments can seem challenging, especially for beginners. Noise, blurry shots, lack of sharpness, and washed-out colors are some of the common problems. However, with a few simple techniques and adjustments, it’s entirely possible to capture amazing images—even in difficult lighting conditions. In this article, you’ll learn practical tips to improve your results when shooting at night, in dark indoor settings, events with limited lighting, or any situation with low natural or artificial light. Understanding the Challenges of Low Light Before anything else, it’s important to understand why low-light photography is so tricky: Now that we know the challenges, let’s move on to the solutions. Tip 1: Use ISO to Your Advantage ISO determines the sensor’s sensitivity to light. The higher the ISO, the more sensitive it becomes—but the more noise it may introduce. How to apply: Tip 2: Lower the Shutter Speed Carefully A slower shutter speed allows more light into the sensor, but increases the risk of motion blur. How to apply: Tip 3: Open the Aperture as Wide as Possible The aperture (f/stop) controls how much light enters through the lens. The lower the f-number, the more light gets in. How to apply: Tip 4: Use Available Light Sources Even in dark environments, there’s usually some light—lamps, streetlights, computer screens, candles, etc. How to apply: Tip 5: Shoot in Manual or Semi-Auto Modes Modes like “P”, “S/TV”, or “M” provide more control over camera settings. How to apply: Tip 6: Use Manual Focus When Necessary Cameras and smartphones may struggle to autofocus in the dark. How to apply: Tip 7: Use Night Mode (on Smartphones) Many modern smartphones have night mode, which simulates long exposure and enhances photos without manual adjustments. How to apply: Tip 8: Avoid Direct Flash Built-in camera or phone flashes often produce harsh light, overexposed details, and unnatural shadows. How to apply: Tip 9: Edit Your Photos with Care You can’t always get the perfect shot in-camera, but editing can make a huge difference. How to apply: Tip 10: Test, Experiment, and Know Your Limits Each camera and phone model handles low light differently. The key is to experiment and evaluate your results. How to apply: Let Darkness Spark Your Creativity Low-light environments don’t have to be seen as obstacles—but as opportunities to create unique visuals. Intense shadows, strong contrasts, soft light, and mysterious atmospheres are elements that shine under dim conditions. With the right techniques, you can turn limitations into artistic expression. Whether you’re shooting a concert, a candlelit dinner, or a quiet night street, darkness can reveal beauty where you’d least expect it.

How to Use Sunlight to Your Advantage in Outdoor Photography
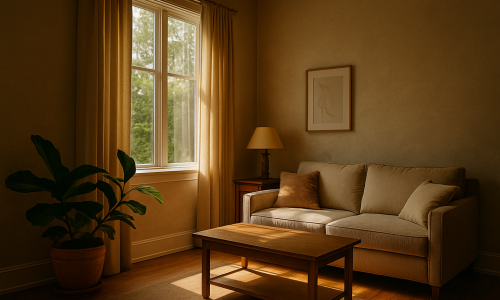
Sunlight is one of the most powerful and accessible tools for any photographer, whether amateur or professional. Knowing how to use it to your advantage can turn ordinary shots into stunning images. However, like any powerful tool, it requires knowledge and sensitivity to be used well. In this article, you’ll discover how to master sunlight in outdoor photography by exploring timing, direction, quality, and practical tricks to get the best results. The Importance of Understanding Natural Light Natural light, especially sunlight, changes constantly throughout the day. Each shift directly affects the tone, texture, and mood of your photos. So, understanding light means understanding the foundation of your image. Unlike artificial lighting, which you can easily control, the sun imposes conditions you must interpret and take advantage of at the right moment. Different Times of Day and Their Effects Morning Light (Sunrise) Light at the beginning of the day, generally between 5:30 a.m. and 8:00 a.m. (depending on the season), is soft and golden. This period, known as the Golden Hour, is highly valued by photographers. Advantages: Ideal for: portraits, landscapes, romantic or natural photo sessions. Midday Light (11 a.m. to 2 p.m.) During this time, the sun is at its highest point, producing intense, direct light. Shadows are harsh and contrast is strong. Disadvantages: How to compensate: Use umbrellas, diffusers, tree shade, or shoot in partially covered locations. Afternoon Light (3 p.m. to Sunset) Just like in the morning, afternoon light becomes softer and more golden. This is the second Golden Hour, often more popular due to the convenient timing. Ideal for: any outdoor session with a warm and gentle aesthetic. Sunset Light In the final 20 to 30 minutes before the sun sets, light turns orange, pink, or even purple. This moment is magical but fleeting. Tip: Be ready and positioned a few minutes before the sun starts to dip. How to Position the Sun Relative to Your Subject Sun in Front When the sun faces your subject, it lights up the face or scene directly. Advantages: Disadvantages: Sun to the Side Side light creates volume and depth, emphasizing skin texture, clothing, or objects. Ideal for: portraits with a dramatic or artistic style. Backlight (Sun Behind the Subject) Backlighting creates a halo or silhouette effect, depending on your exposure. Tip: Use a reflector or HDR mode to keep facial details visible. Best for: creative, emotional shots with soft light outlining hair and shapes. Practical Tips to Make the Most of Sunlight 1. Use Reflectors and Diffusers Reflectors bounce light back onto your subject, softening shadows. Diffusers spread harsh sunlight, creating a softer glow. You can buy these or improvise with white cardboard, sheer fabric, or even a light-colored bedsheet. 2. Watch the Shadows Before taking the shot, check the direction and pattern of shadows. They reveal where the light comes from and how it’s affecting your subject. Very harsh shadows indicate strong direct light—use diffusers or adjust your angle to soften them. 3. Embrace the Weather A cloudy sky acts as a giant natural diffuser. Rather than avoiding cloudy days, embrace them—lighting will be more even and soft, perfect for portraits and product photos. 4. Use Manual Exposure or Lock Focus Auto cameras and phones can misjudge scenes with mixed light and shadow. Manually adjusting or locking focus and exposure helps control the outcome better. 5. Explore Reflections and Textures Surfaces like water, glass, sand, and metal react uniquely to sunlight. Use these textures to create striking effects, especially at sunrise or sunset. 6. Be Patient and Observe Light shifts by the minute. Waiting just 10 minutes can completely transform the mood of your photo. Be patient and attentive to light transitions. Common Mistakes When Using Sunlight (and How to Avoid Them) Let the Sun Be Your Creative Ally Photographing with sunlight is an art that combines observation, sensitivity, and technique. When used well, it enhances emotions, builds unique atmospheres, and brings out the best in your scene. Mastering sunlight is a huge asset for anyone looking to grow in outdoor photography. It’s free, abundant, and—once you practice—can become your most powerful creative tool.

Natural Light vs. Artificial Light: Which Is Better for Your Photos?
Lighting is one of the fundamental pillars of photography. Without light, there is simply no image. That’s why mastering different light sources and knowing when to use each one is a major key to taking stunning photos—whether you’re using a professional camera or a smartphone. Among the available options, two stand out: natural light, usually from the sun, and artificial light, generated by equipment like lamps, softboxes, and flashes. But after all, which one is better for your photos? The answer isn’t that simple, as it depends on the desired style, the environment, and the equipment available. What Is Natural Light? Natural light is any source of illumination that doesn’t rely on man-made devices, with the sun being the main reference. It can be used indoors or outdoors and changes character throughout the day. Shooting in the early morning, at noon, or during sunset produces completely different results. Benefits of Natural Light: Drawbacks of Natural Light: What About Artificial Light? Artificial light is produced by human-made sources such as light bulbs, LEDs, ring lights, flashes, and softboxes. It’s widely used in studios, events, and even at home by content creators. Advantages of Artificial Light: Challenges of Artificial Light: When Should You Use Natural Light? Natural light is ideal for: Pro Tip: The famous Golden Hour—shortly after sunrise and before sunset—is perfect for capturing warm tones, soft shadows, and a magical glow in your images. When Should You Use Artificial Light? Artificial lighting is essential in situations like: Artificial light can also simulate natural light when used properly, resulting in very realistic photos even in a controlled environment. Can You Combine Both? Yes—and this is one of the most advanced and powerful techniques in photography: mixing natural and artificial light. For example, you can use sunlight as the key light and add a flash or LED to fill in shadows. This hybrid method gives you the best of both worlds: natural ambiance with controlled enhancement. So, Which One Is Better: Natural or Artificial? The truth is: there’s no one-size-fits-all answer. The best light depends on your photography style, the desired outcome, and the situation. A creative photographer should learn to work with both and understand the pros and cons of each. If you’re just starting out, go with natural light—it’s free, easy to find, and can yield stunning results. As you progress, explore artificial lighting to expand your creative and professional possibilities. The Key Lies in Knowledge and Practice Mastering light in photography comes down to knowledge and constant experimentation. Observe how light behaves at different times of day, how it reflects on surfaces, and how it sets the mood of an image. Study the use of shadows, contrast, and angles. Experiment with artificial lighting and watch how it transforms your results. Photography is, above all, the art of painting with light. And the more you understand this essential element, the more your photos will stand out.

How to Use Lightroom for Professional Photo Retouching
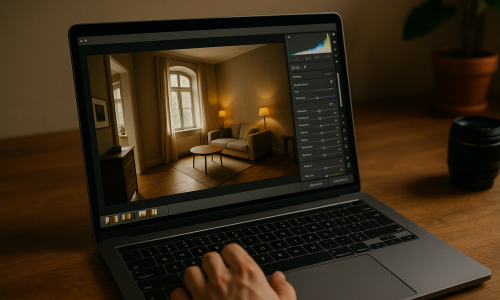
Adobe Lightroom is one of the most popular photo editing programs for photographers, both professional and amateur. It is renowned for its powerful capabilities and user-friendly interface, making it a go-to tool for photographers worldwide. Whether you’re retouching portraits, enhancing landscapes, or correcting lighting issues, Lightroom offers everything you need to improve and fine-tune your images. In this article, we will discuss how to use Lightroom for professional photo retouching, covering the essential tools and techniques that can help you take your photos to the next level. 1. Importing Your Images into Lightroom Organizing Your Photos The first step in any editing process is to organize your images properly. Lightroom offers an excellent library module that allows you to easily import, organize, and categorize your photos. Step-by-Step: Tip: If you are working with RAW files, make sure you import them in their unprocessed format to retain maximum quality and detail for editing. 2. Basic Adjustments: Exposure, Contrast, and White Balance Correcting Exposure The Basic Panel in Lightroom is where most of the initial adjustments take place. Start by correcting the exposure, which is crucial for ensuring that your photo is neither too dark nor too light. You can adjust the exposure slider to brighten or darken the image as needed. Step-by-Step: Tip: Be cautious with the exposure slider. Overexposing an image can result in a loss of detail, while underexposing can create unwanted noise. White Balance Adjustments Correcting the white balance ensures that colors appear natural and realistic. Sometimes, photos taken under artificial lights or in specific lighting conditions can have a color cast (too warm or too cool). Step-by-Step: 3. Enhancing Details: Clarity, Texture, and Dehaze Improving Clarity Adding Clarity enhances the midtone contrast in an image, bringing out texture and detail. This is especially useful for landscapes and architectural photos where you want to emphasize fine details. Step-by-Step: Tip: Use the Clarity slider selectively to highlight textures in the subject without affecting the background or skin tones in portraits. Texture and Dehaze for More Control For more control over detail enhancement, use the Texture slider to fine-tune the finer details of an image. The Dehaze slider can also help to reduce any fogginess or haze in an image, giving it a clearer, sharper look. Step-by-Step: Tip: Use the Dehaze feature carefully when editing landscapes. It works wonders to bring out more defined details, especially in photos taken in misty or foggy conditions. 4. Fine-Tuning Colors with the HSL Panel Adjusting Hue, Saturation, and Luminance (HSL) The HSL/Color panel in Lightroom allows you to make precise color adjustments to specific parts of the image. This is particularly useful if you want to enhance or reduce specific colors, like making the sky more vibrant or adding warmth to skin tones. Step-by-Step: Tip: When editing portraits, pay special attention to skin tones. Use the Luminance slider to brighten or darken the skin to achieve a more flattering result. 5. Removing Blemishes and Imperfections Using the Spot Removal Tool One of the most important aspects of retouching is cleaning up any imperfections in your photo. The Spot Removal Tool is perfect for removing blemishes, spots, or dust spots on your photos. Step-by-Step: Tip: For portraits, make sure to use the Heal option (rather than Clone) in the Spot Removal Tool to make the skin look smooth and natural. 6. Adding Vignette and Adjusting the Borders Creating a Vignette Effect A vignette is a gradual darkening of the edges of the image, which helps draw attention to the center of the photo. This is particularly useful for portraits or images where you want to emphasize the subject. Step-by-Step: Tip: Use a vignette subtly to focus attention on the main subject without making the effect too noticeable. 7. Finalizing the Image and Exporting Sharpening and Noise Reduction Before you finish editing, sharpen your image to make it look crisper, especially if you are printing it or using it for high-quality purposes. Use noise reduction tools to smooth out any graininess in the image, which is often more noticeable in night photos or low-light conditions. Step-by-Step: Exporting the Image Once you’re satisfied with the retouching, it’s time to save and export your image. To do so, click on File > Export and choose your desired export settings (file format, resolution, etc.). Tip: For social media or web use, export the image in JPEG format with 72 DPI. For print, use TIFF or JPEG with 300 DPI for higher quality. Conclusion: Mastering Professional Retouching in Lightroom Lightroom is an incredibly powerful tool for professional photo retouching. From basic exposure adjustments to fine-tuning colors and textures, Lightroom provides all the necessary features to transform your photos into polished, professional-looking images. With a combination of exposure corrections, detail enhancements, and creative effects, you can take your photography to the next level. Whether you’re retouching portraits, landscapes, or still life images, mastering Lightroom will help you achieve the results you desire.

How to Edit Night Photography to Enhance the Atmosphere
Night photography offers unique challenges and opportunities. Capturing the beauty of the night sky, city lights, or starry landscapes requires special techniques and editing skills. Using the right tools in Photoshop, you can transform your night shots into breathtaking images that reveal more details, enhance colors, and bring out the atmosphere of the scene. In this article, we will explore how to edit night photography to enhance the overall effect and atmosphere. 1. Preparing the Image for Editing in Photoshop Importing the Image The first step in editing night photography is to import the image into Photoshop. Open Photoshop, click on File > Open, and select your night photo. If you’re working with a raw file, it’s a good idea to open it in Adobe Camera Raw first to make basic adjustments before bringing it into Photoshop. Tip: Always work on a duplicate of the original image to preserve the original file. You can create a copy of the image by pressing Ctrl + J (Cmd + J on Mac). Organizing Layers Once the image is imported, it’s important to work with layers in Photoshop. Create a duplicate of the original image layer so you can apply edits non-destructively. Working with layers allows you to revert changes easily and keep the original intact. Tip: If you have multiple edits, consider organizing your layers into folders. This will help keep things organized and manageable. 2. Enhancing the Exposure and Shadows Adjusting the Exposure In night photography, the exposure can often be a challenge. Sometimes, the image may appear too dark, or there could be areas that lack detail. One of the best tools to use is the Exposure Adjustment Layer in Photoshop. Step-by-Step: Tip: If your night shot has very dark shadows, use the Shadows/Highlights tool under Image > Adjustments to recover some of those details. Using the Shadows/Highlights Tool This tool helps bring back details that might be lost in the shadows and highlights. It’s especially useful for night photography where the contrast between the sky and artificial lights can create very dark areas. Step-by-Step: 3. Adjusting Colors for a More Vibrant Night Scene Enhancing the Colors with Vibrance Night photography often features dim colors that can look dull when first captured. The Vibrance adjustment tool in Photoshop helps enhance these colors without oversaturating the image. Step-by-Step: Tip: Be careful not to oversaturate the image, as this can create unnatural colors. Focus on enhancing the cool blues of the night sky and the warm yellows and oranges of streetlights. Creating a Cool Night-Time Effect If you’re capturing cityscapes or starry skies, the colors of the night scene should convey a cool atmosphere. You can adjust the Temperature and Tint sliders in Camera Raw or use a Color Balance adjustment layer to shift the tones toward cooler colors. Step-by-Step: Tip: For starry night shots, you can also increase the blue tones in the shadows and highlights to make the stars and sky pop. 4. Improving the Details with Clarity and Sharpness Using Clarity for a Crisper Image Night photos can sometimes appear soft or lacking detail. The Clarity adjustment helps enhance the midtone contrast, making the photo appear sharper and more defined. Step-by-Step: Tip: Use Clarity subtly, as too much can create an unnatural look. It’s best for bringing out architectural details and textures in cityscapes. Sharpening the Image To make your night shots look crisper, apply sharpening to the image. However, be cautious when sharpening, as night images often have noise that can become more prominent. Step-by-Step: Tip: For a cleaner result, you can apply sharpening selectively to the areas of the image that need it most, such as the subject or architectural details. 5. Adding Creative Effects to the Night Photo Creating Light Trails with Motion Blur Light trails, such as car headlights or moving traffic, are a popular feature in night photography. You can add these effects in Photoshop using the Motion Blur filter. Step-by-Step: Tip: Using motion blur can help create a dynamic feel in your cityscape or night scene, simulating the busy life of a city at night. Adding Star Trails or Glow Effects If you are shooting the stars or a night sky, adding star trails or glow effects can make the image more interesting. Use brushes or glow effects to create glowing or star-like elements. Step-by-Step: 6. Finalizing the Image and Saving Final Adjustments Once you’ve enhanced the exposure, colors, and details, take a step back and assess the overall balance of the image. Adjust the exposure and colors if necessary and fine-tune any effects you’ve applied. Saving the Image When you’re satisfied with your edited image, save it in the appropriate format. For print, choose a 300 dpi resolution, and for web use, export the image at 72 dpi to ensure the best quality. Tip: Save your image in PSD format if you want to preserve all layers and effects for future editing. For final use, export as JPEG or PNG. Conclusion: Enhancing Your Night Photography with Photoshop Editing night photography in Photoshop can elevate your photos by bringing out the details, enhancing colors, and creating dynamic lighting effects. By using tools like exposure adjustments, clarity, and creative effects, you can transform a dark and flat photo into a vibrant, high-quality image. Learning how to properly edit your night shots allows you to showcase the beauty of the night, whether it’s a starry sky, a cityscape, or a stunning light trail.