Building a solid visual identity is a critical goal for photographers who want to be recognized for their unique style. In the world of interior photography—where each environment brings different challenges with light, composition, and décor—maintaining a consistent aesthetic is what transforms common work into an unmistakable visual brand.
In this article, we’ll apply that concept in practice. You’ll see how visual identity is expressed through three real shoots (hypothetical but based on typical scenarios) showing “before and after” editing. The aim is to show how, even in different environments, you can maintain a consistent photographic language without losing the authenticity of each space.
What Is Visual Identity in Photography?
Visual identity is the set of aesthetic choices that make a photographer’s work recognizable and authorial. It can be perceived through:
- Recurring color palette
- Use of specific light and shadow
- Characteristic framing and composition
- Style of editing and post‑production
- Repeated visual themes (materials, objects, forms)
Building this identity requires consistency and intent. More than following trends, it relies on authenticity and technical mastery.
Before and After: The Importance of Visual Coherence
Editing isn’t just correction—it’s a refinement of your photographic vision. The “before” shows what was captured with technique and sensitivity; the “after” reveals how your visual identity manifests through editing, composition, and narrative.
In the next three shoots, you’ll see how visual identity can be maintained with small adjustments that make a big difference.
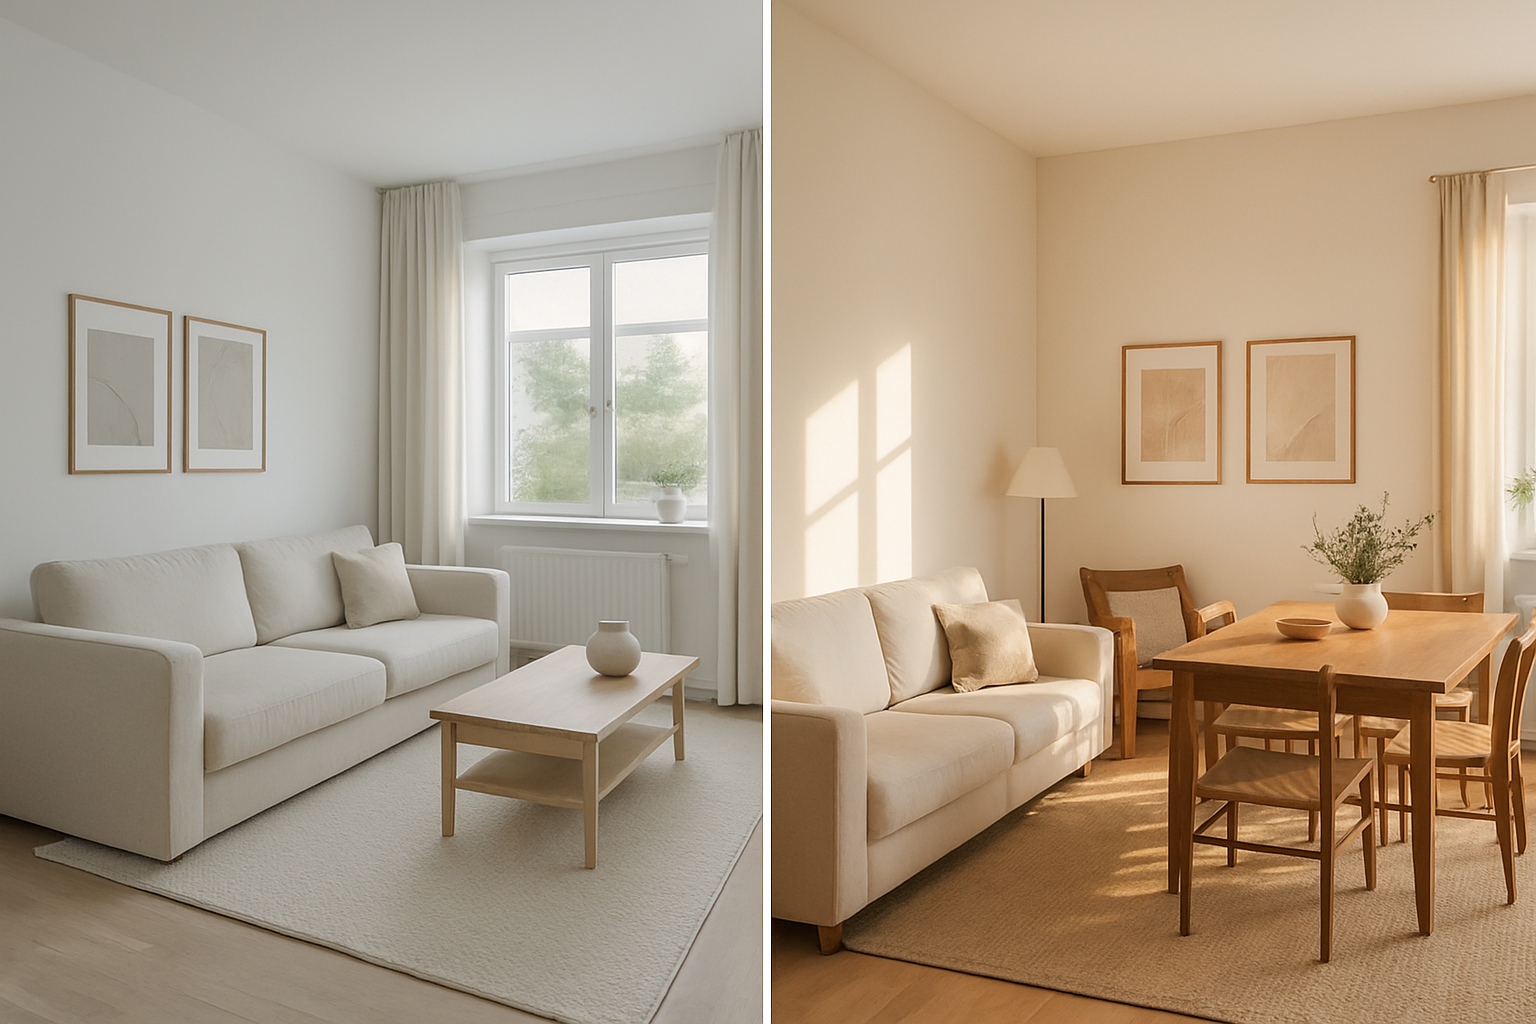
Shoot 1: Scandinavian Apartment with Diffuse Light
Context:
A light space with white walls, light wooden furniture, and minimalist décor. Natural light softly enters through sheer drapes.
Before:
- Light is well distributed, but the image looks cold and somewhat washed‑out.
- Composition is centered but lacks depth.
- Contrast is low, losing definition in some objects.
After Editing:
- Color temperature has been slightly warmed to enhance a sense of comfort.
- The tone curve has been tweaked to increase contrast without losing softness.
- Whites are balanced, maintaining the purity of the space.
- A subtle vignette gently guides the viewer’s eye toward the center of the image.
- Wooden tones are enhanced to warm up the overall composition.
Result:
The final image carries the photographer’s aesthetic—minimalist, natural, and welcoming. The style is discrete but consistent, with emphasis on soft light and color harmony.
Shoot 2: Industrial Loft with Directional Lighting
Context:
An urban environment with concrete walls, exposed plumbing, and dark décor. Natural light enters laterally through large windows.
Before:
- Strong light on one side, creating harsh shadows.
- The concrete’s cool tones dominate the image.
- The composition is interesting but appears “raw”.
After Editing:
- Contrast between light and shadow is emphasized without losing detail in dark areas.
- Cool tones are retained, but saturation is adjusted for greater depth.
- A slight grain is added to reinforce the urban aesthetic.
- Tone curves are adjusted to create a cinematic feel.
- Copper tones and dark wood are warmed slightly for contrast.
Result:
The edited image conveys strength, drama, and personality. Although the setting differs from the first, the photographer’s style remains clear—strong contrast, controlled palette, and visible visual storytelling.
Shoot 3: Country House with Variable Natural Light
Context:
A living room with rustic décor, small windows, and natural lighting that changes with the day. Decorative objects with texture: baskets, ceramics, textiles.
Before:
- Slight under‑exposure, with excessive shadow areas.
- Natural colors appear muted.
- Lack of clarity in object details.
After Editing:
- Exposure is adjusted to highlight shadowed areas without eliminating contrast.
- Greens and earth tones are precisely enhanced via HSL adjustments.
- Sharpening is applied only to areas of interest (textured objects).
- A radial filter highlights the central area of the room.
- Tone curves are used to give a “film‑like” appearance.
Result:
The final image carries the visual signature of someone who values natural light, textures, and a cozy atmosphere. It looks organic and thoughtfully composed.
What Do These Shoots Have in Common?
Despite distinct styles of environment (minimalist, industrial, rustic), there is a unifying thread that reveals the photographer’s identity:
- Consistency in color temperature
- Preference for natural light in varied forms
- Neutral color palette with specific touches of accent color
- Subtle but intentional editing
- Attention to the space through balanced compositions
This shows that visual identity does not depend on the environment—it depends on conscious choices made throughout the photographic process.
Applying This to Your Work
1. Conduct before‑and‑after analyses of your own shoots
Compare photos pre‑ and post‑editing and observe what you are maintaining as standard—and what is varying too much.
2. Build a portfolio with consistency
Choose images that, together, speak the same “visual language”. Even if the subject varies, the language must be recognizable.
3. Edit based on your vision—not trends
Avoid applying editing styles that don’t align with what you want to convey. Great auteur work is timeless.
4. Develop presets based on you
Create your own presets and variants for different lighting conditions and spaces—but from the same aesthetic foundation.
5. Train your eye for light and color
Observe how light changes during the day and how it affects objects and spaces. The more you master light, the more unified your aesthetic will be.
Bonus Tip: Share Behind the Scenes
Showing the “before and after” of your shoots can be a powerful way to:
- Educate your audience about your creative process
- Highlight both technical and artistic skill
- Reinforce your visual identity
- Link with other professionals in your field
Use social media, stories or blog posts to share this content and strengthen your brand.
Conclusion: Before and After as Authenticity Tool
The “before and after” approach goes far beyond showing editing skill. It’s an identity exercise, where every adjustment reaffirms who you are as a photographer. This is not about “beautifying” images—it’s about revealing the unique viewpoint behind the camera.
Visual identity is built slowly, through consistency and intent. Each shot, each edit, each aesthetic decision shapes your language. The more you work consciously, the clearer your style becomes—to both yourself and your audience.
So, use your own shoots as your laboratory. Observe, compare, refine. And always remember: the true “after” of a photograph begins when it aligns with your vision as an artist.


