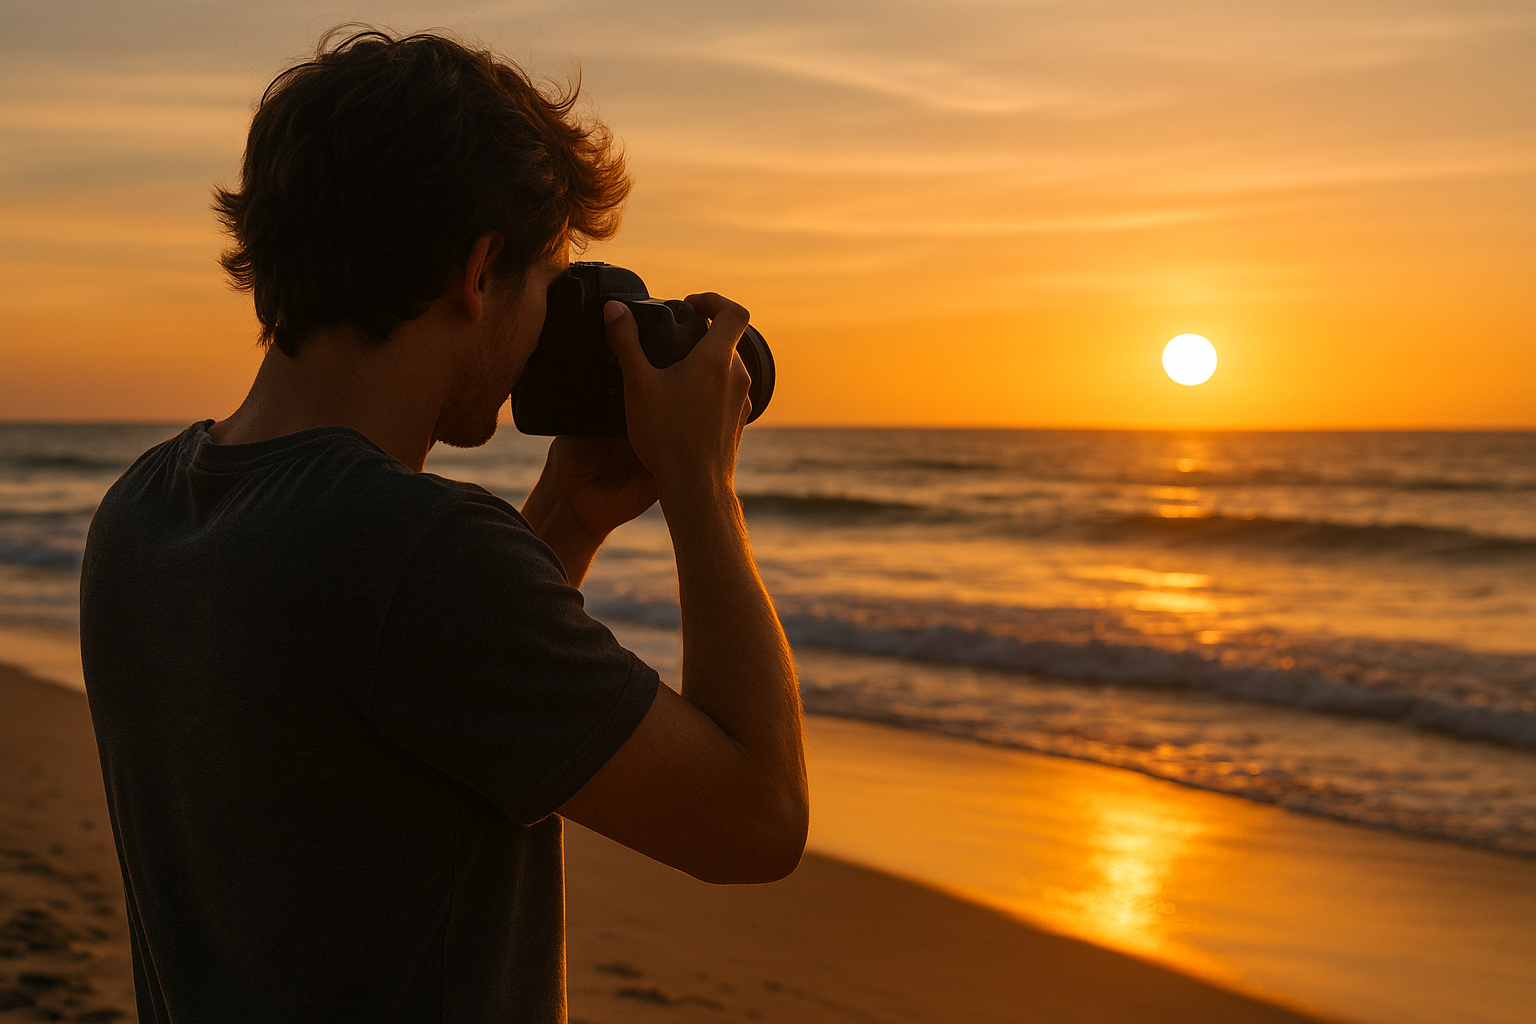
There’s something magical about beach photography. The golden glow of the sun, the sparkling water, and the endless sky create the perfect canvas for unforgettable shots. But capturing that beauty through the lens isn’t always easy—especially under intense sunlight or when dealing with unpredictable beach conditions. Whether you’re a beginner learning the ropes or an experienced photographer looking to refine your beach shots, this guide is crafted to help you take stunning, sun-soaked photos that truly tell a story. Understand the Light: The Sun Is Both a Friend and a Foe Photographing at the beach means dealing with bright, direct sunlight—and while it can help illuminate your shots, it can also create harsh shadows and blown-out highlights. Try to avoid shooting at midday, when the sun is at its highest and brightest. Instead, aim for the golden hours—shortly after sunrise or just before sunset. During these times, the sunlight is softer, more golden, and adds a dreamy warmth to your beach photos. But don’t completely dismiss midday. With the right composition and understanding of exposure, you can create high-contrast, striking images that showcase the intensity of a summer day. Use hats, beach tents, or palm trees to play with shadows. And when possible, position yourself so the sun is behind your subject to create natural backlighting or even lens flares for artistic effects. Use the Right Camera Settings Shooting in bright conditions means you’ll need to adjust your camera settings to avoid overexposed images. In extremely bright conditions, consider using exposure compensation to slightly underexpose your image. This prevents the highlights from being blown out, and you can always recover details in the shadows during post-processing. Polarizing Filters: A Beach Photographer’s Secret Weapon A polarizing filter is one of the most valuable tools for beach photography. It helps cut down on reflections and glare from the water and wet surfaces, making colors richer and skies more dramatic. It also deepens the contrast between the sky and the clouds—perfect for that “postcard” look. If you’re using a DSLR or mirrorless camera, invest in a circular polarizer. For smartphone photographers, there are clip-on lenses that simulate the effect. Some high-end phones even allow for software-based polarization, which can be effective for basic correction. Pro tip: Rotate your polarizing filter while looking through the viewfinder until you see the effect you want. It can significantly improve the vibrancy of your shot. Protect Your Gear from Sand and Water Beaches are beautiful—but brutal on gear. Sand can get into lenses and buttons, and salty air isn’t camera-friendly. Additionally, keep a small blower brush with you to clean sand off delicate parts. For smartphone users, carry a microfiber cloth and check your lens frequently—pocket lint and smudges can ruin clarity. Composition Tips: Think Beyond the Horizon The beach is more than just water and sky. To make your photos stand out, focus on composition and storytelling. Don’t underestimate the power of a unique angle—try getting low to the sand, or shooting from above if you’re near a dune or cliff. A change in perspective can turn an ordinary scene into something special. Capture the Details That Others Miss Most beach photos look the same because people take the same kinds of shots: the wide view of the ocean, the bright sun, the sand. Look closer. Some of the best beach photos come from focusing on the small things—the bubbles in the foam as the tide rolls in, the delicate patterns the wind makes in the sand, the texture of a weathered piece of driftwood. Consider creating a series of detailed shots that tell a complete story. Think of it like a visual diary—sandals tossed on a towel, sunscreen bottles on the edge of a cooler, sunglasses reflecting the water, a melting ice cream cone. These vignettes feel personal and nostalgic, resonating deeply with viewers. Experiment with Silhouettes and Shadows Sunlight at the beach offers an ideal opportunity to experiment with silhouette photography. During sunrise or sunset, position your subject between the camera and the light source, then expose for the background. You’ll end up with beautiful, moody images where the subject is in shadow, but the background is rich with color. Silhouettes work especially well for storytelling. A lone surfer, a couple holding hands, a child flying a kite—all of these can become powerful images when reduced to outline and posture. Shadows, too, offer creative potential. Capture the stretched shadow of a person walking along the beach, or the patterns cast by a palm leaf. These subtle elements can elevate a simple composition into something artistic. Use Props to Add Personality Don’t be afraid to incorporate props into your beach photos. Surfboards, hats, beach balls, towels, and even books can add character to your images. Props can help create a specific mood—a straw hat and sunglasses suggest relaxation, while a surfboard implies adventure. Choose objects that align with your personal style and the story you want to tell. For travel bloggers or content creators, props are also a great way to include brand colors or personal touches that make your work stand out visually. Don’t Forget About Editing Even the best beach photos can benefit from a little post-processing. For mobile users, editing apps like Lightroom Mobile, Snapseed, or VSCO offer powerful tools with user-friendly interfaces. Lightroom in particular allows you to apply selective adjustments, giving you precise control over highlights, shadows, and specific color tones. For those editing on desktop, consider experimenting with tone curves, split toning, and gradients to create a cinematic finish to your beach shots. Tell a Story, Not Just Take a Picture At its core, great photography is about storytelling. Anyone can point a camera at the ocean and click—but what are you trying to say with your photo? Are you capturing peace and solitude? Joy and playfulness? Adventure? Try to have a theme or feeling in mind before you start shooting. This will help guide your composition, subject choices, and editing style. For example, if you’re aiming to
How to Photograph in Rural Areas: Tips for Capturing the Charm of the Countryside
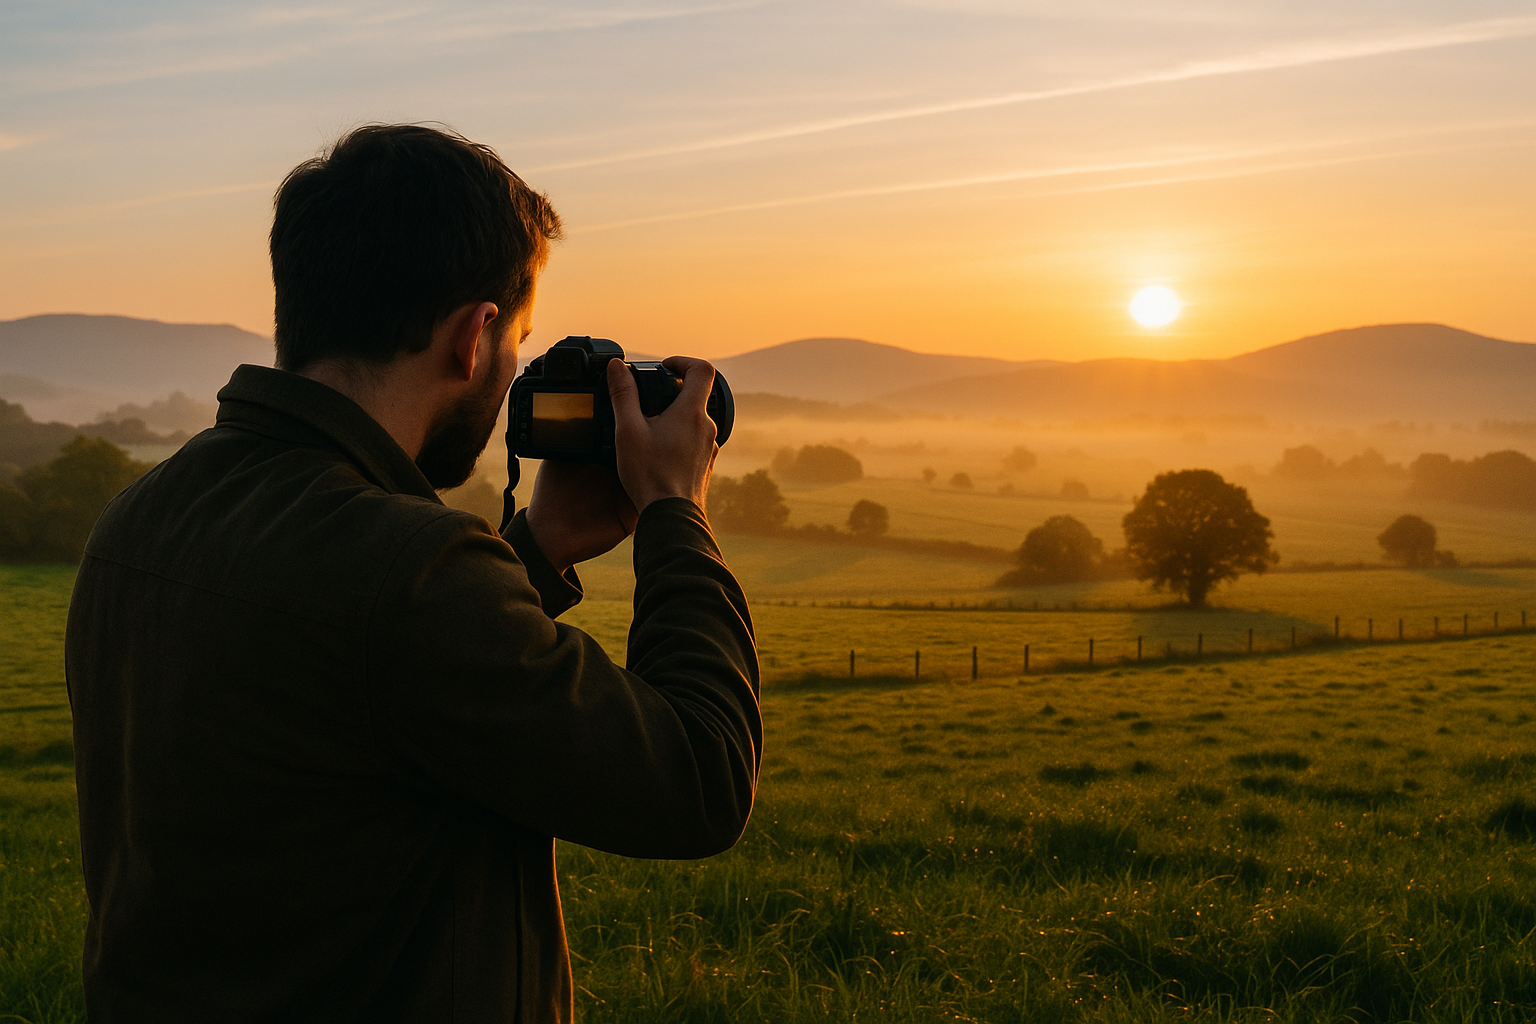
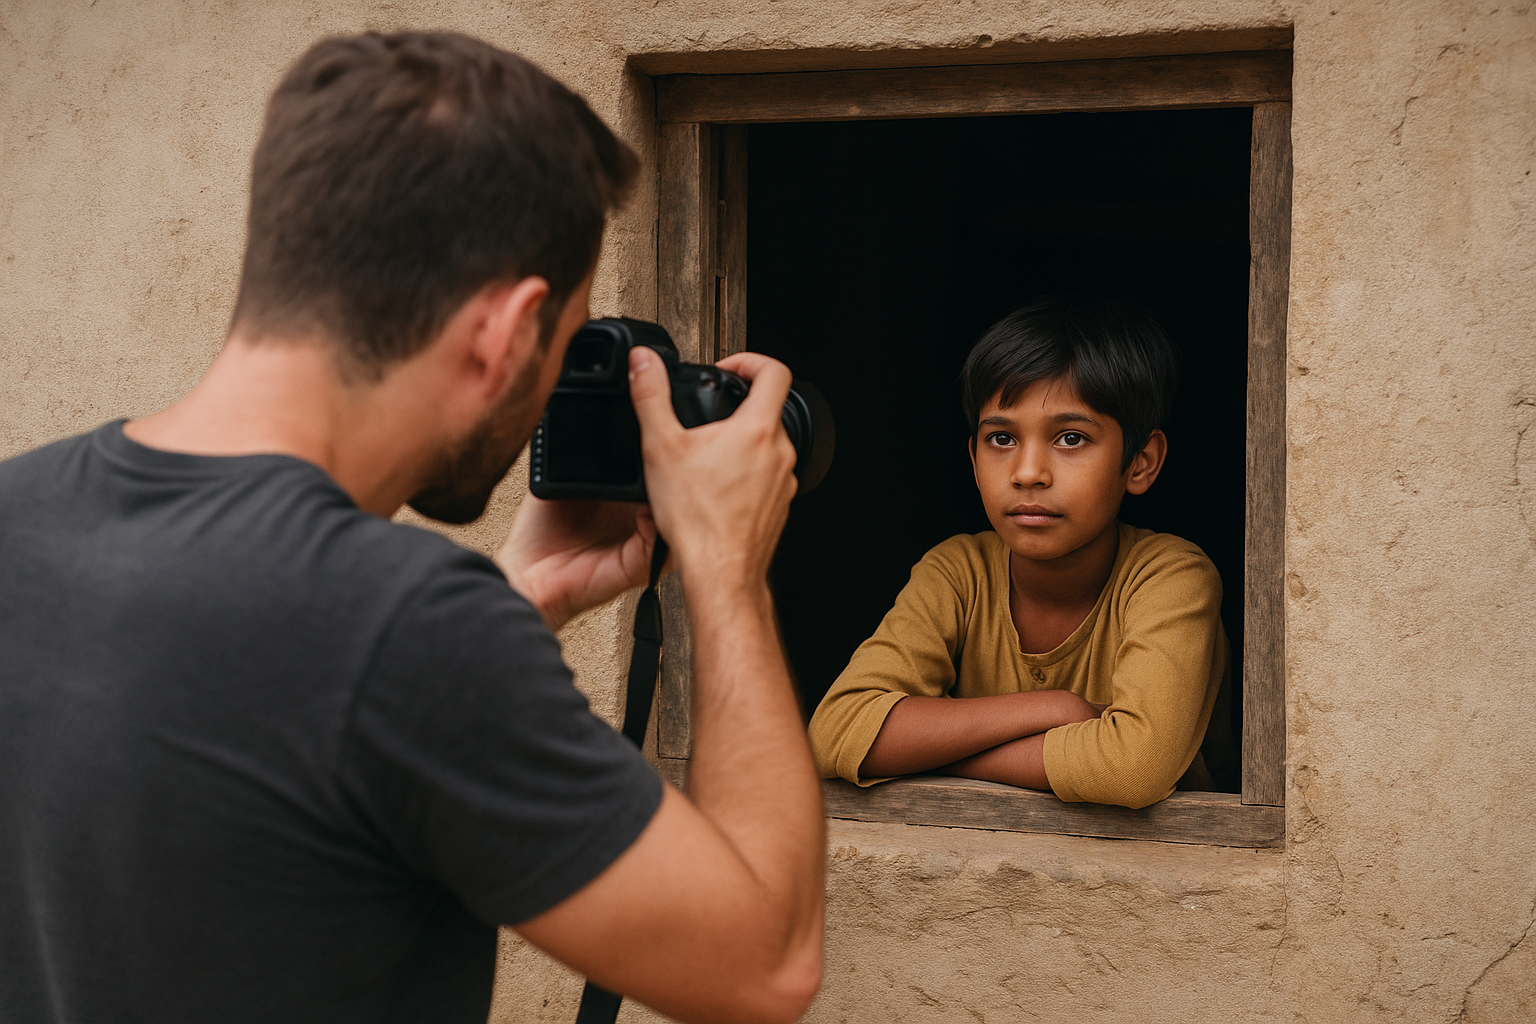
Photographing rural areas offers a unique and enriching experience for any travel photographer. Unlike the fast-paced energy of urban environments, the countryside invites you to slow down, breathe in the fresh air, and engage with landscapes and communities that hold timeless stories. From golden fields and rustic barns to winding dirt roads and morning fog, the rural world is bursting with charm and quiet beauty—if you know how to capture it. Whether you’re just starting out or have years of experience behind the lens, shooting in rural settings demands a different approach. It’s less about speed and spectacle, and more about patience, observation, and emotional connection. In this guide, we’ll explore practical tips and creative insights to help you bring the heart of the countryside into every frame. Embrace the Slower Pace The countryside isn’t in a rush—and neither should you be. One of the most powerful aspects of rural photography is the slow rhythm of life. Take time to explore the area on foot, talk to locals, observe how light plays across the fields, and wait for the right moment. Photographing in rural areas is about immersion, not just documentation. When you allow yourself to absorb the environment, your photos will feel more honest and deeply connected to the place. Research the Region Before You Go While spontaneity has its charm, doing your homework can vastly improve your results. Look up maps, seasonal changes, local festivals, or cultural landmarks. Many rural areas have hidden gems—a historic farmhouse, a lavender field in bloom, or a weekly farmer’s market—that aren’t obvious from the road. Use tools like Google Earth to scout landscapes and plan compositions. Join local photography forums or Facebook groups for tips and little-known spots. And always keep an eye on weather apps to anticipate foggy mornings, golden sunsets, or dramatic skies. Being prepared allows you to maximize your shooting opportunities while staying respectful of local customs and private property. Make Light Your Best Companion In the countryside, natural light reigns supreme. The absence of artificial city lights means you can rely almost entirely on the sun to sculpt your images. But rural light can be tricky—it changes quickly and dramatically throughout the day. Golden hour—early mornings and late afternoons—bathes the landscape in warm, diffused light, enhancing colors and textures. Blue hour, just before sunrise or after sunset, gives you soft, cool tones and a peaceful, dreamlike quality that’s perfect for foggy fields or still water. Even midday sun, often avoided by urban photographers, can work in your favor in rural settings. With wide open spaces and dramatic shadows, you can create high-contrast images that feel raw and cinematic. Just be aware of the harsh highlights and use lens hoods or filters when needed. Learn to read the light, not just react to it. Cloud cover, mist, and even wind can change the character of a landscape within minutes. Adapt and respond with your camera, rather than waiting for the “perfect” moment. Use the Right Gear—but Keep It Light Rural areas often mean long walks, dirt roads, and unpredictable weather. You don’t want to be burdened by excessive equipment. If you’re using a DSLR or mirrorless camera, consider a versatile setup: a wide-angle lens (16–35mm) for sweeping landscapes, and a prime lens like 50mm or 85mm for portraits and fine details. A polarizing filter is great for reducing glare and making skies and foliage pop. Don’t forget a lens hood for protection and contrast control. A lightweight tripod is your best friend for long exposures, sunrise shots, or low-light conditions. And always carry extra batteries and memory cards—you’ll be surprised how quickly you burn through them in remote areas. For smartphone photographers, invest in a clip-on lens kit and use apps like Lightroom Mobile or VSCO for professional-level control over exposure, contrast, and tone. Pack smart. A weatherproof backpack, microfiber cloths, and even a compact rain cover can save you stress and protect your gear in case of sudden showers or dusty paths. Focus on Composition: Let Nature Guide You Rural landscapes offer endless compositional possibilities—if you know where to look. Use leading lines like fences, dirt paths, or furrows in fields to draw the viewer’s eye through the frame. Incorporate natural frames such as tree branches, barn doors, or even open windows. These elements add layers and guide attention to your subject. Think about foreground, midground, and background. A bale of hay in the foreground, a grazing cow in the midground, and rolling hills in the background create depth and dimension. Use the rule of thirds to place points of interest off-center, giving the scene a more organic balance. Don’t forget to look up and down. Birds, overhead wires, cloud patterns, wildflowers, and animal tracks all make for visually compelling additions to your narrative. Unlike cities, where everything competes for attention, rural areas often provide clean, spacious scenes. Let your compositions breathe. Simplicity is often more powerful. Capture the People and the Stories The soul of the countryside isn’t just in the land—it’s in the people. Farmers, artisans, shepherds, and elders all hold a deep relationship with the place, and their lives reflect traditions that are worth preserving through photography. Approach people with humility and genuine curiosity. Strike up a conversation before asking to take a photo. In many rural cultures, this simple gesture of respect goes a long way. You might be invited to watch someone milk a cow, bake bread in a clay oven, or repair a tractor—each moment ripe with photographic potential. When photographing people, use natural light, and focus on gestures, hands at work, expressions, and attire. These elements say more about a person’s life and values than a posed portrait ever could. Candid shots often feel more authentic, but always be aware of personal and cultural boundaries. If someone says no, respect that. The best travel photographers are also great listeners and observers. Tell the Story Through Details In rural photography, the details are everything. The chipped paint on a wagon, the
What Is ISO, Aperture, and Shutter Speed? Explained Simply
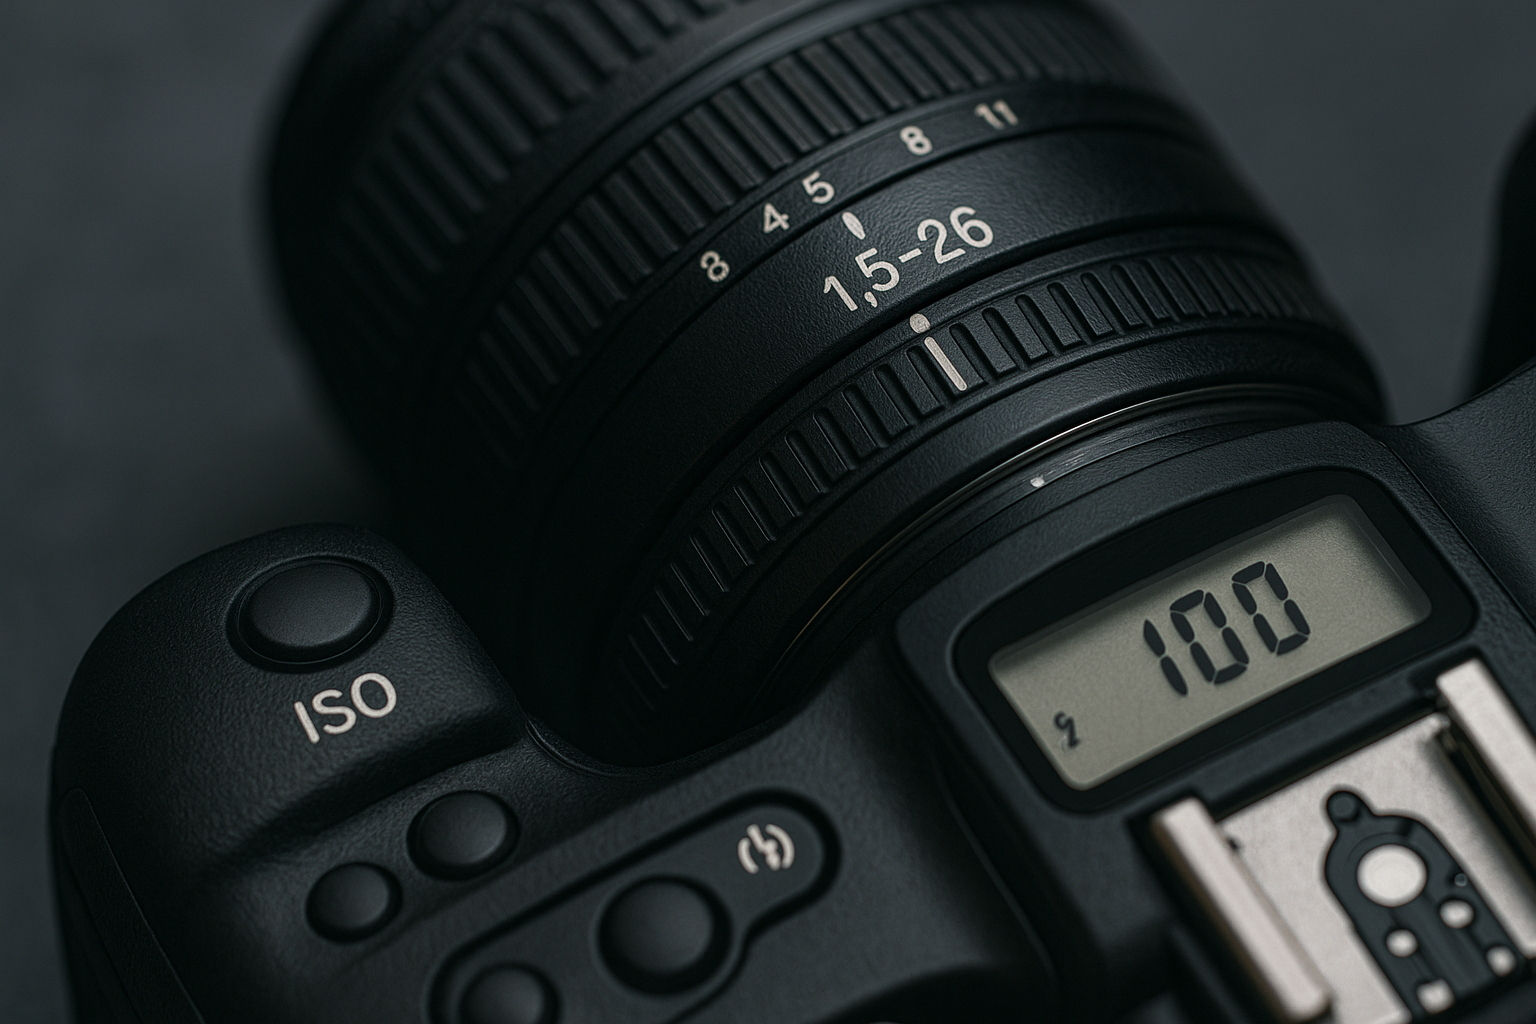
If you’re just getting into photography, you’ve probably come across the terms ISO, aperture, and shutter speed. These three elements make up what’s known as the exposure triangle, and together, they control how your photo looks — whether it’s bright or dark, sharp or blurry, grainy or crystal clear. At first glance, they might seem overly technical or intimidating. But trust me, once you understand how each one works — and more importantly, how they work together — photography becomes a whole lot more creative and fun. In this guide, we’ll break down ISO, aperture, and shutter speed in the simplest way possible. No jargon. No tech-heavy explanations. Just real talk and examples you can understand and apply right away. Why the Exposure Triangle Matters The exposure triangle is made up of three settings: Together, they determine the exposure of your image — how bright or dark it appears. But they also affect depth of field, motion blur, and image quality. Knowing how to balance these three is essential if you want to take full creative control of your photos. Whether you’re shooting portraits, landscapes, night scenes, or fast-moving subjects — it all starts with this triangle. Let’s dive into each one. What Is ISO? ISO refers to how sensitive your camera’s sensor is to light. A low ISO means less sensitivity (best for bright scenes), and a high ISO increases sensitivity (ideal for dark conditions). Common ISO Settings: Example: You’re shooting indoors without a flash. Your photo comes out too dark. You raise the ISO from 200 to 800, and now the image is brighter. But there’s a catch. The Trade-Off: Noise Higher ISO can introduce digital noise — that grainy look, especially noticeable in shadows. That’s why most photographers try to use the lowest ISO possible for a clean image. Real-Life Tip: If your photo is too dark and you can’t slow your shutter or widen your aperture any further, raising your ISO is better than getting a blurry shot. What Is Aperture? Aperture is the opening inside your lens that lets light in. It’s measured in f-stops, like f/1.8, f/2.8, f/4, f/8, f/11, f/16, and so on. A lower f-number means a wider opening (more light comes in). A higher f-number means a narrower opening (less light). But aperture doesn’t just affect brightness — it also controls depth of field, which is how much of your image appears in focus. Example: The Trade-Off: Depth of Field A wider aperture (like f/1.8) gives you a shallow depth of field — great for isolating your subject but tricky to focus precisely. A narrow aperture (like f/11) gives you deep depth of field, but lets in less light, requiring slower shutter speed or higher ISO. Real-Life Tip: For portraits, use f/1.8 to f/2.8. For group shots or landscapes, f/5.6 to f/11 is often ideal. What Is Shutter Speed? Shutter speed controls how long your camera’s sensor is exposed to light. It’s measured in fractions of a second or seconds, like: A faster shutter speed freezes motion. A slower shutter speed creates motion blur or allows more light in during low-light scenes. Example: The Trade-Off: Motion Blur Too slow a shutter speed while hand-holding your camera will cause camera shake, making the image blurry. A fast shutter speed avoids blur but lets in less light — so you’ll need a wider aperture or higher ISO to compensate. Real-Life Tip: Use 1 over your focal length as a rule. If you’re shooting at 50mm, use at least 1/50 shutter speed for a sharp handheld image. How These Three Settings Work Together Now here’s where things get fun. ISO, aperture, and shutter speed all affect exposure — and adjusting one usually means adjusting at least one of the others. Here’s a real-world scenario: You want to shoot a portrait indoors with natural light. That’s the exposure triangle in action. You balanced brightness, depth of field, and sharpness — and made creative decisions based on your goal. A Simple Analogy: Think of a Window Imagine exposure like filling a bucket with water. You can fill the bucket using different combinations. But some will leave splashes (noise), others may overflow (overexpose), and some might take too long (blur). The perfect exposure happens when you balance all three. Tips for Learning the Exposure Triangle Faster When Should You Prioritize One Setting Over the Others? As you get more comfortable with ISO, aperture, and shutter speed, you’ll notice that in different shooting situations, you’ll want to prioritize different parts of the triangle. For Portraits For Action or Sports For Landscapes For Low Light By asking yourself: “What matters most for this shot — sharpness, depth of field, or brightness?” you can decide what setting to adjust first, and then balance the others around it. Final Encouragement: Learn the Rules, Then Play One of the most freeing parts of photography is knowing the rules well enough to break them with purpose. Yes, there’s a “correct” exposure — but sometimes underexposing creates mood.Yes, f/1.8 gives beautiful blur — but maybe you want everything sharp at f/16.Yes, low ISO is cleaner — but a little grain can feel nostalgic or gritty. These settings aren’t just technical tools — they’re creative levers. When you understand them deeply, you stop guessing and start crafting each image. So don’t worry about memorizing charts. Get your hands on your camera. Experiment. Observe. Adjust. Fail. Try again. And over time, you’ll stop thinking so much about ISO, aperture, and shutter speed — because they’ll feel like second nature. That’s when your creativity truly takes flight. Final Thoughts ISO, aperture, and shutter speed might sound technical, but they’re really just creative tools. Once you understand what they do — and how they affect your images — photography becomes a playground of possibilities. Mastering these three settings gives you the power to: Start simple. Practice often. Make mistakes. And most importantly — enjoy the process. Great photos aren’t made by perfect settings. They’re made by people
Using Instagram to Attract Photography Clients
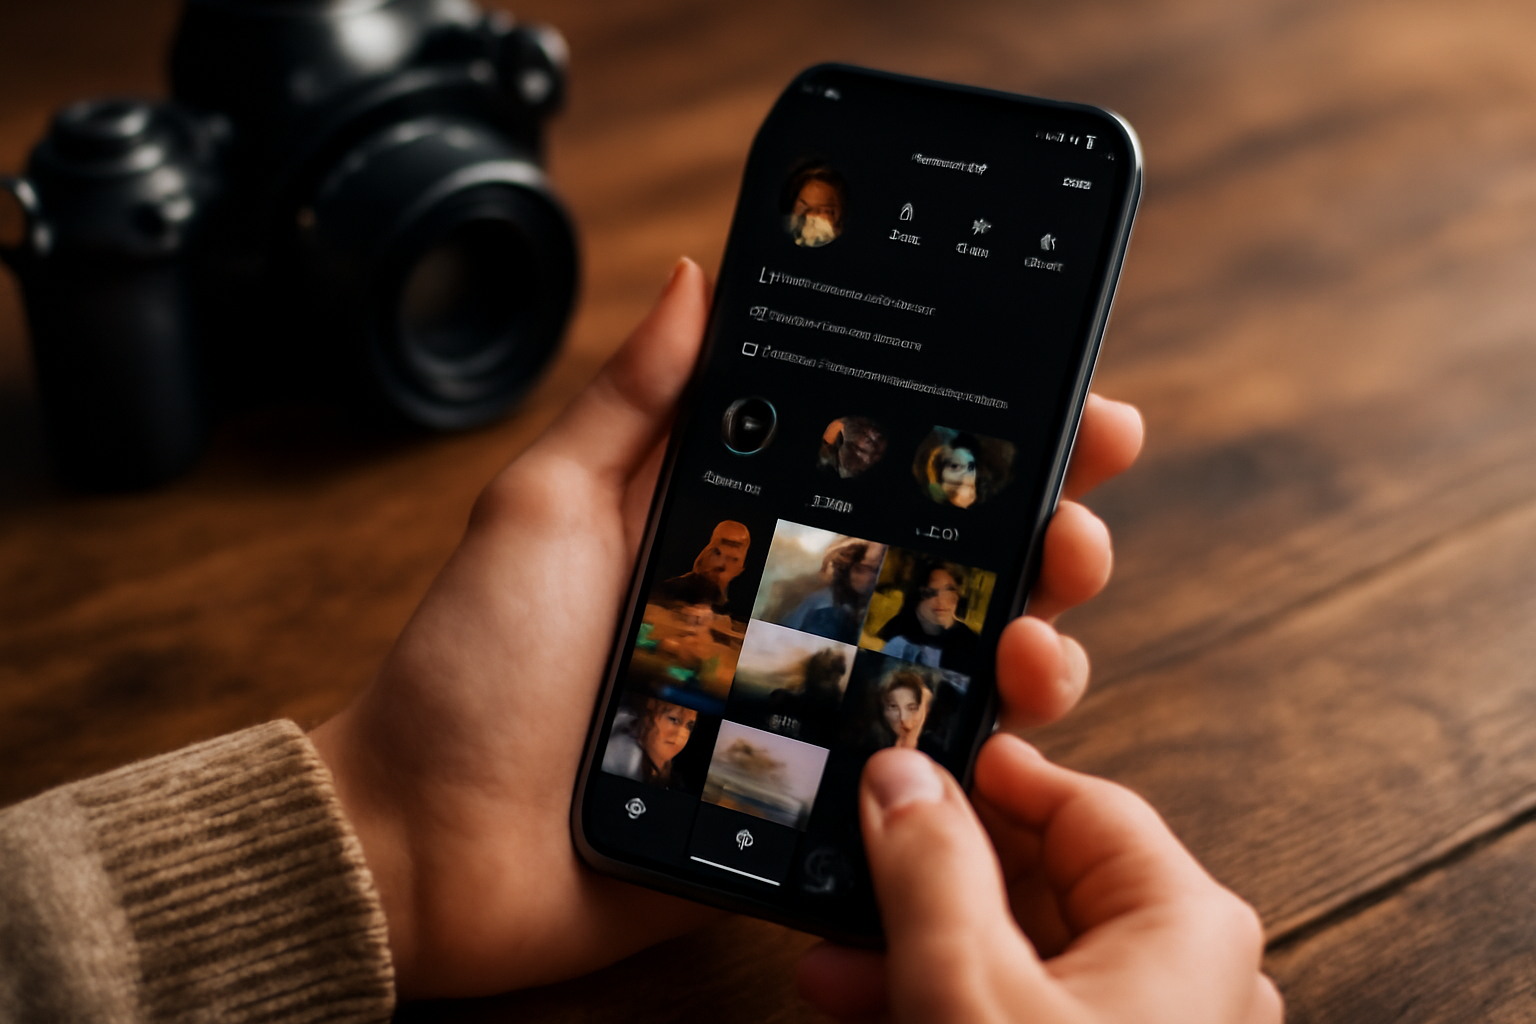
Se você é fotógrafo e ainda não está usando o Instagram de forma estratégica para atrair clientes, está perdendo uma das ferramentas mais poderosas — e gratuitas — que temos hoje no mundo da fotografia. Mais do que um lugar para postar fotos bonitas, o Instagram é um verdadeiro portfólio vivo, um canal de relacionamento e, para muitos profissionais, a principal fonte de novos trabalhos. Mas aqui vai a verdade: não basta postar fotos e esperar que os clientes apareçam. Para que o Instagram funcione de verdade como uma vitrine que atrai pessoas interessadas no seu trabalho, você precisa entender como usar a plataforma com intenção, consistência e autenticidade. Neste artigo, vou te mostrar passo a passo como transformar seu perfil em uma máquina de oportunidades, mesmo que você esteja começando agora. Entenda que o Instagram é mais do que um portfólio Muitos fotógrafos caem na armadilha de tratar o Instagram apenas como um lugar para “jogar” suas melhores fotos. Isso é um erro comum. Claro, qualidade importa. Mas hoje, os clientes não contratam apenas quem tem boas imagens. Eles contratam quem transmite confiança, se comunica bem e mostra estar presente. O Instagram é uma plataforma visual, sim — mas também é uma rede social. Ou seja, ela favorece quem se relaciona, compartilha processos, responde comentários, e cria presença digital. Você não precisa ter milhares de seguidores. Precisa ter um perfil claro, ativo e profissional o suficiente para que, quando alguém cair nele, entenda: “Essa pessoa sabe o que está fazendo. Eu gostaria de trabalhar com ela.” Tenha um perfil otimizado Antes de pensar em conteúdo, pense na casa que vai receber seus futuros clientes. Seu perfil precisa estar claro, direto e profissional. Elementos fundamentais: Poste com consistência (mas não com desespero) Você não precisa postar todo dia. Mas precisa aparecer com frequência e intenção. O Instagram premia consistência. O ideal é postar de 2 a 4 vezes por semana e manter os stories ativos quase todos os dias — nem que seja com algo simples. Crie um calendário leve: Quando seu público começa a ver você com frequência, passa a lembrar de você quando precisar de fotos. Use os stories para gerar conexão (e fechar jobs) Os stories são ouro para quem quer atrair clientes. É neles que você se mostra humano, acessível e presente. Diferente do feed, que tem aquela “vibe de portfólio”, os stories são mais soltos e pessoais — mas isso não quer dizer que você deva postar sem pensar. Ideias de stories que geram resultado: Dica: Use o recurso de “destaque” para fixar stories importantes. Se alguém visitar seu perfil pela primeira vez, vai encontrar ali várias provas sociais de que você é profissional. Mostre o seu rosto (isso vende mais do que você imagina) Sim, a sua arte importa. Mas sabe o que mais importa para o cliente antes de te contratar? Sentir confiança. E nada transmite mais confiança do que ver o rosto do profissional por trás das fotos. Não precisa virar influenciador. Mas aparecer de vez em quando, nos stories ou em uma publicação no feed, mostrando quem você é, contando um pouco da sua história, já muda completamente a percepção das pessoas sobre seu trabalho. Gente se conecta com gente. Escreva legendas que falam com pessoas (não com fotógrafos) Outro erro comum: escrever legendas técnicas, frias ou voltadas para outros fotógrafos — quando, na verdade, seu público são clientes. Evite textos como:📸 “1/250 | f/1.8 | ISO 400 com a 35mm em golden hour.” No lugar disso, escreva algo assim:✨ “A Ana queria um ensaio leve, que mostrasse a nova fase que ela está vivendo. Escolhemos o fim da tarde em um parque que ela ama, e esse foi um dos cliques mais espontâneos do dia. Ela amou. E eu também.” Repare a diferença? A segunda legenda conecta, emociona, vende — sem parecer uma venda. Fale com as pessoas na linguagem delas. Isso é marketing com alma. Use hashtags estrategicamente As hashtags ainda funcionam, principalmente se forem bem escolhidas. Prefira hashtags locais e de nicho, como: Evite hashtags genéricas demais (#photooftheday, #love, etc.). Elas têm milhões de publicações e não te colocam na frente de ninguém. Use entre 10 a 15 hashtags por post, variando sempre para não ser penalizado pelo algoritmo. Reels: seu melhor amigo para alcance Se você quer crescer de forma orgânica no Instagram, precisa abraçar os reels. Eles têm maior alcance e funcionam muito bem para mostrar: Você pode gravar com o celular mesmo, usando seu carisma e voz. Ou pode fazer algo visual e rápido com trilha sonora. O importante é não ignorar esse formato. Dica: mantenha seus reels sempre com título claro e legível nos primeiros segundos. Incentive a interação com o seu conteúdo O algoritmo do Instagram entende que um conteúdo é relevante quando gera interações. Por isso, incentive curtidas, comentários, compartilhamentos e salvamentos. Como fazer isso? Quanto mais as pessoas interagem, mais o Instagram entrega seu conteúdo. Provas sociais: mostre que você entrega resultados Não tem nada que converte mais do que um bom feedback. Sempre que possível, peça autorização para compartilhar: A famosa “prova social” serve para mostrar que outras pessoas já confiaram em você — e ficaram satisfeitas. E isso quebra a maior objeção de quem ainda não te conhece: o medo de errar na escolha do fotógrafo. Converse no direct (sem vergonha) O direct do Instagram é onde as vendas acontecem. Quando alguém comenta, curte várias fotos ou responde um story, isso pode ser um sinal de interesse. Puxe papo: Claro, com respeito e naturalidade. Nada forçado. Mas o direct é um espaço informal onde você pode fazer convites leves e criar oportunidades. Ofereça “Chamadas para ação” Muitos fotógrafos criam conteúdo, mas esquecem de dizer o que querem que as pessoas façam depois de ver o post. Sempre que fizer uma publicação, finalize com algo como: É simples, mas poderoso. Não dependa só do Instagram (mas use ele como ponte) Por mais que o Instagram seja uma ferramenta poderosa,
Top Mistakes Beginner Photographers Make (And How to Avoid Them)
Making mistakes is natural — but repeating them shouldn’t be the norm Starting out in photography is like learning a new language. At first, you mispronounce, mix up tenses, and forget words. But little by little, you improve. In photography, the process is no different. Mistakes are part of the journey — often necessary. But repeating the same errors for too long slows down your growth, especially when they’re avoidable with awareness and practice. This guide is designed to help you grow faster by recognizing the most common mistakes beginner photographers make. More importantly, it offers actionable solutions and practical advice from someone who understands the learning curve, not just from theory but from real, hands-on experience. 1. Ignoring the importance of light — the true core of photography Light matters more than the gear Many beginners focus too much on cameras, lenses, and accessories, and completely overlook the one thing that truly defines an image: light. Photography, after all, is the art of painting with light. How to avoid this mistake Train your eye to observe how light behaves — its direction, softness, warmth, and shadows. Try shooting at different times of the day. Early morning and late afternoon light (the golden hour) is softer and more flattering. Indoors, practice using natural light from a window, and avoid harsh overhead lighting. Even shadows, when used creatively, can become key storytelling elements. 2. Relying too much on automatic mode Auto mode is comfortable — and creatively limiting Auto mode is helpful when you’re just starting out, but it doesn’t allow for creative control. Your camera doesn’t know if you want a blurry background, a dramatic silhouette, or to freeze a fast-moving subject. It simply tries to balance exposure based on light data. What to do instead Start experimenting with semi-automatic modes. Aperture Priority lets you control the depth of field, while Shutter Priority helps you freeze or blur motion. As you gain confidence, move into full manual mode. Compare results with different settings to understand how each adjustment impacts the final image. This hands-on experimentation is where real growth begins. 3. Overlooking composition Composition guides the eye and creates intention A poorly composed image can make even the most beautiful subject look dull or confusing. One common beginner mistake is placing everything dead center without thinking about balance or storytelling. How to improve this Start with the rule of thirds, but don’t stop there. Use leading lines, natural frames (like doors or windows), symmetry, and visual hierarchy. Eliminate distractions from the background, and guide the viewer’s eye deliberately. Think of each shot as a visual story: what are you showing, and how are you leading someone into that story? 4. Always shooting from the same angle Perspective changes everything Shooting only from eye level quickly leads to flat, repetitive images. You see the world that way all day — your camera doesn’t need to show the same perspective. How to break the habit Kneel down, lie on the ground, shoot from above, tilt your frame slightly, or experiment with reflections and shadows. A shift in angle can turn an ordinary moment into something visually powerful. Try including foreground elements to add depth and dimensionality. 5. Believing gear is everything The camera doesn’t make the photographer One of the biggest misconceptions is that better gear equals better photos. But great photography isn’t about having the most expensive lens — it’s about seeing differently. The real solution Work with what you have. Even a smartphone can produce stunning images when you understand light, timing, and composition. Mastering these fundamentals will always matter more than the latest specs. Gear is a tool, not a shortcut to talent. 6. Not reviewing your own photos Growth comes through reflection Many beginners shoot dozens (or hundreds) of photos but never take the time to critically review their work. Without reflection, it’s hard to identify patterns or areas for improvement. How to build a review habit After each shoot, pick your 10 best images and evaluate them honestly. Ask yourself: What worked? What didn’t? Is the focus sharp? Is the composition clean? Did I capture what I intended to? This review process solidifies learning and helps you move forward with purpose. 7. Overediting — or not editing at all Editing is part of the process, not a fix-it tool Some beginners go overboard with filters, saturation, and contrast. Others fear editing and leave everything raw — even when minor adjustments could elevate the photo significantly. How to strike a balance Use editing to enhance, not mask. Start with basic adjustments: exposure, white balance, contrast, sharpness. Avoid extreme color shifts unless you’re intentionally creating an artistic style. Let your edits support the image’s emotion, not distract from it. Keep it natural, clean, and cohesive. 8. Missing focus A blurry image loses its power Poor focus ruins even the best-composed images. Many beginners trust the camera to pick the focus point — which often lands on the background or the wrong subject. How to improve Use manual focus or touch-to-focus on your subject’s eyes, especially in portraits. Be cautious with very wide apertures (like f/1.4 or f/1.8), which give you shallow depth of field and a smaller margin for error. Learn your camera’s autofocus modes and test them in different situations. 9. Shooting without intention Shooting without thinking leads to forgettable images Clicking the shutter isn’t the same as creating an image. If you’re just capturing things because they’re there, your photos may lack depth or meaning. How to photograph with purpose Pause before shooting and ask: Why am I taking this photo? What’s the emotion or story? How can I show it best? With that mindset, every click becomes more deliberate — and your images will start to connect on a deeper level. 10. Ignoring the background The background tells half the story A distracting or messy background can ruin an otherwise beautiful image. Unfortunately, beginners often focus so much on the subject that they forget to
How to Tell Stories Through Photography
Photography is more than capturing beautiful moments—it’s about conveying meaning, emotion, and narrative through a single frame or a series of images. When done well, storytelling in photography transforms pictures into experiences. It invites viewers to pause, feel, and reflect. Whether you’re a traveler exploring unfamiliar cultures, a street photographer documenting daily life, or a creator capturing your own memories, the ability to tell stories through images will elevate your work from good to unforgettable. This guide will help you master the art of visual storytelling, combining technical skills, intuition, and heart. Understand What Makes a Story At its core, a story has characters, setting, conflict, and emotion. In photography, these elements may be subtle—but they’re always there. A story can be as simple as a child chasing pigeons in a plaza or as layered as the quiet resignation on a commuter’s face. What matters is that your photo goes beyond aesthetics—it says something. Start by asking yourself: The answers form the backbone of your visual narrative. Observe Before You Shoot Storytelling requires patience and presence. Before you lift your camera, take time to observe. Watch how people interact, how light falls across a space, how movement and silence shape the mood. Avoid rushing to capture what’s obvious. Instead, dig deeper. The best stories often emerge after the obvious moment has passed. For example, don’t just shoot the tourist in front of a monument. Wait for a quiet moment when their expression changes or their body language shifts. That’s where story lives. Train yourself to be a watcher first, and a photographer second. Find the Emotional Anchor Emotion is the heart of every compelling story. Your image doesn’t need to make people cry—but it should make them feel something. Look for emotion in facial expressions, gestures, eye contact, or even isolation. Sometimes, the absence of people tells a powerful story too—a deserted alleyway after rain, an empty bench at sunset. Ask yourself: What do I feel when I look at this scene? If you feel it, your viewer will likely feel it too. Try to shoot with empathy, not just observation. Compose With Intention Composition isn’t just about visual balance—it’s a tool to guide the viewer’s attention and emphasize your story. Use techniques like: Every element in your frame should serve the story. Remove distractions. Simplify where needed. Be deliberate. Even the choice of perspective—shooting from above, below, or the side—can completely change the narrative tone. Don’t be afraid to experiment with unconventional compositions if they support the narrative better. Think in Sequences Some stories are too rich for a single image. In that case, think in terms of photo series. A sequence allows you to explore different angles, moments, and moods. For example: A well-edited photo story can read like a film—beginning, middle, and end—pulling the viewer along. Travel photography, in particular, benefits from this approach. Show not just the place, but the people, textures, traditions, and quiet moments in between. Use sequencing to build narrative tension and reveal transformation. Even a brief moment—a street vendor preparing a dish—can become a compelling sequence when told through thoughtful progression. Use Light to Shape Mood Light is one of your strongest storytelling tools. The way you use it can dramatically affect the mood of your image. Don’t just use available light—read it. Ask what the light is doing to your subject. Does it support or fight the story you’re telling? Learn to see light not as a technical factor, but as a narrative voice in your image. Night scenes, candlelight, and backlighting can all open different emotional doors—use them with intent. Look for Details That Speak Volumes Big stories often live in small details. A weathered hand resting on a market stall. A torn poster on a crumbling wall. A pair of shoes left outside a temple. Details invite curiosity. They give context. They transform the generic into the specific. Get close. Change your perspective. Pay attention to textures, patterns, symbols. A story doesn’t always need faces—it needs honesty. Photograph objects with a sense of presence—make them feel part of something larger. Often, viewers connect deeply with these quiet symbols because they recognize a piece of their own experience. Embrace Imperfection Perfect isn’t always interesting. Some of the most powerful photos are grainy, slightly out of focus, or asymmetrical. What matters is the feeling they carry. Let go of the need to control every aspect. Be ready for serendipity. Let things unfold naturally. Often, it’s the candid glance, the unplanned gesture, the in-between moments that tell the truest story. Imperfections can often be the most human elements in a photo—they make your story relatable. Develop a Personal Style Storytelling is not just about what you see—it’s about how you see. Your perspective, your sensibility, your voice. Don’t try to imitate other photographers. Instead, reflect on what draws you to certain subjects or scenes. What colors, compositions, or stories feel most you? Over time, your projects will begin to carry a signature—a blend of technique and emotion that is unmistakably yours. Personal style is not static—it evolves as you do. Let it grow with each new story you tell. Think of your style as a filter through which you interpret the world—not a fixed recipe. Edit for Impact, Not Quantity A strong story isn’t about showing everything—it’s about showing the right things. Be ruthless in your selection. Ask: Less is often more. Create rhythm in your photo essays. Alternate between wide and tight shots. Use breathing space. Let your sequence guide the viewer’s journey. Avoid the temptation to over-explain. Trust your images to speak. Editing is where your raw material becomes a narrative—give it the attention it deserves. Add Context When Needed Sometimes, a photo speaks for itself. Other times, a brief caption or description enhances the story. Share the backstory, if it adds depth. A short paragraph can give emotional or cultural context. But avoid over-explaining—let the image do most of the talking. For travel storytelling, including location, date, and
How to Promote Your Work as a Beginner Photographer
Starting out in photography is both thrilling and intimidating. You’re learning your camera, experimenting with light, building your portfolio—and then suddenly, you realize: It’s time to show your work to the world. But how do you promote yourself when you’re just starting out, don’t have many clients, and your portfolio still feels “under construction”? The truth is, you don’t need to be famous, or even fully “ready”, to begin promoting your photography. You just need to be strategic, consistent, and authentic. In this article, I’ll show you how to promote your work as a beginner photographer—even if you feel like you’re still figuring it all out. First, Accept Where You Are Before anything else, stop waiting for the perfect moment. There is no magic number of followers, no milestone that grants you permission to start promoting your work. You are a photographer now. Not “one day when…” Promoting your work isn’t about pretending to be a pro. It’s about telling the world: Hey, I’m learning, I’m creating, and I’d love to connect through my work. Own your beginner stage. People actually find it refreshing. Build a Simple Portfolio (Even with Limited Work) You don’t need 100 amazing photos to start promoting yourself. What you do need is a small, curated portfolio that reflects the type of work you want to do more of. Choose 10 to 15 of your strongest images. Focus on consistency: in editing, mood, and subject. Create simple galleries for categories like “Portraits”, “Street”, or “Lifestyle”. You can host them on a clean platform like Adobe Portfolio, Squarespace, Wix, or even Instagram Highlights. A bonus tip: include captions or short notes on what you loved about each photo or what you learned. This humanizes your portfolio and shows your growth mindset. Share Your Process, Not Just the Final Product As a beginner, your greatest asset is your story. People love watching artists grow. So don’t just share polished images—share your journey. Post things like: By showing your process, you build connection. Your audience starts rooting for you. And that emotional connection is way more powerful than any viral photo. Use Instagram (Smartly, Not Desperately) Instagram is a natural fit for photographers—but it’s easy to get stuck in a cycle of chasing likes and comparing yourself to others. Instead, use it as a mini-portfolio and visual journal. Optimize your profile: What to post: Use a blend of niche and location-based hashtags: The goal isn’t to go viral. It’s to be visible to the right people, and to slowly build a genuine following. Tell People You’re a Photographer (Yes, Out Loud) This may sound basic, but many beginner photographers hide their passion like a secret. If you don’t talk about your photography, people won’t know to support or refer you. Start doing this: You don’t have to say “I’m a professional photographer.” You can say: That simple shift opens doors. Offer Free or Low-Cost Sessions (With Purpose) When starting out, it’s okay to do some shoots for free or cheap—as long as it’s intentional and benefits both sides. How to make it valuable: These shoots give you real-world experience, create content you can promote, and often lead to word-of-mouth referrals. You’re not working “for free.” You’re investing in your growth. Use Local Communities and Events Don’t underestimate the power of your local scene. Often, beginner photographers overlook how many people around them need photos but don’t know who to ask. Places to connect: Offer to shoot: Start conversations, make connections, and be helpful. Many beginners land their first clients through real human interaction—not just hashtags. Start a Newsletter or Blog It might seem old-school, but email still works. A small newsletter is a great way to: Even if only 10 people read it—those 10 people are invested. They’re more likely to refer you, hire you, or cheer you on. You can use platforms like Substack, Mailchimp, or ConvertKit. A photo plus two paragraphs of honest reflection is enough to build trust and connection. Collaborate with Other Creatives Collaboration opens doors you can’t open alone. As a beginner photographer, you can team up with: Offer to create content in exchange for creative freedom and portfolio use. Be sure to communicate clearly and respectfully. Over time, these partnerships evolve into referrals and paying gigs. Document Everything The more you create, the more content you have to promote. So get in the habit of documenting your shoots—not just the final photos. Capture: Even if the shoot wasn’t perfect, showing your work ethic and consistency builds trust with your audience. Be Consistent, Not Constant Promoting your work doesn’t mean you have to post every day or burn yourself out. The key is consistency. Create a rhythm: This keeps you active and visible without overwhelming yourself. Don’t Try to Be Everyone As a beginner, it’s tempting to say “yes” to everything—portraits, products, events, food, weddings, pets. And while exploring is good, don’t dilute your identity. Choose one or two areas to focus on (even if just for now), and promote yourself in that niche. The more focused your style and message, the more people will remember you and refer you for that specific kind of work. Track Your Growth to Stay Motivated When you’re just starting out, it’s easy to feel invisible. You might wonder if your posts are reaching anyone, or if your progress even matters. But here’s something most photographers overlook: tracking your growth is itself a promotional strategy. Keep a simple record of: This gives you clarity, boosts your confidence, and helps you refine your direction. It’s proof that you’re evolving—and that’s worth sharing too. Learn to Write About Your Work One of the most underrated ways to promote your photography is through good storytelling—not just with images, but with words. You don’t need to be a writer. Just try to describe: This kind of reflection adds depth and personality to your posts. It invites people into your world. And in a crowded market, authenticity stands out more than perfection.
How to Practice Photography at Home
Many people think you need exotic locations, expensive studios, or fancy gear to improve your photography. But the truth is, some of the most valuable lessons you’ll ever learn can happen right where you are: at home. Your living room, your backyard, your kitchen, even your windowsill can become a powerful classroom if you learn how to use it. Practicing photography at home teaches you to be resourceful. It forces you to pay attention to light, composition, and storytelling in everyday environments. And when you finally do get outside for a big shoot, you’ll be sharper, more confident, and more creative. This guide will show you how to practice photography at home with intention, fun, and growth in mind. Why Practicing at Home Matters First, let’s clear a misconception: photography isn’t only about traveling to beautiful places. Sure, a mountain at sunrise makes for a stunning photo, but if you rely on scenery alone, you won’t truly master your craft. Practicing at home builds your foundation. It teaches you to notice subtle changes in light, to experiment without pressure, and to create stories in ordinary spaces. Think of it like a musician practicing scales. The audience doesn’t see the hours spent in a bedroom with just a guitar and a notebook. But those moments are what prepare them for the stage. Practicing at home is your equivalent. Step 1: Start by Observing the Light in Your House Light is the heart of photography. And your home is full of lessons if you pay attention. Take one day and watch how natural light shifts throughout your rooms: Practice photographing the same object in different parts of your home at different times of day. This will teach you to understand how light shapes mood. Example: Place a mug on your table. Photograph it at 9 a.m., noon, and 6 p.m. Compare the images. Notice how the light changes its texture, color, and presence. That awareness will make you a stronger photographer anywhere. Step 2: Practice Still Life Photography Still life is one of the easiest and most effective ways to practice indoors. You don’t need models or elaborate scenes—just everyday objects. Try these setups: Focus on composition. Experiment with the rule of thirds, leading lines, or negative space. Use both natural and artificial light. Play with backgrounds—maybe a blanket, a piece of paper, or even your wooden table. Still life trains your eye for detail. You’ll learn patience, framing, and how to make ordinary objects look extraordinary. Step 3: Master Self-Portraits If you don’t have people to photograph, use yourself. Self-portraits aren’t just selfies—they’re a creative challenge that sharpens multiple skills at once. You’ll learn: Self-portraits also build empathy for your future clients. You’ll know what it feels like to be in front of the camera, which makes you better at directing others. Tip: Don’t aim for “perfect.” Aim for honest, expressive, and fun. Step 4: Experiment With Different Types of Light Artificial light is everywhere in your home. Instead of relying only on daylight, practice with lamps, fairy lights, candles, or even the flashlight on your phone. Exercises to try: These experiments teach you how to control light creatively and problem-solve in less-than-ideal conditions. Step 5: Photograph Everyday Activities Some of the most powerful images come from ordinary routines. Document life at home as if you were telling a story. Ideas: The goal isn’t just to take pictures—it’s to capture moments. This practice builds your storytelling skills, which is what truly elevates a photographer beyond technical ability. Step 6: Play With Abstract and Detail Shots Look closer. Your home is full of textures, patterns, and details that you usually overlook. Try photographing: Abstract shots encourage creativity. They help you see beyond the obvious and turn small details into compelling images. Step 7: Create Themed Projects Give yourself structure by creating mini-projects. For example: Projects keep you accountable. They also make practice more fun, like a personal challenge rather than random snapshots. Step 8: Learn Editing With Your Own Photos Editing is where your images gain polish and personality. Use your at-home practice photos as material to improve your editing skills. Start with free tools like Snapseed, Lightroom Mobile, or desktop programs like Darktable. Practice adjusting: Your editing style will evolve as you practice. Don’t chase trends—focus on what feels true to you. Step 9: Recreate Famous Photos at Home Find inspiration from iconic images or your favorite photographers. Then, challenge yourself to recreate their style using what you have at home. For example: You don’t need the exact same props. The point is to study the choices the photographer made—lighting, framing, mood—and practice translating them into your environment. Step 10: Practice Storytelling With a Photo Series Instead of focusing on single images, try creating a small series that tells a story. Example themes: Arrange the photos in sequence. Ask yourself: does this flow make sense? Does it communicate a feeling or narrative? This practice helps you think like a visual storyteller, not just someone taking random shots. Step 11: Use Mirrors and Reflections Mirrors, windows, and shiny objects can transform your photos. Experiment with: This teaches you to see multiple layers in an image, adding depth and interest. Step 12: Review and Critique Your Work Practicing is important, but reviewing is where the real growth happens. After a week or month of shooting at home, go back through your photos. Ask yourself: Keep your best shots in a “favorites” folder. Over time, this collection will show your progress—and your emerging style. Bonus: Share Your Work Online Don’t keep your practice hidden. Share your images on Instagram, a personal blog, or in photography groups. Not for validation, but for connection. Other photographers might give feedback. Friends might appreciate your perspective. And by sharing, you hold yourself accountable to keep shooting. Bonus: Make Practice Playful Photography at home doesn’t have to be serious all the time. Play games with yourself: These limitations spark creativity. Sometimes the best photos come from restrictions, not
How to Organize Photo Shoots to Practice
One of the most effective ways to improve your photography skills is by organizing your own photo shoots. Not commercial sessions. Not paid gigs. Just intentional, self-directed shoots created purely for growth, exploration, and practice. This might sound overwhelming at first, especially if you’re new to photography. But the truth is: setting up your own practice shoots is easier—and more powerful—than you might think. It puts you in control of the environment, the lighting, the subject, and the creative direction. You’re not under pressure to deliver perfect results for a client. You’re free to experiment, fail, try again, and learn. In this guide, we’ll walk step by step through how to plan, organize, and execute photography practice sessions that actually help you grow, both technically and artistically. Why Organizing Your Own Photo Shoots Matters Before we get into the logistics, let’s understand why organizing your own shoots is so important—especially as a beginner. When you’re only taking photos during events or casual moments, you’re reacting to the world as it happens. That’s useful, but it’s limited. You’re not always in control of the lighting, the subject, or the timing. When you organize a photo shoot: This level of control allows for focused practice, and that’s where growth accelerates. Want to learn how to shoot with harsh midday sun? Organize a shoot at noon. Want to practice low-light portraits? Set up a moody shoot in your room with one lamp. It’s your lab. Step 1: Define the Purpose of the Shoot Before anything else, be clear about what you’re trying to practice. Are you learning: Being intentional about your learning goal will shape everything about your shoot: location, time, subject, gear, and editing. Example: Let’s say you want to learn how to shoot sharp portraits using only window light. Your decisions will look like this: The more specific your goal, the better your practice. Step 2: Choose a Theme or Concept (Optional but Powerful) Even for practice shoots, having a visual or emotional theme can help fuel your creativity and keep the session focused. Here are some simple themes you can start with: You don’t need a full mood board, but collecting a few reference images on Pinterest or Instagram can guide your thinking and help you explain your idea if you’re working with someone else. Themes are especially helpful if you struggle with creativity or decision-making during a shoot. They give you an anchor. Step 3: Find Your Subject Now it’s time to choose what or who you’ll be photographing. Depending on your goal, you might shoot: If you’re photographing people, communicate clearly. Let them know: When your subject feels comfortable, your photos will be better—and your practice more enjoyable. Tip: Start with people you trust. As you build confidence, you can invite new faces through local model groups, online communities, or even Instagram. Step 4: Select the Location Your location doesn’t need to be fancy. In fact, some of the best practice shoots happen in the most ordinary places: The key is to choose a location that fits your learning goal. Pay attention to: If you can, visit the location ahead of time and take some test shots. It helps reduce surprises on shoot day. Step 5: Prepare Your Gear Thoughtfully Resist the urge to bring all your equipment. For a focused practice session, less is more. For example: Clean your gear the day before. Charge all batteries. Format your memory cards. Pack your bag so you’re not fumbling during the shoot. Treat it like a real job—even if it’s just for you. Checklist Example: Step 6: Create a Loose Shot List You don’t need to storyboard every frame, but having a loose list of shots or techniques you want to try keeps your session organized and purposeful. Your list might include: You don’t have to follow it exactly—but when you feel stuck or anxious, it gives you something to fall back on. Step 7: Set the Mood for the Shoot Whether you’re shooting alone, with a subject, or with a team—the energy you bring matters. Simple ways to set the tone: People feed off your energy. The more confident and open you are, the better the atmosphere—and the better your photos. Step 8: Review and Adjust During the Shoot Don’t just click away blindly. Stop periodically to: If something’s not working, change it. That’s the beauty of a self-directed shoot—you’re free to experiment. Also, take breaks! Step back and look at the scene with fresh eyes. Sometimes the best photo is right behind you. Step 9: Reflect After the Shoot Once your session is over, don’t rush to post or edit everything. Instead, take 15 minutes to reflect: This kind of reflection helps you absorb the learning and make better decisions in your next shoot. You can even write a quick summary in a notebook or voice memo. Over time, this becomes a goldmine of insight into your growth. Step 10: Edit with Intent and Purpose When editing practice photos, don’t aim for “likes.” Aim for learning. Use this time to: Editing is where your photos take on their final mood—so experiment with purpose. And remember: not every photo needs to be posted. Some of your best lessons come from “failed” shots. Bonus: Schedule Practice Shoots Regularly Don’t wait for inspiration. Don’t wait for a perfect location. Don’t wait for the newest lens. Make practice shoots a routine part of your photography journey. You can start small: By creating a habit around intentional practice, your confidence will grow, your creativity will expand, and your style will naturally evolve. Bonus: Collaborate with Others Once you’re comfortable planning your own shoots, consider collaborating with others: Even for unpaid sessions, collaboration brings new perspectives and keeps things fresh. Just make sure to communicate roles, expectations, and boundaries clearly. And always credit your collaborators. Final Thoughts: Practice with Purpose Organizing your own photo shoots to practice isn’t just a technique—it’s a mindset. It’s about stepping into the role of a creator,
How to Make Money from Photography as a Beginner
Yes, You Can Start Earning Even If You’re Not a Pro (Yet) You love photography. You’ve been practicing, learning, watching tutorials, sharing your work on Instagram, and maybe hearing from friends, “Wow, you should charge for this!” But the big question lingers: Can you actually make money from photography — even as a beginner? The short and honest answer is: yes, you can. No, you don’t need the most expensive gear. No, you don’t need ten years of experience or a fancy studio. What you do need is a realistic plan, a bit of boldness to put yourself out there, and a mindset that treats your creativity as something valuable. Let’s break down practical, proven, beginner-friendly ways to earn money with your photography — even if you’re just starting out. 1. Start Where You Are, With What You Have The perfect moment to start doesn’t exist Too many beginner photographers fall into the trap of waiting: waiting for better gear, waiting to finish a course, waiting until they’re “good enough.” But truthfully, you don’t need to wait to start offering value. Start with what you already enjoy shooting. Do you love capturing your pets? Offer pet photo sessions in your local area. Take portraits of friends. Photograph your neighborhood, local cafés, or nature trails. Use whatever camera you have — even if it’s a smartphone. What matters more than gear is your vision and your ability to connect with people. 2. Offer Affordable Sessions to Gain Experience Practice with purpose (and payment) You don’t need to charge hundreds of dollars for your first photoshoot. In fact, it’s often better to start with low-cost sessions while you gain real-world experience. These early jobs allow you to practice working with clients, handling lighting conditions, posing people, and managing post-production — all while building your portfolio. Structure your first offers like this: Overdeliver and ask for a review or testimonial. This helps you build credibility and referrals. Even one satisfied client can become your best marketing tool. 3. Use Your Personal Network to Land First Clients People around you want photos — they just need to know you offer them Your first paid photography jobs probably won’t come from strangers on the internet. They’ll come from people who already know, like, and trust you. Start close. Tell friends, family, and coworkers that you’re available for paid sessions. Offer “friends and family” pricing to get your foot in the door. Share your best shots on personal social media with a caption like, “Now booking portraits/pet photos/product shoots.” You don’t need a big audience — you need a few people who trust you and are willing to support your work. 4. Say Yes to Different Gigs to Discover Your Niche Let your market choose your specialty In the beginning, it’s okay to be a generalist. Take on a variety of jobs — portraits, couples, products, events, pets, food. You’ll learn what you enjoy, what comes naturally to you, and what the market is willing to pay for. Over time, try to specialize. Specializing makes it easier to target your messaging and charge more. For example, being “a wedding photographer for intimate backyard ceremonies” is more powerful than just “a photographer.” But remember, exploration comes first. You can’t find your lane if you never try different roads. 5. Sell Prints, Digital Art, and Stock Photos Turn your passion into passive income If you enjoy landscape, travel, street, or abstract photography, your photos may have value as decor or digital products. There are many platforms that let you sell your work in print or digital formats. Start by uploading your best shots to: You can also create your own online store using Shopify or a simple portfolio site. Promote your shop casually through your social media or email list. Even if it starts slow, this can grow into recurring, passive income over time. 6. Photograph Local Events and Celebrations Small events need great photos too Not every event is a big wedding or corporate gala. Think small: birthday parties, baby showers, local music nights, school events, or small business openings. These often go unphotographed — or worse, end up with only blurry phone photos. Reach out to local event planners, businesses, and community groups. Offer to cover their next event with a small portfolio package. You’ll not only earn money but also expand your network quickly, since events put you in front of lots of people. 7. Offer Personal Branding Shoots for Creators and Entrepreneurs Everyone needs good photos now We live in a visual world. Entrepreneurs, freelancers, coaches, and influencers all need professional images for their websites, Instagram, LinkedIn, and newsletters. That’s where you come in. Branding shoots are perfect for beginners because they can be: Market these as “starter branding sessions” with 10–15 edited photos. Make it affordable, quick, and fun — and your clients will likely come back every season. 8. Work with Small Businesses and Local Shops Help others grow while growing yourself Many small business owners can’t afford big marketing agencies, but they still need quality photos. Offer to shoot their products, staff, interiors, or even create social media content bundles. Reach out with a friendly message and a few examples of your work. You might say: “I’d love to help showcase your products with high-quality photos for your Instagram. I’m building my portfolio and offering special rates this month.” A few happy clients here can lead to long-term collaborations — and even retainers if you offer monthly content. 9. Join Freelance Marketplaces and Job Boards Remote work opportunities for photographers are growing Even if you’re not ready to shoot big gigs, you can offer editing, retouching, or image consulting services online. Many photographers make a side income by: Use platforms like: Be honest about your level, start with small jobs, and build a 5-star reputation. Every project you complete increases your confidence and skill. 10. Build a Simple, Powerful Online Portfolio Look professional, even as a beginner Having a portfolio