Photography is more than pointing your camera at something and pressing the shutter. The difference between an average photo and an impactful one often comes down to small, intentional choices. You don’t need to own expensive gear or be a professional with decades of experience. Sometimes, it’s the simplest techniques that make your images stand out. Impactful photos don’t just capture a subject; they make people feel something. They draw the eye, tell a story, and leave a lasting impression. If you’re wondering how to elevate your photography, this guide will walk you through practical techniques you can start using today — regardless of what camera you own. Why Impact Matters More Than Perfection Before diving into techniques, let’s talk about why impact is important. Many beginners obsess over sharpness, megapixels, or fancy lenses. But technical perfection doesn’t guarantee emotional connection. A photo can be perfectly exposed and flawlessly sharp, but if it lacks soul, viewers won’t remember it. Think about the photos that stick with you — maybe an old family picture, a raw street capture, or a dramatic portrait. Chances are, they’re not perfect. They’re powerful because they evoke emotion, tell a story, or highlight something ordinary in an extraordinary way. So instead of chasing flawless, chase meaningful. These simple techniques will help you do just that. 1. Pay Attention to Light Above All Else Light is the foundation of photography. Learning to observe and use it is the single most powerful skill you can develop. Tips to try: Exercise: Pick one subject and photograph it at different times of day. Compare how the light changes the mood. You’ll realize light isn’t just illumination — it’s emotion. 2. Simplify Your Composition Impactful photos are often the simplest. Too many elements confuse the viewer. Focus on one subject and remove distractions. How to simplify: Example: If you’re photographing a flower, filling the frame with petals and color will feel more powerful than a busy shot with other plants and objects in the background. 3. Use the Rule of Thirds (Then Break It) The rule of thirds is one of the most popular composition techniques for a reason. Imagine dividing your frame into nine equal sections with two horizontal and two vertical lines. Place your subject along those lines or at their intersections. This creates balance and draws the eye naturally. But once you understand it, experiment with breaking it. Center your subject for symmetry, place them at the edge for tension, or fill the frame entirely. Rules are great for starting — breaking them with intention is even better. 4. Focus on the Eyes When photographing people or animals, sharp eyes instantly create impact. They connect the viewer emotionally to the subject. Tips: Even if the rest of the photo is imperfect, clear eyes will make it feel alive. 5. Change Your Perspective Most people shoot from eye level. That’s fine — but it’s also predictable. Impact often comes from seeing the world differently. Ideas: The more you play with angles, the more unique your images will feel. 6. Use Leading Lines Our eyes naturally follow lines. Roads, fences, bridges, hallways, even shadows can guide the viewer’s gaze toward your subject. Place your subject at the end of a line to create flow. Or use converging lines to add depth. For example, imagine a person standing at the end of a long pier. The planks of wood lead the viewer straight to them. It feels intentional and impactful. 7. Play With Depth of Field Depth of field is how much of your image is in focus. A shallow depth (like f/1.8) isolates your subject and creates creamy backgrounds. A deep depth (like f/11) keeps everything sharp. Both can be impactful when used deliberately. Shallow depth creates intimacy, while deep depth creates storytelling in landscapes or busy scenes. Experiment with both, and don’t just stick to one style. Impact comes from using depth to match your subject and message. 8. Capture Emotion and Movement Static poses are fine, but emotion and movement add life. Instead of asking someone to “smile,” try making them laugh. Instead of photographing a runner standing still, capture them mid-stride. Tips: An imperfect but emotional photo beats a technically perfect but lifeless one any day. 9. Look for Patterns and Symmetry Our brains love patterns. They create harmony and rhythm in images. Look for repeating shapes, colors, or lines — like tiles, windows, or even rows of trees. Symmetry, on the other hand, creates a sense of order and calm. Center your subject and let the balance do the work. But remember: breaking symmetry can be just as powerful. Imagine a perfectly lined-up street with one person slightly off-center. That tiny disruption draws attention. 10. Use Color Intentionally Color is one of the strongest tools for impact. It sets mood instantly. A warm palette feels inviting. Cool tones feel calm or mysterious. Black and white removes distraction and emphasizes texture. Tips: Color isn’t just decoration; it’s part of your storytelling toolkit. 11. Anticipate the Decisive Moment Henri Cartier-Bresson, the father of street photography, coined the term “decisive moment” — the exact instant when everything aligns to create a powerful image. This doesn’t just apply to street photography. It applies to portraits, family gatherings, sports, or even pets. Great photos often come from waiting for that exact split second: the laugh, the glance, the movement. Be patient. Be ready. Sometimes impact is about timing. 12. Experiment With Shadows and Silhouettes Light isn’t only about what it shows — it’s also about what it hides. Shadows and silhouettes can create mystery, drama, and depth. Try: These techniques often require no extra gear, just awareness and creativity. 13. Tell a Story With Context An impactful photo doesn’t just show what something looks like. It tells you something about it. For example: Ask yourself: what’s the story here? Then include or exclude elements to strengthen that narrative. 14. Practice Minimalism Minimalism is the art of less. It strips away
Mastering Light: A Beginner’s Guide to Lighting in Photography
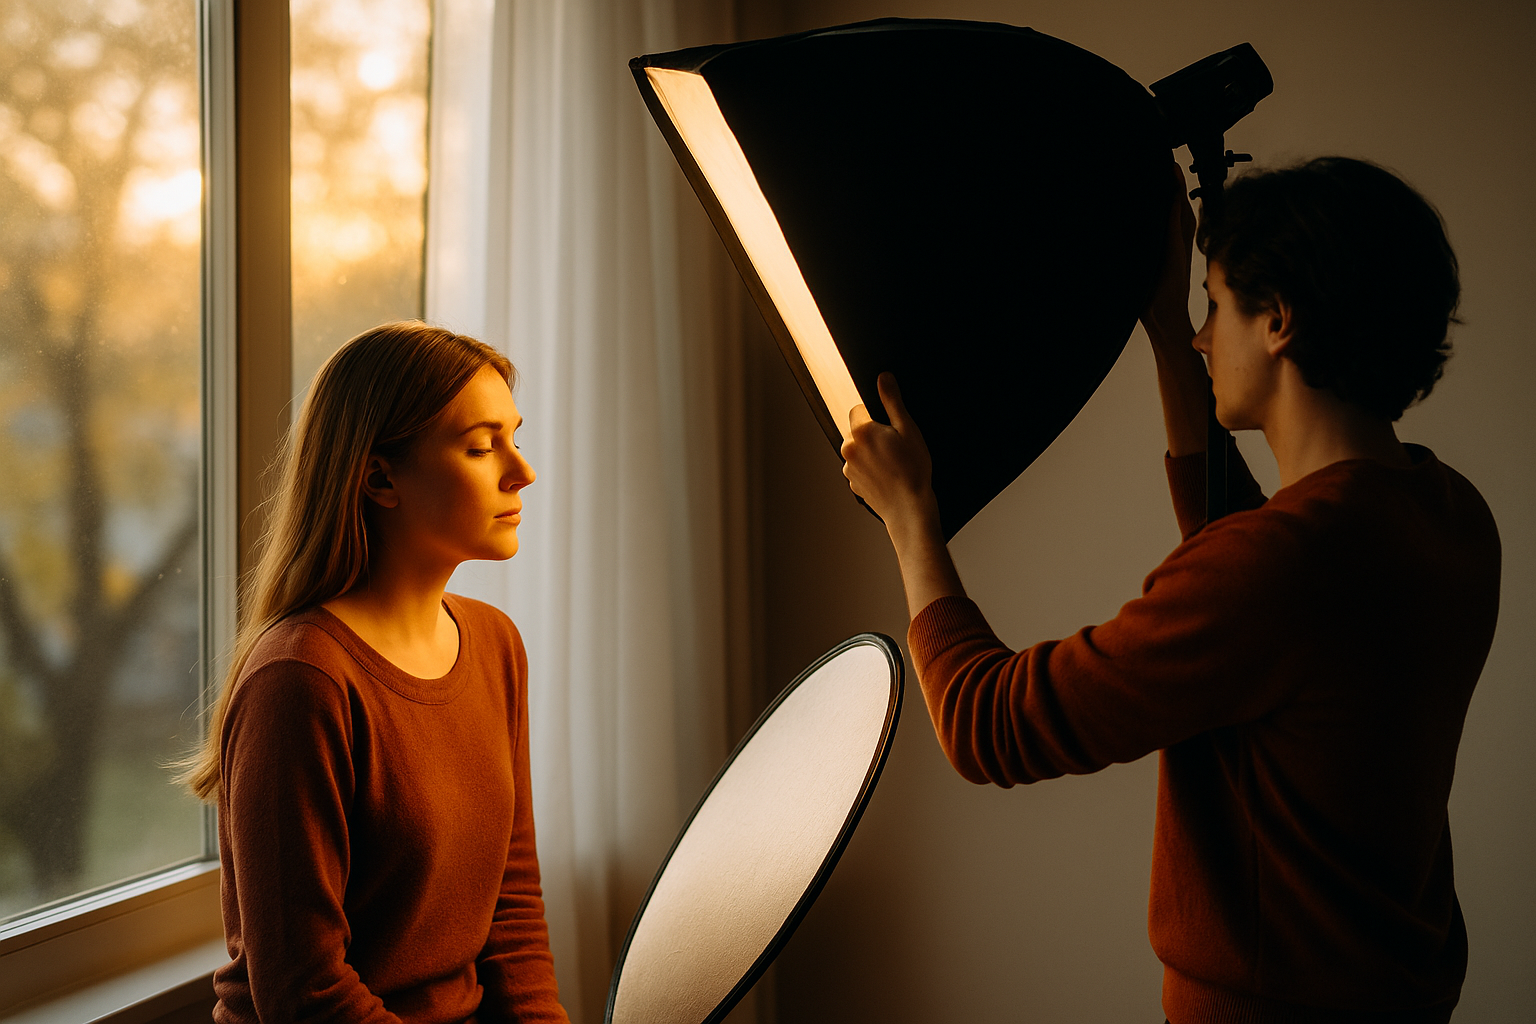
Photography, at its very core, is the art of capturing light. No matter how advanced your camera is, or how carefully you compose your shot, without a solid understanding of lighting your images will always feel incomplete. For beginners, mastering light can seem intimidating, but once you start observing and working with it intentionally, photography becomes far more creative and rewarding. This guide will walk you through the fundamentals of lighting, share practical techniques, and offer examples to help you develop an eye for light—one of the most important skills any photographer can cultivate. Why Light Matters Light determines the mood, tone, and clarity of your photographs. It shapes your subject, adds depth, and can even tell a story on its own. Think about the difference between a portrait taken at noon under harsh sun versus one taken during golden hour with soft, warm light. Same subject, different light—two completely different images. Learning to read light, adapt to it, and even manipulate it is what separates a snapshot from a compelling photograph. Types of Natural Light Golden Hour The period shortly after sunrise and before sunset, known as golden hour, provides a warm, soft, and flattering light. It’s perfect for portraits, landscapes, and almost any kind of photography. Blue Hour The twilight period before sunrise or after sunset, when the sky glows in deep blues and purples. Blue hour is great for cityscapes and moody, atmospheric images. Midday Light Harsh and direct, midday sunlight often creates strong shadows and high contrast. While it can be challenging, it’s not unusable—you just need to adapt. Look for shaded areas, use reflectors, or embrace the dramatic shadows. Overcast Light Cloudy days diffuse sunlight, creating soft, even lighting. This type of light is wonderful for portraits, macro shots, and situations where you want to avoid harsh shadows. Direction of Light The direction light comes from drastically changes the look of your image. Experiment with walking around your subject and noticing how the angle of light transforms the scene. Understanding Shadows Shadows are not the enemy—they’re part of the language of photography. They add contrast, drama, and shape to your images. Pay attention to: Learning to balance highlights and shadows is key to creating images with strong impact. Using Artificial Light Natural light is wonderful, but you won’t always have it. That’s where artificial lighting comes in. Continuous Lighting Continuous lights (like LED panels or softboxes) let you see exactly how light falls on your subject before taking a photo. They’re perfect for beginners because they make experimenting easy. Flash Flash can be intimidating, but when used correctly, it opens endless possibilities. On-camera flash often looks harsh—bouncing it off walls or ceilings creates softer, more natural light. Off-camera flash gives you full control to shape and direct light. Practical Lights Don’t underestimate lamps, candles, or even your phone’s flashlight. These can add warmth, atmosphere, or creative highlights when used thoughtfully. Modifying Light Light can be shaped, softened, or redirected with tools called modifiers: Even household items like foil, cardboard, or white poster boards can be used as DIY modifiers. Light in Different Photography Genres Portraits For portraits, soft light is often best. Golden hour or window light can flatter skin tones and add warmth. Reflectors help reduce harsh shadows on the face. Landscapes Landscapes come alive with directional light. Side lighting during sunrise or sunset emphasizes texture in mountains or fields, while midday light can flatten the scene unless you use shadows creatively. Street Photography Street photographers often embrace harsh light for its contrast and drama. Shadows from buildings or streetlamps can be part of the composition. Still Life Soft, diffused light works wonders here. A simple desk lamp with parchment paper as a diffuser can create beautiful, moody still-life setups. Macro Photography Macro subjects, like flowers or insects, benefit from diffused light. Harsh shadows can overwhelm small details, while soft light highlights texture and color delicately. Creative Uses of Light Light isn’t just something to manage—it’s something to play with. Once you understand the basics, start experimenting: These creative approaches push you beyond the safe zone and into images that stand out. Low-Cost Lighting Tricks You don’t need expensive gear to experiment with lighting. Try these DIY tricks: When I started out, I used a desk lamp and aluminum foil as my first lighting setup. It wasn’t glamorous, but it taught me how much difference light direction and quality make. Practical Tips for Beginners Real-World Example When I first started out, I used to avoid midday sun entirely. But one day, shooting in the city, I embraced the strong shadows of skyscrapers cutting across sidewalks. The result? Bold, high-contrast images that had a graphic, almost cinematic feel. That experience taught me that all light has potential—it’s just about learning how to use it. Another time, while photographing a friend indoors, I used nothing but a bedside lamp with a thin scarf over it. The result was a warm, diffused glow that made the portrait look intimate and artistic—proof that creativity often matters more than equipment. Common Beginner Mistakes Exercises to Train Your Eye for Light Final Thoughts: Light as Your Creative Partner Mastering light isn’t about memorizing rules—it’s about developing awareness. Once you learn to see light—its direction, quality, and impact—you’ll never look at the world the same way again. Every walk outdoors, every café visit, every moment at home becomes an opportunity to notice how light transforms the ordinary into something extraordinary. As a beginner, your goal isn’t to control light perfectly—it’s to play with it, to experiment, and to build intuition. With practice, light will stop being a challenge and start becoming your greatest creative partner. The more you engage with light, the more it reveals. And soon, you’ll discover that light is not just part of photography—it is photography. So, the next time you step outside or turn on a lamp, pause for a moment. Notice how light paints the world. That awareness is where mastery begins.
How to Use Manual Mode on Your Camera
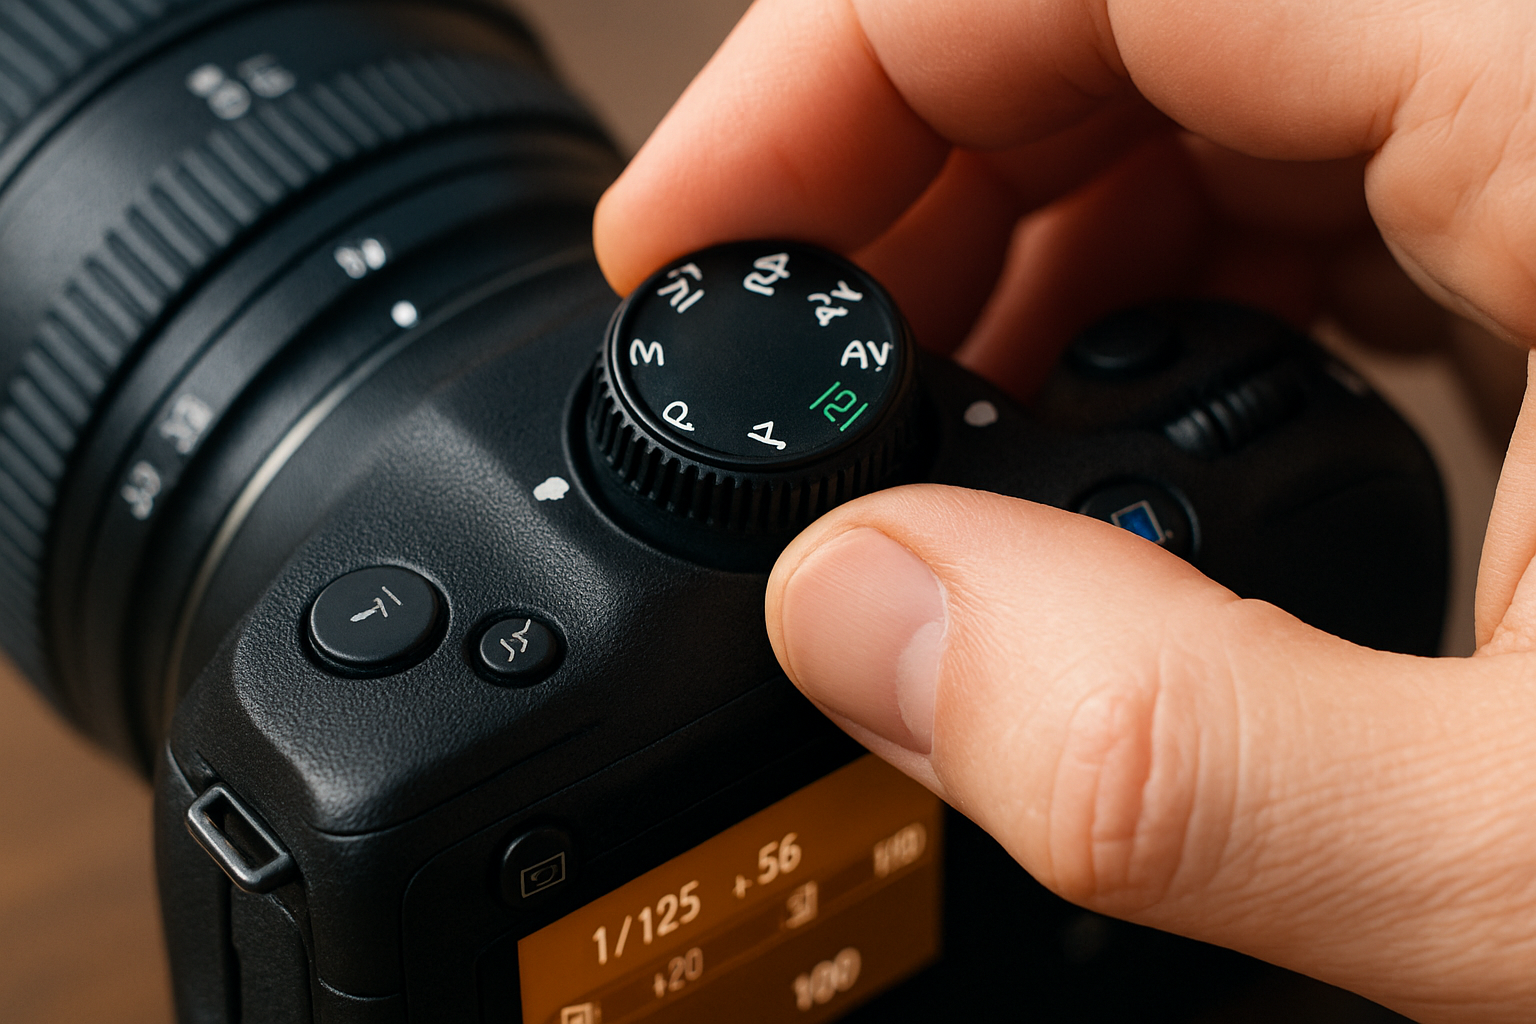
Learning to use manual mode on your camera might seem intimidating at first. You’re suddenly faced with settings like aperture, shutter speed, and ISO — all of which affect your photo in different ways. But here’s the truth: manual mode isn’t just for professionals. It’s for anyone who wants to take full control of their photography and create images that reflect their personal style and intention. If you’ve been shooting in auto mode and wondering why your photos look good — but not quite how you imagined — manual mode is the next step. This guide is here to demystify it for you. No technical jargon, no robotic instructions. Just real, practical advice from someone who has been exactly where you are and found joy in the creative freedom that manual mode offers. Why Manual Mode Matters When you shoot in auto, your camera makes all the decisions. It guesses how bright the photo should be, how much should be in focus, and how to freeze or blur movement. And to be fair, modern cameras do a pretty decent job. But they don’t know what you’re trying to say with your photo. Manual mode gives you full creative control. You decide what’s important in the scene, what should be in focus, what should be blurred, how the light feels, and how motion is captured. It turns photography from reactive to intentional. It’s the difference between “I got lucky” and “I made this.” The Three Key Settings You Need to Understand Manual mode is built around three main settings, often called the “exposure triangle.” These are aperture, shutter speed, and ISO. Mastering these three will give you total control over how your photo looks. Aperture (f-stop) Aperture controls how wide your lens opens to let in light. It also affects how much of the scene is in focus — known as depth of field. Aperture values look like this: f/1.8, f/2.8, f/5.6, f/8, f/11, f/16… Here’s what you need to know: If you’ve ever admired a portrait with that creamy blurred background, that’s the result of a wide aperture. Shutter Speed Shutter speed is how long the camera’s sensor is exposed to light. It’s measured in seconds or fractions of a second, like 1/1000, 1/250, 1/60, 1/2, or 10″. Faster shutter speeds freeze motion. Slower ones create blur — either intentional or not. Use it like this: Your choice of shutter speed tells the story: is the moment sharp and crisp, or soft and flowing? ISO ISO is your camera’s sensitivity to light. A lower ISO produces a cleaner image. A higher ISO brightens the photo but adds noise (grain). Here’s a general guide: In manual mode, ISO is your backup. You adjust aperture and shutter speed to get the look you want, then raise ISO if you still need more light. Putting It All Together Manual photography is about balancing these three settings. If one changes, another must compensate. Let’s say you’re shooting a portrait outdoors: That’s it — you just made a photo exactly the way you wanted. The best way to practice this balance is to experiment with one setting at a time. Set your ISO to a fixed value, and just play with shutter and aperture. Then try changing ISO while keeping the others stable. The more you experiment, the more second-nature it becomes. How to Read Your Camera’s Light Meter When you switch to manual mode, most cameras display a built-in light meter — usually a horizontal bar that looks something like this: -2 … -1 … 0 … +1 … +2 This tells you if your exposure is balanced. The goal is to bring the indicator close to 0, which means your camera thinks the scene is properly exposed. But here’s the twist: you don’t always want “correct” exposure. Maybe you want a photo that’s intentionally dark and moody, or one that’s bright and dreamy. Manual mode lets you do both. The light meter is just a tool — not a rule. Tips for Using Manual Mode in Real Situations Let’s go beyond the theory and talk about how manual mode works in real life. Here are some practical scenarios with settings to try: Portrait in Natural Light Focus on the subject’s eyes and expose for their skin tone. If shooting near a window, position the light at an angle to create depth. Landscape Use a smaller aperture to get everything sharp. A tripod helps avoid camera shake. Low-Light Street Balance available light with higher ISO. Be mindful of noise. Creative Motion Blur Perfect for light trails, moving water, or artistic blur. Use a tripod and remote shutter if possible. Common Mistakes (And How to Avoid Them) Best tip: slow down. Manual photography is about intention. Why Shooting in RAW Helps When using manual mode, you’ll get the best results by shooting in RAW. It allows: If your camera allows it, always choose RAW + JPEG. That way, you have flexibility and a backup. When to Use Manual Mode — And When Not To Manual mode shines when: But sometimes, Aperture Priority or Shutter Priority are better: Great photographers use all modes. Manual is a tool — not a badge of honor. Manual Mode on Smartphones — Yes, It Matters Many smartphones now offer “Pro” or “Manual” mode. These let you control shutter speed, ISO, white balance, and sometimes focus. Manual mode on your phone is useful for: If you’re using your phone as your main camera, manual mode is a great training ground for DSLR or mirrorless gear later. How Manual Mode Sharpens Your Creative Identity One of the most underrated benefits of using manual mode is that it forces you to make decisions. Every setting you choose reflects how you see the scene. Over time, this process helps you uncover your personal visual identity. You may not realize it at first, but shooting in manual mode gradually turns you into more than just someone who takes nice pictures. It turns you into
How to Train Your Photographer’s Eye: Practical Tips
Ask any seasoned photographer what sets great photos apart from average ones, and they’ll probably say the same thing: “It’s all about the eye.” The photographer’s eye is that intuitive sense of composition, light, and timing. It’s not just technical—it’s deeply artistic, personal, and learnable. Yes, you can train your eye. And the earlier you start, the more it becomes second nature. In this article, we’ll dive into practical tips that will help you develop a keen photographer’s eye, even if you’re just starting out. These are habits, exercises, and mindset shifts that real photographers (myself included) use every day. What Is the Photographer’s Eye, Really? The term “photographer’s eye” refers to the ability to see the world in frames, anticipate moments, and instinctively recognize what will make a compelling photograph. It’s not just about identifying beautiful subjects—it’s about noticing: It’s about being visually awake in a world most people rush through. Can You Learn to See Like a Photographer? Absolutely. While some may have a natural sensitivity to visuals, training your eye is much like building a muscle. The more you exercise it, the stronger it becomes. It’s not about being born talented—it’s about becoming observant, curious, and deliberate in how you look at the world. 1. Start with One Frame a Day Challenge yourself to take just one meaningful photo per day. Not fifty. Not ten. Just one. This practice forces you to slow down and look intentionally. What moment is worth capturing today? What light or detail stands out? Even if you only shoot with a smartphone, the discipline of choosing your best frame will sharpen your eye faster than snapping hundreds of random shots. 2. Study the Light Great photography lives and dies by light. Whether you’re shooting portraits, landscapes, or urban scenes, understanding light is everything. Spend time observing: Exercise: Pick a window in your home and photograph how the light changes in that spot throughout the day. Notice color shifts, shadow shapes, and the emotion the light conveys. 3. Crop with Your Eyes (Before the Camera) One of the best exercises is to frame scenes without lifting your camera. Imagine your eyes are the viewfinder. Wherever you are—waiting in line, walking to work, having coffee—ask yourself: This habit helps you internalize composition techniques, so by the time you lift your camera, your framing is more intentional. 4. Analyze the Work of Photographers You Admire Studying great photography is like reading great books if you’re a writer. It helps you absorb style, tone, and creative decisions without copying them directly. Pick 3 to 5 photographers whose work you love and do a deep dive: Then ask yourself: What can I borrow and interpret in my own way? 5. Practice Composition Rules—Then Break Them Learning classic composition techniques helps build strong visual habits. Start with: Practice these until they become second nature. Then, when you’ve mastered the basics, break the rules intentionally to create more dynamic or emotional impact. Example: Placing your subject dead center can be powerful when done with purpose, even though it “breaks” the rule of thirds. 6. Shoot in Black and White (Temporarily) Switching to black and white—either in-camera or in post-processing—forces you to pay more attention to: Without color as a distraction, you’ll start to see the world differently. This exercise is especially helpful for learning how light defines a scene. 7. Carry a Camera Everywhere (Even If It’s Just Your Phone) The best way to train your eye is to always be ready to use it. Carry a compact camera or smartphone and shoot casually as you go about your day. The goal isn’t to produce masterpieces—it’s to practice seeing. Some of my favorite images were taken during errands, coffee breaks, or while walking the dog. The more you shoot, the more moments you’ll notice. 8. Create Photo Series or Themes Training your eye isn’t just about isolated images—it’s also about recognizing patterns. Pick a theme or subject and create a short series. Ideas include: This kind of focused shooting teaches you to spot recurring elements in your environment. It also makes you more intentional about how you present a subject. 9. Limit Your Gear (and Yourself) Creativity thrives under constraint. Try limiting your gear to one lens or shooting only with a fixed focal length (e.g., 35mm or 50mm). It might feel restrictive at first, but it forces you to think more about composition, distance, and perspective rather than fiddling with gear. Bonus constraint: Choose a color, shape, or emotion and spend an hour photographing only things that match that theme. 10. Slow Down We live in a fast-paced, scroll-happy world. But photography rewards slowness. When you find a potential shot, don’t just fire off ten frames and walk away. Take a breath. Move your feet. Wait for the right expression, gesture, or light. Often, the difference between a good photo and a great one is simply patience. 11. Review and Reflect on Your Work Don’t just take photos—study your own photos. Set aside time weekly to review what you’ve shot: Reflection is where real learning happens. Consider keeping a visual journal or folder where you save your best images (and ones that almost worked) to see your progress over time. 12. Get Feedback from Other Photographers Sometimes we’re too close to our work to see it clearly. Getting feedback from other photographers—even fellow beginners—can reveal blind spots or spark new ideas. Join local meetups, online forums, or photography communities. Share your work and invite constructive criticism, not just likes. You’ll start seeing through other people’s eyes—and that, in turn, trains your own. 13. Look Beyond Photography A strong visual eye isn’t developed only through photography. Look to: These disciplines teach you about color theory, symmetry, rhythm, and emotional storytelling. You’ll begin noticing echoes of these ideas in your photography. 14. Take a Photo Walk (With a Purpose) Photo walks are simple but powerful exercises. Choose a location—your neighborhood, a park, downtown—and spend an hour walking and observing
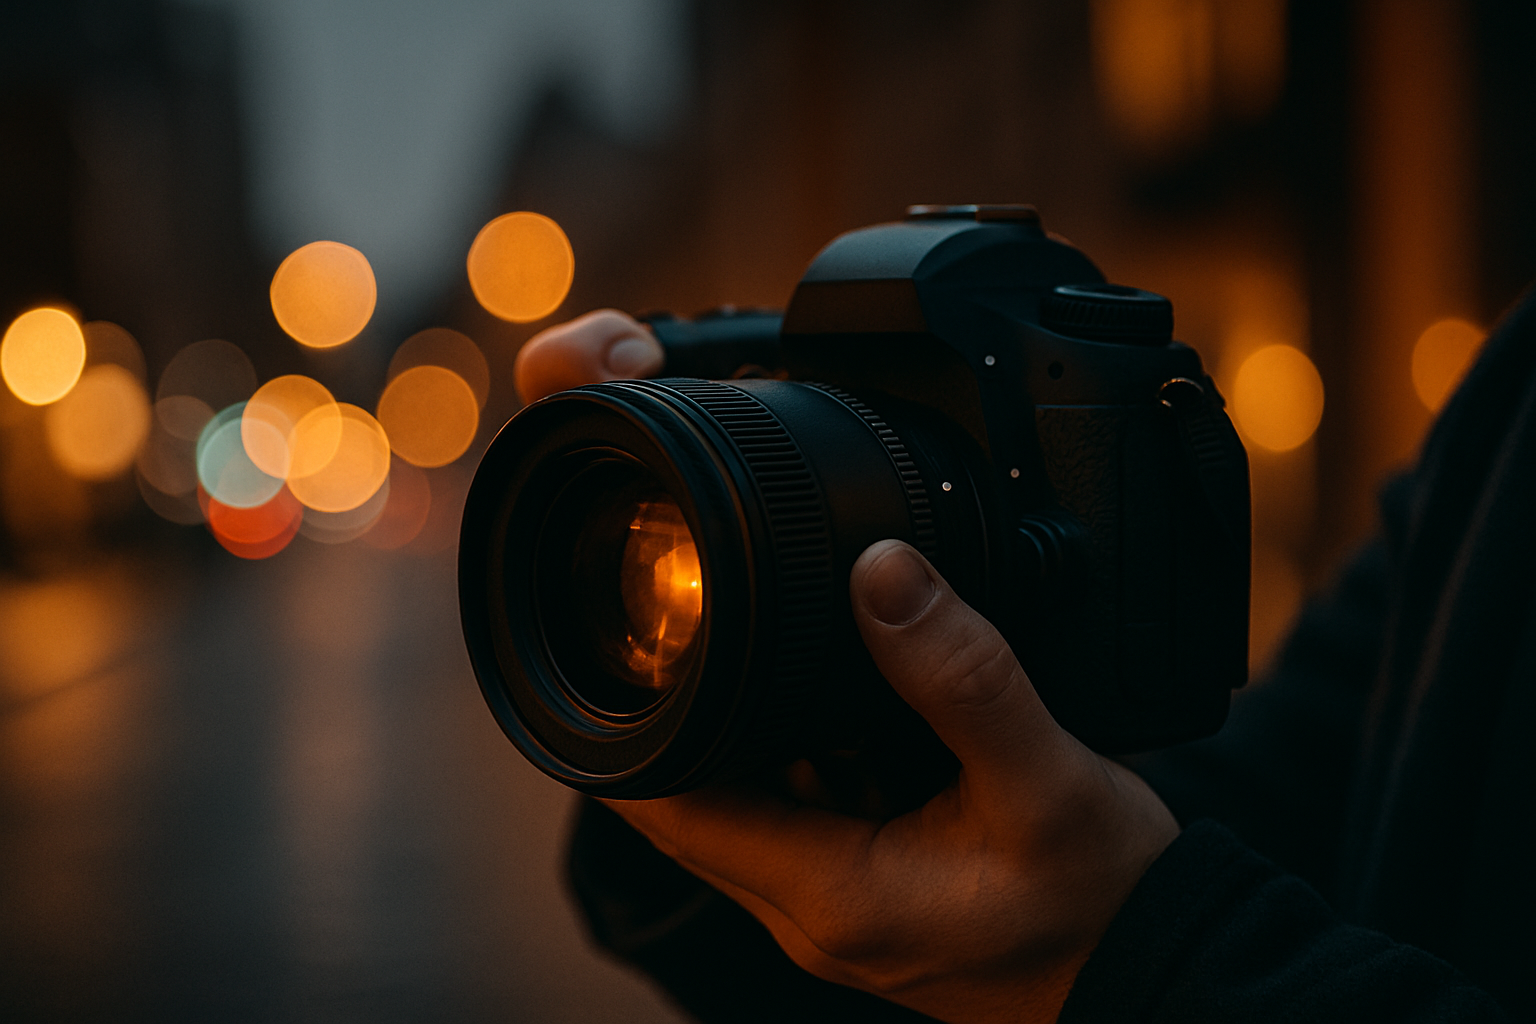
How to Take Great Photos in Low Light
Low light is one of the most challenging environments a photographer can face — but also one of the most rewarding. There’s something magical about the softness of evening shadows, the glow of streetlights, or the quiet mystery of indoor scenes lit by a single lamp. Yet for beginners, low-light photography can feel frustrating. Photos turn out blurry, noisy, or just too dark to save. But here’s the good news: you don’t need expensive gear to capture stunning images in low light — you just need to understand the settings, the techniques, and the small adjustments that make all the difference. Let’s walk through how to master low-light photography and take sharp, clear, beautiful photos even when the sun goes down. Understanding the Challenges of Low Light Before diving into settings and solutions, it helps to understand why low light is difficult for cameras. Cameras need light to expose an image. In dark environments, there’s less light hitting the sensor, which can cause: To overcome these limitations, we need to work smart — using every tool available to bring more light in, or compensate for the lack of it. Use a Wide Aperture One of the best tools for shooting in low light is a wide aperture. Aperture controls how much light enters the lens. The wider it is (meaning a lower f-number), the more light your camera can capture. For example: That makes a huge difference in dark environments. Tips: Increase Your ISO (Smartly) ISO determines how sensitive your camera is to light. In low-light scenarios, you’ll almost always need to increase your ISO. Higher ISO helps brighten the image when aperture and shutter speed aren’t enough. But it comes with a trade-off: more digital noise. Modern cameras handle high ISO surprisingly well. But knowing your camera’s limits helps you find the sweet spot between brightness and noise. Tips: Use the Slowest Shutter Speed You Can Handle Shutter speed controls how long the sensor is exposed to light. The longer it stays open, the more light gets in — which is helpful in low-light conditions. But slower shutter speeds can introduce motion blur or camera shake, especially if you’re handholding the camera. Tips: Pro tip: If shooting handheld in near darkness, try burst mode — take 3–5 shots in quick succession. One will usually come out sharper than the others. Stabilize Your Camera Camera shake is one of the biggest causes of blur in low light. Even small vibrations from pressing the shutter can ruin a shot. If you can’t use fast shutter speeds, your best ally is stabilization. Options: Combine stabilization with a 2-second timer or remote shutter release to avoid movement during the shot. Use Manual Focus (When Needed) Autofocus can struggle in low light — it hunts, misses, or locks onto the wrong thing. Sometimes it’s better to switch to manual focus. Many mirrorless cameras and DSLRs offer focus peaking or magnified view to help with precision focusing in the dark. Tips: Use Available Light Creatively When you can’t bring more light in — use what’s already there. Low-light scenes are often filled with natural and ambient light sources: These can add beautiful, moody atmosphere to your images if you embrace them rather than fight them. Tips: You don’t always need a bright scene — just enough light in the right place. Shoot in RAW Format When you’re working with tricky lighting, you want as much flexibility as possible. RAW files retain more image data, giving you greater control in post-production. RAW allows you to: Most cameras and even smartphones offer RAW shooting. It’s a must for serious low-light work. Use Noise Reduction (Carefully) Even with the best technique, some low-light photos will have noise — and that’s okay. Noise isn’t the enemy, as long as your photo is exposed and focused well. You can reduce noise in post-processing using tools like: Caution: Try Creative Low-Light Styles Low light doesn’t have to mean struggle — it can be your artistic playground. Some of the most powerful images are made in shadows. Try exploring: Low light often means high emotion. Don’t just aim for clarity — aim for feeling. Why Low-Light Photography Can Make You a Better Photographer There’s an unexpected bonus to practicing photography in low-light situations: it sharpens your overall skill set faster than almost any other type of shooting. Why? Because it forces you to: It pushes you out of auto mode. It teaches you that photography isn’t about perfect conditions, but about adapting, reacting, and creating within real limitations. Low-light work trains your eye to look for small glimmers, reflections, and subtle contrasts that might otherwise go unnoticed. It builds discipline — and creativity — in equal measure. Many professionals even recommend shooting in low light as a way to accelerate your learning curve, especially if you’re serious about improving quickly. Gear Isn’t Everything — But It Can Help While this article focuses on techniques that work with any camera, it’s worth mentioning that some gear choices can make low-light photography easier: That said, don’t let gear hold you back. Many breathtaking low-light images are taken on crop-sensor cameras or even smartphones. Master the light first — the gear will follow. Don’t Forget White Balance In low light, white balance often gets overlooked — but it plays a huge role in the mood of your image. Streetlights, candlelight, or neon signs each have very different color temperatures. A warm image can feel cozy or nostalgic; a cooler image can feel mysterious or cinematic. Tips: Sometimes, a slightly orange or blue cast makes the photo feel right — even if it’s not technically correct. Final Thoughts Low light isn’t something to fear — it’s something to explore. It pushes you to slow down, think more intentionally, and embrace creativity over convenience. By learning how to work with your camera’s settings — aperture, ISO, shutter speed, and focus — and applying simple techniques like stabilization, RAW shooting, and using available light, you can transform
How to Start in Photography from Scratch: A Beginner’s Guide
Photography is more than just clicking a button. It’s an art, a skill, and for many, a lifelong passion. Whether you dream of becoming a professional photographer or simply want to take better pictures, starting your journey in photography from scratch can be both exciting and overwhelming. This guide is designed to simplify that path and provide you with actionable steps to become confident with a camera in your hands. Understanding the Basics of Photography Before diving into equipment and techniques, it’s crucial to grasp the foundational concepts of photography. These include: The Exposure Triangle This consists of ISO, aperture, and shutter speed. Understanding how these three elements interact helps you control how your images look. Mastering the exposure triangle allows you to take full control of your camera and develop your style. Practice taking photos at different settings and reviewing how each change affects the result. Over time, you’ll begin to predict how each adjustment influences your image. Composition Rules Photography isn’t just technical; it’s also visual storytelling. Learn these basic composition techniques: Composition brings balance, interest, and emotion to your photographs. Try experimenting with different techniques on the same subject to see how framing and positioning affect the mood. Understanding these principles can drastically elevate your photography, making it more professional and compelling. Choosing Your First Camera You don’t need a high-end DSLR to start. Many photographers begin with: Popular beginner models include: Focus on learning how to use what you have before upgrading. Your creativity matters more than your gear. Join online communities where other beginners share experiences and recommend cameras based on real-world performance. Getting to Know Your Camera Understanding your camera’s functions is key to unlocking its potential: Learn how to navigate your camera’s menu, read the histogram, and use live view mode to preview results. Practice adjusting settings manually while observing changes in real time. Spend time exploring all the buttons and menus; it may seem complex at first, but soon it becomes second nature. Essential Gear for Beginners Aside from the camera, a few pieces of equipment will help you get started: You don’t need to buy everything at once. Build your kit slowly based on your needs and interests. Visit local camera stores to test accessories before buying. As you progress, you’ll naturally learn which accessories are worth the investment for your shooting style. Practicing Daily Builds Skills The best way to learn photography is by doing. Make it a habit to shoot something every day. Practice helps you: Even 15 minutes a day can make a big difference over time. Keep a photo journal or digital folder to track your growth. Don’t worry about making mistakes — each photo teaches you something new. Over time, your eye becomes sharper and your confidence grows. Self-Assignments and Challenges Give yourself specific tasks to focus your practice: These challenges make learning engaging and structured. Share your results online for constructive feedback. The discipline of regular practice accelerates improvement and builds momentum. Learning the Art of Editing Editing enhances your photos and helps express your vision. Start with: Recommended tools: Experiment with presets and filters, but learn how to edit manually for full control. Editing is not about fixing bad photos, but enhancing good ones. Use editing to refine your storytelling and emphasize the emotion or message you want to convey. Building a Portfolio As you improve, start selecting your best work and organizing it in a digital portfolio. Use free platforms like: Focus on one or two photography styles to start (like portraits or street photography), and show consistency in your images. Keep updating your portfolio as your style evolves. A strong portfolio not only tracks your progress but can also help you attract collaborations, clients, or followers. Creating an Online Presence Even as a beginner, having an online presence helps build confidence and attracts feedback. Interacting with others online will accelerate your learning and boost motivation. Use hashtags and engage with similar creators to grow your audience. Consistency in posting and engaging with followers also builds credibility in the photography community. Studying Other Photographers Find photographers you admire and analyze their work: Don’t copy. Instead, learn and adapt techniques that resonate with your style. Suggested Photographers to Follow Try recreating a photo you admire to understand the techniques behind it. Studying professionals sharpens your eye and inspires new approaches. Joining Photography Communities Being part of a community keeps you motivated and gives you a chance to grow through feedback and support. Where to connect: Ask questions, share your progress, and participate in group challenges. Community feedback helps you see your work from different perspectives and encourages continuous improvement. Exploring Photography Genres Beginner photographers often experiment with different genres to discover what excites them the most. Some popular types include: Try different styles and pay attention to what you enjoy most. Each genre teaches new skills and opens new opportunities. Setting Photography Goals Setting goals helps track your progress and stay motivated. Examples include: Writing down and reviewing your goals regularly will push your growth. Clear goals give you direction and make your learning more purposeful. Turning Photography Into a Career (Optional) If photography becomes more than a hobby, consider monetizing your skills: Build a basic pricing structure and start small. Deliver quality work, and let your portfolio speak for itself. Over time, word-of-mouth and client referrals can grow your business. Final Thoughts: Photography is a Journey, Not a Destination Starting in photography from scratch can seem intimidating, but it’s also incredibly rewarding. With the right mindset, tools, and consistent practice, you’ll transform your curiosity into genuine skill. Every great photographer started where you are right now—with a camera in hand and a desire to capture the world. Embrace the process, enjoy your progress, and remember: the best camera is the one you have with you.
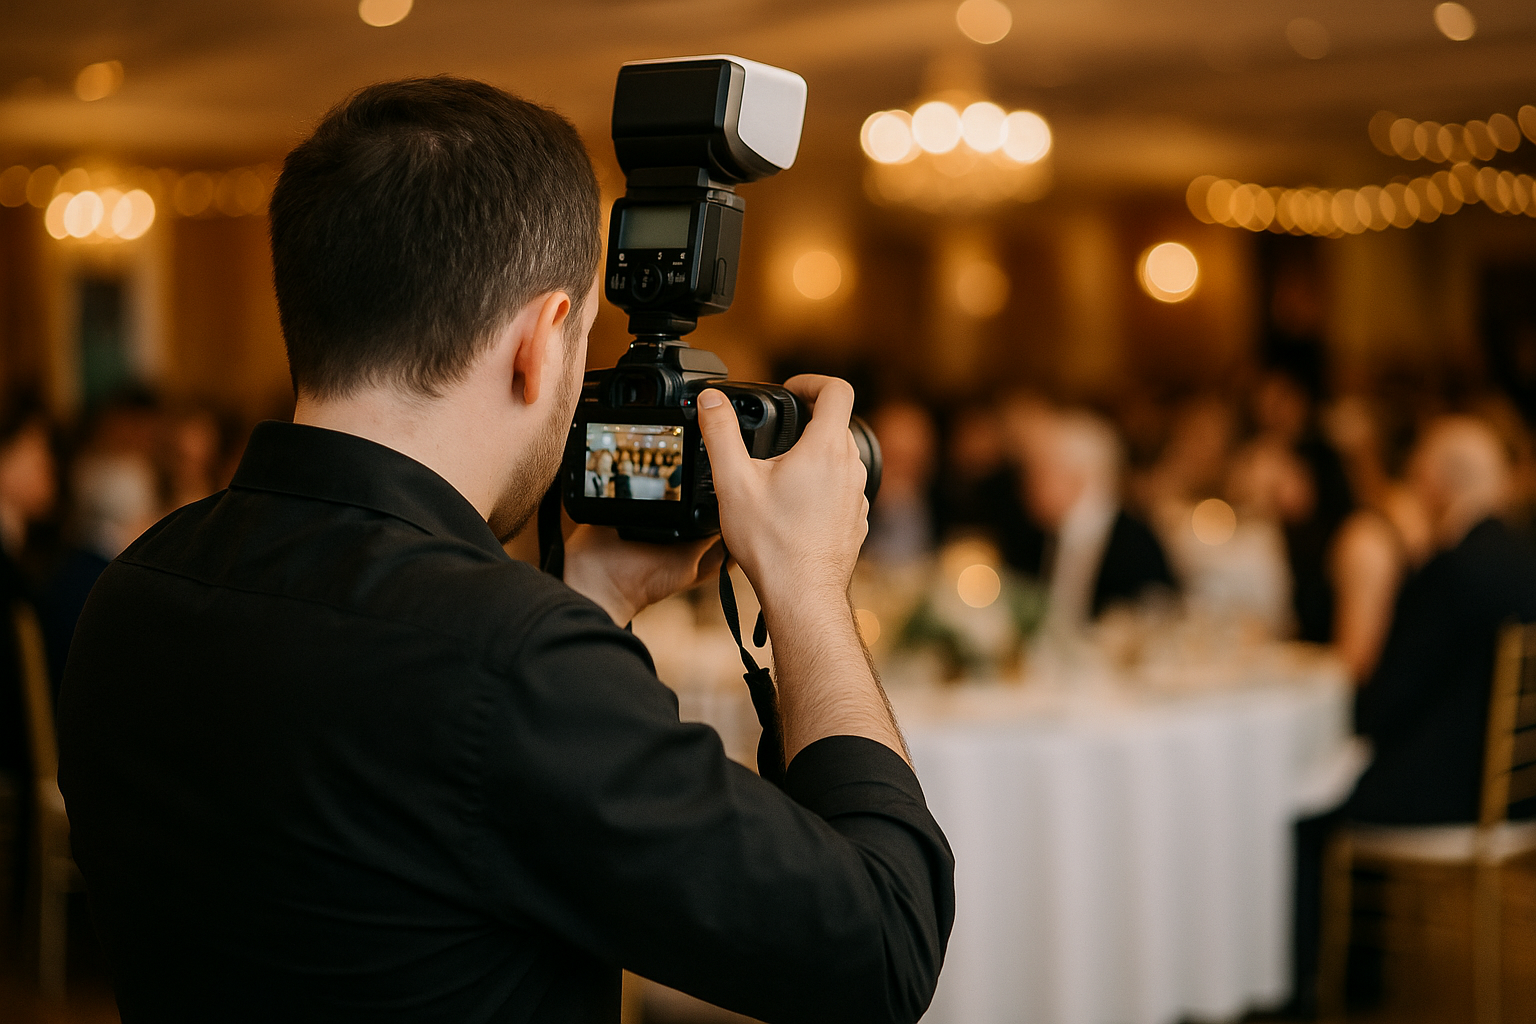
How to Photograph Events Without Common Mistakes
Photographing events sounds exciting — and it is. But it also comes with pressure, unpredictability, and no second chances. Whether you’re shooting a birthday, wedding, corporate gathering, or a cultural event, you have to be ready for anything. The lighting changes, people move, emotions flare, and there’s always something happening behind your back. And the truth is: many beginners make the same avoidable mistakes that cost them not just good photos, but reputation and confidence. This article is your practical guide to photographing events with intention, preparation, and presence — and most importantly, without falling into the traps that catch so many new photographers off guard. First Rule: It’s Not About You — It’s About the Story Event photography isn’t your personal photoshoot. You’re not there to experiment with wild edits or capture your artistic vision only. You’re there to document a story — and preserve the energy, people, and details that matter to your client or audience. Before anything else, ask yourself: This mindset shift immediately separates amateur shooters from real event photographers. Mistake #1: Not Understanding the Event Beforehand One of the biggest beginner mistakes is showing up with zero context. Every event has a different flow, different priorities, and different “must capture” moments. Before the event, ask the organizer or client: Example: Shooting a corporate awards night? Know when the speeches and awards are happening — missing that would be unforgivable. Shooting a birthday party? Know who’s bringing the cake out and where it will happen. Weddings? Know the family structure and critical ceremonial moments. Photograph with purpose, not guesswork. Mistake #2: Arriving Unprepared Technically Event photography is often fast-paced and full of lighting challenges. You’ll need to adapt quickly, and that means knowing your gear inside and out. Here’s what you should always do before any event: Pro tip: Use two memory cards in dual-slot cameras and write duplicates to both. This protects you in case of card failure. Being prepared technically frees you to be present creatively. Mistake #3: Relying Too Much on Natural Light (Indoors) Natural light is beautiful, but most indoor events happen in dim or inconsistent lighting. If you’re not prepared to light your shots, you’ll end up with grainy, blurry, or flat images. What you should do: Real example: At a dance floor, the lighting may constantly change color. Your flash (balanced with ambient light) helps freeze movement while preserving the mood. Lighting is not just technical — it’s emotional. It affects how people feel when they look at the photo later. Mistake #4: Forgetting the Candid Moments While posed group shots are important, the true heart of an event is in the candid moments: a laugh, a glance, a hug, a quiet moment, a toast. How to capture them: Candid photography requires you to be observant, patient, and fast. Mistake #5: Not Capturing the Environment Events aren’t just about people — they’re about context. Decor, food, the venue, lighting setups, gifts, signage — all of that matters, especially to clients who spent time and money organizing it. Before the event gets crowded, capture: These photos often become the anchor points in an event gallery — the quiet images that tell the story in between the action. Mistake #6: Being Too Obvious One underrated skill in event photography is disappearing. The more visible you are, the more people pose or get stiff. That ruins the candid vibe and interrupts the flow. Tips to stay discreet: Blend into the scene. Be part of the moment, not a disruption to it. Mistake #7: Taking Too Many Photos Without Intention Yes, events move fast. But that doesn’t mean you should shoot blindly. A thousand mediocre shots won’t save you from missing the one great frame. Be intentional: Remember, editing takes time. A tighter, more intentional collection will save you hours and earn more respect from clients. Mistake #8: Ignoring the Emotional Range An event is not just fun and smiles. It’s layered — nervousness before a speech, pride during a toast, nostalgia during a goodbye, laughter in between. Capture the range: Those are the images people will treasure most. Mistake #9: Not Backing Up Immediately This can’t be said enough: back up your files the same day. You’re dealing with moments that can’t be recreated. Card corruption, accidental deletion, or file loss could be devastating. Have a backup routine: Redundancy is your safety net. Don’t skip this step, even if you’re tired. Mistake #10: Forgetting the People Who Made the Event Happen Organizers, hosts, caterers, speakers, volunteers — these are the unsung heroes of many events. Capturing behind-the-scenes moments adds depth and gives clients a full sense of the story. Ideas: These images go beyond documentation. They become a thank-you — and people never forget that. Mistake #11: Failing to Build Relationships During the Event Event photography isn’t just about what you capture — it’s also about how people experience you being there. If you act cold, distant, or robotic, people will be less open in front of your camera. On the other hand, if you build small, warm connections — through eye contact, a simple smile, or a few kind words — you’ll start to see people drop their guard. Here’s how to do that, naturally: You’re not just photographing strangers — you’re honoring memories. People remember how you made them feel. Bonus: Those connections often lead to word-of-mouth referrals later. Mistake #12: Overediting or Oversaturating in Post-Production This happens a lot with beginner event photographers. In an attempt to “save” underexposed or badly composed shots, they crank up the clarity, saturation, or filters — and end up with images that feel unnatural and heavy. Less is more. Event photography is storytelling. And stories need to feel real. Tips for natural editing: Your editing should enhance the memory, not reinvent it. Mistake #13: Forgetting to Photograph Connections Between People One of the most overlooked aspects of events is how people relate to each other. It’s not just about solo moments or center-stage
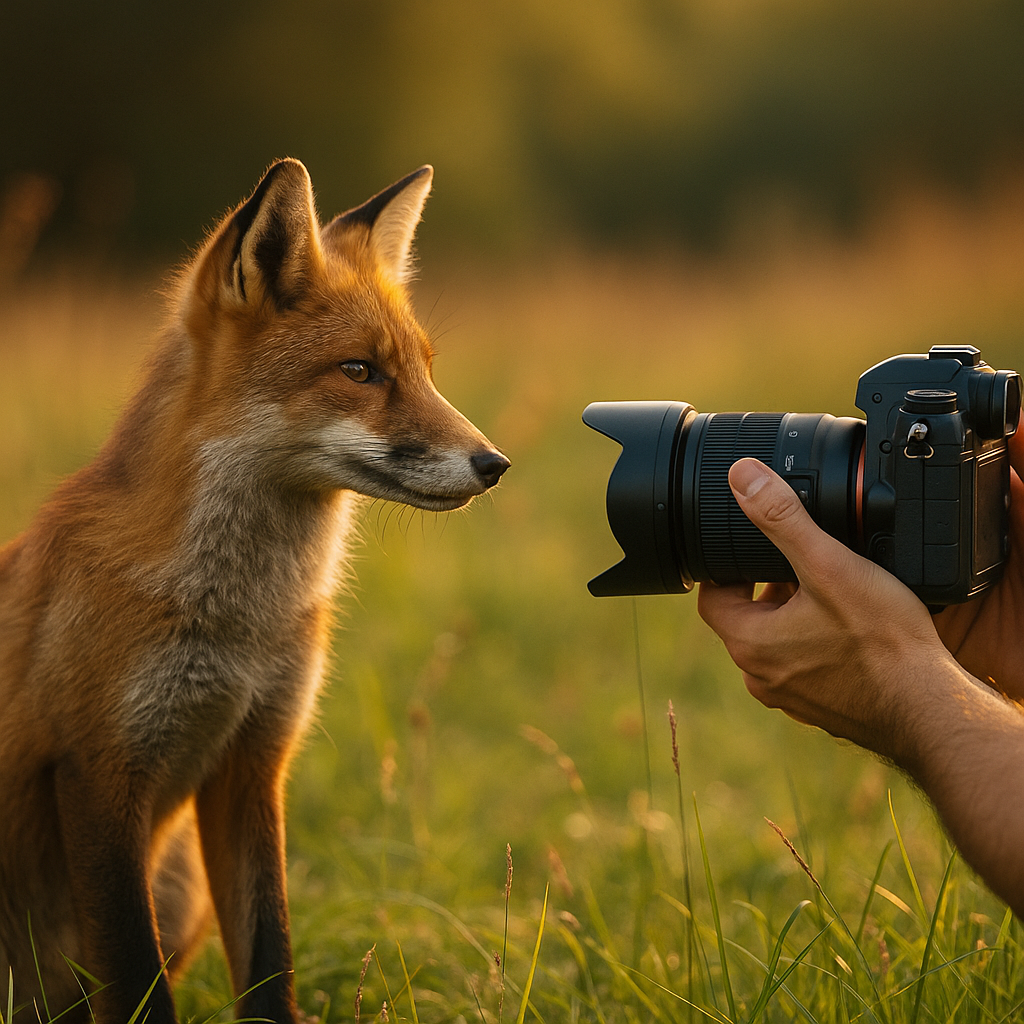
How to Photograph Animals and Capture the Perfect Moment
Photographing animals is one of the most exciting, emotional, and unpredictable types of photography. Whether you’re capturing your dog mid-yawn, a squirrel jumping between branches, or a wild fox at golden hour, animal photography offers the magic of freezing nature in motion. But it’s also one of the most challenging — animals don’t pose, they rarely sit still, and the best shots often disappear in a blink. This guide is designed for beginner and enthusiast photographers who want to learn how to photograph animals with more consistency, creativity, and intention. From understanding animal behavior to mastering your camera settings, you’ll discover how to capture those elusive, perfect moments that tell a story. Why Animal Photography Is So Rewarding Animals are pure. Their expressions are authentic, their movements are instinctive, and their moments are unpredictable — which makes it all the more satisfying when you capture them well. Each great photo of an animal holds emotion, energy, and a sense of connection between the viewer and the subject. Plus, you don’t need to travel to the wild to practice. You can photograph your dog in the backyard, a cat on a windowsill, birds in the park, or farm animals in your town. Every encounter is a chance to train your eye, improve your timing, and build your photographic instinct. Know Your Subject Before You Shoot One of the best ways to improve your animal photography is to understand the animal first. Whether it’s a house pet, a bird, or a wild animal, learning about their behavior, body language, and natural habits can drastically improve your chances of getting a great shot. For example: By observing these signs, you can anticipate what might happen next — and prepare your camera settings before the moment arrives. If you’re shooting your own pet, spend time watching how they move in different environments and times of day. If you’re heading out to photograph wildlife, do a bit of research first. Understand when the animal is active, where it usually appears, and how to approach without scaring it off. Use Natural Light to Your Advantage Lighting makes or breaks an animal photo. The best moments often happen outdoors, so natural light becomes your best friend — if you know how to work with it. Golden Hour Is Your Secret Weapon The golden hour — that soft, warm light shortly after sunrise and before sunset — is ideal for photographing animals. It gives your subject a beautiful glow, adds dimension, and reduces harsh shadows. Try backlighting for a magical, halo-like effect around fur or feathers. Position yourself so the light hits your subject from behind or slightly to the side for maximum drama. Overcast Days Are Underrated Don’t cancel your plans because of clouds. Overcast skies create soft, even lighting that’s perfect for detailed shots — especially with animals that have dark fur or shiny coats that reflect too much light in the sun. Avoid harsh midday sunlight, unless you’re intentionally going for dramatic shadows or silhouette shots. Get Down to Their Eye Level One of the most common beginner mistakes is photographing animals from a human standing position. This creates distance — emotionally and visually. Instead, lower your camera to the animal’s eye level. This creates a more intimate connection and brings the viewer directly into the animal’s world. You’ll notice the difference instantly. If you’re photographing a dog, crouch or lie down. For birds or squirrels, try kneeling or using a low tripod. Even for larger animals like horses or deer, positioning your camera at head height will improve composition dramatically. Use a Fast Shutter Speed Animals move — a lot. Even the most relaxed ones can twitch, blink, scratch, or suddenly jump. To avoid motion blur, you need a fast shutter speed. Start with 1/500s for slower animals or calm pets, and go up to 1/1000s or more for action shots like birds in flight, dogs running, or wildlife on the move. If you’re indoors or in low light, you’ll need to increase your ISO to keep the image bright. That’s okay — a sharp, slightly grainy photo is almost always better than a clean but blurry one. Focus on the Eyes The eyes tell the story. Whether it’s curiosity, calmness, excitement, or wild alertness, the eyes are the emotional anchor of any animal portrait. Use single-point autofocus and place it on the eye closest to the camera. This ensures that even if other parts of the body are slightly out of focus, the expression and connection will still feel strong. For animals in motion, use continuous autofocus (AF-C) and tracking mode to help keep the focus locked as the animal moves. Use a Zoom Lens or Telephoto Getting close to animals without disturbing them is one of the toughest parts of the job. That’s why a zoom or telephoto lens is incredibly helpful — especially for wildlife, birds, or shy pets. A lens in the 70-200mm or 100-400mm range gives you flexibility to stay at a comfortable distance while still filling the frame. You’ll get more natural expressions and behavior, and reduce the risk of scaring the animal away. For pets, even a kit lens with 55mm reach can do the trick if you’re patient and creative with your angles. Use Burst Mode for Action Shots When you’re trying to capture movement — a jump, a wing flap, a playful wrestle — switch your camera to burst mode (continuous shooting). This allows you to capture a sequence of frames rapidly and increases your chances of freezing the perfect moment. Just remember: burst mode creates a lot of files. Use a fast memory card, and be ready to cull later in post-processing. Practice Patience and Stillness Great animal photography often requires you to wait — and wait. Then wait some more. If you move too much, make noise, or rush the shot, you’ll miss opportunities. Many of the most stunning animal images are the result of sitting quietly, letting the animal come to
How to Improve Your Photos with Creative Composition
In photography, gear matters far less than many people think. A great composition can turn an average camera into a storytelling tool — and a bad composition can ruin even the best lens. If you want to level up your photography fast, learning creative composition is one of the most powerful steps you can take. And here’s the best part: it’s not about rules, it’s about seeing differently. About paying attention to what’s already in front of you, and making intentional choices that guide the viewer’s eye and emotion. Whether you’re just starting out or trying to break out of a creative rut, this guide is filled with simple, practical, and creative tips to help you compose photos that don’t just look good — they make people feel something. Let’s dive in. What Is Composition — and Why It Matters More Than Gear Composition is how elements in a photo are arranged. It’s about balance, flow, direction, and focus. It’s what turns a snapshot into a photograph. When your composition is strong, even a simple subject (like a leaf, a shoe, or a shadow) can become visually powerful. It helps the viewer: A well-composed photo feels intentional. It tells the viewer, “I meant to show you this.” Start with the Basics: The Rule of Thirds (and When to Break It) If you’ve never studied composition before, the rule of thirds is a great place to begin. Imagine your frame divided into nine equal parts by two vertical and two horizontal lines. Placing your subject along these lines — or at their intersections — generally creates a more dynamic photo than just centering everything. Use this rule when: But here’s the thing: once you understand why the rule works, you’re free to break it. Some of the most striking images are composed symmetrically, or with the subject in the extreme corner. What matters is that the placement feels deliberate. Leading Lines: Directing the Eye Leading lines are natural or manmade lines that draw the viewer’s eyes through the photo — ideally, toward your subject. Examples: Use them to create depth, guide the eye, or create movement in a still image. Leading lines work beautifully in landscape, architectural, and urban photography. Try shooting from a lower angle to exaggerate the lines, or use wide-angle lenses to stretch the perspective. Framing Within the Frame One powerful — yet often underused — technique is framing. It involves using elements in your environment to naturally frame your subject. Examples: This adds dimension and draws attention to your focal point. It also helps tell a story about where the subject is, creating context. It’s especially effective in portraiture, travel, and storytelling photography. Negative Space: Let the Image Breathe In the rush to “fill the frame,” many beginners forget the power of empty space. Negative space gives your subject room to breathe. It adds minimalism, calmness, or isolation — depending on the mood. Try composing a portrait with the subject taking up only a small part of the frame, surrounded by a plain sky or wall. It emphasizes emotion and solitude. Or shoot a small object on a large, clean background. The simplicity creates focus and draws the eye. Negative space is especially powerful when paired with strong color contrast or texture. Use Foreground Interest to Add Depth Want your photo to feel more immersive? Don’t just think about what’s in front of you — think about what’s between you and your subject. Adding a foreground element creates depth, helping the photo feel three-dimensional. Examples: You don’t always need everything in focus — in fact, using a wide aperture to blur the foreground can create dreamy, cinematic effects. Symmetry and Patterns The human brain loves patterns — and it also loves when they’re broken. Use this to your advantage. Look for: Capture them from a centered, symmetrical angle for maximum impact. Then, add a disruption: a person walking by, one item out of place, or a shadow that breaks the rhythm. That little twist keeps the image from being too “perfect” — and makes it memorable. Change Your Perspective Most people shoot from eye level, standing up. But that’s the view we’re used to seeing all day. If you want creative compositions, start by changing your perspective. Try: You can even shoot through glass, fabric, or textured objects to give the photo a layered, interesting feel. Remember: composition isn’t just what you shoot — it’s how and from where you shoot it. Use Color Intentionally Color is a powerful compositional tool. You can use it to: Try composing with color blocks: one area of solid color paired with another, or a pop of color in an otherwise neutral frame. Or look for color repetition — like a red car, red shoes, and red umbrella in the same shot. It feels satisfying and deliberate. Look for Balance (But Not Always Symmetry) Balance doesn’t mean everything has to be symmetrical. It means the visual weight of the photo feels right. A small subject on one side can be balanced by a large area of empty space, or by a darker object in the background. Think of your frame like a scale. Unbalanced compositions can feel chaotic — which can be good if that’s the mood you want. But in most cases, aim for intentional balance, where nothing feels accidental. Layer Your Scenes The most compelling photos often have more than one thing going on — foreground, midground, and background. Instead of just snapping your subject alone, step back and include: This layering draws viewers in and invites them to explore the photo with their eyes. It’s especially effective in street, travel, and documentary photography. Play with Shadows and Light Composition isn’t only about objects — it’s about light. Shadows, reflections, and contrast can become compositional elements themselves. Try photographing: Use light not just to see your subject, but to shape the image emotionally. Use Minimalism to Tell More with Less Minimalist compositions strip away distractions and force the
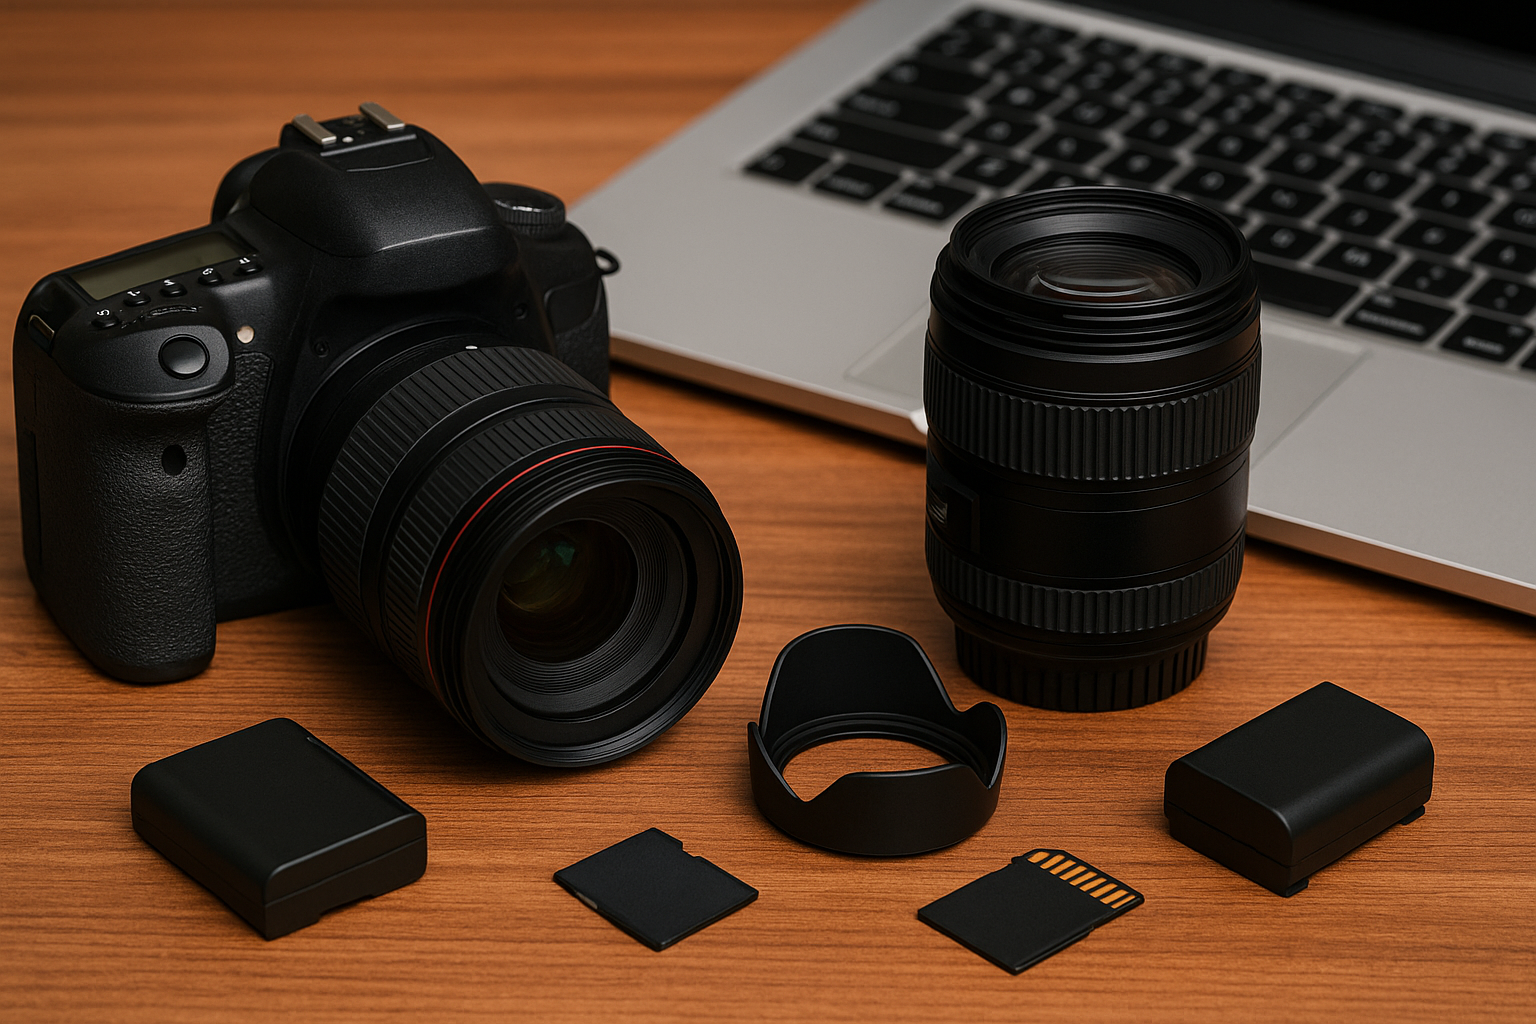
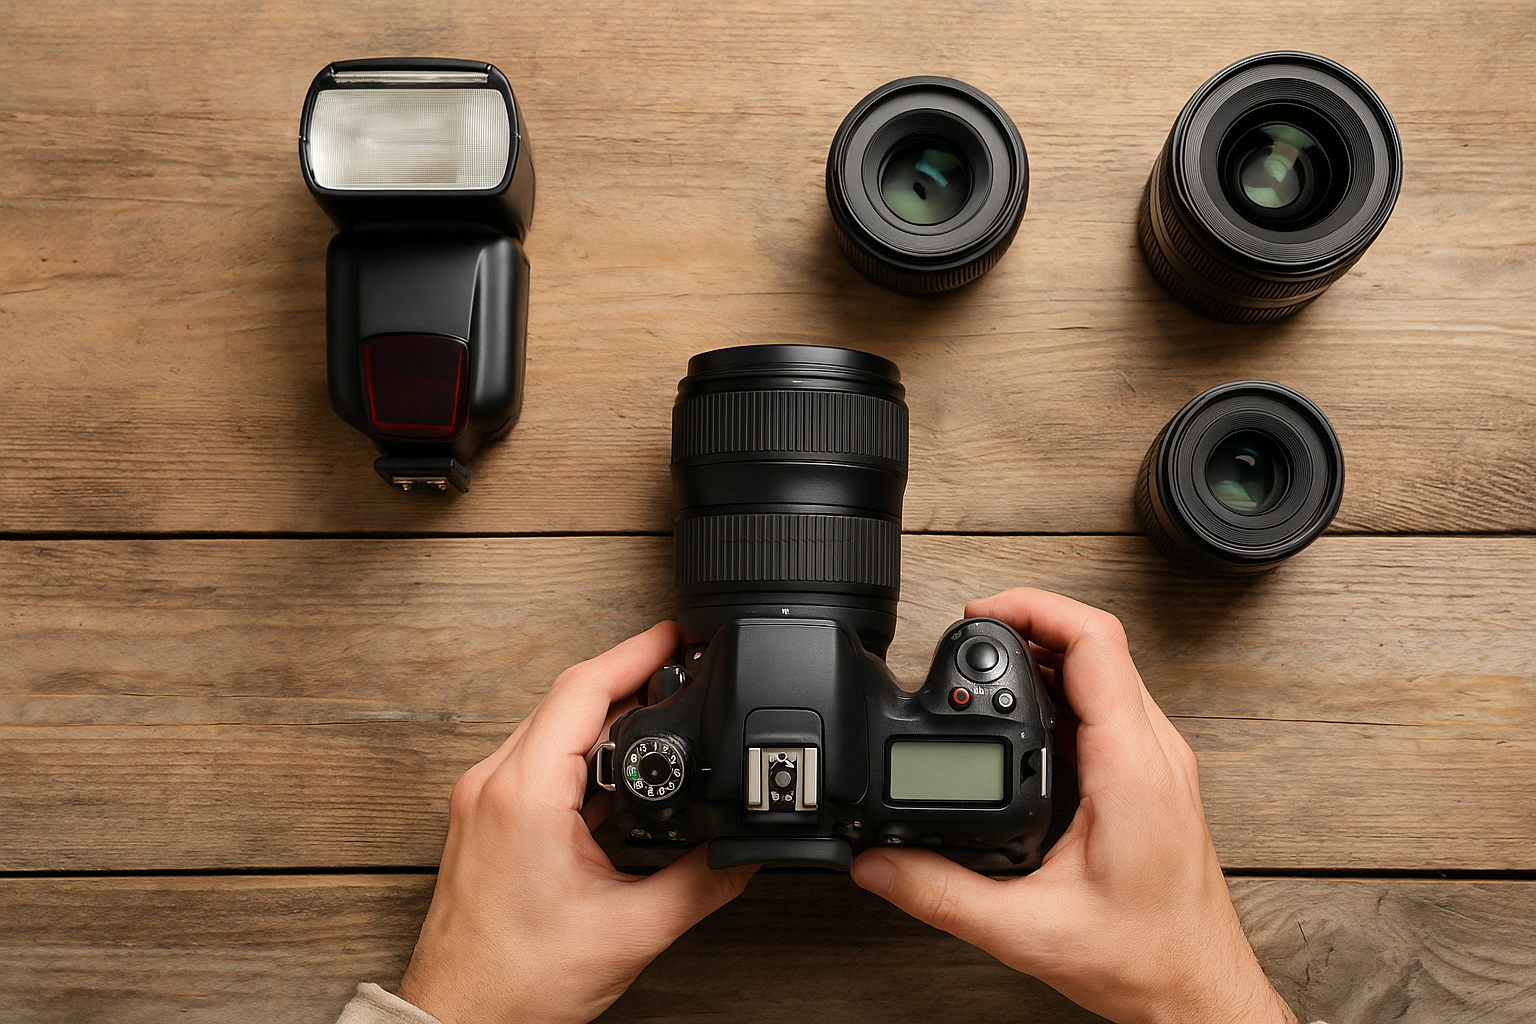
Essential Equipment for Aspiring Photographers
Getting into photography is thrilling. The idea of capturing a moment in time, telling a story with a single frame, or simply sharing your unique view of the world can be addictive. But once the passion kicks in, the next big question is: what gear do I really need to begin this journey? As a photographer who started with nothing more than curiosity and a secondhand camera, I know how overwhelming it can be when you see all the gear pros use. The truth is, you don’t need a studio full of equipment to start producing great photos. In this guide, I’ll walk you through the essential tools that will support your creativity and growth as a beginner photographer. Start With the Right Camera You might expect me to say, “Buy the best camera you can afford,” but honestly? The best camera is the one you’ll actually use. Many aspiring photographers get caught up in specs, sensor size, or fancy features. Here’s the truth: you can take incredible photos with entry-level DSLRs, mirrorless cameras, or even your smartphone. DSLR vs Mirrorless vs Smartphone If you want to explore manual settings, change lenses, and have room to grow, an entry-level DSLR or mirrorless camera is a great investment. Look for cameras like the Canon Rebel T7, Nikon D3500, or Sony Alpha a6100. Don’t worry too much about having the latest model—good technique matters more than gear. Used Cameras Can Be a Smart Move Buying used from a reputable source (like KEH, B&H, or a local camera store) is a smart way to save money. Many beginner photographers get great deals on cameras that have only a few thousand shutter clicks and are in excellent condition. Lenses: Your Eyes in Photography Lenses are arguably more important than the camera body. As a beginner, you don’t need a bag full of glass. Just one or two well-chosen lenses can serve you for a long time. Kit Lens: The Starter Tool Most entry-level cameras come with an 18-55mm kit lens. It’s versatile and great for learning. You can shoot landscapes, portraits, and even some close-ups with it. Prime Lens: Game-Changer for Beginners If you can invest in just one additional lens, make it a 50mm f/1.8 prime lens (aka “nifty fifty”). It’s sharp, fast in low light, and perfect for portraits with a beautifully blurred background. It’s also one of the most affordable lenses out there. This lens taught me so much about composition, depth of field, and working with natural light. It forced me to move my feet and think more critically about my shots. Wide-Angle or Telephoto (Optional) If you discover a love for landscapes or sports, consider a wide-angle (10-18mm) or telephoto (70-300mm) lens later on. But don’t rush. Start with what you have and grow naturally. Tripod: Your Steady Assistant You may think tripods are just for landscape photographers, but they’re super useful in many scenarios: A tripod helped me slow down and be more intentional with each frame. It also opened the door to night photography and light painting—genres I never thought I’d try. Look for something lightweight but sturdy, especially if you plan to shoot outdoors. Brands like Manfrotto, Joby (GorillaPod), or Neewer offer affordable options. A Personal Tip When I first got into photography, I used a basic aluminum tripod I found at a thrift store. It wasn’t fancy, but it helped me get sharp night shots and long exposures of waterfalls. The key is to start with what’s accessible and build from there. Memory Cards: Store Your Masterpieces Photos eat up storage quickly. Having multiple high-speed SD cards (Class 10 or UHS-I) is a must. I recommend at least 32GB per card, and keep a spare on hand—always. Avoid cheap, no-brand cards. A reliable card from SanDisk or Lexar can save you from the heartbreak of corrupt files. Extra Batteries: Power to Keep Going Your camera’s battery life can drain faster than you think, especially in cold weather or during long shoots. Carry at least one extra battery, preferably fully charged. Pro tip: keep spare batteries in your pocket during winter—your body heat helps preserve the charge. Camera Bag: Protection and Portability A camera bag is more than a fashion accessory. It protects your gear from damage and makes it easy to carry: Look for padded dividers, weather resistance, and enough space for your future gear. You don’t need a huge backpack, just something practical for your style. Cleaning Kit: Maintain Your Tools Dirty lenses lead to blurry photos. Keep a basic cleaning kit with: Cleaning your gear regularly shows respect for your craft. It also avoids costly repairs down the line. External Flash: Light Up Your Creativity Most entry-level cameras have a built-in flash, but it’s often harsh and unflattering. An external flash (also called a speedlight) allows you to bounce light off ceilings or walls, creating softer, more professional-looking lighting. For beginners, consider: Even experimenting with a simple flash can drastically improve your indoor photos and help you understand how light behaves. Reflectors: Budget-Friendly Light Control A 5-in-1 reflector is one of the cheapest yet most effective tools you can add to your kit. It helps: I carry mine everywhere. It folds up small and makes a huge difference, especially in outdoor shoots. Editing Software: Finish What You Started Taking the photo is only half the work. Editing allows you to fine-tune exposure, color, and composition. Start with: Even if you’re not ready to pay for software, free tools like Darktable or GIMP are great places to learn the basics. Editing is where your personal style can truly shine. It’s not about fixing mistakes, but enhancing your vision. Optional But Nice to Have Once you’re comfortable with the basics, these accessories can elevate your workflow: Each of these items supports different styles and genres, so add them as you discover your niche. Budget Tips: Building Your Kit Without Breaking the Bank Photography can be expensive, but it doesn’t have to be. Here are


